There are plenty of reasons for wanting to connect your MacBook to a TV, and all of them are great. A big-screen TV makes for an impressive external monitor from which to stream Netflix or enjoy a Hollywood blockbuster. It’s also a more accessible way for people to view the contents of your Mac, rather than having to gather around a small display. It’s particularly useful if you’re giving a presentation of some kind.
Hooking your Mac up to a TV is easier than you might think. You can be up and running in a couple of minutes. However, there are different ways of connecting to a TV and different cables for doing so. That’s what this post is all about: showing you what you need and how it’s done.
Before we get into choosing a Mac-to-TV cable and streaming your content, though, there’s some general housekeeping to take care of.
Choosing the right cable to connect your MacBook to a TV
The first thing you need to do is see what kind of ports you’re working with.
As far as your TV is concerned, HDMI has been standard in all TVs for the past seven or eight years, so that’s one end of the cable sorted. Now it’s time to look at the ports on your Mac.
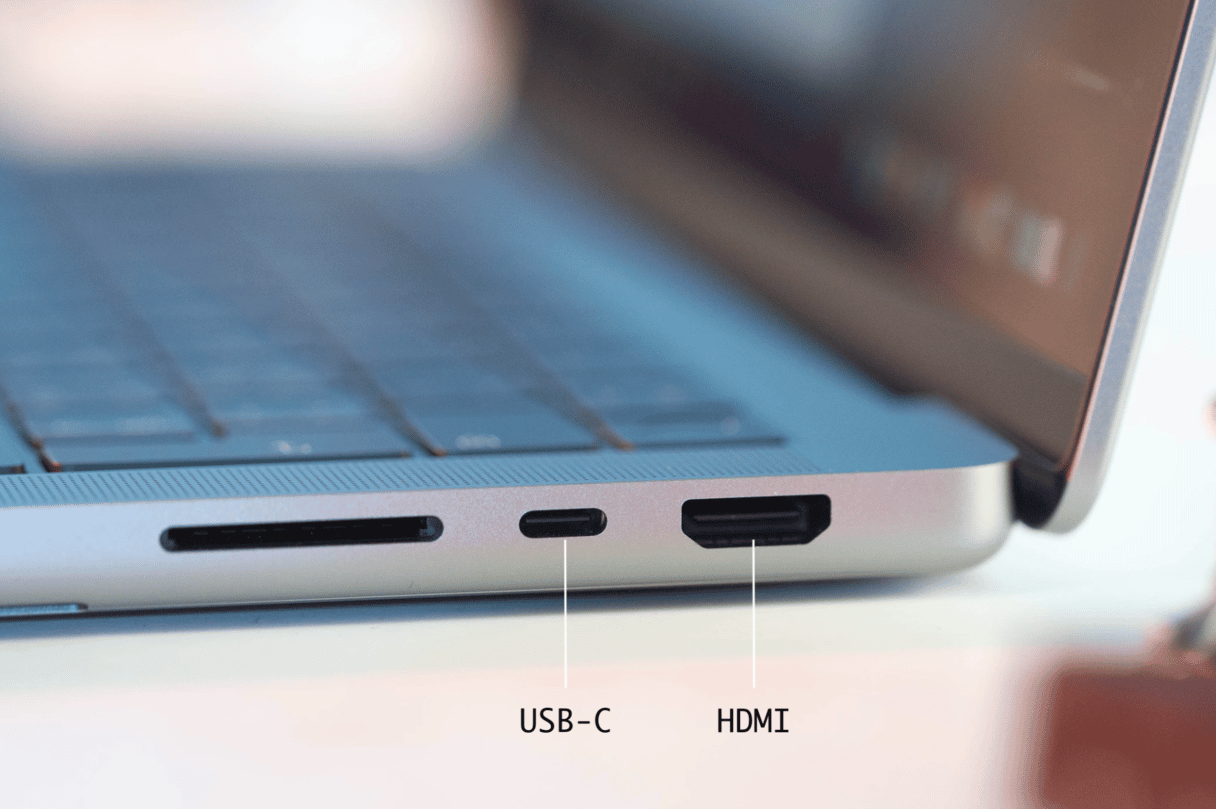
Macs that are equipped with any of the following ports can connect to HDMI devices:
- If your Mac has an HDMI port, you can connect directly to HDMI with an HDMI cable.
- If your Mac has USB-C ports, you can use an adapter, like the Apple USB-C Digital AV Multiport Adapter, to connect to HDMI.
- If your Mac has a Thunderbolt 2 or Mini DisplayPort connection, you’ll need a Mini DisplayPort-to-HDMI adapter and an HDMI cable.
While Apple does offer HDMI-to-HDMI cords for Mac, they don’t make Mini DisplayPort-to-HDMI cables. They are, however, widely available on Amazon and eBay, so you shouldn’t have much trouble finding one.
If your system has a Thunderbolt 3 port, a USB-C to HDMI adaptor is what's needed. These are available from Apple and third-party manufacturers, but for performance, you’re better off sticking with Apple.
Configuring the TV display
With your Mac-to-TV cable at the ready, you’re just about set to start viewing.
By running the cable from your Mac to the TV's HDMI port and choosing the correct output, your computer should instantly recognize the TV and automatically extend your desktop. With this setup, you can use the TV like an external display and do most of the things you need to. But if you feel like the resolution isn't the best for streaming movies or playing games, here's what you should do:
- Go to System Settings > Displays.
- Select "Default" to set the resolution automatically or choosr your own preferred resolution.
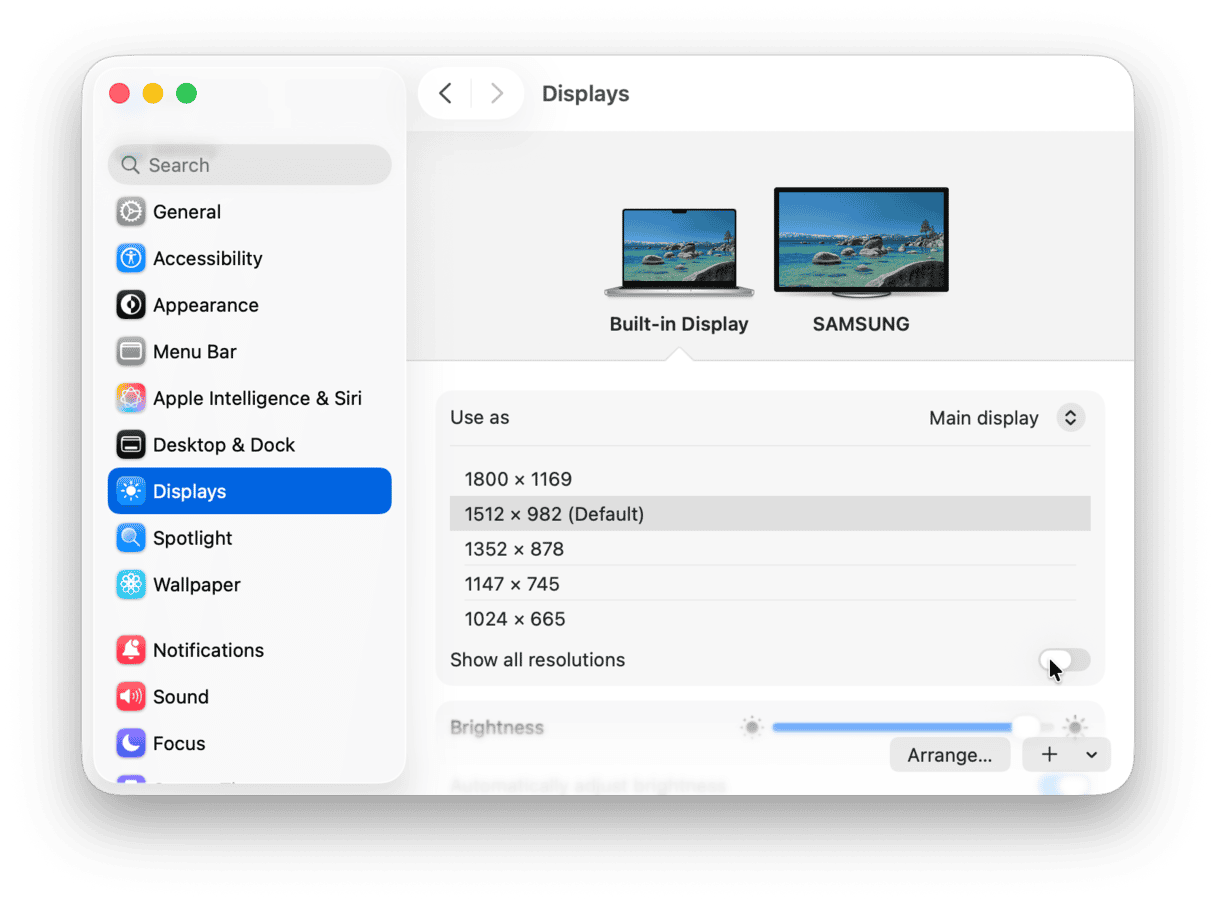
If you cannot see the list of resolutions, click Advanced and enable "Show resolutions as list."
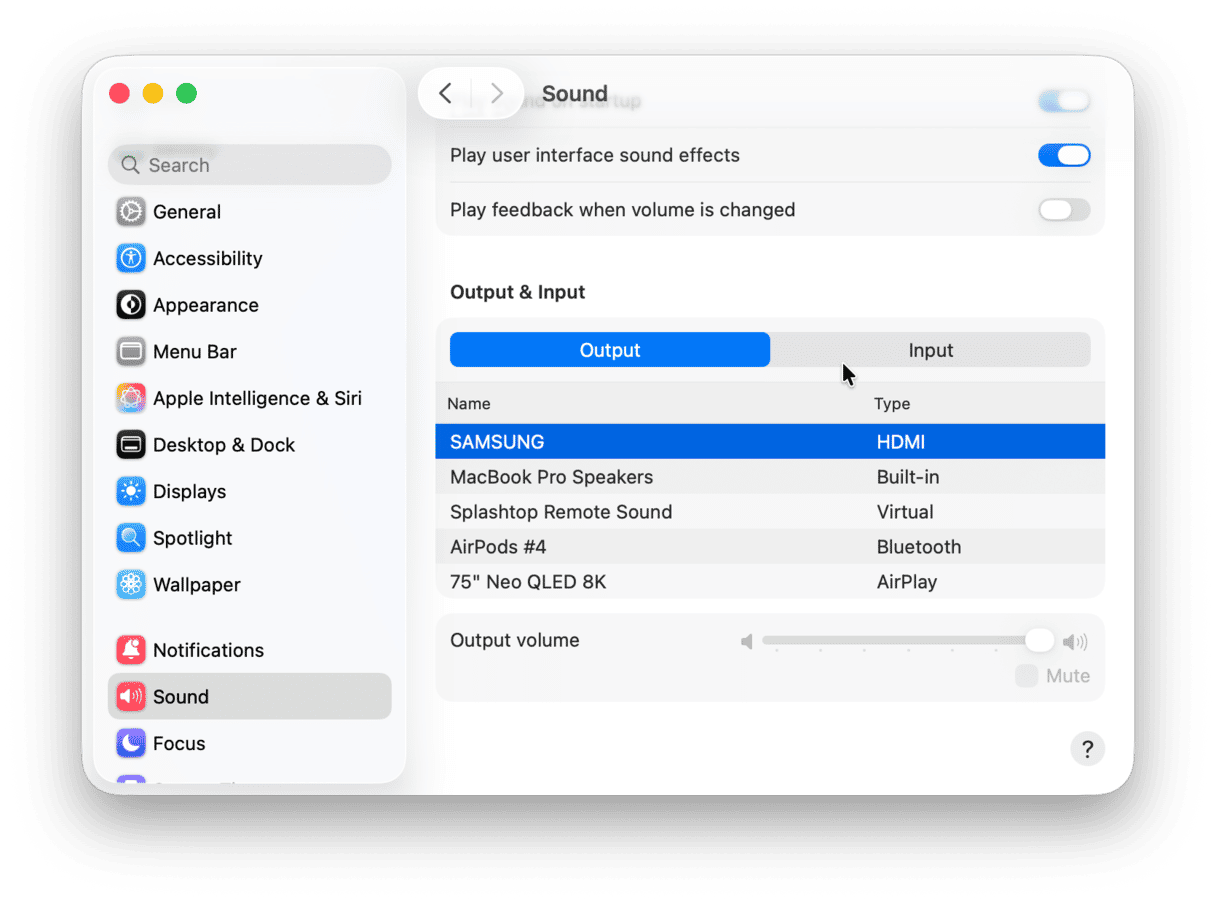
Using HDMI, the audio should automatically switch from your Mac to the TV once connected. If this isn’t the case, you can do it manually.
- Go to System Settings > Sound.
- Click the Output tab and select the HDMI option under Type.
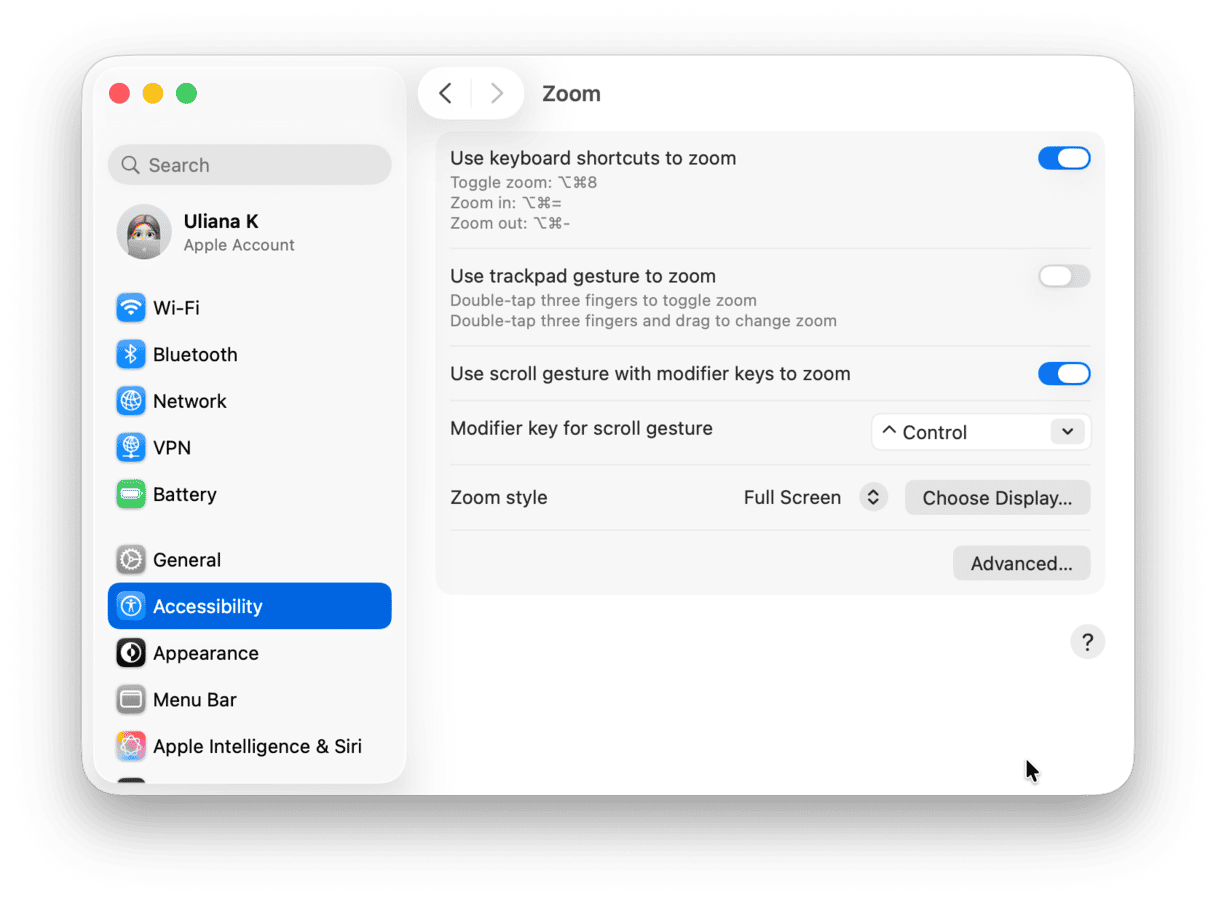
Finally, if you start streaming a video from the web and notice black bars on either side of the screen, you can remove them by zooming in.
- Go to System Settings > Accessibility.
- Go to Zoom and enable "Use keyboard shortcuts to zoom" and "Use scroll gesture with modifier keys to zoom."
How to connect a Mac to a TV with Apple TV
If you have Apple TV, you can connect your Mac to your TV without the need for a cable. All you need to do is look for the AirPlay icon in the menu bar and choose to mirror your display:
- Ensure your Mac and Apple TV are on the same network.
- Go to Control Center on your Mac and click the Screen Mirroring icon.
- Choose your Apple TV.
- Click the AirPlay status icon and then choose This Mac or your Apple TV to set whether your desktop matches the size of your Mac or the TV screen. The AirPlay status icon will be lit blue when you're using Mirroring.
Apple TV lets you stream content from your desktop and the web. Once you have the correct cable, connecting your Mac to a TV is an easy task. HDMI ensures audio takes care of itself, and adjusting display settings can be done in a few clicks.
Monitoring the health of your Mac with CleanMyMac
As some users have reported, macOS can overheat whenever a second screen is added, in some cases reaching upwards of 60 degrees. Hooking your Mac up to a TV increases pressure on the GPU, which gets hotter as it works harder. In turn, the fans have to work harder to keep the system cool, and performance suffers.
If you plan on regularly streaming content from your Mac to a TV, you’ll need to look after your system. Overheating doesn’t just affect performance, it can take years off Mac’s life.
For this reason, we suggest you use CleanMyMac to ensure everything is ticking over smoothly. It has a handy Menu that helps control battery health, CPU load and prevent overheating and keep your Mac running smoothly whenever you need it.
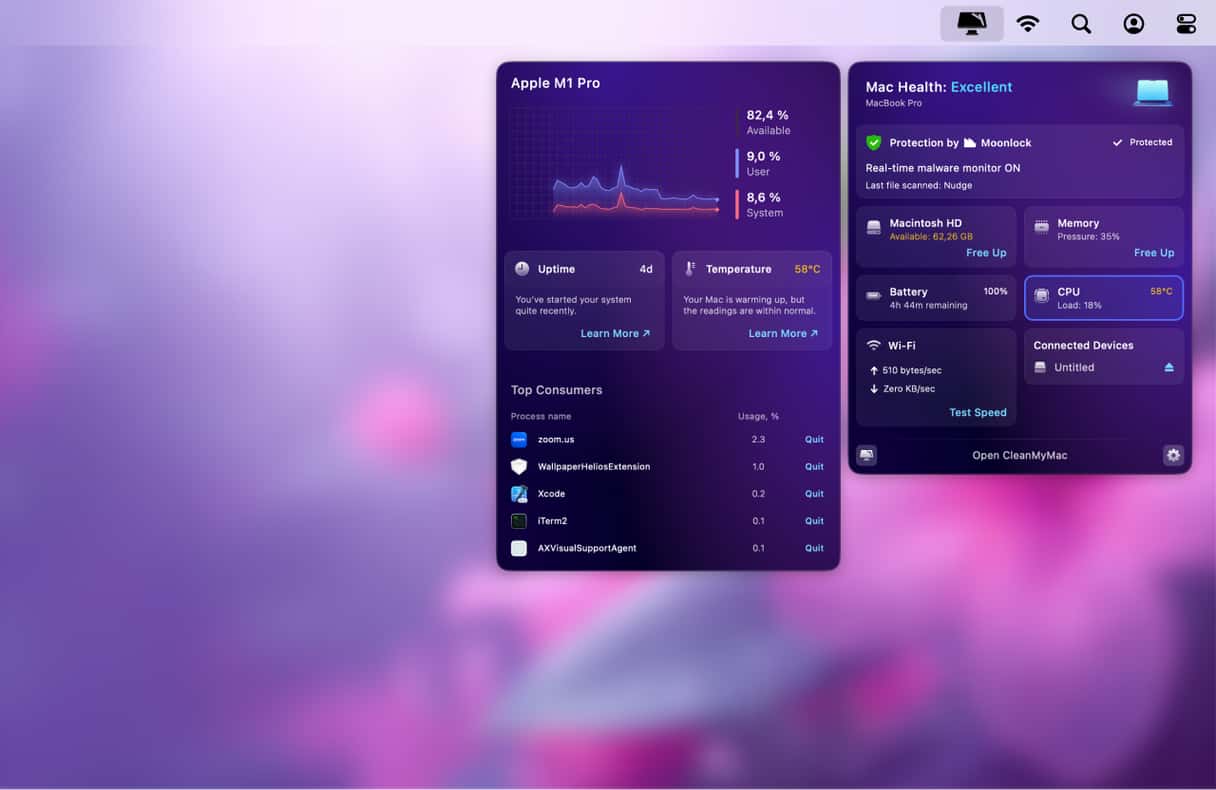
You can test CleanMyMac for free for 7 days — get your free trial here.
Once installed, you can run a Smart Care scan to remove any unneeded junk files that may have been accumulated. Finding and deleting outdated, broken, and unwanted files take little more than a few clicks:
- Open CleanMyMac.
- Select Smart Care from the sidebar.
- Click Scan and wait for CleanMyMac to complete its scan.
- Click Run to remove junk files and run quick optimization routines.

Do this regularly to ensure your system isn’t clogged up with useless junk files.
Happy streaming!


