Each new iPhone released comes with a better camera, but it also increases the size of the photo files. New iPhone photos rival those from DSLRs in quality, but the downside is how big those image files are.
If you love taking photos but don’t love your photos gobbling up all of your storage on your iPhone, take heart. You can reduce the size of a photo on your iPhone in several ways without compromising on quality. Note that we’re talking about the file size of your photos, not cropping them to physically make them smaller.
How to reduce the size of a photo on an iPhone
Large photo files quickly use up your iPhone’s limited storage space and are much more difficult to email or send via text messages. There are a few different ways to reduce the size of your iPhone photos — within Settings or with frequently used third-party apps. Also, in the article we'll share tips on how to declutter your iPhone so you always have enough space.
Compress photos on iPhone to reduce the size of files
When it comes to gobbling up storage on your iPhone, apps are definitely one of the biggest culprits. Photos are a close second. To quickly sort and delete unwanted photos, download CleanMy®Phone. The app, also, can turn Live Photos to Still which can help save your storage. Here’s how to reduce the size of Live Photos at once:
- Download CleanMy®Phone and open it on your iPhone.
- If this is your first time using the app, you will have to permit it to access your photos.
- Go to the Organize module.
- Select up to 100 photos.
- Tap ‘Convert’
- Choose ‘Delete Originals’ or ‘Keep Originals.’
- Repeat until you have compressed all of your images.

Reduce the size of a photo in Camera Settings
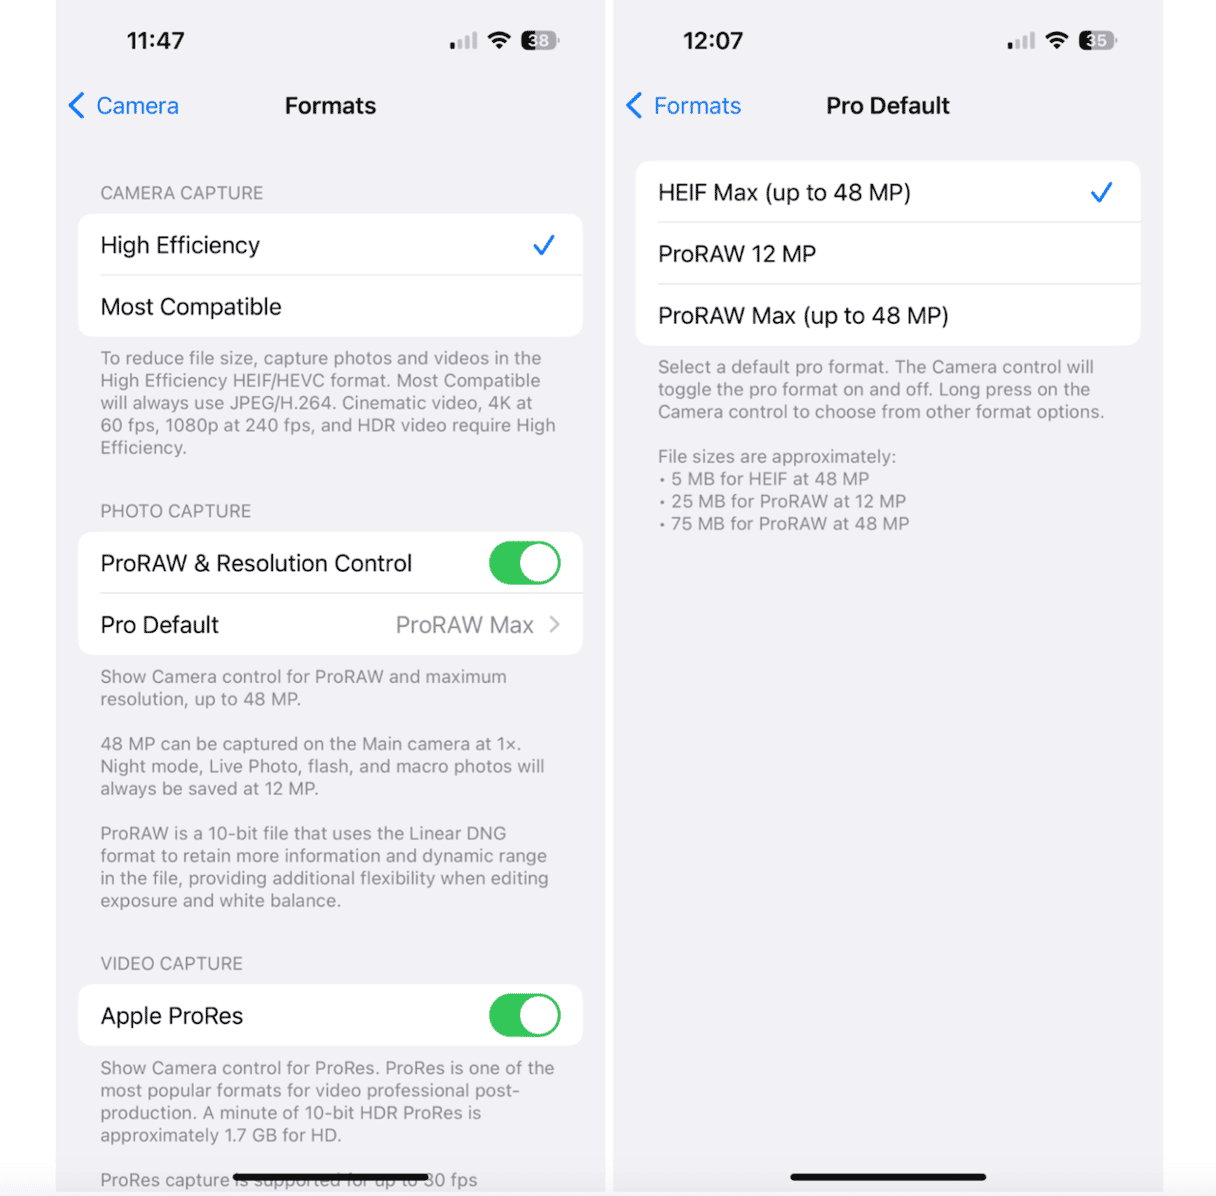
The simplest way to reduce the size of your photos is within the Settings app on your iPhone. Using this method, you can choose the format for all of the photos you take with your iPhone camera.
Using the high-efficiency format will not reduce the quality of the images, but it will save you lots of space on your iPhone. Choose the correct format for photos when you set up your iPhone, and you’ll never have to worry about running out of space.
Changing the format of your photos will not reduce the file size of the photos already on your phone. For that, you’ll need another app — one that compresses photos.
Here’s how to change the format of your photos in Settings:
- Navigate to Settings on your iPhone.
- Tap ‘Camera.’
- Tap ‘Formats.’
- At the top of the screen, choose ‘High Efficiency.’ This format will give you the smallest photo size without reducing quality.
- To further reduce the size of your photos, tap ‘Pro Default’ and choose ‘HEIF Max (up to 48 MP.’ This will limit your photo size to approximately 5 MB.

Do not reduce the size of photos, just remove clutter on your iPhone
If compressing wasn't enough, you can use CleanMy®Phone to find end remove clutter. It shows you all your duplicate and similar images, so you can make fast decisions on what stays and what goes.
- Get CleanMy®Phone.
- Tap Declutter > Scan.
- The app will analyze your photo clutter and group it into folders, like Duplicates, Screenshots, Blur, etc.
- Tap any folder and clean the clutter.

How to reduce picture file size in Mail
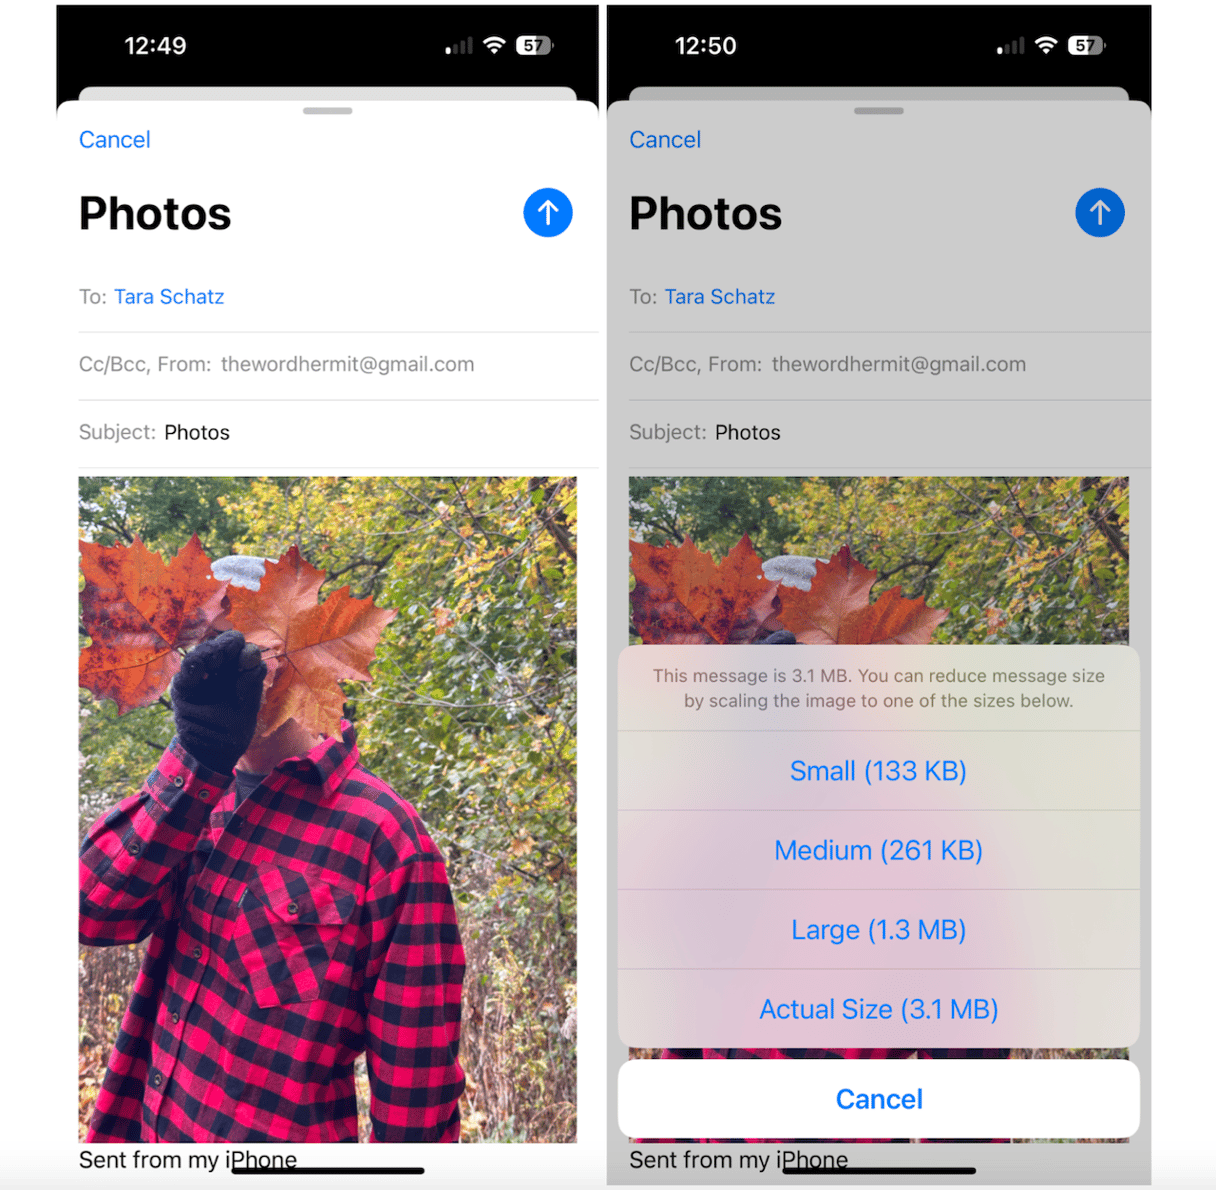
If you use the native Mail app on your iPhone, you’ll find that you can easily adjust the file size of your photo before you send it. Here’s how to do it:
- Open Mail on your iPhone.
- Tap the compose icon in the lower right.
- Add your recipient and subject and compose your message.
- Tap the photo icon above your keyboard.
- Choose the photo(s) that you want to send.
- Tap the send arrow in the upper right.
- A pop-up menu will appear, giving you all of your sizing choices.
- Choose the appropriate size. Your photo will be sent automatically.
- You can also download the compressed image from the email to iPhone storage for further use.

Alternatively, you can choose a photo on your iPhone, tap the share icon, and choose mail. Continue by following the steps outlined above
How to make photo file size smaller in WhatsApp
WhatsApp is a popular messaging app used around the world. Here’s how to reduce the size of a photo before sending it via WhatsApp:
- Open a text message on WhatsApp.
- Compose your message, add the recipient, and tap the attached file icon.
- Tap the photo icon and choose the photo you want to send.
- Tap the ‘+’ to attach additional photos.
- Tap ‘HD’ to adjust the file’s size by choosing to send your photo in standard quality.
- Tap the arrow to send your message.
- You can also download the compressed photo from the WhatsApp message to iPhone storage for further use.
Managing too many too-large photos is a lot of work! We would suggest that you take fewer photos to save space on your phone, but what fun would that be? Instead, compress those files to reduce the size and delete the photos you don’t need!
Because photo files take up so much space on your phone, it’s important to have the knowledge and tools to reduce their size. Once you get into the habit of compressing your images, you’ll find it second nature. The next step, of course, is to delete the photos you no longer need and enjoy the ones that you have in your gallery!


