What is DNSChanger?
First discovered in 2012, following an extensive FBI investigation, DNSChanger — also known as Puper, Jahlav, and RSPlug-F — is a malware virus that can hijack DNS servers and routers. Believed to be the work of an Estonian criminal enterprise, up to 100,000 servers were quietly hijacked around the world without anyone realizing it.

Servers disrupted globally
DNSChanger was so prolific that even social networks, search engines, and ISPs, such as Comcast, COX, Verizon, and AT&T, were inadvertently involved in spreading it. With the FBI's help, these companies were all part of a global effort to remove the problem in 2012.
A coordinated effort was needed to take over this rouge DNS network, with DNS settings pointing at one of the many thousands of hijacked servers being automatically taken over and redirected, restoring the rogue network to a legitimate part of the web again.
Redirection wars
It all started several years ago when an Estonian gang set up a seemingly genuine-sounding digital firm, Rove Digital. With some technical know-how, they created a type of adware that redirected web visitors to sites that displayed adverts. You could be going to do some shopping on Amazon, and then without realizing it — because the server your DNS is using has been hijacked — you would be redirected to a website full of adverts and pop-ups.
Annoyingly, for anyone whose DNS servers (where your Internet comes from, basically) had been infected — which is out of your control — this would keep happening. If any links or adverts were clicked, that would contribute to the profits of this Estonian gang. Over time, the group generated $11 million from adverts and pop-ups that no one wanted to see. It took a joint operation between the FBI and Estonian Police to find the source of this problem and begin restoring thousands of DNS servers to the correct settings. In this case, the servers that were hijacked were in Estonia, along with others in Chicago and New York.
It took time for the number of infected devices to reduce, as Internet providers and search engines updated users and customers with notifications of the infection.
Until the servers could be shut down, the FBI worked with the Information Services Corporation (ISC) to run the servers — albeit without directing anyone to unwanted ads and web pages anymore — giving infected Mac and Windows device owners a chance to prevent it from happening further on their end. Unfortunately, the only way to resolve this problem was to remove the malware, which meant that after the FBI shut the servers down, those who hadn't been able to remove the malware would lose internet access.
How to remove DNSChanger manually?
To start with, although this is older malware, there is a chance that anyone could have carried it over from one device to another. Any operating system that carries the files and settings of previous devices will keep infections with them unless they're detected and eliminated.

Making it useful to check whether DNSChanger has infected you in the past. The best way to do that is through this website:
If you've got the all-clear, then there is nothing to worry about, and you don't need to scan and remove any viruses.
Although we would recommend that you remove DNSChanger with specialized software, you can still attempt to remove the malware manually. And if your router is infected, removing the malware manually is the only way to go.
Bear in mind, however, that the DNS redirection virus can embed itself into your macOS system files. As we previously stated, it could come back later.
Restore your DNS settings by hand
To do this manually, you first need to restore your DNS settings:
- Go to System Settings > Network.
- Within Network > Wi-Fi, click Details next to each network you are connected to and set your DNS settings to what they should be (your Internet Service Provider should have that information, or it will be on a router in your home or office).
- After clicking OK, go to Details once again to check if the changes have been saved.
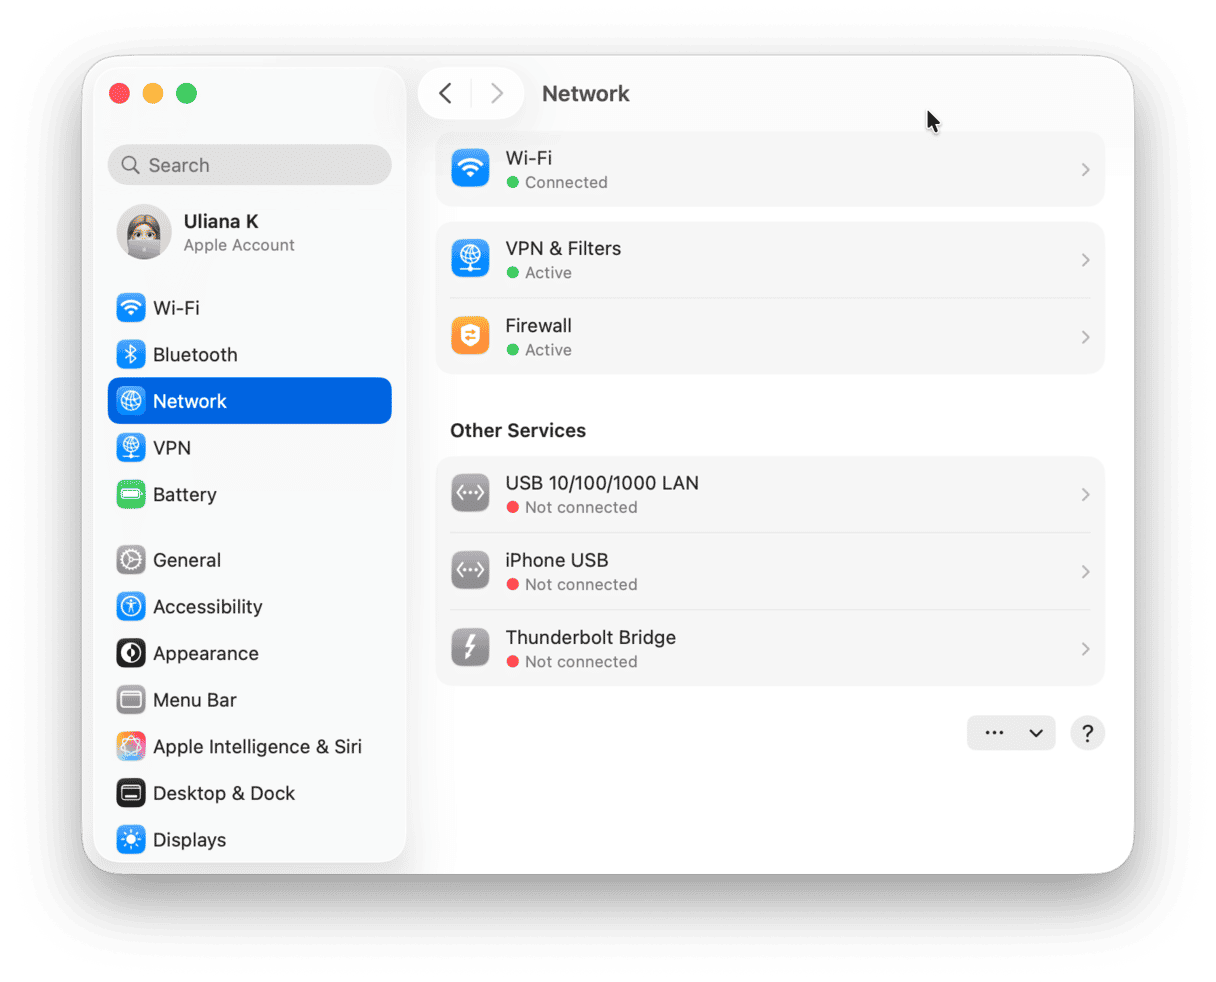
Next, this type of malware has infected your web browser; therefore, you need to remove it from whichever browser you use. Here is how to do that with Safari, Firefox, and Chrome:
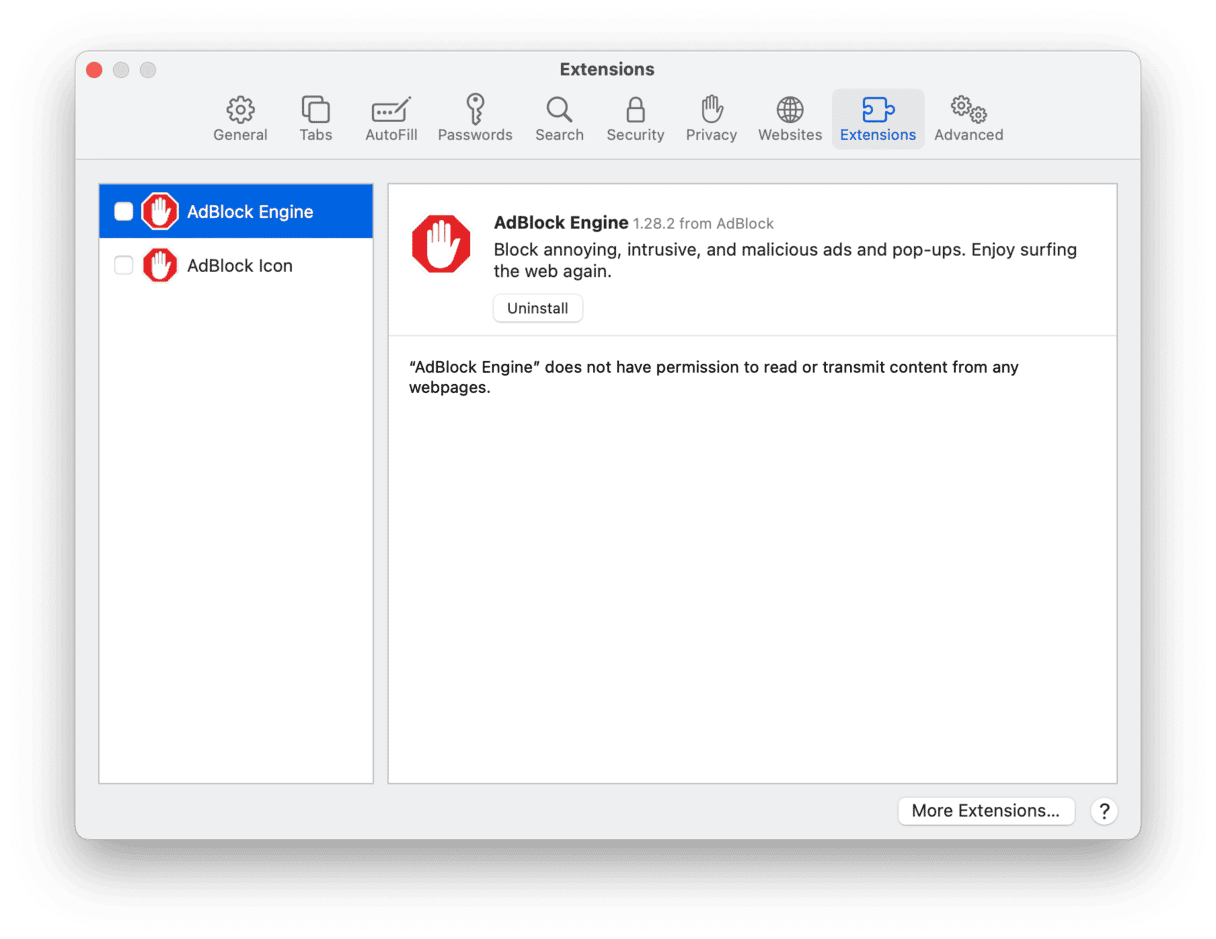
Uninstall DNSChanger from Safari
- Go to Safari > Settings.
- Go to Extensions.
- Pick the extension that you don't recognize to delete.
- Click Uninstall.
- Confirm that you want to Uninstall the extension.
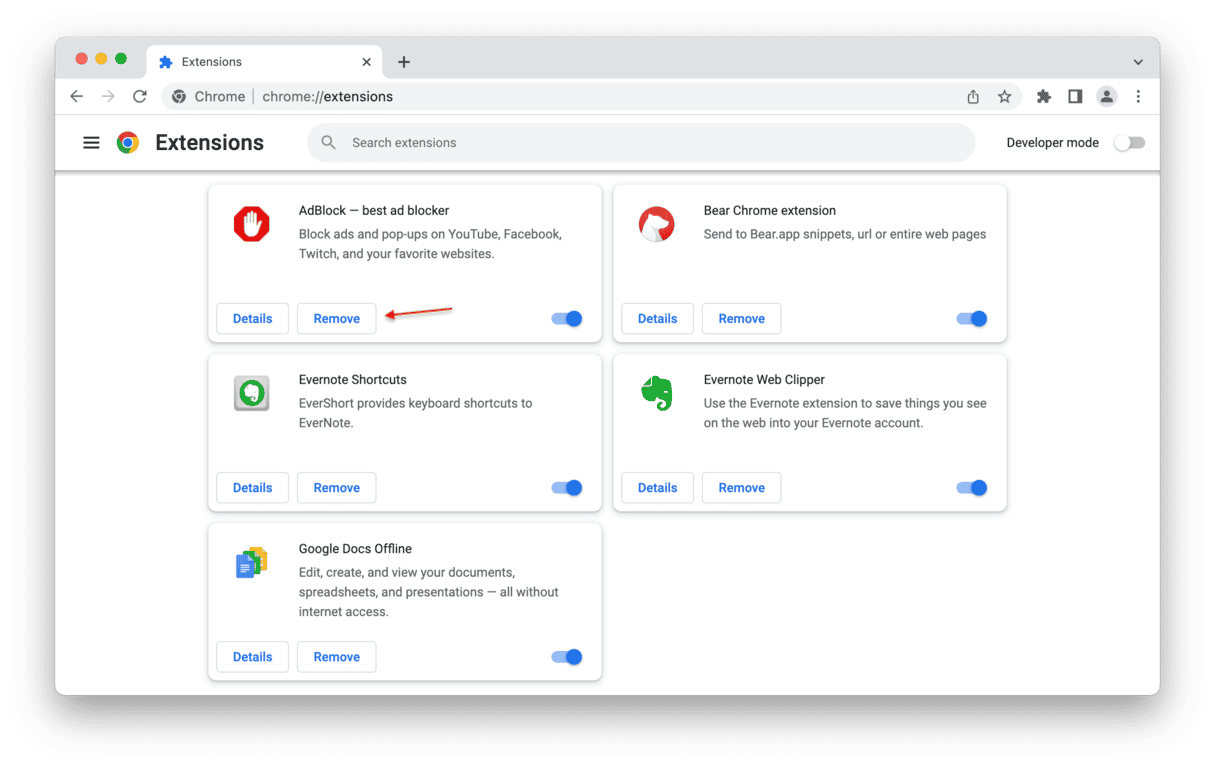
Remove DNSChanger from Chrome
- Open Chrome.
- Go to the Menu in your browser.
- Go to Settings > Extensions.
- Pick the extension that you don't recognize to delete.
- Click Remove.
- Confirm that you want to remove the extension.
Delete DNSChanger from Firefox
- Open Firefox.
- Go to the Menu in your browser.
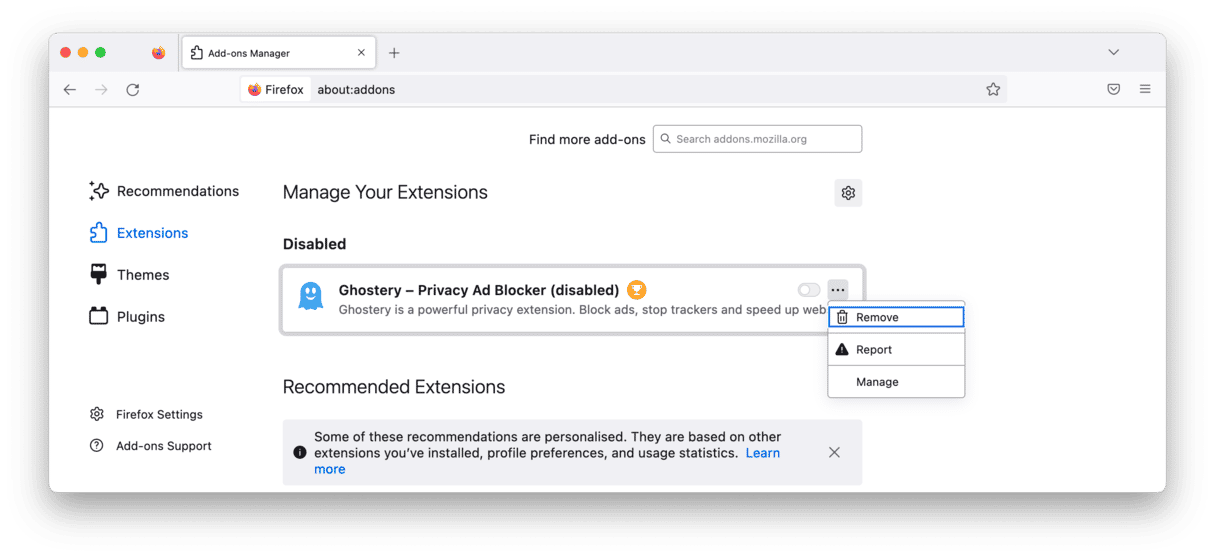
- Go to Add-ons and themes > Extensions.
- Select the extension you want to remove.
- Click Remove.
- Confirm that you want to delete it.
Disconnect from the internet
As always with malware removal, the first essential step to fix DNS hijacking is to disconnect your MacBook from the internet. If you have any other devices on the network, disconnect them, too, as they could also be infected.
By disconnecting, you’re depriving the DNSChanger malware of the connection it needs to communicate with its own servers. Plus, if the router is also infected, you’re separating your machine from that, too.
Reset your macOS DNS settings
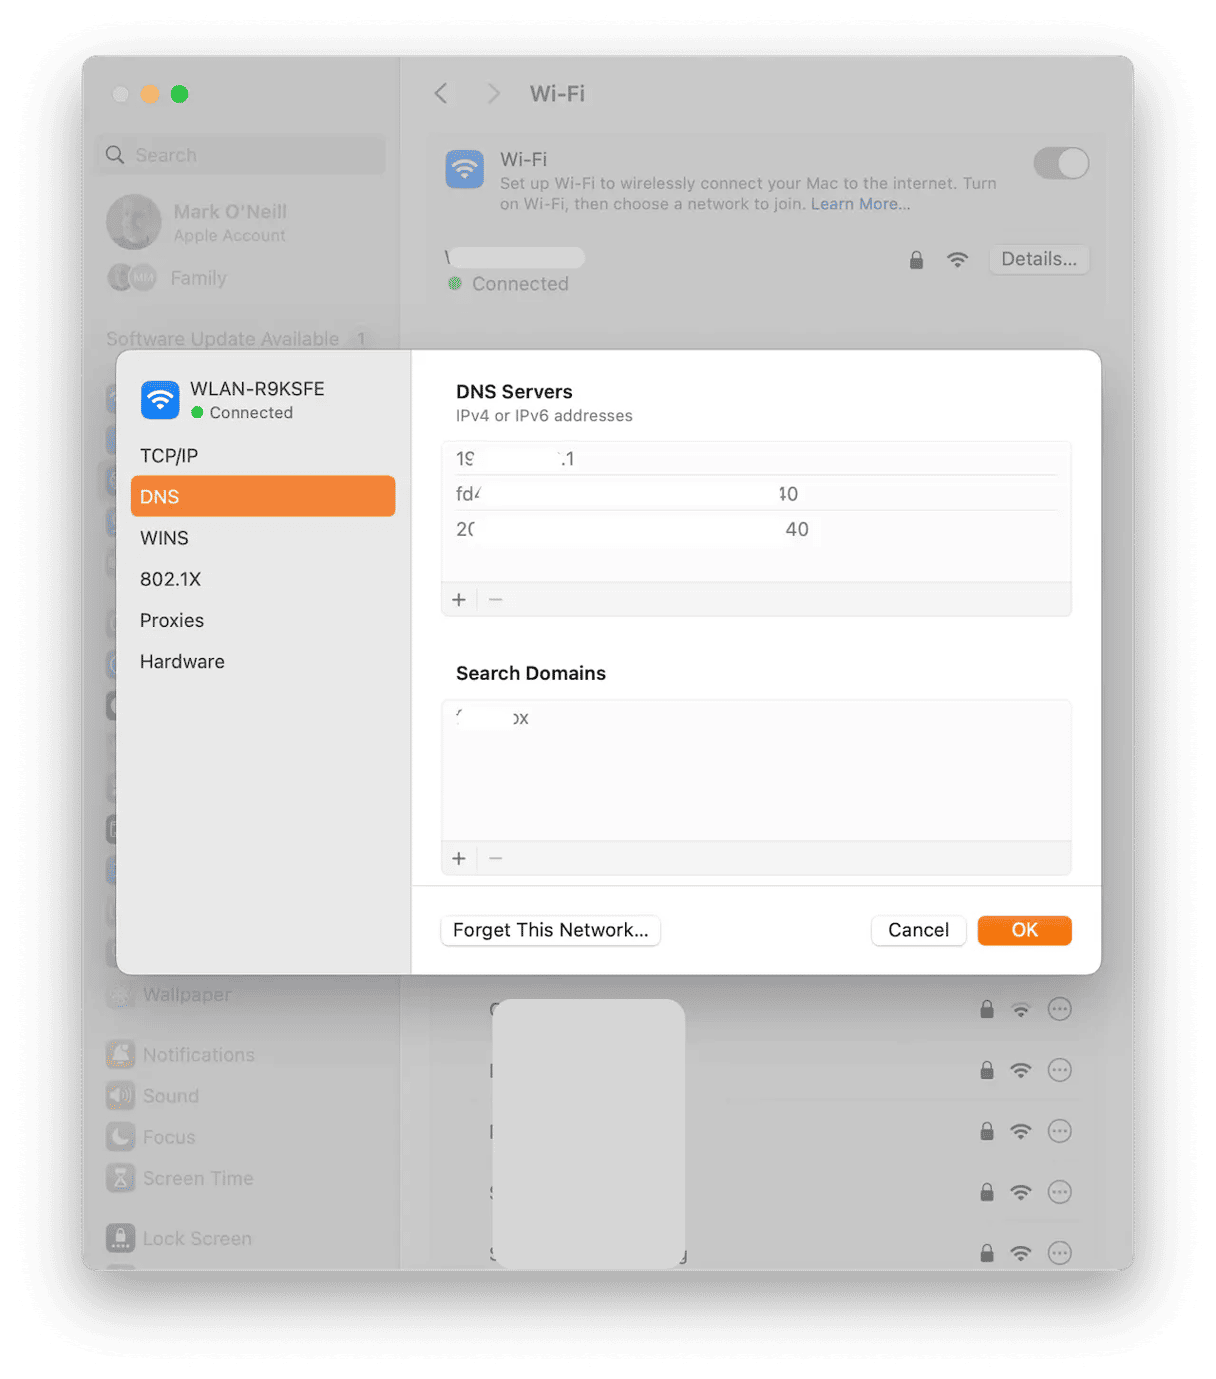
Once you’re offline, the next step is to reset your DNS settings. Here’s how to do this:
- Go to System Settings > Network > Wi-Fi.
- Click the name of your network, which should be at the top of the Wi-Fi box and glowing green.
- Next to the network name will be a box labeled Details. Click it. Then click DNS on the left-hand side. This brings you to the DNS settings.
- In the DNS settings, remove anything suspicious by clicking it, then clicking the minus button (-) underneath it. You’ll be asked for your administrator password to confirm this. You may be wondering what you should consider suspicious. Remove anything that starts with strange-looking numbers (for example, 86.142.x.x). These numbers are just a random example. They could be anything.
- If you don’t remember what the original DNS settings were, change it to something like Google (8.8.8.8) or Cloudflare (1.1.1.1). You do this by clicking the plus button (+) at the bottom of the DNS Servers box and typing in the new DNS setting.
- Save and close the box by clicking OK.
Check for any proxy settings
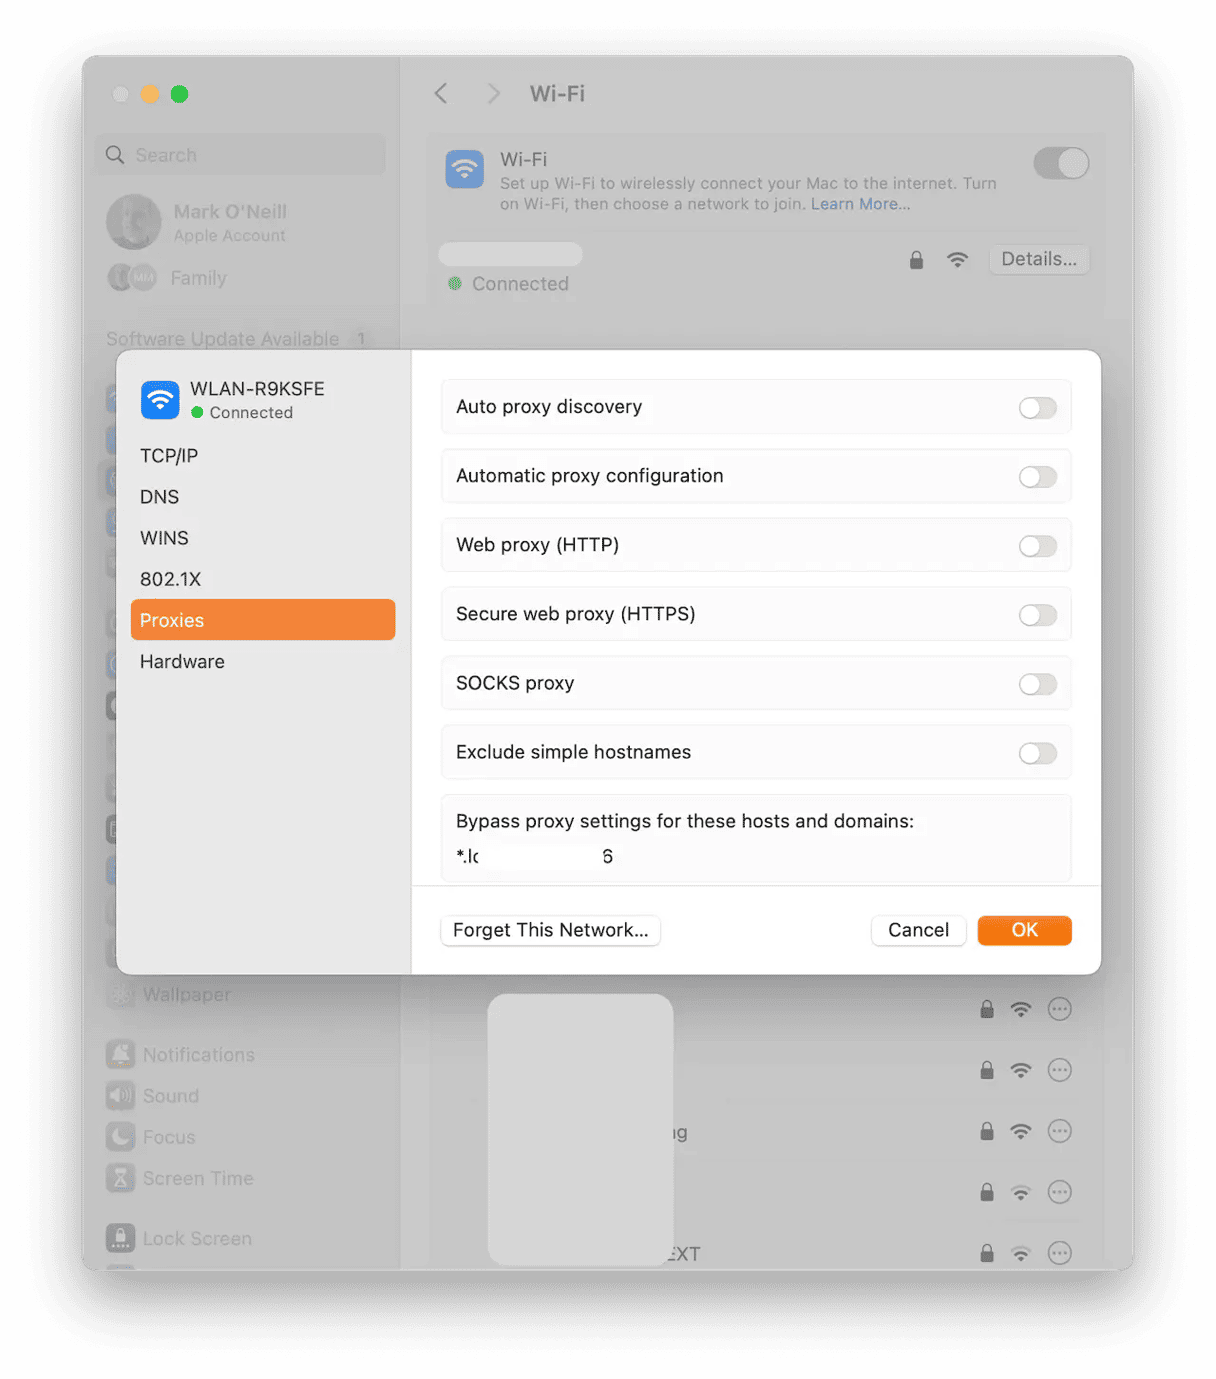
Now, we move on to the proxy settings. Go back to the Wi-Fi box where you changed the DNS settings and select Proxies. Make sure all of these options are disabled.
Check the Launch Agents and LaunchDaemons folder
Now go to Finder. Select Go on the top menu. Click Go to Folder.
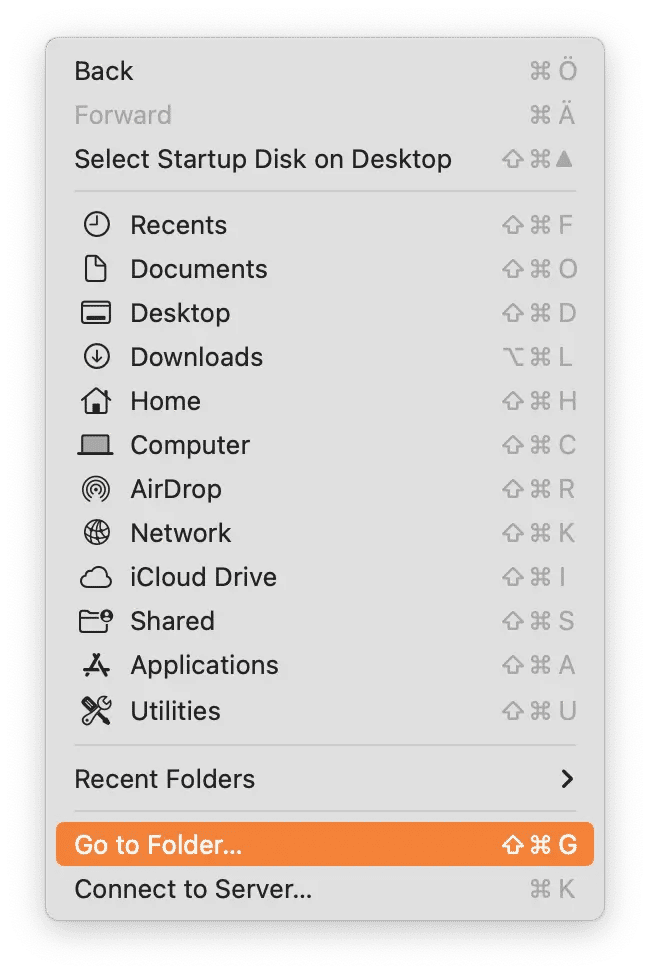
In the box that pops up, type ~/Library/LaunchAgents/ and hit Return.
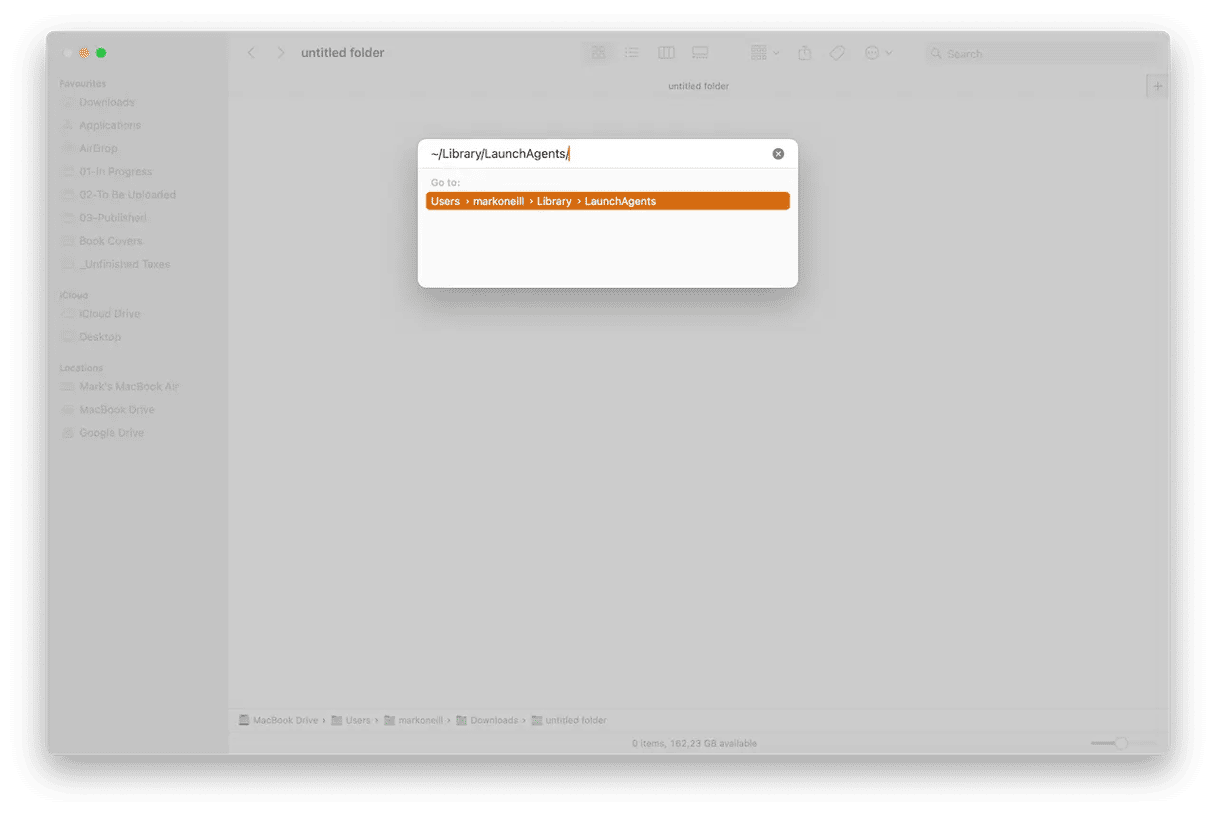
In the Finder folder that opens, look for any suspiciously named files and delete them.
Now, do the same for:
/Applications/
/Library/Application Support/
~/Library/Application Support/
/Library/Internet Plug-Ins/
~/Library/Internet Plug-Ins/
/Library/LaunchAgents/
~/Library/LaunchAgents/
/Library/ScriptingAdditions/
Reset the DNS settings on your router
There are many routers out there, each with its own admin panel and its own way of accessing it. However, in most cases, the process will look something like this:
- Log in to your router admin panel. If you don’t know it, do a web search for the name of your router and “login.”
- Look for DNS settings. If you don’t immediately see it, look for an Advanced Settings link. It may be there.
- Once you’ve found it, remove all DNS settings and select “Obtain DNS Automatically” or a similar setting. Alternatively, you can manually add 8.8.8.8 or 1.1.1.1.
Reboot your MacBook and router
Once the trojan DNSChanger removal process is done, reboot your MacBook and your router. You can now turn your Wi-Fi back on.
Remove DNSChanger with CleanMyMac
Alternatively, you can remove DNSChanger trojan malware with a specialized tool called CleanMyMac, powered by Moonlock Engine. Doing this will remove the actual malware, though you’ll still have to go in afterward and reset your DNS settings, as we’ve detailed above.
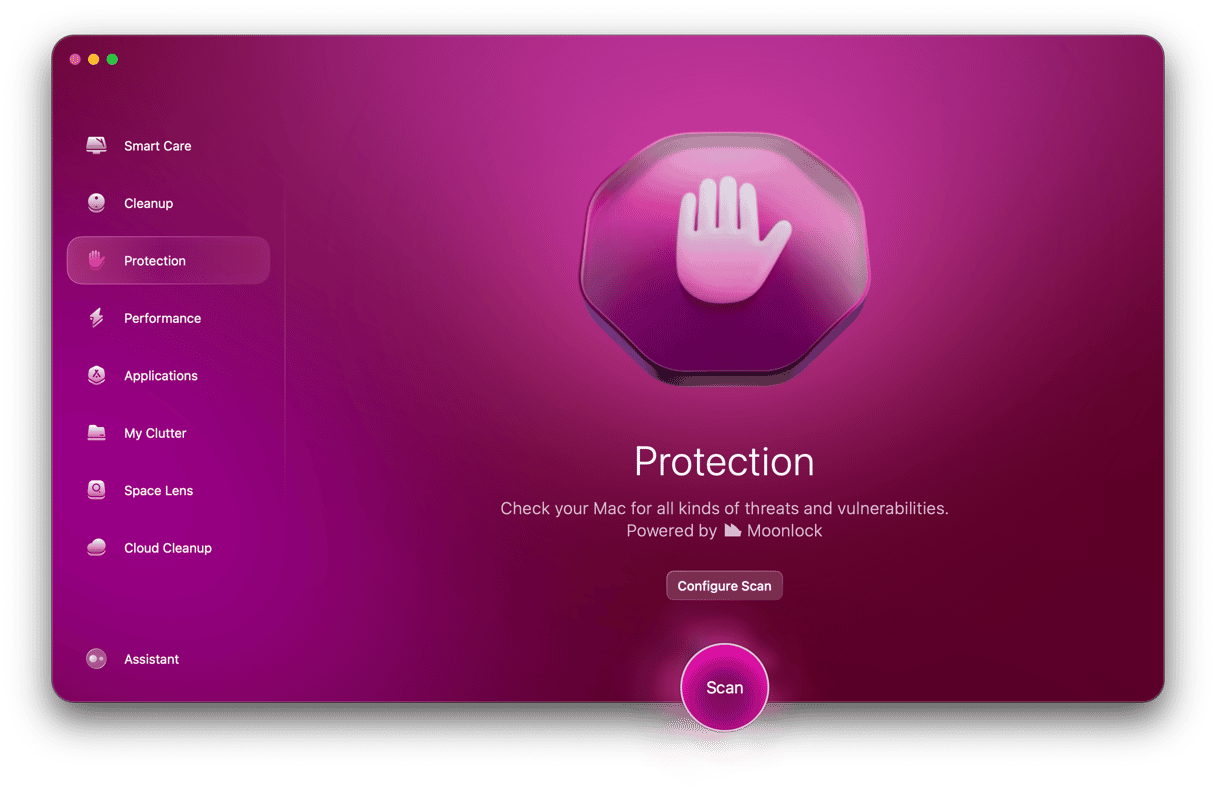
CleanMyMac is a lightweight Mac optimization tool, but it also has a powerful malware detection tool. New customers get a free trial to test it out for themselves. So, once you’ve signed up for that free trial and installed the software, do the following to send DNSChanger packing:
- When you’ve opened CleanMyMac, click the Protection icon on the left.
- Click the Configure Scan button to enable your scan settings. Select everything, including Deep Scan. Save and exit.
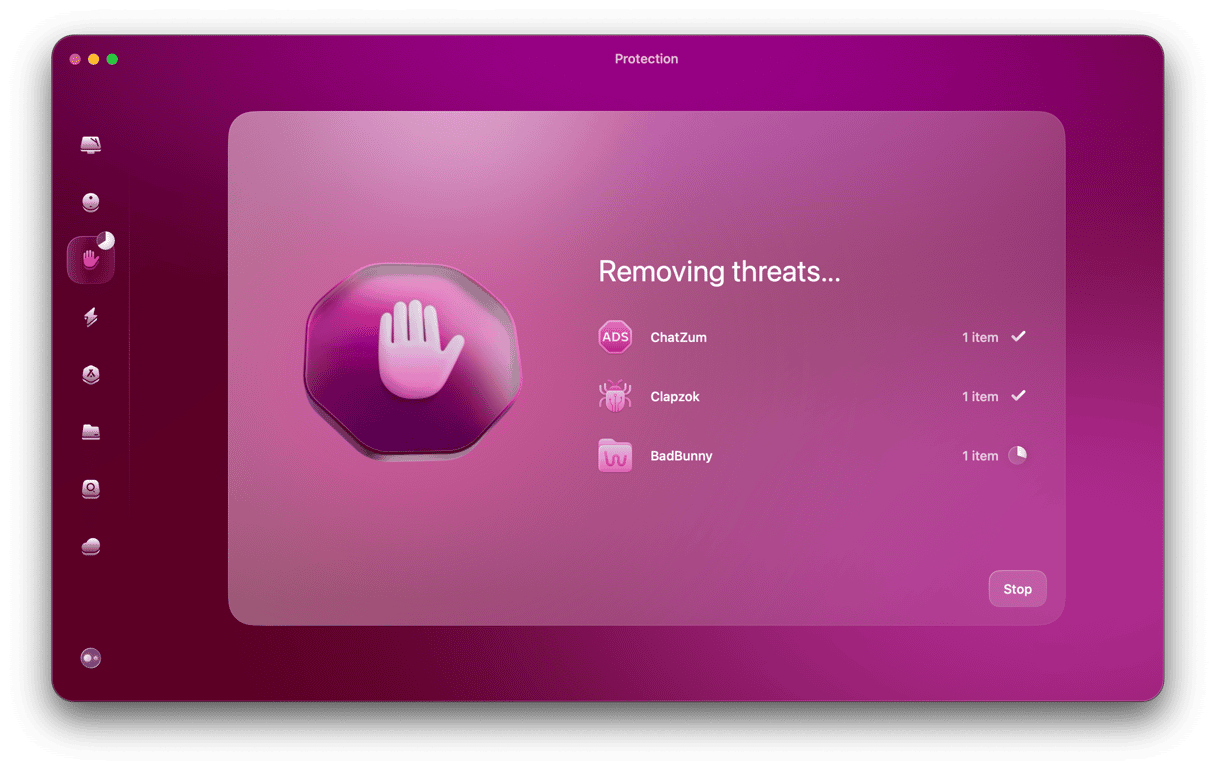
- Click the Scan button to begin the malware detection process. CleanMyMac will now start looking on your Mac for all infected files relating to DNSChanger.
- When those files have been found, you’ll see a list of them all. Select them all and click Remove.
- Exit Protection and select Cleanup. Running this will remove all junk files from your device, some of which may be linked to DNSChanger. Removing these reduces the chance of it reinstalling itself later.
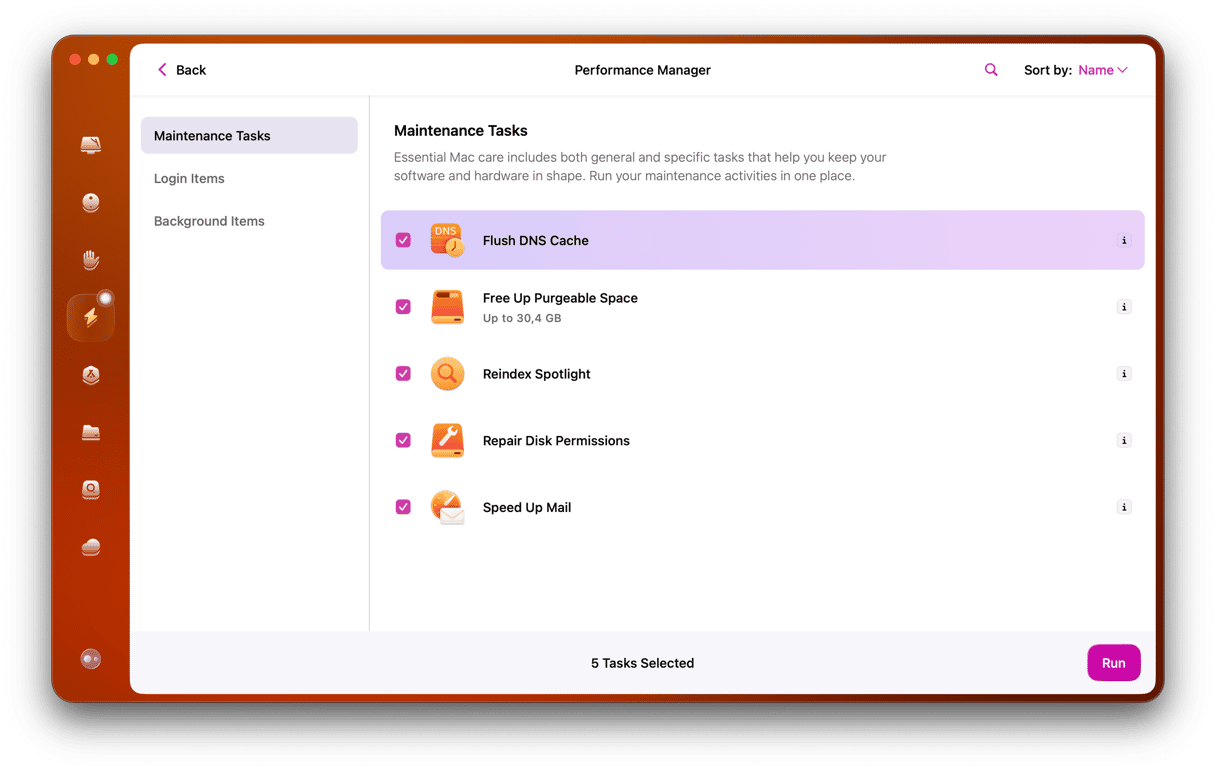
Additionally, go to the Maintenance tab and select Flush DNS cache. This should delete the remains of DNS Changer from your network settings.
Using this program, you can also clear out junk files and folders that you don't need, along with dozens of duplicates and backups that aren't needed anymore.
What can you do to stay safe from DNSChanger malware?
Once DNSChanger is gone, you definitely don’t want it back again. So, what can you do to prevent a repeat occurrence?
Don’t use the default router password
Many people don’t bother changing the router password that was set at the factory. This might be “password” or “admin.”
Neglecting to change the default password leaves the door wide open to attackers. The first thing to do is change that password — and don’t use anything easy like “router” or “knockknock.”
Use real-time malware protection
The best way to stop malware from entering your MacBook is to have a tool that alerts you the moment that malware arrives.
Although there are many options on the market, the best is CleanMyMac, powered by Moonlock Engine. By enabling the real-time detection feature in the scan settings, you’ll have a 24/7 guard watching over your MacBook.
Don’t go to non-HTTPS websites
If your browser tries to stop you from going to a website, warning you that there is no HTTPS or that the site’s security certificate is invalid, always heed that warning and leave. Never overrule it.
DNSChanger was one of those rare Mac infections that spread around the world and impacted millions of people. It took an international law enforcement effort to resolve the problem. Keeping your Mac clean of infections with regular scans is the most effective way to detect issues when they occur, then resolve them quickly with a malware removal tool.


