Domain Name System (DNS) is one of the essential elements of internet access. Translating the name you type into the address bar into an IP, it lets you access the website you need. Like any other system, it stores data in cache that acts like a memory that your Mac refers to when trying to figure out how to load a site. However, occasionally, things can go wrong, and you cannot access a website. If that is your case, try flushing the DNS cache. It’s not a difficult task, and we’ll walk you through the steps needed to reset your DNS on different macOS versions.
What is DNS cache
So what’s DNS cache? It’s a list of domain names attributed to your last-visited websites. It’s not the same as recent online history. Domain name information is coded in numbers, for example, 174.142.192.113.
When a website migrates to a new domain, its DNS address changes. Naturally, it becomes unreachable as your still Mac relies on the outdated DNS record.
So, DNS cache is a logbook that translates this numerical information into human-readable website names. After you’ve cleaned the DNS cache, you may notice that some websites load slower — that’s perfectly normal. Your Mac has forgotten them and is trying to access them from scratch.
Why you should flush DNS cache
There are several reasons to flush DNS cache. The main one, though, is that it can help improve your browsing experience by making a browser you use faster. It can also enhance the performance of your browser due to emptying stored cache files.
What does flushing DNS cache do?
When you flush DNS cache, it removes cache stored locally on your computer, thus forcing your device to retrieve this information once again from the DNS server once a new DNS request is made.
How to flush DNS cache manually and automatically
There are several different ways to flush DNS cache on Mac. First, we’ll show the easiest one — automatic removal with the help of a Mac cleaner app. Then, we’ll proceed with the manual steps.
1. How to flush DNS in one click
As we’ve explained above, you can remove these outdated cache files manually. However, there’s an easier way — with an app. To our knowledge, the only app that does it is CleanMyMac by MacPaw. This is a well-known Mac maintenance app that also is notarized by Apple.
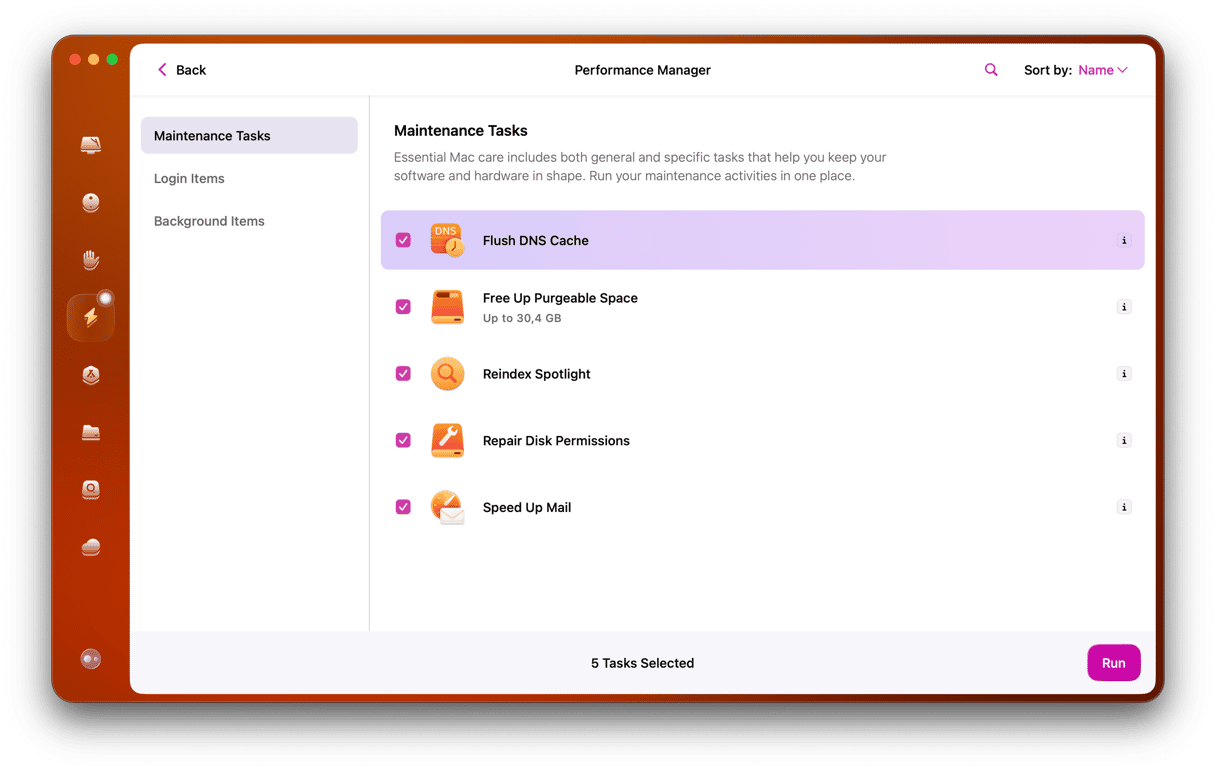
Flushing the DNS cache just so happens to be in its arsenal of features to help you do this. To flush the DNS cache with CleanMyMac, all you’ll need to do is to start your free trial here.

This option is found in the Performance tab when you open CleanMyMac. See the screenshot above. When you click Run, the cache will be cleared automatically, and your internet settings should optimize.
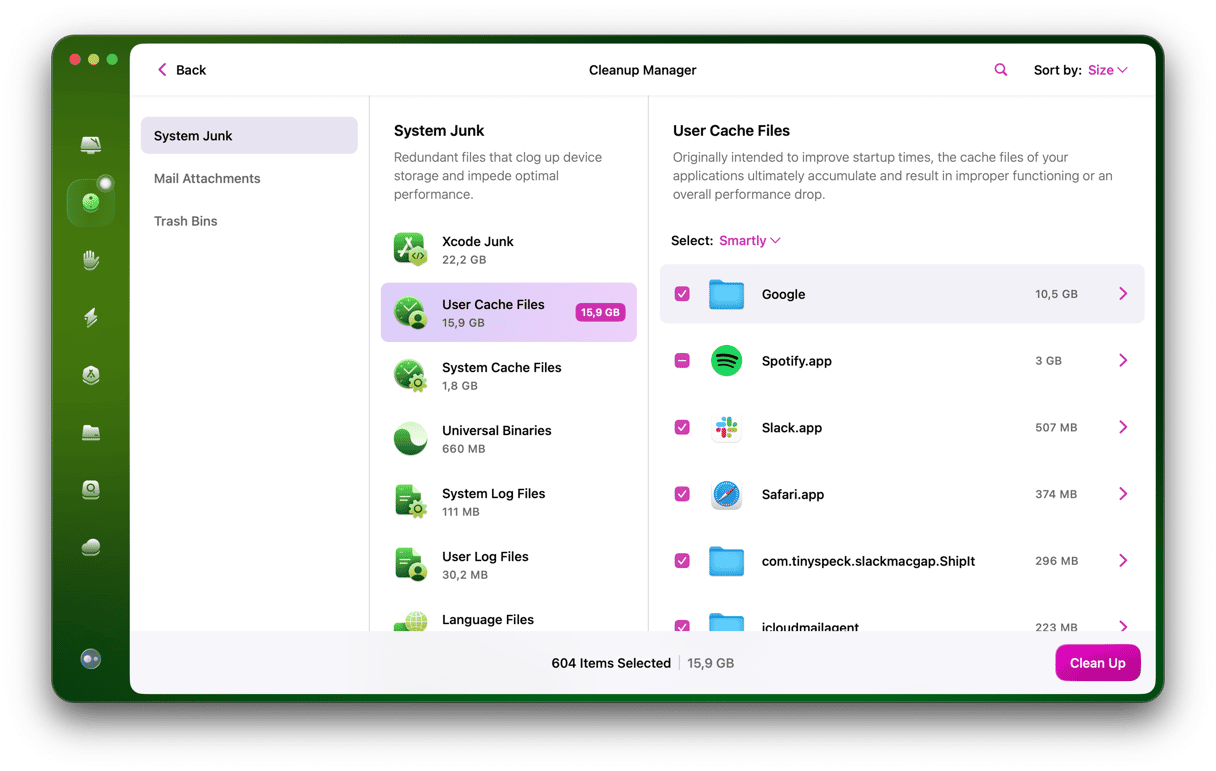
Another thing worth trying is clearing the browser cache itself (not the same as clearing the DNS list). You can do it automatically for all browsers if you open CleanMyMac.
This should potentially fix small access-related issues and free up space.
- Open CleanMyMac.
- Click the Cleanup tab in the sidebar > Scan > Review All Junk.
- Look through the list of found items and click Clean.

It should be pretty easy — everything should be back to normal. Or you can try one or more of the following methods.
_1561977534.png)
2. How to flush DNS cache in Terminal
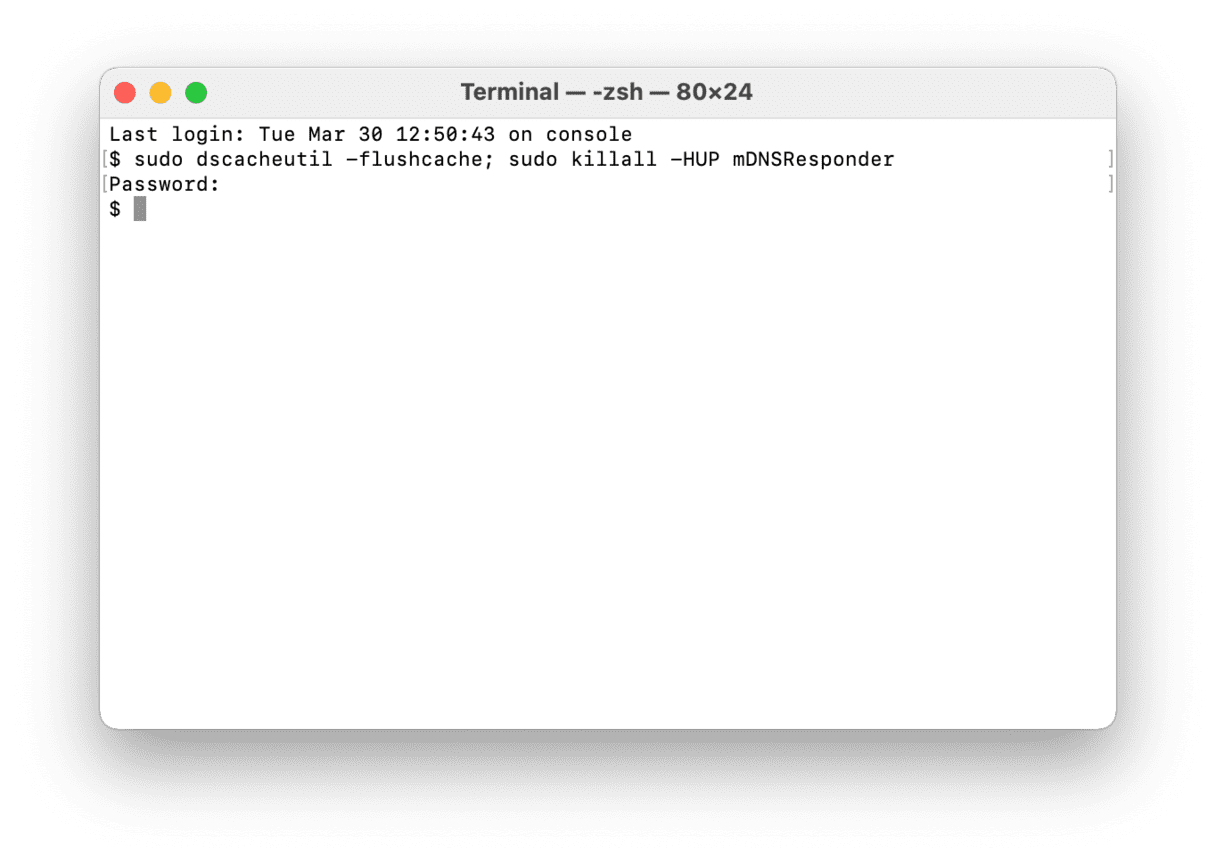
Are you familiar with Terminal? If not, no problem. All you’ll need to do is open the Terminal app and paste in a couple of commands.
- Open the Launchpad in the Dock and type in Terminal in the search bar.
- Enter the following syntax at the command line:
- Press Return, enter your password, and press Return again.
- Quit Terminal.
sudo dscacheutil -flushcache; sudo killall -HUP mDNSResponder 

3. How to clear DNS cache on older macOS versions
The algorithm is the same; only the copy/paste command in the Terminal will be different for each OS.
| macOS or Mac OS X version | Terminal command |
| macOS Ventura macOS Monterey macOS Big Sur macOS Catalina |
|
| macOS Mojave macOS High Sierra macOS Sierra OS X Mountain Lion Mac OS X Lion | sudo killall -HUP mDNSResponder |
| Mac OS X El Capitan OS X Mavericks | sudo dscacheutil -flushcache; sudo killall -HUP mDNSResponder |
| OS X Yosemite | sudo discoveryutil mdnsflushcache; sudo discoveryutil udnsflushcaches |
| Mac OS X Snow Leopard Mac OS X Leopard | sudo dscacheutil -flushcache |
| Mac OS X Tiger | lookupd -flushcache |
4. How to flush DNS cache on Linux
Before clearing the DNS cache on Linux, you need to ensure that systemd-resolved is active. Open a terminal window, and enter this command:
sudo systemctl is-active systemd-resolved
If you see “active,” enter the command to flush the DNS cache:
sudo systemd-resolve --flush-caches
There’s no success message, but you can check whether that has worked by running the next command:
sudo systemd-resolve --statistics
If you see that the Current Cache Size is at 0, you’ve successfully flushed all DNS cache.
Clearing the DNS cache on Mac isn’t something you’ll have to do often, but it’s a good way to troubleshoot named server errors. Use the correct command for your operating system, and you’ll be able to resolve issues within seconds.
Frequently Asked Questions
Do I need admin privileges to flush DNS cache on Mac?
Yes. It is because you need to use sudo in the command, and you won’t be able to run it without admin privileges.
Does flushing the DNS cache clear browsing history, cookies, or saved passwords?
No, it has nothing to do with any browser-related data. It only clears out the DNS record.
What are the alternatives to flushing the DNS cache on Mac?
If the above methods seem too technical, you may try to do a hard refresh in your browser. Another way to refresh outdated DNS entries is to delete browser caches.


