The name of your Mac may seem unimportant, and many of us don’t give it much thought. However, it’s more important than it seems. The name of your Mac is used to identify it on a local network. It’s also used to identify it to any device that’s connecting via Bluetooth, and it’s the name that appears when you use AirDrop. The name of your Mac is also used to link the Mac to your Apple ID in iCloud, which, in turn, dictates how it is identified in the Find My app. In this article, we’ll show you how to change name of MacBook.
Why rename MacBook?
AirDrop and FindMy
There are lots of reasons why you may need to change MacBook name. By default, the name of your Mac is its model — MacBook Pro, MacBook Air, iMac, etc. If you have more than one Mac of the same type, they will both have the same name, which could make identifying them difficult in AirDrop or the Find My app.
Local network
In addition, if you have more than one Mac with the same name on a local network, the name of one of them will be changed automatically, And it might be changed to a name you don’t like.
Someone else had the Mac previously
If you have bought or been given a Mac owned by someone else, it may have a name that includes their name in it, and you will probably want to change it to your name.
Bluetooth
In the same way as having a more descriptive name helps identify it in AirDrop, it does so when you’re connecting to it using Bluetooth.
How to rename MacBook
The method for changing your Mac is slightly different depending on which version of macOS you’re using. Starting with macOS Ventura, several settings that had been in System Preferences and are now in System Settings have moved to different places. So, we’ll show you both versions, starting with macOS Ventura.
macOS Ventura
- Click on the Apple menu and choose System Settings.
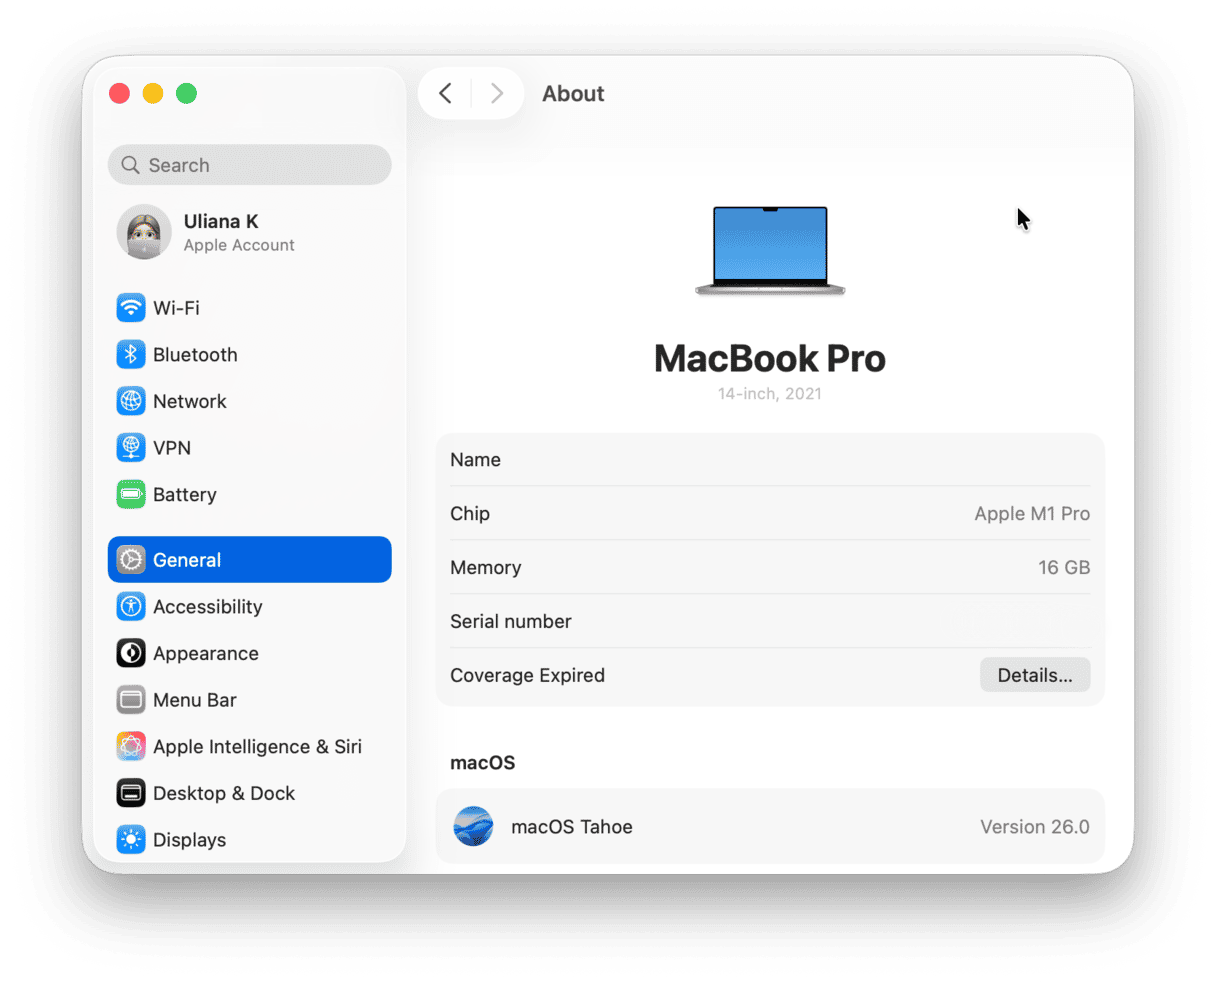
- Choose General and then click on About.
- You’ll see that the top row under the image is ‘Name.’ Click on the name.
- When you see the cursor, edit the name and type a new one.
- Press Return and quit System Settings.

Earlier versions of macOS
- Click on the Apple menu and choose System Preferences.
- Choose the Sharing pane.
- In the text box at the top of the window, next to Computer Name, type the new name.
- Quit System Preferences.
How to boost the performance of your Mac
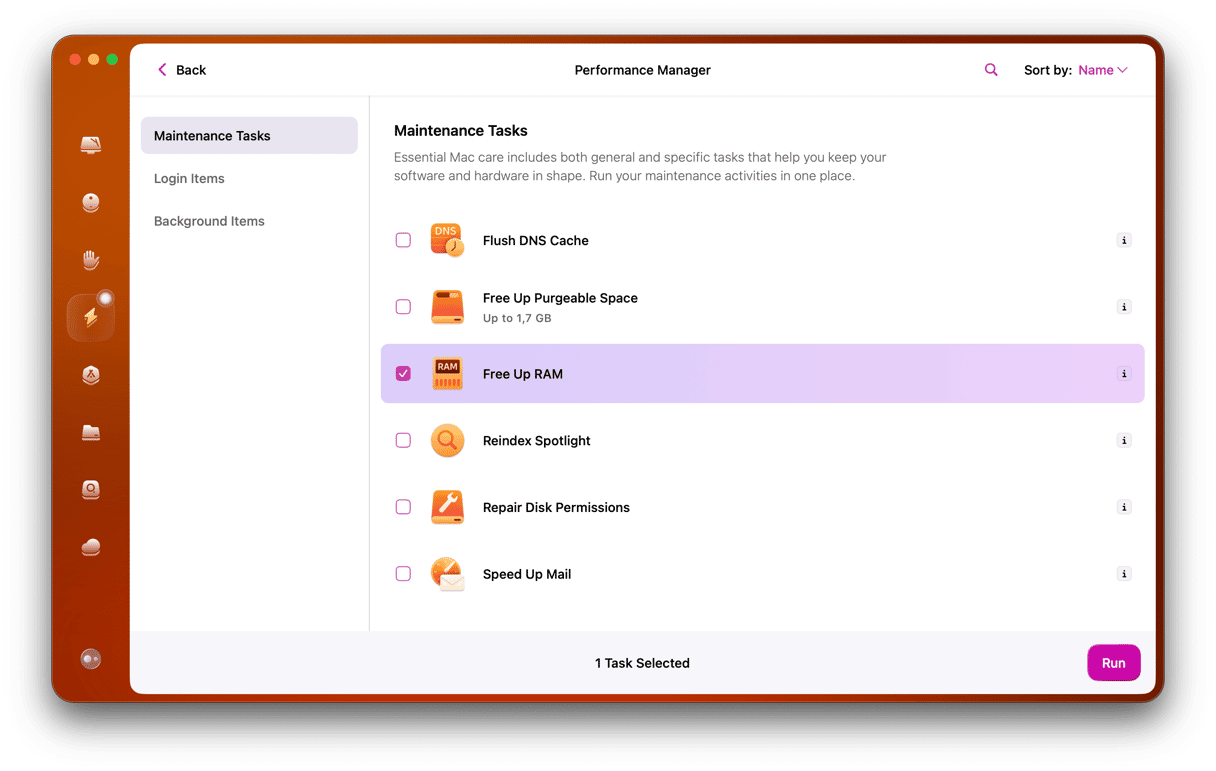
Changing the name of your Mac can sometimes resolve conflicts on the network and fix connectivity issues. But to improve the overall performance of your Mac, you’ll have to do much more. Clearing out junk files, freeing up RAM, deleting DNS cache, and reindexing Spotlight are just a few of the ways you can start to optimize your Mac. You should also check for malware, in case that is slowing down your Mac, and do regular macOS maintenance. Carrying out all those tasks manually is time-consuming and laborious, but thankfully you don’t have to. CleanMyMac can do it all for you. Its Smart Care feature can scan your Mac, looking for ways to optimize performance, free up disk space, and check for malware. And its Performance tool allows you to run various maintenance activities in one place. It’s very easy to use, and you can download CleanMyMac for free and try it out for yourself here.

How to change the name of a user on your Mac
You can change the display name of a user on your Mac, though the username that identifies that user to the rest of the system remains the same. Steps also differ for different macOS versions.
macOS Ventura
- Open System Settings from the Apple menu.
- Choose Users & Groups.
- Control-click on the user whose name you want to change and select Advanced Options.
- Type in your admin password.
- In the ‘Full name’ row, type the new name.
- Click OK.
Earlier versions of macOS
- Open System Preferences from the Apple menu.
- Click on Users & Groups.
- Click the padlock at the bottom of the window and type in your admin password.
- Control-click on the user whose name you want to choose and choose Advanced Options.
- Type in the new full name of the user and click OK.
How to change the hostname of your Mac
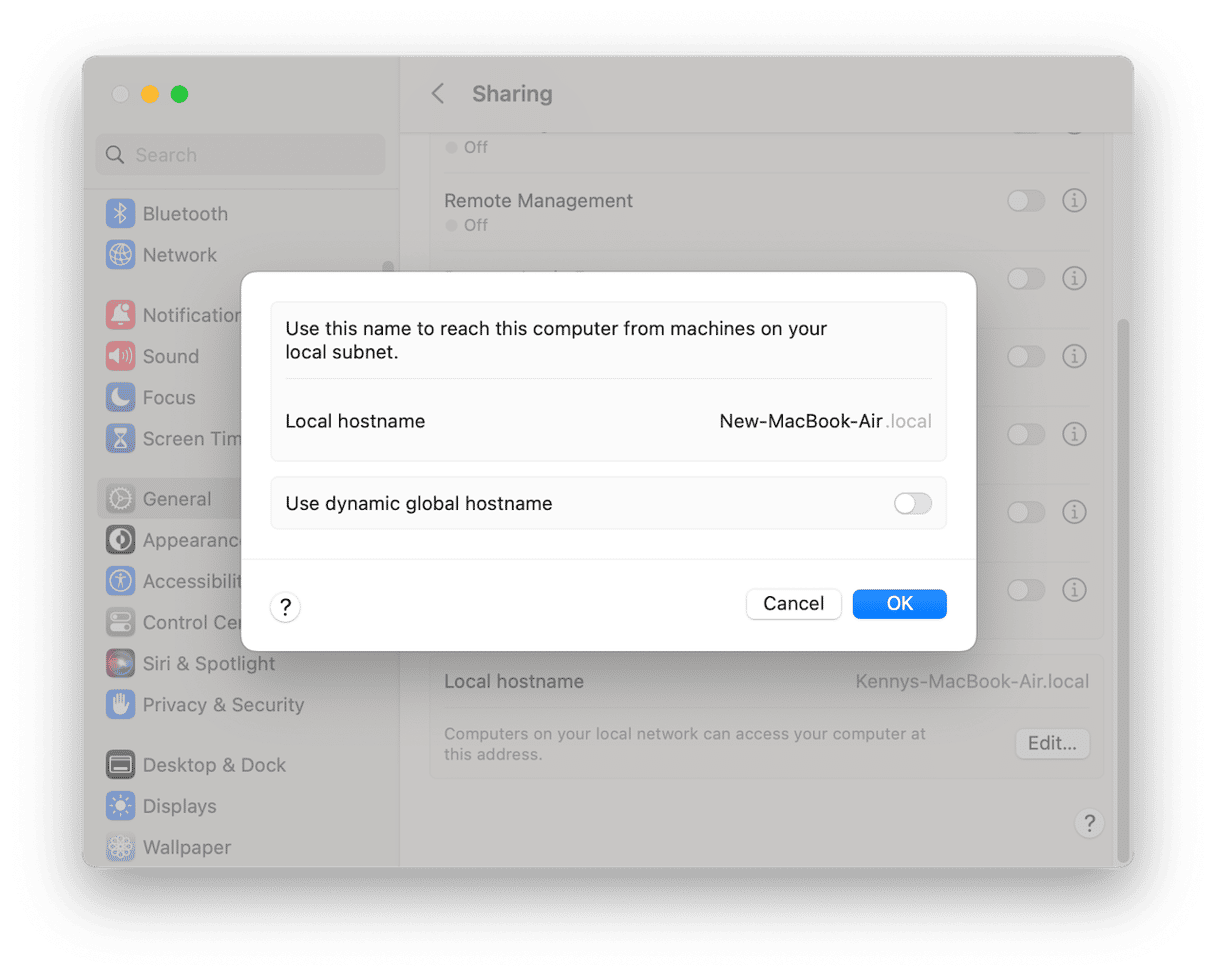
The hostname is the name of your Mac as it appears to other devices on your local network. It’s also the name that will appear in the Finder of any Mac that connects to your Mac over the network. By default, it’s the same as the name of your Mac. Importantly, hostnames must be unique on any network. That means that only one device can have any given name, and it’s one reason the name of your Mac may have been changed automatically. If your Mac’s name has a number in brackets after it, that’s an indication that the name has been changed by the system to avoid conflicting with another device with the same name on the network. When that happens, you should see a message on the screen telling you the name has changed and why. You can change the hostname independently of the device name, however. Again, the process is different for macOS Ventura and versions of macOS before Ventura.

macOS Ventura
- Open System Settings.
- Go to General and then Sharing.
- Click on Edit at the bottom of the window.
- Type the new hostname.
- Click OK.
Earlier versions of macOS
- Open System Preferences.
- Select Sharing.
- Under the text box where you changed the computer name, click Edit.
- Type the new hostname and click OK.
- Quit System Preferences.
The name of your Mac is more important than you might think. It’s necessary for identifying it on a network as well as to find it when you need to use AirDrop to send files to it or connect a Bluetooth device. The name of your Mac is also used to identify it in the FindMy app and in iCloud. You can change the name of your Mac to whatever you like, and you can change its hostname — the name by which it is identified on a local network — separately from the computer name. Follow the steps above to do all of that and avoid conflicts with Macs that have the same name on your network.


