Apple’s Find My service is incredibly useful, both for locating family members or friends who have agreed to share their location with you and for locating Apple devices like a Mac, iPhone, or AirPods. Most of the time, it’s a good idea to keep Find My switched on on all your devices so that you don’t lose them. However, there may be occasions when you want to remove a Mac from Find My. For example, if you lend it to a friend, give it away, or sell it. In this article, we’ll show you how to remove a Mac from Find My.
What is Find My?
Find My is an Apple service that allows you to locate people (so long as they have agreed to share their location with you) or devices. It works on Mac, iPhone, and iPad and makes it very easy to pinpoint the location of the person or device on a map.
If the reason you want to remove a Mac from Find My is that there is a problem with the Mac and you think that Find My might be causing it, you can run maintenance first, and that might fix the issues you’re having. You should clear out junk files, check for malware, and optimize your Mac’s performance. Doing all that manually would be very difficult and take a lot of time. But help is at hand — CleanMyMac’s Smart Scan module scans your Mac, looking for junk, malware, and opportunities to improve its performance. Once it’s done, it takes only a few clicks to get rid of the junk, any malware it’s found, and optimize performance. You can download CleanMyMac for free here. Then, open the app and click Smart Scan > Scan > Run.

How to remove a Mac from Find My
There are a number of different options for removing a Mac from Find My. The steps below assume that the Mac is associated with your Apple ID, and so appears in Find My on your devices.
- Remove a Mac from Find My using another Mac.
If you have more than one Mac associated with your Apple ID, you can use the other Mac to remove the one you want to remove from Find My. Go to Applications on the other Mac and open Find My. Select the Devices tab and locate the Mac you want to remove. Select it and click the ‘i’ next to its name in the main window. Choose ‘Remove This Device’.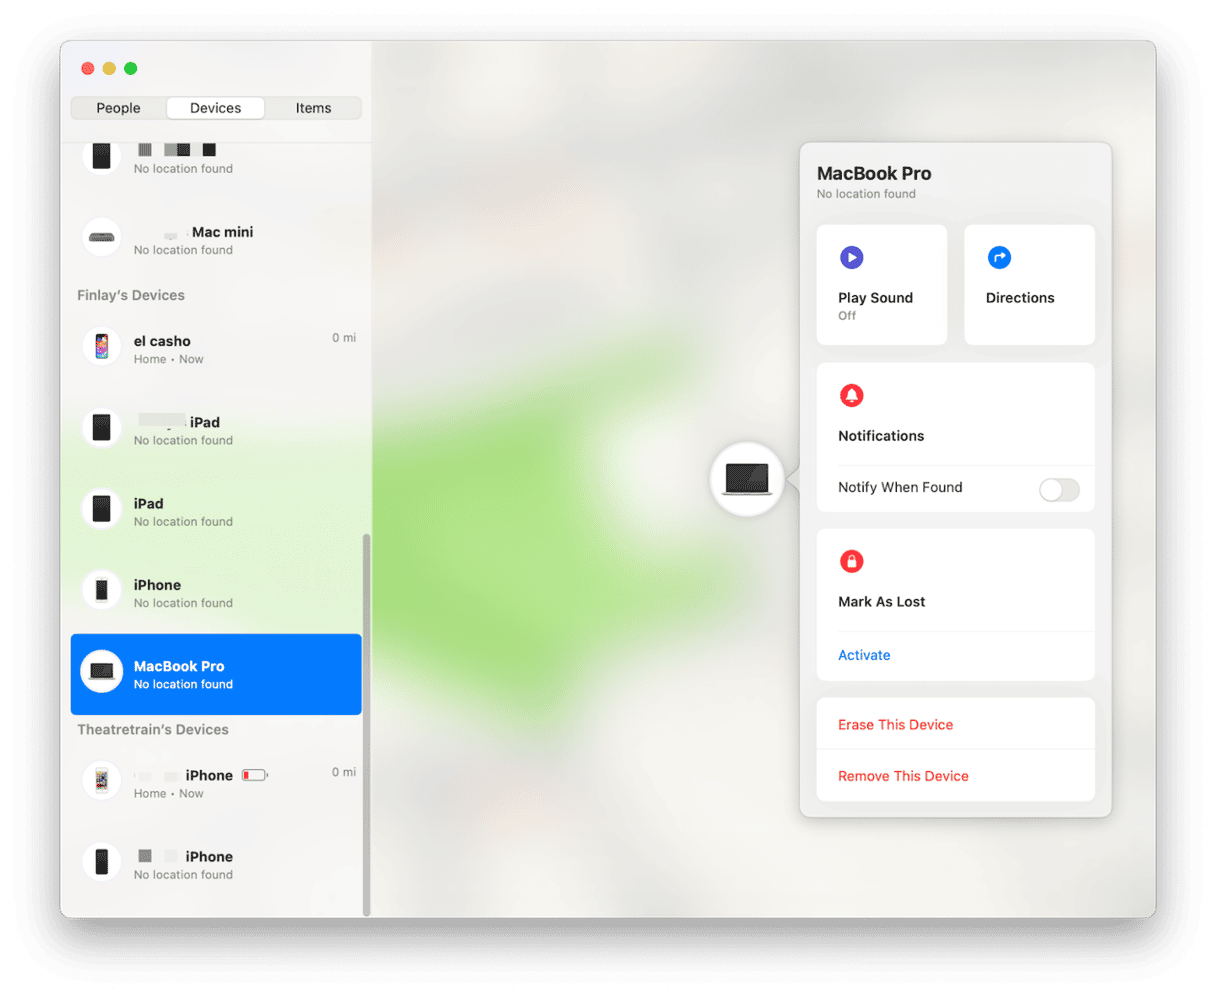
- Remove a Mac from Find My using an iPhone or iPad.
On an iPhone or iPad associated with your Apple ID, tap the Find My app to open it. Choose the Devices tab, then tap the Mac you want to remove. Swipe up on the drawer at the bottom of the screen and tap ‘Remove This Device’.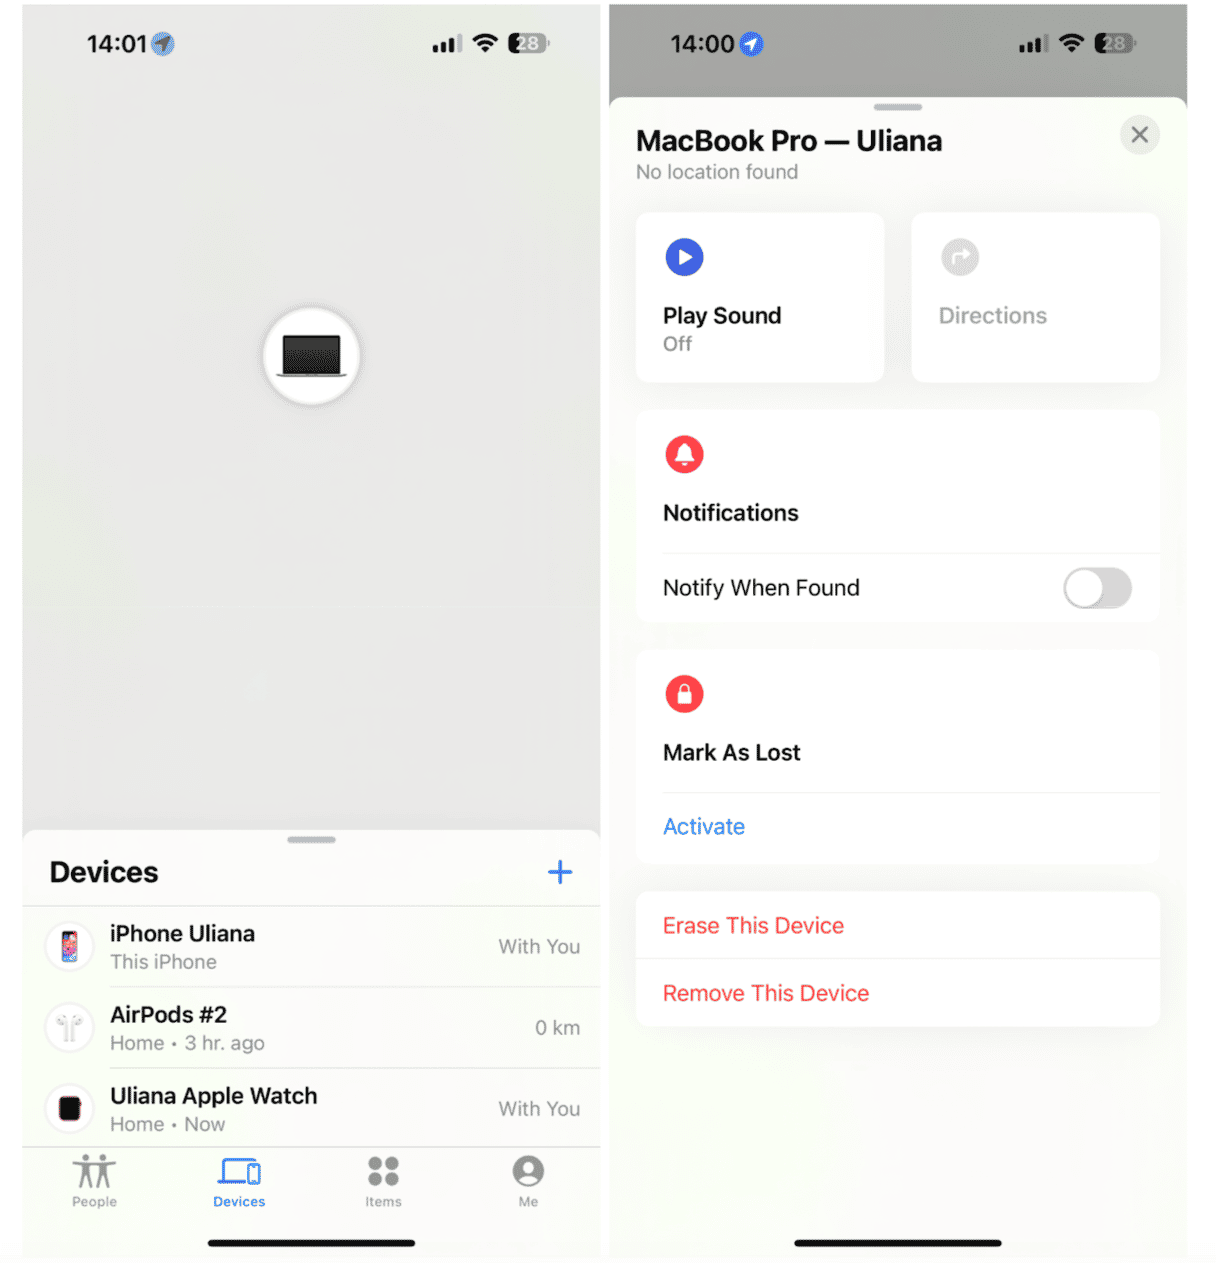
- Remove a Mac from Find My on iCloud.com.
If you don’t have another Apple device linked to Find My, you can also remove a Mac using a web browser. Navigate to iCloud.com and sign in with your Apple ID. You may have to confirm your identity on another device or via SMS message. Choose Find My and then click your Mac in the list of devices. Select ‘Remove This Device’. Apple says that when you do that, Activation Lock is turned off immediately and the device is removed from Find My after 30 days.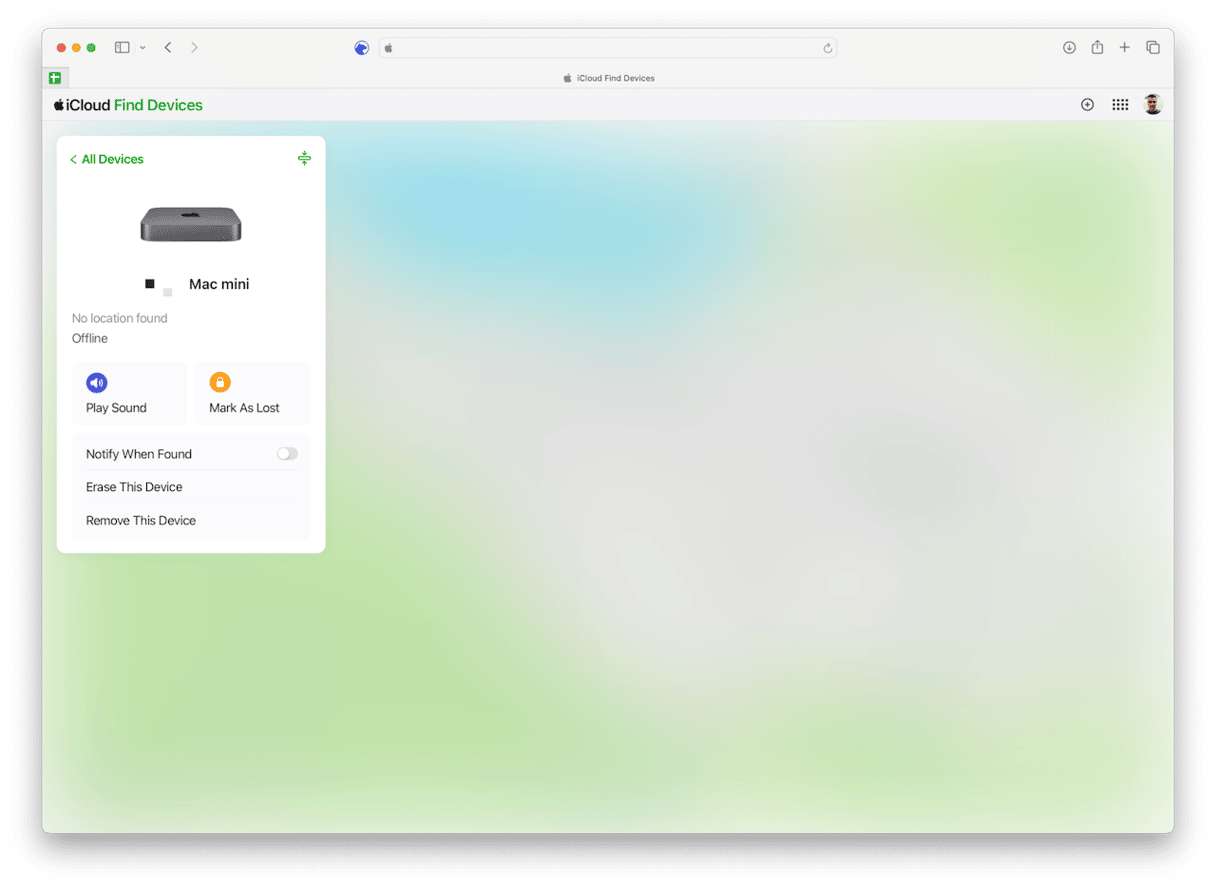
- Sign out of iCloud on your Mac.
If you don’t need to use any Apple online services on that Mac, you can just sign out of iCloud in System Settings > your Apple ID. That will automatically remove the Mac from Find My. - Erase the device.
If you’ve already given the Mac away or sold it and forgot to remove it from Find My, you should remove Activation Lock from iCloud.com by erasing the device. In step 4 above, instead of choosing ‘Remove This Device’, choose ‘Erase This Device’.


Find My is a great service for keeping track of your Mac and other Apple devices. But there may be times when you don’t want your Mac to appear on the list of devices. Follow the steps above to remove your Mac from Find My.


