Buying a new Mac is very exciting. It opens a whole world of new possibilities. It’s even more exciting if you’ve been struggling along with any ageing Mac for a while. The move from Intel to Apple Silicon adds a new dimension because the difference in performance is significant, particularly for applications optimized for Apple’s hardware. Setting up your new Mac is fairly straightforward, thanks to the onscreen guidance. However, there are a few things you should think about before you start. We’ll take you through those, then walk you through the process of setting up your new Mac.
Setting up a new Mac step by step
Here are the things you will need before you start setting up your new machine.
- Your Apple Account, aka Apple ID, and password.
- Your Wi-Fi network’s name and password.
- A backup of your old Mac if you want to transfer data to your new Mac.
- Cables to connect your backup to your new Mac (unless it’s on a network Time Machine disk)
- Licence codes for any apps you own and want to install on your new Mac (unless they are from the App Store or a subscription service like Office 365 or Adobe Creative Suite, in which case you’ll just need your login details for those).
How to set up a MacBook Air (or any other Mac)
The first thing you should do is connect your Mac to a power outlet. If you’re setting up a Mac mini, connect your display. You should also plug in a keyboard and mouse, even if you plan to use Bluetooth versions once your Mac is set up.
Connect to Wi-Fi network
- Press the power button on your Mac to start it.
- When you see Setup Assistant appear, choose your language and click Continue — this is the language that will be used to display everything on your Mac, including menus and dialog boxes.
- Choose the keyboard layout you want to use — usually the one for the country or region where you live.
- Click Continue.
- If you connect to the internet using Wi-Fi, choose your Wi-Fi network. If you use Ethernet, choose Other network > Ethernet.
- Type in your Wi-Fi password.
- Click Continue and wait for your new Mac to connect to the network.
Transfer your data
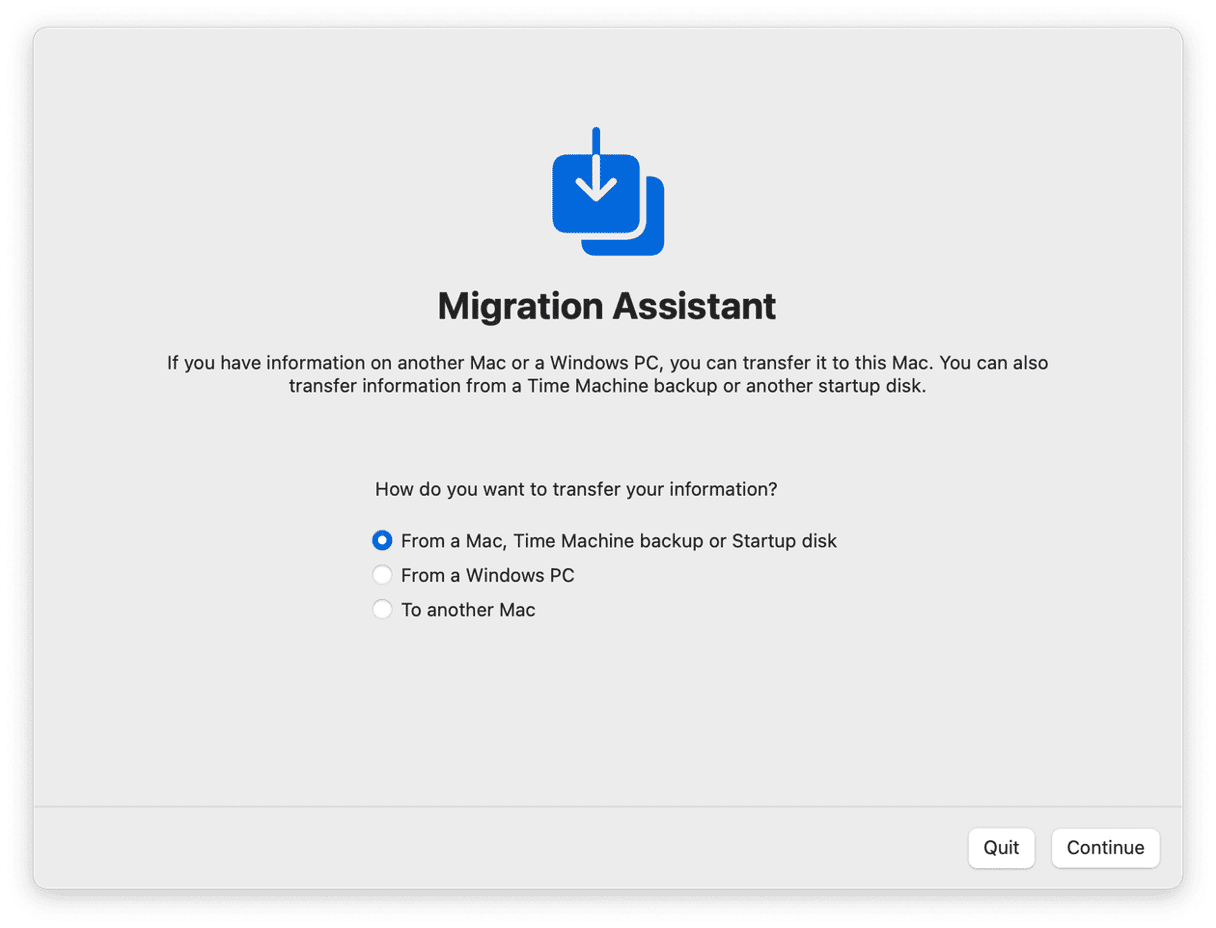
Next, you’ll be asked if you want to transfer data from an old Mac, PC or Time Machine backup. If you do, choose an option and follow the instructions when Migration Assistant appears. You can choose whether just to copy data or copy applications and settings as well. If you want to start using your new Mac from a fresh start, you might want to transfer your data and install apps and recreate system settings separately.

Enable Location Services
Now, you need to enable Location Services. If you want to access the full features in Maps, Siri, Find My, and other parts of the system, choose Enable. If you don’t want Apple to have access to your location data, don’t check the Enable box.
Sign in with your Apple Account
Type in your Apple Account and password. If you have two-factor authentication enabled, you’ll have to confirm your identity on a trusted device like an iPhone, or using a code sent by SMS.
Next, you’ll be asked to agree to Apple’s Terms and Conditions. If you click Agree, you can carry on setting up your Mac. If not, you won’t be able to continue.
Set up your account
The next step is to set up an admin user account. The username box will be populated automatically from your AppleID, but you can change it.
Type in an admin password. It should be secure — that means difficult to guess but easy for you to remember. If you want to be able to reset your password using your Apple Account, select that checkbox. Next, set your time zone and click Continue.
Over the next few screens you will be asked if you want to:
- Enable FileVault — which encrypts the contents of your boot drive.
- Allow your iCloud account to unlock your disk (if you turned on FileVault).
- Store files from Documents and Desktop in iCloud — which can free up space on your Mac, but will take up storage space in iCloud.
- Enable Siri.
On each screen, choose the option you want, and press Continue. When you get to the end, you’ll see the spinning beachball as your Mac is set up, and then it will be ready to use. You’ll probably get many notifications from Apple apps telling you that new accounts have been added and asking for permission to access certain services. Don’t worry, that’s normal.
Setting up a new Mac is easy if you follow the prompts. Now, you can enjoy using your new Mac!


