We’ve all become accustomed to using audio and video tools on our Macs since the start of the pandemic. Ever since, they have become an important part of our personal and private lives. Whether it’s Zoom, Teams, FaceTime, or Skype, we have relied on them to keep in touch with friends and family and hold work meetings. But what do you do when the tools don’t work? This article will explain what you should do when you can’t connect to Skype on your Mac.
What to do when Skype won’t connect on your Mac
1. Check your Wi-Fi network
The most likely cause of Skype connecting problems is your Wi-Fi network. Is it working correctly? Are you too far away from the router? Look at the Wi-Fi signal in the menu bar. Is it showing three bars? If not, try moving closer to your router if you can. Can you connect to a different network? If you can’t connect to a different router or move closer to the router you’re connected to, try switching Wi-Fi on your Mac off and then on again. If you still can’t connect, restart your router; that often does the trick.
2. Check your broadband connection
If you’ve ensured that your Wi-Fi network isn’t the problem, your internet connection is the next thing to check. Even if your Wi-Fi network is working, Skype won’t connect if your Mac can’t connect to the outside world. Do websites load in a web browser? Are they slow? If they are, your broadband connection might be slow, which could be causing a problem for Skype. Check your broadband provider's network status to see if there are any problems in your local area.
3. Check other activity on your network
Is anyone in the house streaming a movie or TV program, or playing an online game? If so, this will use bandwidth, and there may not be enough available for Skype to work properly. The only solution to that is to wait for them to finish or ask them to stop so you can use Skype.
4. Reset Skype
It’s possible that the Skype application has become corrupt or developed a problem, and that’s why it can’t connect. The solution to this is to reset Skype so that it returns to its default settings. The easiest way to do that is to use the Applications tool in CleanMyMac. This will allow you to reset any application. Here’s how to use it:
- Open CleanMyMac (download it for free here if you don’t have it).
- Choose Applications and run a scan.
- Click Manage My Applications.
- In the Uninstaller tab, find Skype.
- Click the arrow (>) next to it, select everything except Binaries, and click Remove.

5. Check Skype preferences
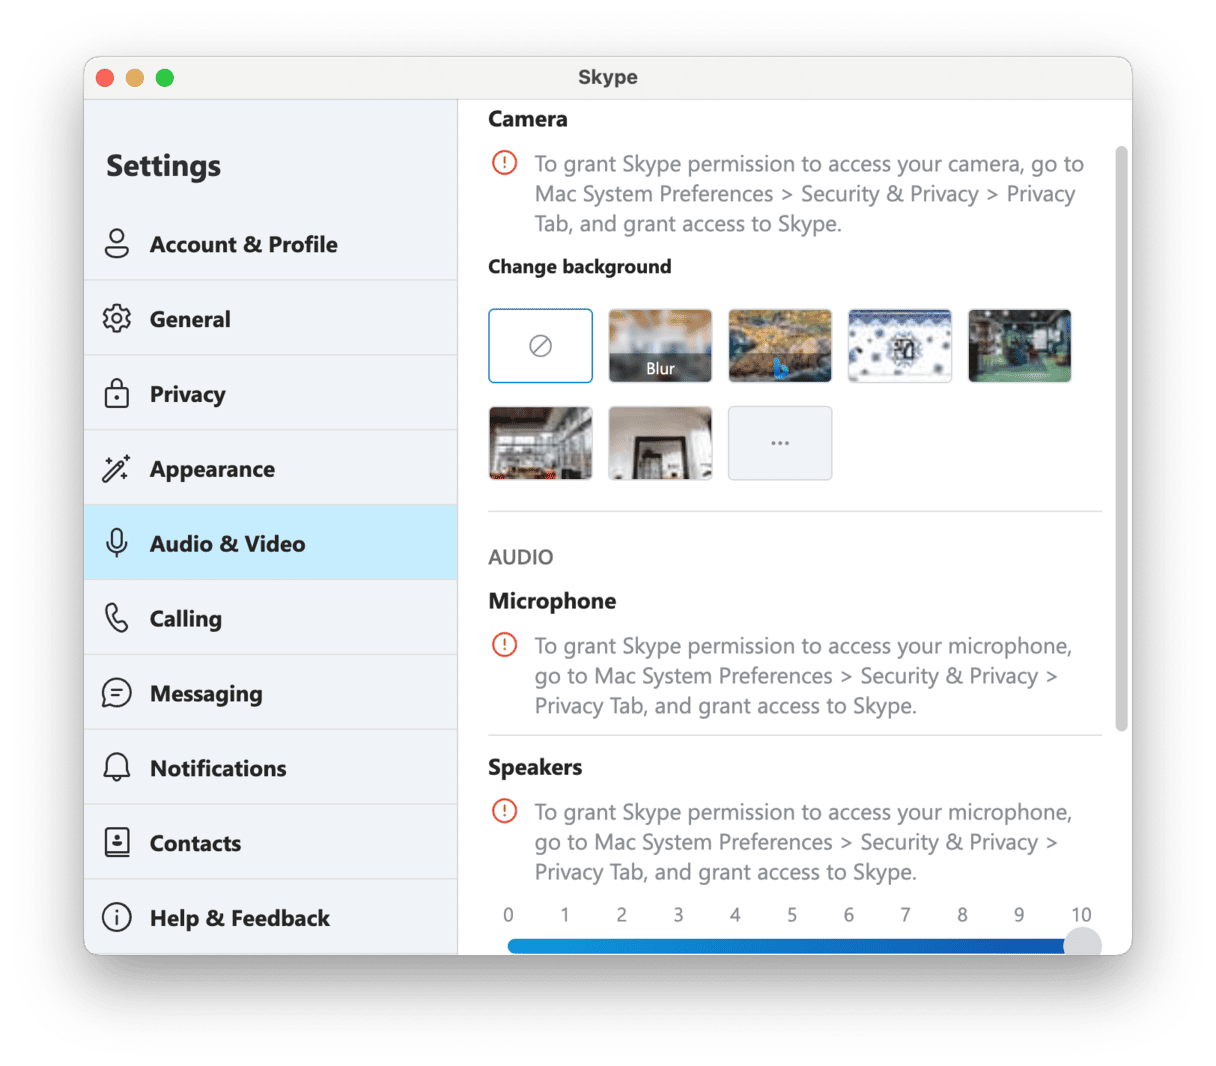
If Skype can make calls, but you can’t be heard by the other person on the call, the problem probably lies with the audio and video settings. It may be, for example, that Skype doesn’t have permission to access your microphone or webcam.
- Go to the Skype menu and choose Preferences.
- Choose Audio and Video.
- At the top of the window, you’ll see the settings for the video camera you want to use. If you see a red exclamation mark, it means that you haven’t granted permission to Skype to access your webcam. To fix that, go to System Settings > Privacy & Security > Camera and grant access to Skype. For macOS versions older than macOS Vertura, open System Preferences > Security & Privacy > Privacy > Camera and check the box next to Skype.

- Once you’ve granted permission, check that the webcam you want to use is selected in Skype > Settings > Audio & Video.
- Repeat steps 3 and 4 for Audio, making sure Skype has access to your Mac’s microphone and that the microphone and speakers you want to use are selected.
6. Check your camera and microphone are working properly
If everything is set up correctly in Skype’s Preferences, you should check that your microphone and camera are working if they don’t seem to work in Skype. You can do that by using another app like FaceTime to make a call. Or you can use QuickTime Player to record a video from your webcam. If that records video and sound, you know the camera and microphone are working properly.
- Go to Applications > Utilities and open QuickTime Player.
- Click the File menu and choose New Movie Recording.
- If you are using your Mac’s built-in camera and microphone, click the record button and record a short clip. Click record again to stop.
- If you are using an external webcam or microphone, click on the down arrow next to the record button and select the camera and microphone before you press record.
- If the recording captures sound and video, you know your camera and microphone are working correctly.
7. Reinstall Skype
If nothing else works, it’s time to reinstall Skype. First of all, you’ll have to uninstall it completely, making sure you don’t leave any files behind. The easiest way to do that is to use CleanMyMac’s Uninstaller. Follow the process above for resetting Skype, but this time, simply select Skype and click Uninstall.

Once Skype is uninstalled, you can re-download and reinstall it. Alternatively, you can log in to Skype in a web browser and make a call from there.
There are several things you can do when Skype won’t connect on your Mac. The most likely cause is your Wi-Fi network or your connection to the wider internet. However, if both of those are fine, you should consider resetting Skype to its default settings or reinstalling it completely. Also, check your video and audio settings to ensure it has access to your camera and microphone. As a last resort, try using Skype from a web browser instead of in an app.