Moving files around your Mac is usually glitch-free. But sometimes, when you try to do something with your files, you may see an error saying, ‘The Finder can’t complete the operation because… (Error code -36).’ Keep on reading to find out why it pops up and how to fix it.
What is error code -36?
Error code -36 relates to actions in the Finder, such as moving, copying, or deleting files. The error message will helpfully tell you which file is giving problems. When you see the file name, you may notice that it has a ‘.’ before its name and an ‘_’ later in the name (e.g., ‘.DS_Store’ is one file that may cause the error). That ‘.’ means the file is hidden in the Finder.
What causes error code -36 on Mac?
Error code -36 usually occurs when a file with a ‘.’ and ‘_’ in its name becomes corrupted or there is some other problem with it. When that happens, the Finder is unable to work with the files you are trying to copy, move, or delete because it can’t find the information it needs.
Here are some other reasons why you may see error code -36 on Mac:
- Software bug in your macOS version
- Issues with read/write file permissions
- If you see it when you use an external drive, it may be corrupted or not properly connected
How to fix error code -36 on Mac
Below, we will introduce two ways to fix error code -36 — manually with a few workarounds and automatically with a Mac optimization tool.
How to fix error code -36 automatically
A quick way to try and address this and other Finder errors is to use a handy app for resolving all kinds of problems on your Mac. As well as helping you fix issues, CleanMyMac can also improve your Mac’s performance, keep it free from malware, and free up several gigabytes of space currently occupied by junk.
To fix the error code -36 problem, we will use CleanMyMac to reset the Finder. Here’s what you need to do:
- Start your free CleanMyMac trial.
- Open CleanMyMac, choose Applications in the sidebar, and click Scan.
- Once the scan is complete, click Manage My Applications and go to Uninstaller.
- Locate the Finder in the window on the right and click the arrow to the right of its name. Select everything except Binaries.
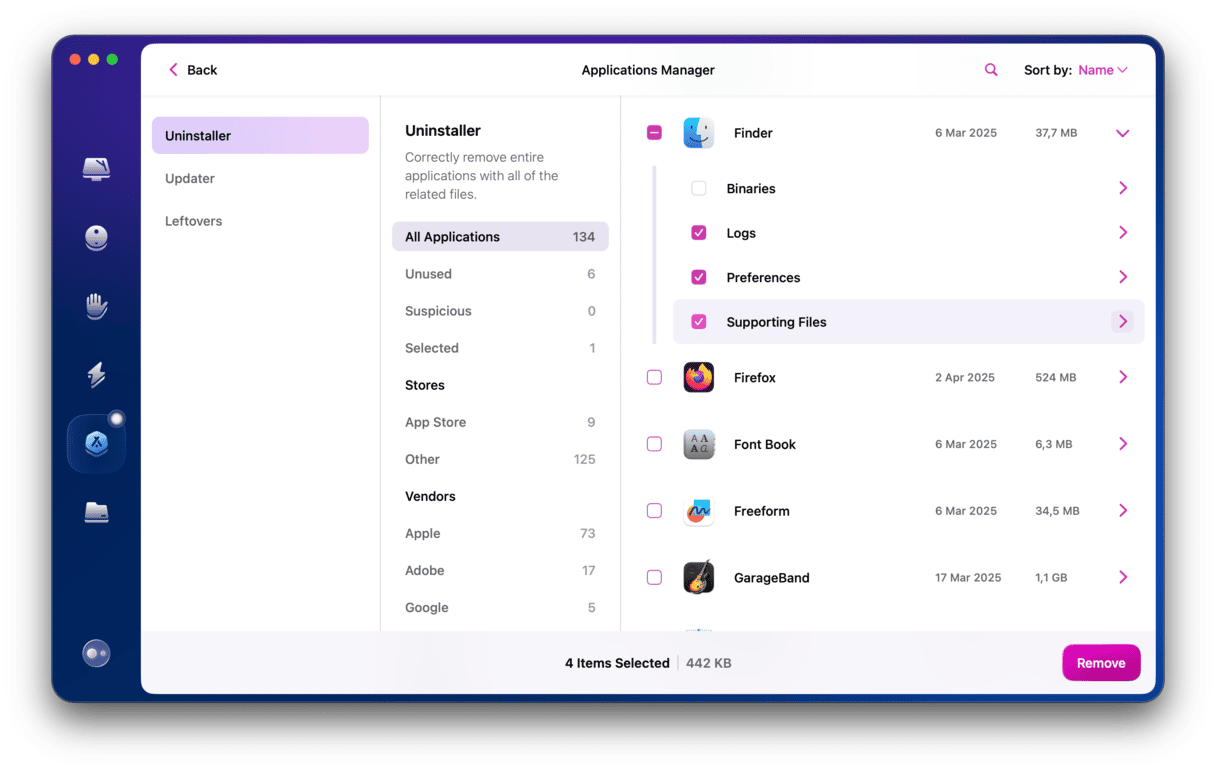
- Click Remove.


You can use CleanMyMac to reset any app by simply selecting everything except Binaries in the list.
How to fix error code -36 manually
If you want to try to fix error code -36 manually, there are a few workarounds that could help.
1. Use Terminal
The solution to the error, in most cases, is to merge the files causing the problem with their parent files using a Unix command. That will eliminate the problematic files while retaining the information they hold. As with every other command-line interaction on your Mac, this is done using Terminal. It’s straightforward to do, but you should make sure, as with all Terminal commands, that you type in the command exactly as it is displayed here:
- Go to Applications > Utilities.
- Double-click Terminal to open it.
- Type
dot_clean - In the Finder, navigate to the folder that contains the files you were trying to copy, move, or delete.
- Drag the folder onto the Terminal window after the command you just typed.
- You should now see the file path displayed after the command you typed.

- Press Return.
- Try moving, copying, or deleting the files again.
- Quit Terminal.

2. Manually change file permissions
Sometimes, the error code is caused by corrupted file permissions, so another way to solve it is to check those permissions and change them if necessary. Here’s what you need to do:
- Go to the Finder and select the file or folder you want to copy, delete, or move.
- Control- or right-click it and choose Get Info. You can also press Command + I to open the same window.
- Scroll down until you see the Sharing & Permissions section.
- Set permissions for your current user to Read & Write. You may need to click the lock icon at the right side of the window and enter your admin credentials if you can’t change it.
- Close the Info window.

3. Use Disk Utility to run First Aid
Another common reason why you may see the error message is that the disk has got corrupted. Luckily, macOS comes with a built-in tool that can help you fix it — Disk Utility. Here’s how to use it:
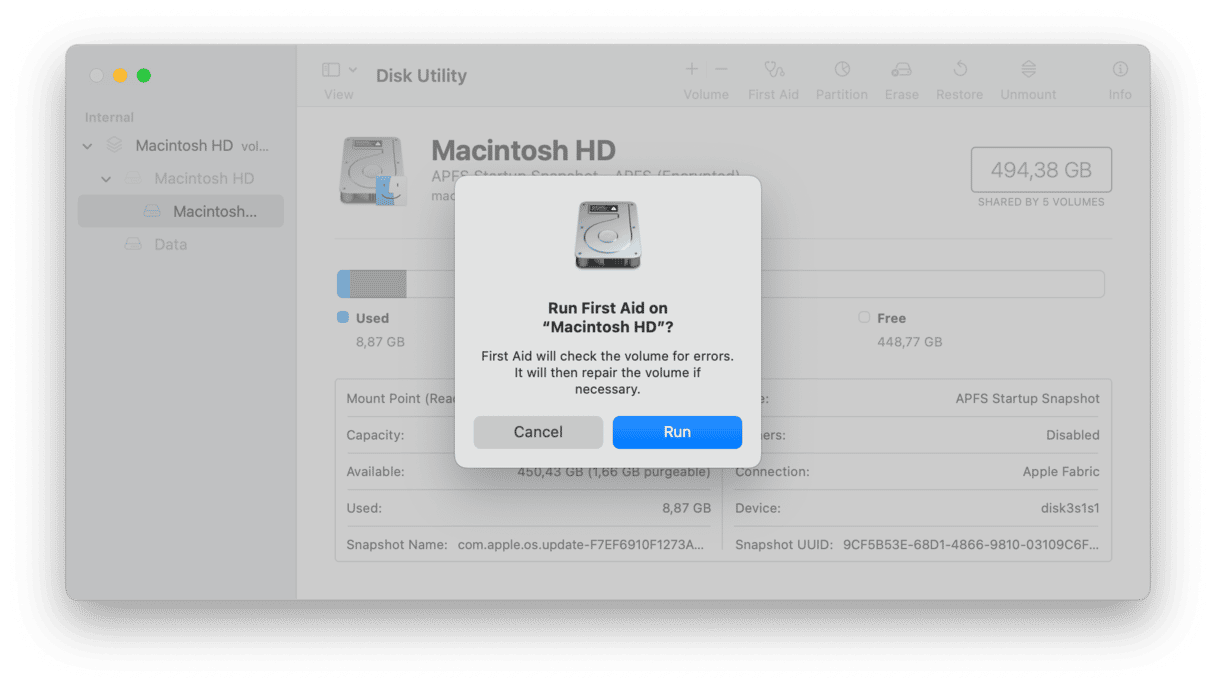
- Open Disk Utility from Applications > Utilities. Or you can use the Spotlight search to find it or ask Siri to open the app for you.
- Select your startup disk from the sidebar.
- Now, in the toolbar, locate First Aid and click it.
- Click Run.


If you use an external drive when you get the error, first, make sure that it’s properly connected. If it is, follow the steps above to run First Aid for your external drive. But at step 2, select it instead of your startup disk.
4. Delete the .DS_Store files
Another quick fix is to find and delete the .DS_Store files. If they got corrupted, it may cause error code -36. To delete them, you’ll need to use Terminal once again:
- Open Terminal from Applications > Utilities or using the Spotlight search or Siri.
- Type the following command and press Return:
sudo find / -name ".DS_Store" -depth -exec rm {} \ - Enter your password if asked.
- Wait for the command to run and restart your Mac.

5. macOS update
The final fix is to update your macOS. The thing is that you may see the error message because of a software bug that has been addressed in a new version of the operating system. More than that, it is always a good idea to keep your Mac updated to the latest macOS version compatible with your computer to ensure that you have all security patches installed and enjoy the most recent performance improvements.
Here’s a quick reminder of how to update your Mac:
- Go to System Settings > General > Software Update.
- Click Update Now or Restart Now and wait for the update to be installed.
- Take a moment to enable automatic updates.

If nothing helped, you may need to contact Apple Support for more tips.
Error code -36 refers to a rare problem in macOS that affects the Finder. It usually happens when you try to copy, move, or delete a file and can be caused by the Finder running into problems with hidden files that store attributes for files and folders, such as the position of icons or comments on files. You can fix it using Terminal or by resetting files in the Finder using CleanMyMac’s Uninstaller tool.