Spotify is a hugely popular music streaming service, and while many people use it on a smartphone while they’re on the move, lots of us use it on our Macs to play music or podcasts at home or while we work. You may have noticed that after you have been using it for a while, Spotify can start to run slowly. Why does it do that, and what can you do about it? We’ll answer those questions in this article as well as give you a tip on how you can keep your Mac running all the time smoothly.
Why is Spotify running so slow?
When you listen to Spotify, the music or podcasts you stream are cached on your boot drive. That way, if you listen to the same track again, it doesn’t have to stream it over the internet; it can only play it from the cache. The cache is supposed to be deleted each time you quit Spotify. But like all cache files, sometimes that doesn’t happen. And if you keep Spotify open all the time and don’t restart your Mac often, it won’t be deleted. That means it will keep growing and growing and eventually start to slow Spotify down.
How to speed up Spotify on your Mac
If the Spotify app is slow on your Mac, you could try reducing the size of the cache file so that it no longer slows it down.
There are two ways you can speed up Spotify on your Mac: limit the amount of data Spotify streams so that the cache doesn’t grow as quickly, or manually reduce the size of the cache.
1. Limit the data Spotify streams

- Go to your Applications folder and open Spotify on your Mac.
- Select the Spotify menu in the menu bar and choose Settings.
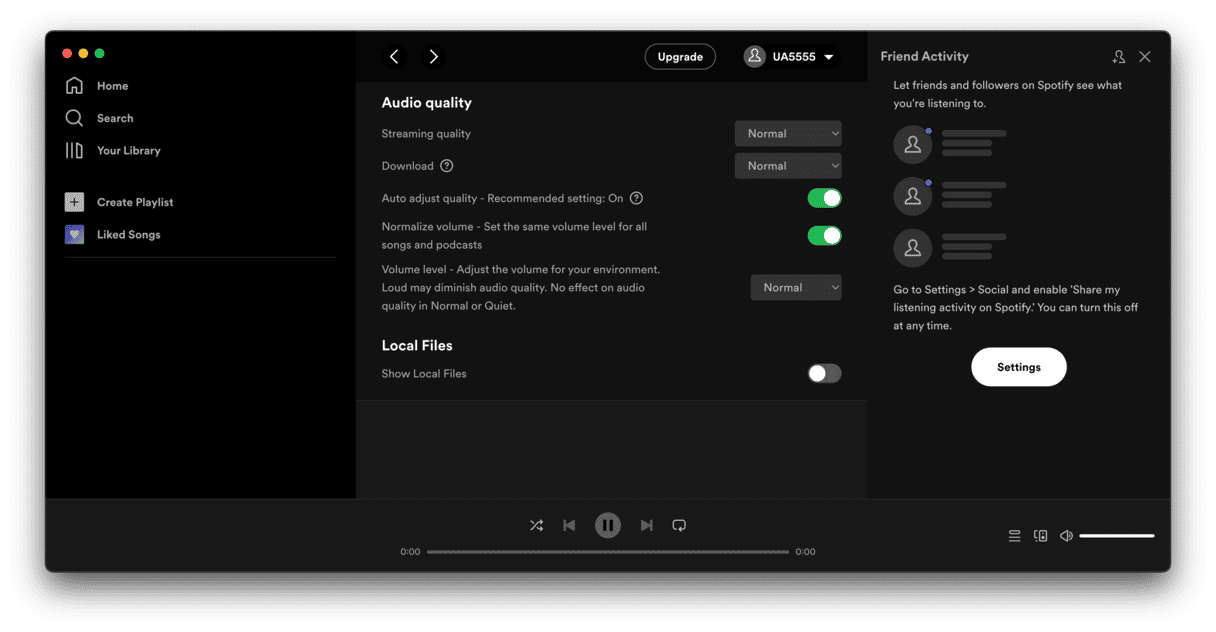
- Look for the Audio Quality section.
- Click the menu next to Streaming quality and Download and select Low or Normal.
This will reduce the bit rate of the music that Spotify streams and reduce the size of the cache needed to store it on your Mac.
2. Clear Spotify’s cache

- Press Command-Q to quit Spotify, or choose Quit from the Spotify menu.
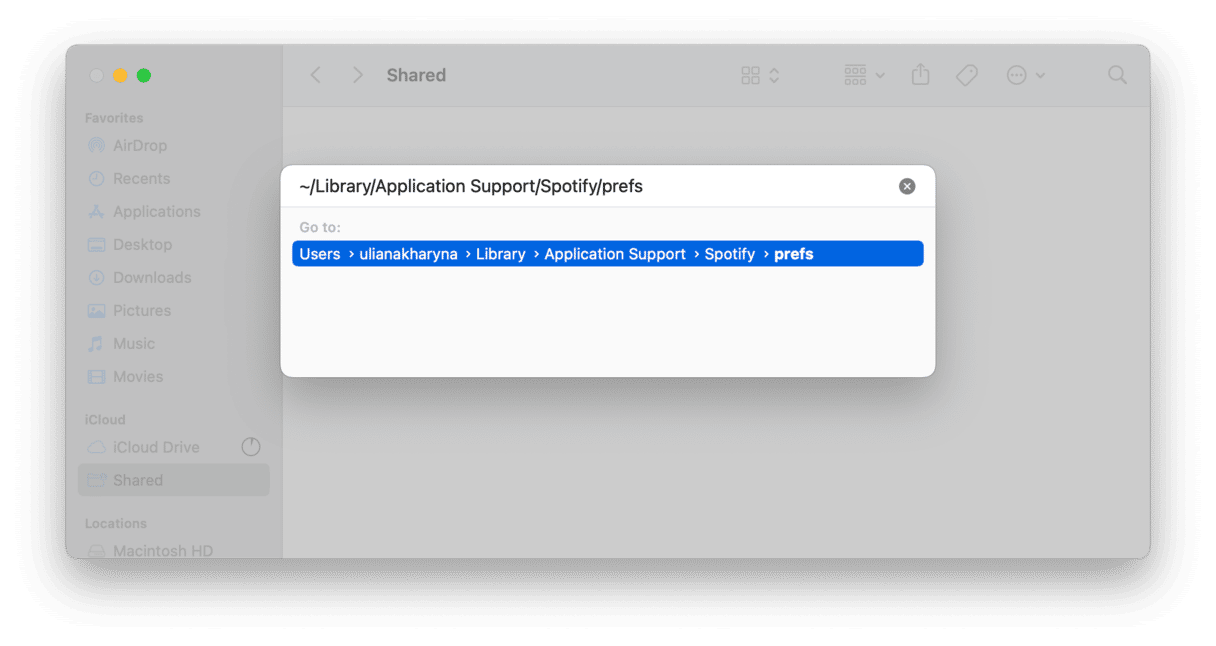
- In the Finder, select Go from the menu bar and choose Go to Folder.
- When the text input box appears, type or paste this:
~/Library/Application Support/Spotify/prefs - Right-click or Control-click on that prefs file and choose Open With, then Text Edit (or another text editor like BB Edit if you have one installed).
- Scroll to the bottom of the text file and paste this in a new line: storage.size=1024 (1024 is the maximum size of the cache in MB. You can replace that number with whatever you choose and set your own maximum limit).
- Save and close the file.
- Drag the PersistentCache folder inside the Spotify folder to the Trash.
- Open Spotify.
Spotify’s cache will now have shrunk to the size you specified in the text file. The rest has been deleted. The cache shouldn’t ever grow larger than the size you selected in the text file.
3. Reset the Spotify app
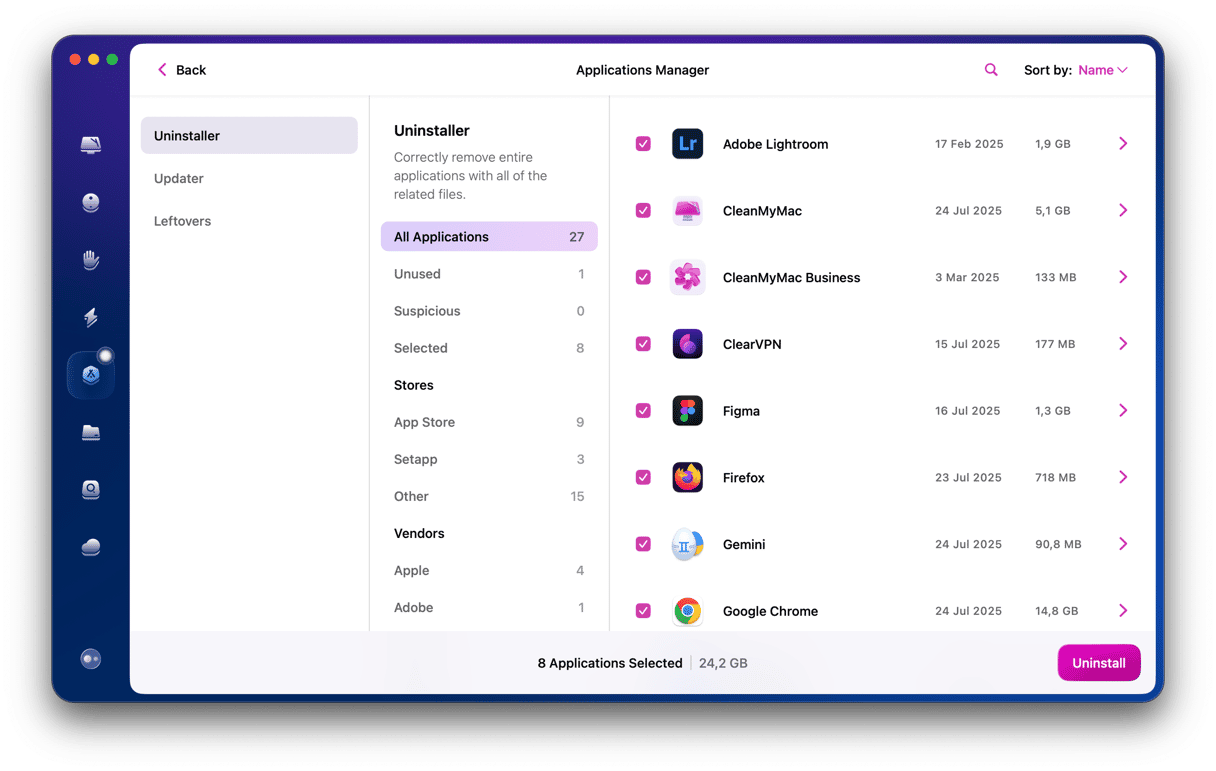
If the previous methods didn’t help, you could try deleting and reinstalling the app. Although, if you want to save time, resetting Spotify might be the option. With CleanMyMac, you can reset any app to its default state and fix possible issues. Here’s how to do that:

- Open CleanMyMac (download the app here).
- Go to Uninstaller.
- Choose Spotify from the list of apps.
- Click the options next to the app’s name and choose Reset.
- Click the Reset button.
Spotify caches the music you stream on your Mac so that you can listen to the same track again and again without having to keep streaming the data over the internet. The cache should be deleted at the end of each session, but sometimes this doesn’t happen, and it causes Spotify to run slowly. If that has happened to you, follow the steps above to get Spotify running smoothly.


