So you've checked how much free storage you have on Mac, only to find out that gigabytes of space are occupied by other volumes? Worry not; it is a common message, especially if you use the Optimize Storage feature. Luckily, it is easy to fix. Keep on reading, and we'll explain what other volumes in a container are and how to safely remove them.
What is other volumes in container on Mac
In HFS+, the file system replaced by APFS could split a disk into different partitions. APFS gets rid of the concept of partitions and replaces them with containers. But containers differ from partitions. As well as having multiple containers on a physical disk, a container can have multiple volumes. For example, in macOS, your startup container has the main boot volume — usually called Macintosh HD — as well as the Recovery volume, Preboot volume, and volume for virtual memory like swap files.
Before we discuss what 'other volumes' in a container are, let's look at where the message appears:
- Go to System Settings > General.
- Choose Storage.
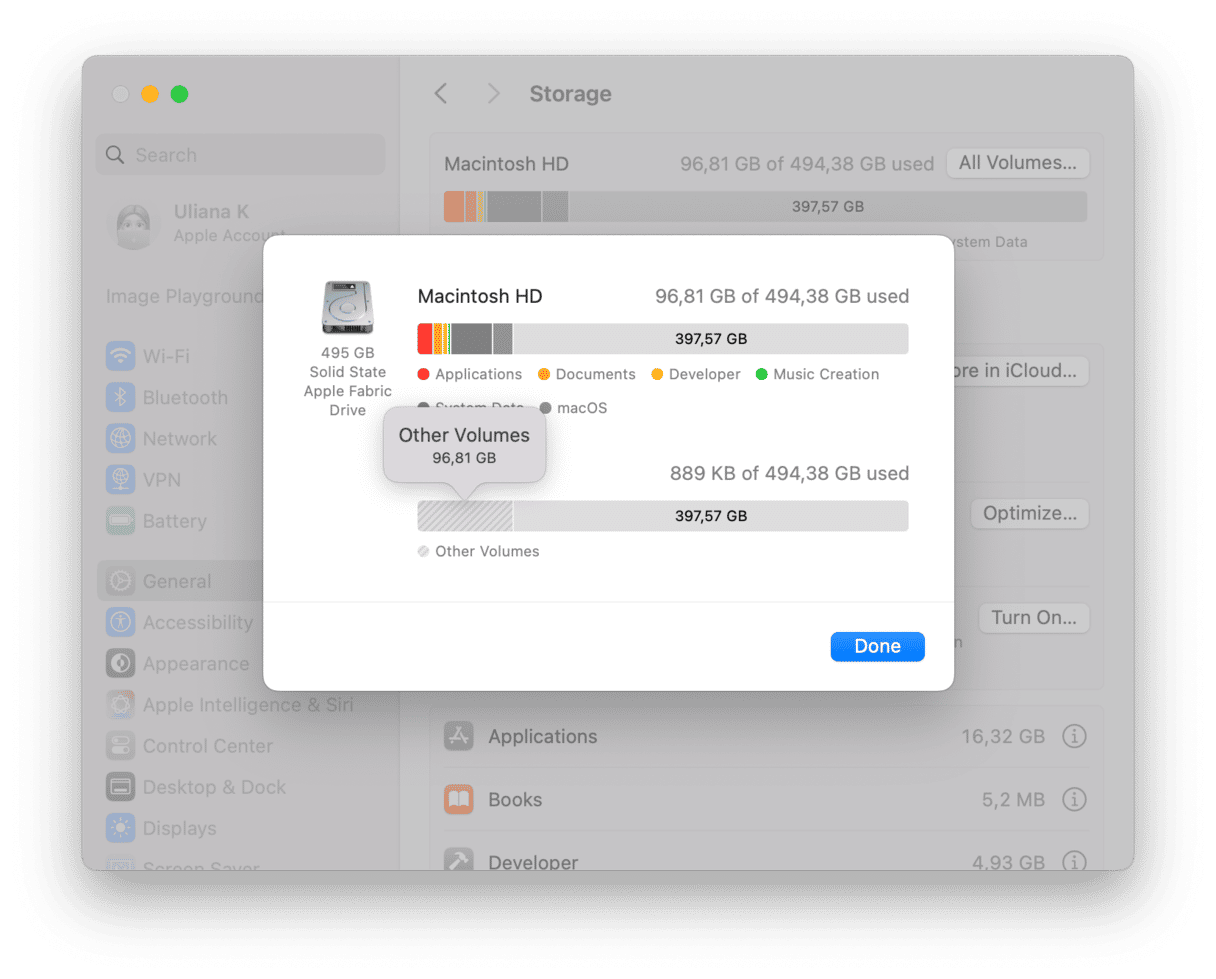
After a short time, when macOS has calculated it, you'll see a colored bar describing how your storage is allocated. Sometimes, you'll see a part of the box colored gray and the description 'other volumes in container'. Other times, you may see it if you click All Volumes above the colored graph.
| Recovery volume | Used to restore Mac from a backup |
| Preboot volume | Is necessary to start a boot process |
| Virtual volume | Lets you access a virtual drive |
Those 'other volumes' are the recovery, preboot, and virtual volumes. If you see that message, the other volumes likely take up much more space than they should because something has gone wrong. Unfortunately, reclaiming the storage space isn't as simple as just getting rid of the other volumes since they are crucial to the OS.
How to delete other volumes in a container?
However, there are other ways you can fix the problem to free up space on your Mac or get rid of the other volumes in a container message. Let's look at the options.
1. Reclaim free space with CleanMyMac
CleanMyMac is one of our favorite apps for freeing up space as well as doing general maintenance on a Mac. Don't take our word for it, though — try it out yourself.
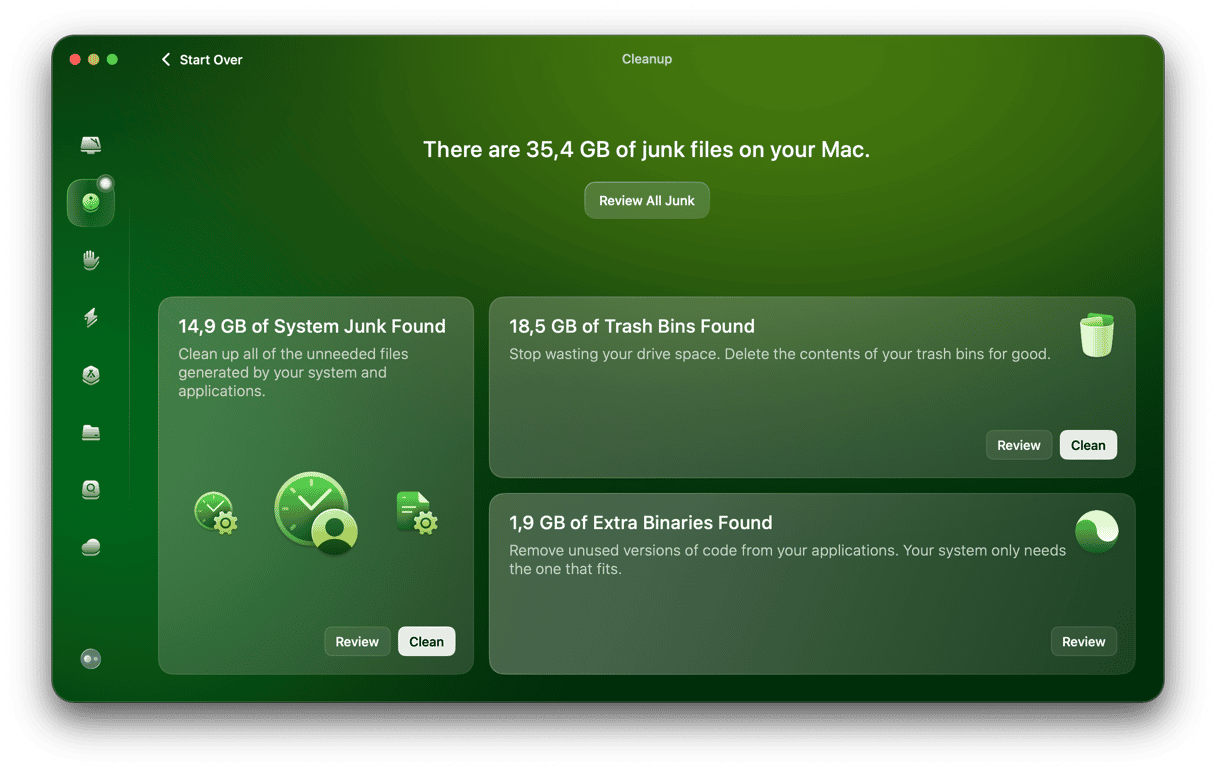
CleanMyMac’s Cleanup feature is perfect for identifying files that could be safely erased to keep your Mac running smoothly. Here's how it works:
- Get your free CleanMyMac trial.
- Open CleanMyMac
- Choose Cleanup from the sidebar and click Scan. Identifying space that can be safely cleaned takes a few minutes, but it won't be too long.
- When it's finished, you'll see the recommended items to clean. Simply click Clean, and you’re all set.
2. Create a new user account
Some Mac users have reported that creating a new user account allowed them to reclaim storage from other volumes in a container successfully.
- Click the Apple menu and choose System Settings.
- Go to Users & Groups.
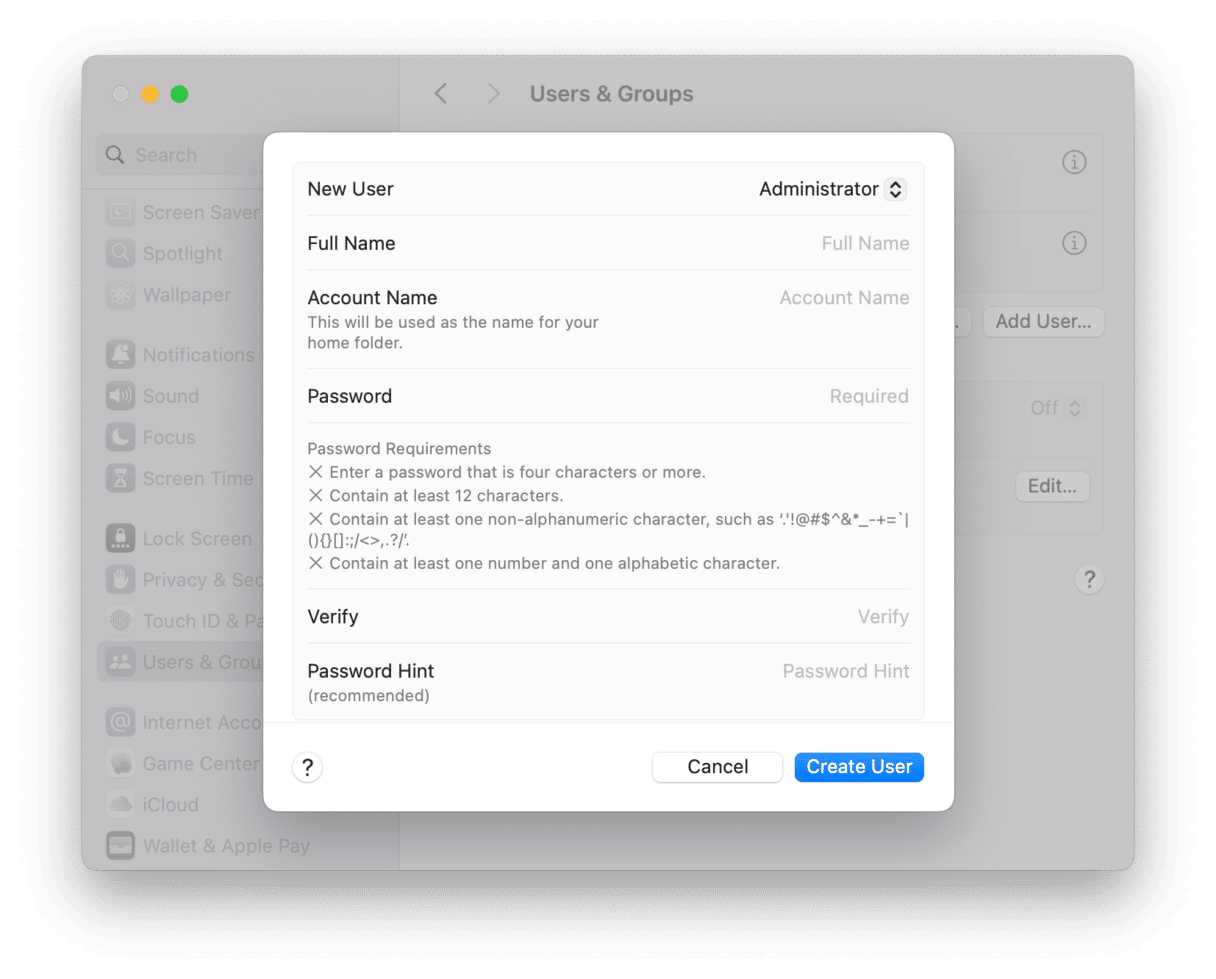
- Click Add User.
- Enter your username and password.
- Select Administrator from the dropdown menu and enter details for the new account.
- When you have created it, restart your Mac and log in with the new Administrator account.
- Check storage again to see if the 'other volumes in this container' disappeared.
3. How to manage each volume using Terminal
Apple's Storage tab doesn't give many details on what's going on with your drive and those other volumes. To find out what volumes your drive consists of, let's run this Terminal command: diskutil list
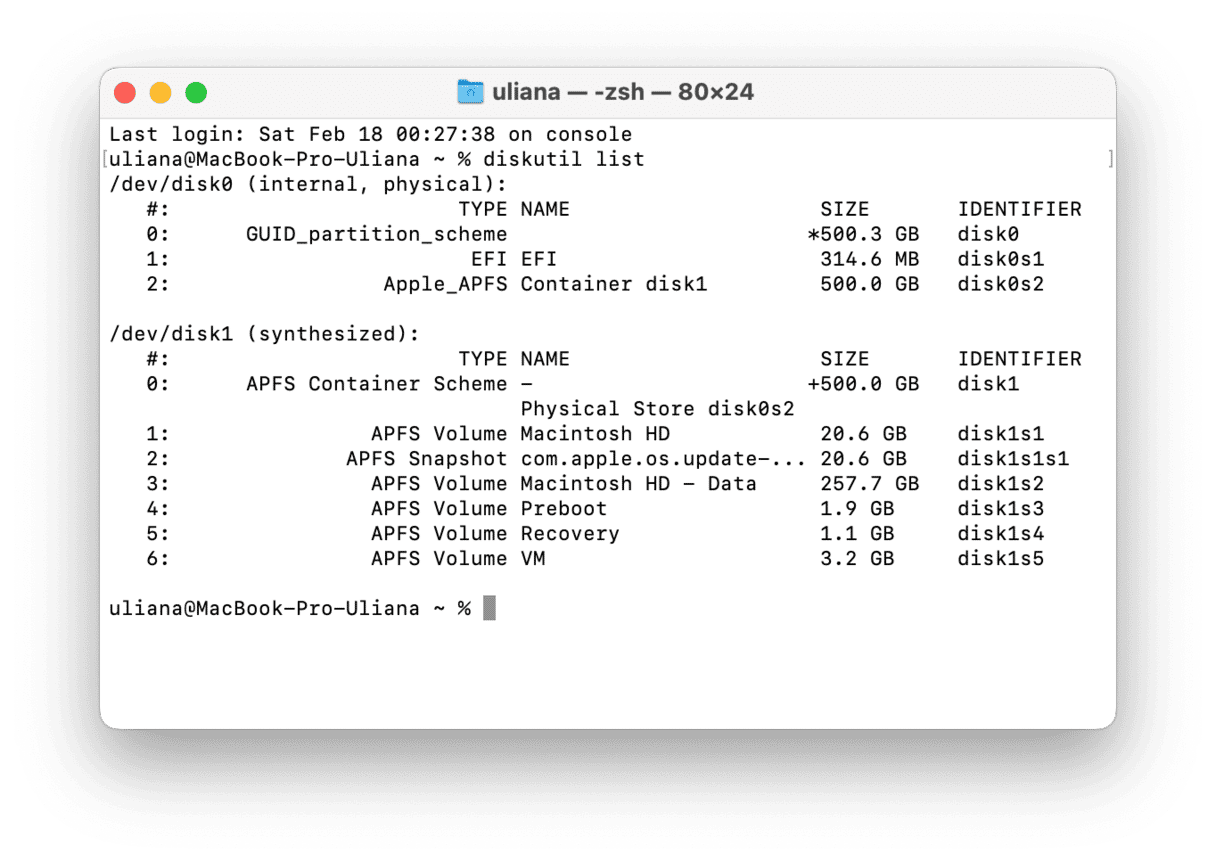
Look at the breakdown and see if there are multiple Macintosh HD — Data volumes. If you've found the extra volume, probably that's the one that eats out your space. You can even see how much space it occupies.
To delete this volume, follow the instructions:
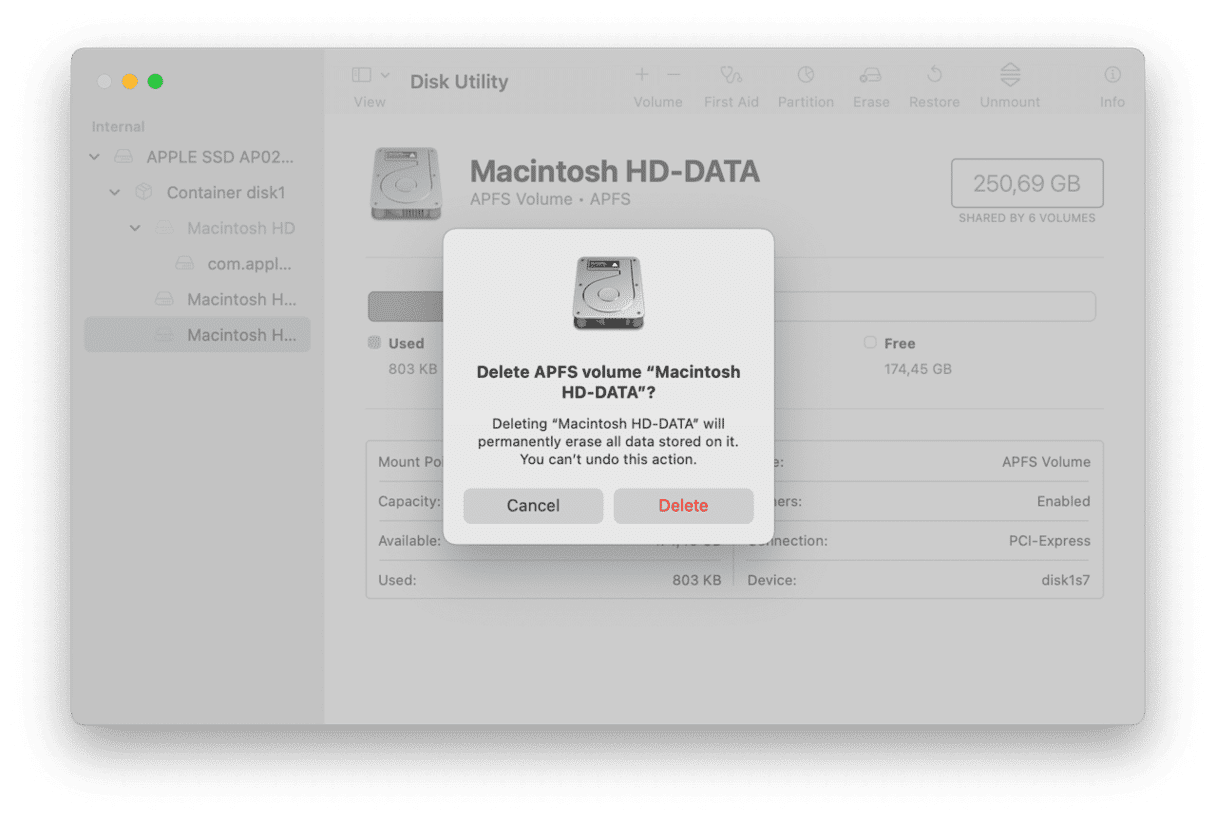
- Open Disk Utility on your Mac.
- Select the APFS Volume you want to remove.
- Click the Delete Volume button '-' in the toolbar. If the button is dimmed, the selected volume is in use, which means you can't delete it. To delete this volume, you need to enter Disk Utility in macOS Recovery.
To start up from macOS Recovery, for an Intel-based Mac, press and hold Command-R when your Mac starts up. Release the keys when you see an Apple logo, a spinning globe, or some other startup screen. Go to Disk Utility from the Utilities window.
For a Mac with Apple silicon, press and hold the power button when turning on your Mac. Release it when the Startup Options window appears. Now, open Disk Utility and follow the steps above to delete Disk Utility other volumes.
4. Delete unneeded Time Machine snapshots
While Terminal is open, you can run a few more commands that may help remove other volumes in a container — delete unnecessary Time Machine snapshots.
Here's what you need to do:
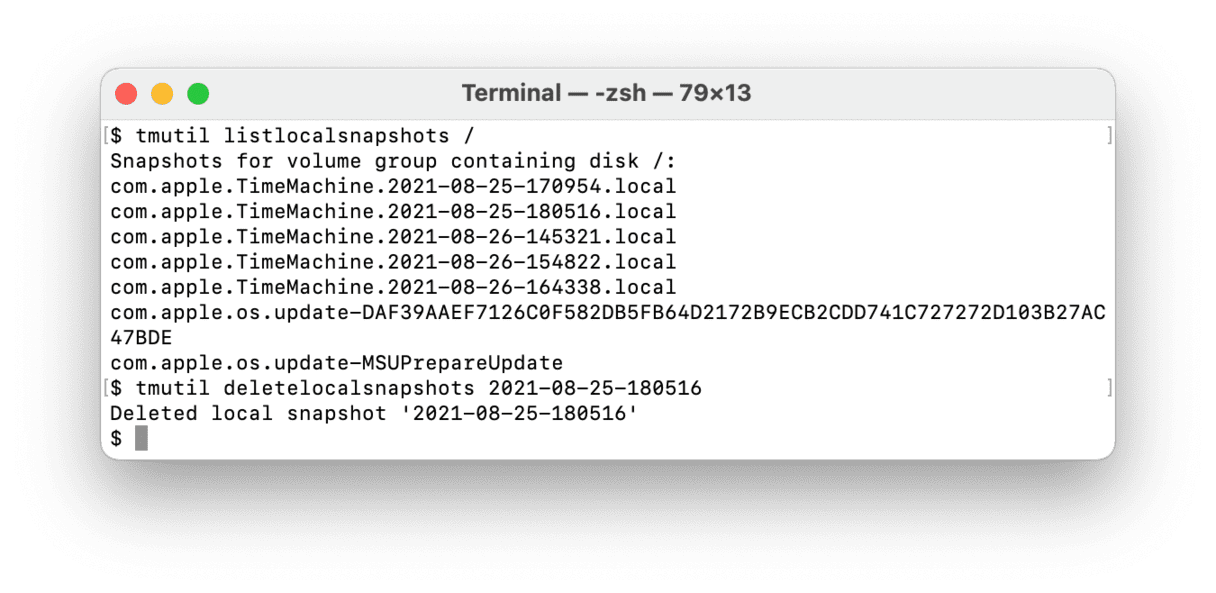
- In Terminal, paste this command followed by Return:
tmutil listlocalsnapshots /
You will see a list of snapshots with names like "com.apple.TimeMachine.2021-08-25-180516" - To delete a specific snapshot, type, or copy and paste:
tmutil deletelocalsnapshotsand then add the date of the snapshot you want to delete so that it looks like this:tmutil deletelocalsnapshots 2021-08-25-180516 - Press Return.
- Once deleted, you should see the following message:
Deleted local snapshot '2021-08-25-180516' - Repeat for all snapshots you want to remove.
5. Disable iCloud Content Caching
Content caching was designed with the aim of speeding up software updates. Helpful as it is, it may also add up to the size of Macintosh HD other volumes. To reduce it, turn off iCloud Content Caching by following these steps:
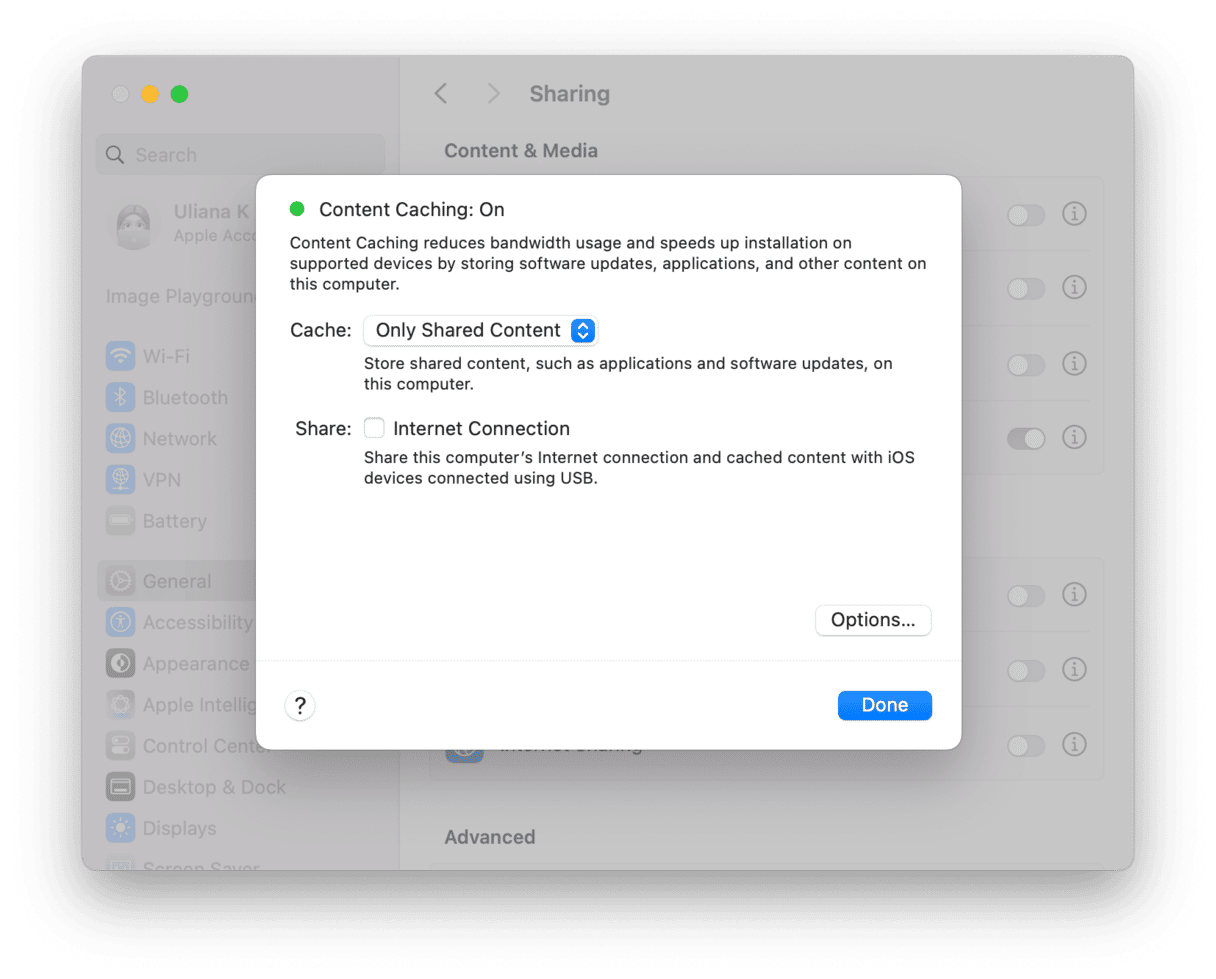
- From the main Apple menu, go to System Settings > General > Sharing.
- Disable Content Caching.
- Alternatively, you can turn off iCloud Content Caching but choose Only Shared Content from the menu next to Cache — click the i next to Content Caching to see it.
6. Find and remove suspicious apps
Sometimes, the issue may be caused by the apps installed on your Mac. It may be either a legit app or even a malicious one. Either way, to get rid of the problem, hunting down such third-party apps and removing them may help. Here's how to do it:
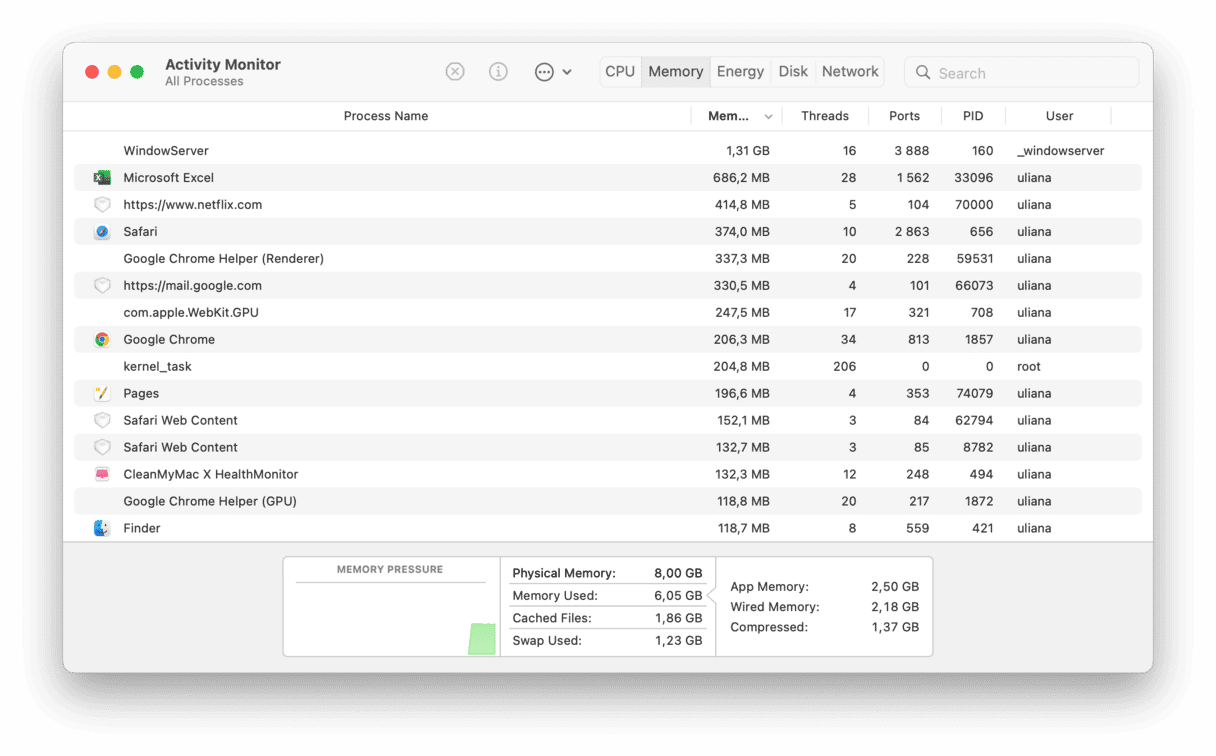
- Open Activity Monitor from Applications > Utilities.
- Click Memory and look for the apps or processes that seem to use too much memory.
- Do a quick online research and click X to quit any of those you find suspicious.
Once you've quit them, it's a good idea to uninstall third-party apps if you no longer need them. To do it, you'll have to go to the Applications folder and drag the app to Trash. Besides, finding and deleting app leftovers is necessary (read more on uninstalling apps completely here).
7. Erase your disk and reinstall macOS
If nothing else helps, erasing the disk and reinstalling macOS may be the only way to fix the 'other volumes in container' issue. Don't forget to back up your data first.
To erase your disk:
- Start up your Mac in recovery mode (press and hold Command-R on Mac's startup or power button as described above based on the Mac you have).
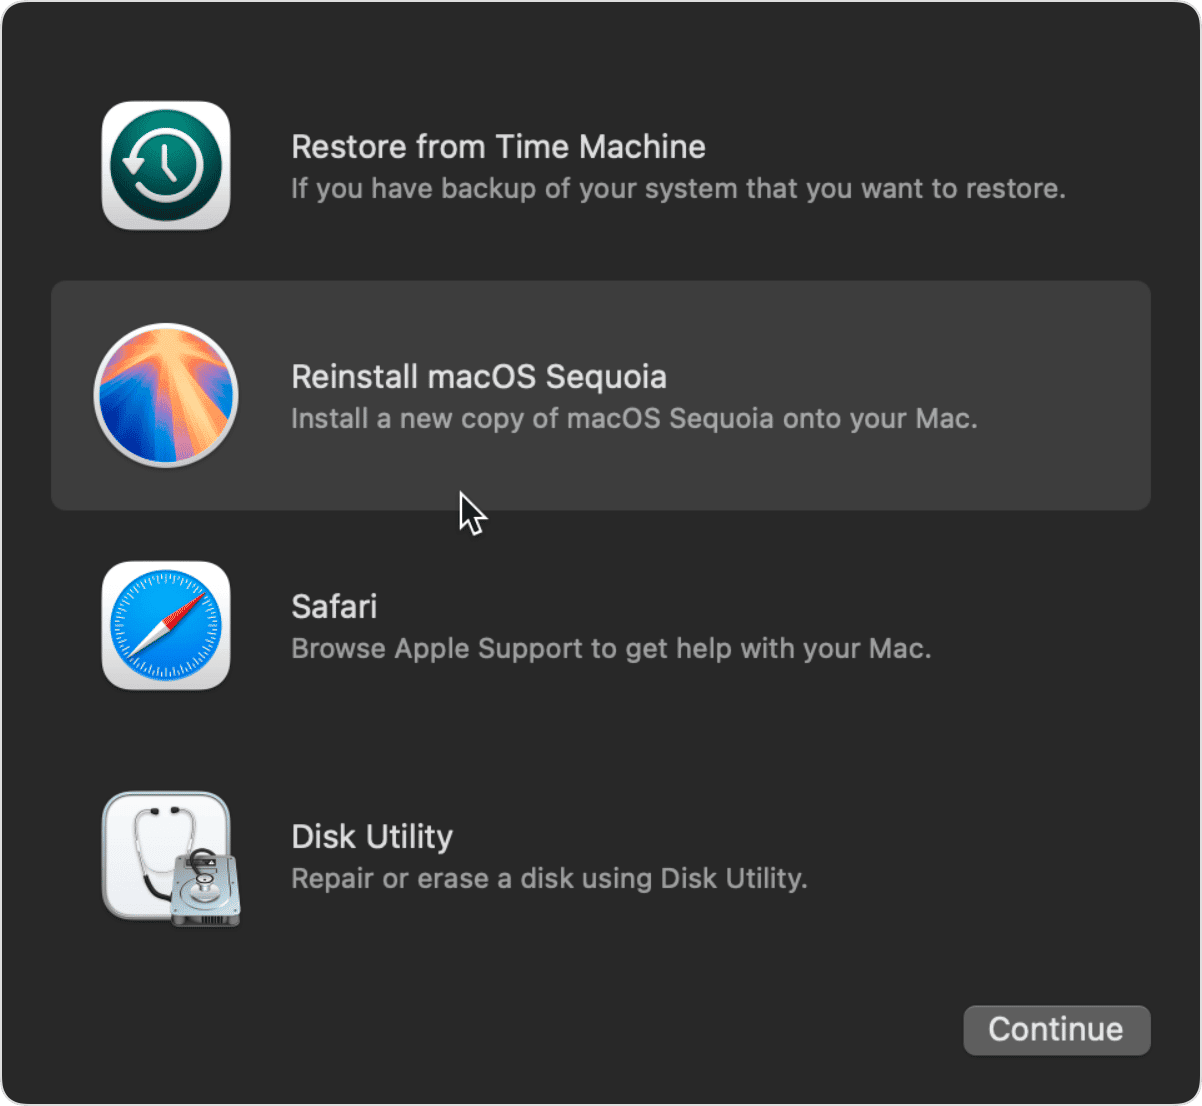
- From the Utilities window, select Disk Utility and click Continue.
- Select Macintosh HD in the sidebar of Disk Utility and click the Erase button.
- Use Macintosh HD as the name.
- In the Format field, choose APFS or Mac OS Extended (Journaled).
- Click Erase.
- After the erase is complete, delete all the volumes that may be left in the sidebar — keep the Macintosh HD volume you just erased.
- Quit Disk Utility.
You will see the Utilities window again. Click Reinstall macOS and wait till it's done. The other volumes should be gone.
8. Run Disk Utility repair in macOS Recovery
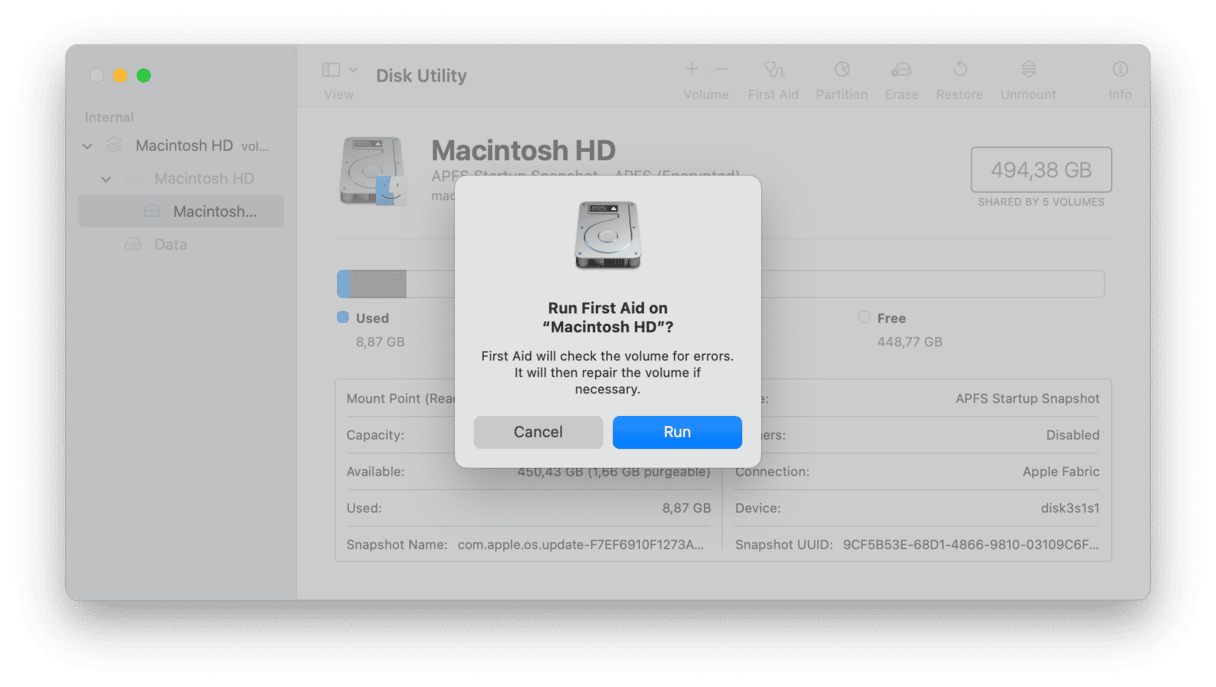
If you do not want to reinstall macOS, you can try another fix — run First Aid in recovery mode. To do it, you will need to use a built-in tool designed for troubleshooting various issues with drives. Here's how:
- Boot your Mac into recovery mode by following the steps above.
- Select Disk Utility and click Continue.
- From the sidebar, select the drive where other volumes are located. If you cannot see it, click View in the menu bar and choose Show All Devices.
- Click First Aid in the toolbar > Run.
- Check storage to see if it helped.
9. Hardware solutions
If none of the above worked, it might be a hardware problem that led to the issue. There have been reports that unplugging USB devices and replacing the old battery may help reduce the size of Macintosh HD other volumes. Note, though, that to replace the battery, you'll need to book an appointment with the certified repair shop, but do it after the system notifies you that the battery is too old.
macOS has made lots of improvements to the way it deals with storage space on your Mac, but due to these changes, you may sometimes see other volumes in a container. Hopefully, one of the nine fixes above helped remove them and reclaim some storage. If you want to free up even more space on Mac, check out this handy guide outlining quick cleaning tips.


