If you’ve recently turned on two-factor authentication on your Mac and have decided you no longer want to use it, you can turn it off with one condition, though — you have enabled it less than two weeks before you turn it off. If you wait more than two weeks, you won’t be able to turn it off. However, that’s no bad thing. As we’ll discuss below, two-factor authentication is far more secure than just logging in using a password, and some Apple features and services now require it in order to use them. With all that in mind, if you still want to and have enabled it less than two weeks ago, here is how to turn off two-factor authentication on your Mac.
What is two-factor authentication
Two-factor authentication is a method of logging into a website, app, or service that requires you to verify your identity using more than just a username and password. In Apple’s case, you can choose to receive a text message with a code in it or have that code sent as a notification to another device associated with your Apple ID. You then type in that code after supplying your username and password. It’s an extra layer of security and is designed to safeguard your Apple ID from being hacked.
Two-factor authentication vs two-step verification
Before it introduced two-factor authentication, Apple used two-step verification. The system was similar in that when you tried to log in to iCloud or your AppleID, Apple would send you a notification to a trusted device or an SMS with a code in it. However, with two-factor authentication, you can also generate a code yourself from a trusted device, even if it’s offline.
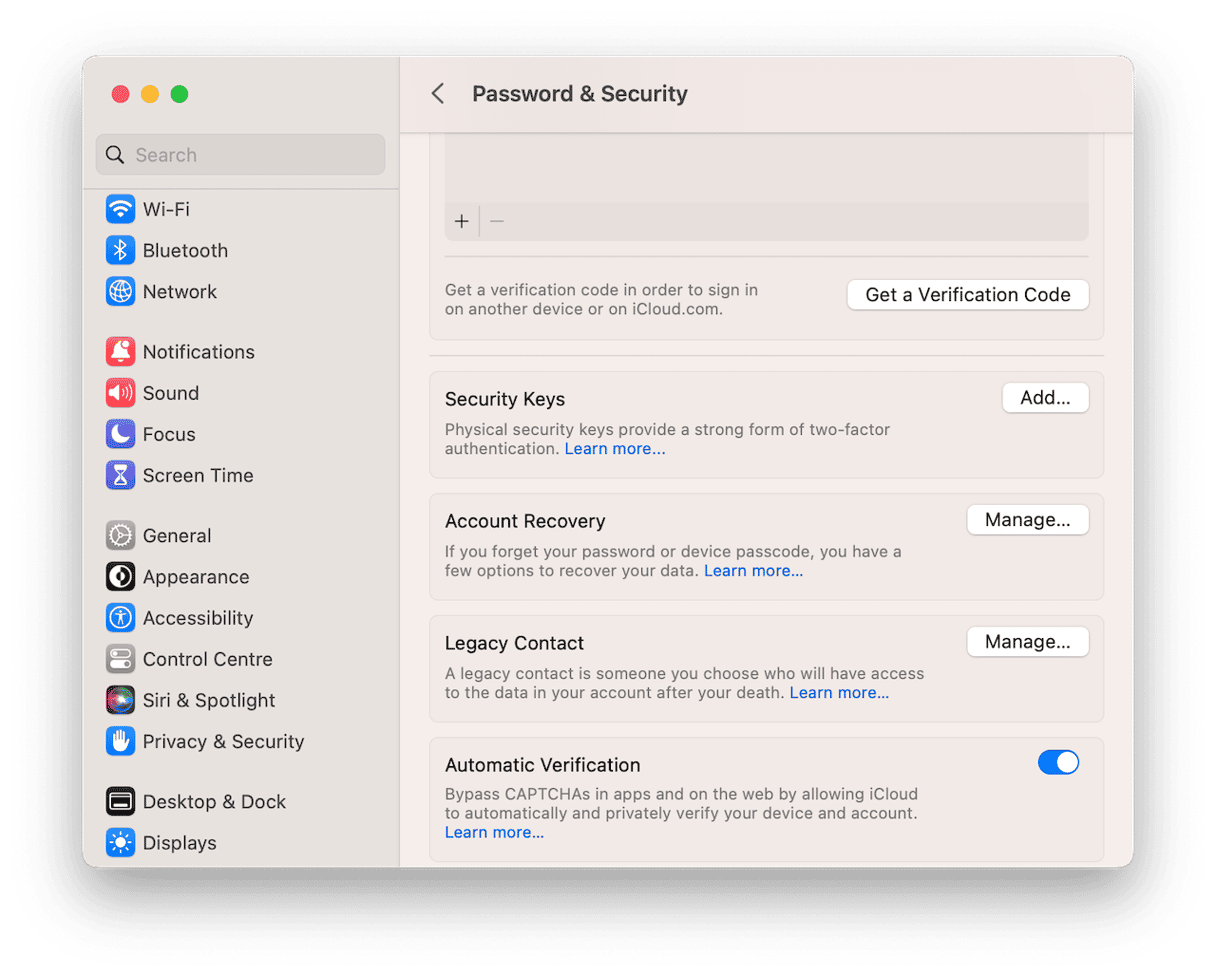
Here’s how to use two-step verification:
- On Mac, click on the Apple menu and choose System Settings.
- On iOS, open the Settings app.
- Click on your name.
- Choose Passwords & Security.
- Click or tap ‘Get Verification code.’

Why turn off two-factor authentication
There’s no good reason to turn off two-factor authentication other than for convenience. It’s slightly more convenient to log in using just a username and password than it is using two-factor authentication, but there is no other benefit.
Why you should keep two-factor authentication turned on
The main reason for keeping it turned on is that it provides an extra layer of security for your Apple ID and iCloud account. Without two-factor authentication, anyone who gains access to, or guesses, your password could log in as you and have access to your Apple ID, including the passwords, financial information, and location data stored there. However, it’s very unlikely that anyone who accesses your password will also have physical possession of another Apple device belonging to you or to your phone (if you lose any of these or they’re stolen, you should mark them as stolen in the Find My app so that two-factor authentication notifications aren’t sent to them).
How to improve privacy on your Mac
Using two-factor authentication is important in order to keep your personal data private. But there are many other things you can do to improve your privacy. For example, you can delete data your Mac stores about you, which could fall into the wrong hands. This data includes:
- Your Recent Items List
- Your web browsing history
- Search history
- Browser cookies and other data
- Public Wi-Fi networks
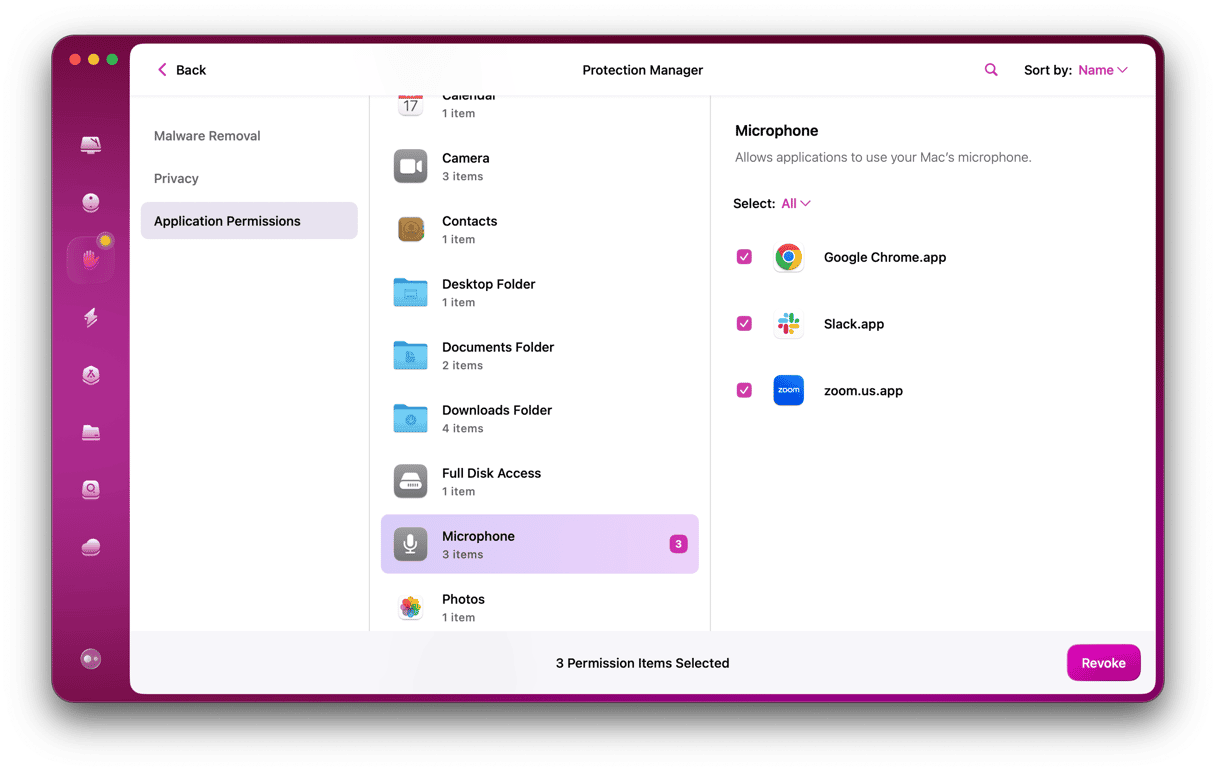
In addition to that data, third-party apps, if you give them permission, can access your Desktop and Documents folders, camera and microphone, contacts, and calendar. They can also record your screen. All of those features are useful for apps that need them. But many of us just agree to give apps permission to access them without thinking about it. Managing that access afterward isn’t always straightforward.
So, to improve privacy on your Mac, you need to review and manage all that data as well as check which apps have permission to access various parts of the system and revoke that permission if necessary. Fortunately, there is a very easy way to do that, thanks to CleanMyMac. CleanMyMac’s Privacy module. From there, you can check which apps have permissions for each part of the system and clear out private data from web browsers and macOS. You can download it for free here. Once you’ve downloaded and installed it, follow the steps below:
- Open CleanMyMac and select Privacy in the sidebar.
- Click Scan.
- Follow the instructions on the screen.
- Choose an item in the middle pane to review what it has found.
- Select what you want to remove and click Remove.

How to turn off two-factor authentication on your Mac
Apple is very keen that all users have two-factor authentication turned on because it is so much more secure than just using a username and password. For that reason, it makes it very difficult to turn it off once you’ve enabled it. Whichever version of macOS you are using, you can only turn off two-factor authentication within two weeks of enabling it. And if you do turn it off, you won’t be able to use features and services like Apple Pay and Sign in with Apple.
If you still want to turn off two-factor authentication on your Mac, find the email from Apple that confirms your enrollment. There will be a link in the email that allows you to return to your previous security settings; click it.
How to turn off two-factor authentication on your iPhone
As we said, the only way to turn off two-factor authentication is via the email that Apple sent you confirming you have enabled it. So, to turn off two-factor authentication on your iPhone, do the following, remembering that it must be less than two weeks since the email was sent:
- Tap the Mail app or whichever app you use for email.
- Search your inbox for an email from Apple confirming enrollment in two-factor authentication.
- Tap the email to open it.
- Tap the link in the email to return to your previous security settings.
What if two-factor authentication doesn’t work?
One reason some people may choose to turn off two-factor authentication is that they are worried that it may not work and that even if they enter the correct code, they will be locked out of their account.
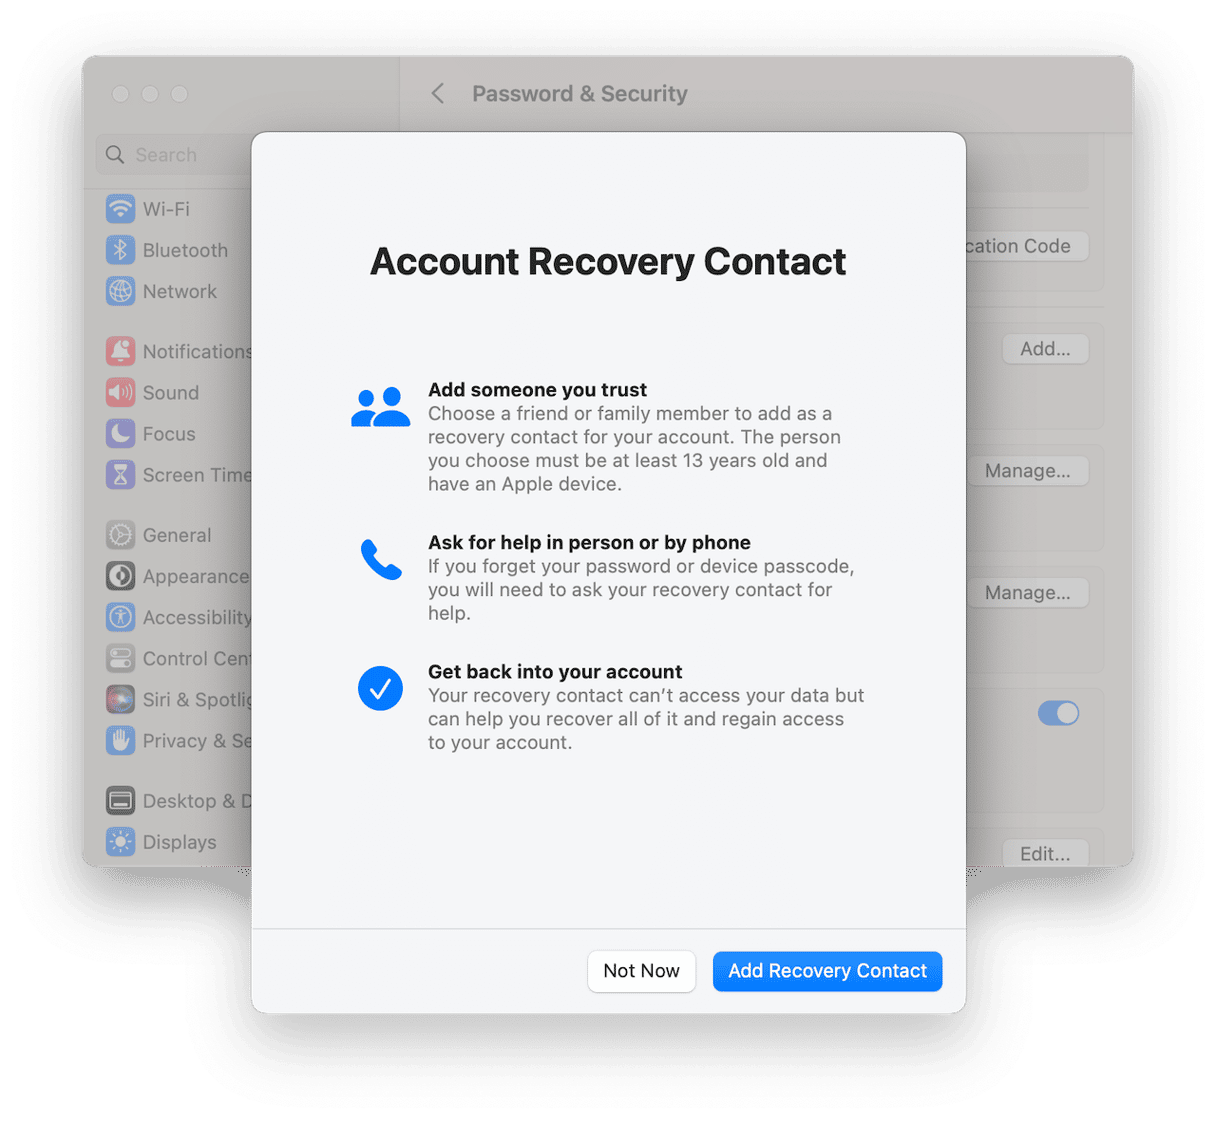
This is very rare, but if it does happen, there are several options for regaining access. For instance, you may choose between either going to iforgot.apple.com or taking your Mac to an Apple Store Genius Bar. However, the simplest method of regaining access is by using a Recovery Contact. Once you’ve set up a Recovery Contact, they can generate a code on their device to help you regain access to your account. To set up a Recovery Contact on your Mac, do this:
- From the Apple menu, choose System Settings.
- Click your name and choose Password & Security.
- Click Manage next to Account Recovery.
- In the Recover Assistance section, click the ‘+’ button,
- Click Add Recovery Contact.
- Choose a recommended Contact or click Someone Else and choose a contact.
- Click Continue.

You can also set up a Recovery Contact on iPhone from Settings > Your name > Password & Security > Account Recovery.
Two-factor authentication is a system for logging into your Apple ID, iCloud, and several other Apple services that is more secure than just typing in a username and password. Enabling it is a requirement of using services like Apple Pay and Sign in with Apple. If you enable it, you only have two weeks to turn it off. If you need to do that, follow the steps above.


