Looking for a way to uninstall Parallels Desktop with no hassle? You can remove it manually or use CleanMyMac to delete Parallels and all of its leftovers. Today, we’ll show you both methods. Let’s get started!
What is Parallels?
Parallels Desktop for Mac is desktop virtualization software. Its sole purpose is to run Windows, Linux, or other operating systems on Mac computers without rebooting. The app assimilates the guest’s virtual machine into macOS, letting them work side by side.
If you no longer need an extra OS on your Mac or want to free up disk space, getting rid of Parallels Desktop is the way to go. Here are some problems you may face during the uninstallation:
- You can’t move the app to the Trash as it keeps running in the background.
- You can’t remove its components from your computer.
Let’s see how to solve these issues and safely delete Parallels from your computer.
How to uninstall Parallels on a Mac manually
There are several steps to uninstalling Parallels Desktop. First, you need to shut down your virtual machine and quit the app. Follow these steps:
- Go to Actions in the toolbar while running the virtual machine. Choose Shut Down.
- Click the Parallels icon in the top-left corner. Select Quit Parallels Desktop.
Now, go to the Applications folder, find Parallels, and drag it to Trash. Empty it and reboot your Mac.
That is how to uninstall Parallels Desktop due to its website. But it’s not enough, as app leftovers still hide in the deep roots of your startup disk. To find and delete them:
- Head over to the Go menu in the menu bar.
- Choose Go to Folder.
- Paste each of the following folder’s pathnames into the text box, one at a time, and hit Return:
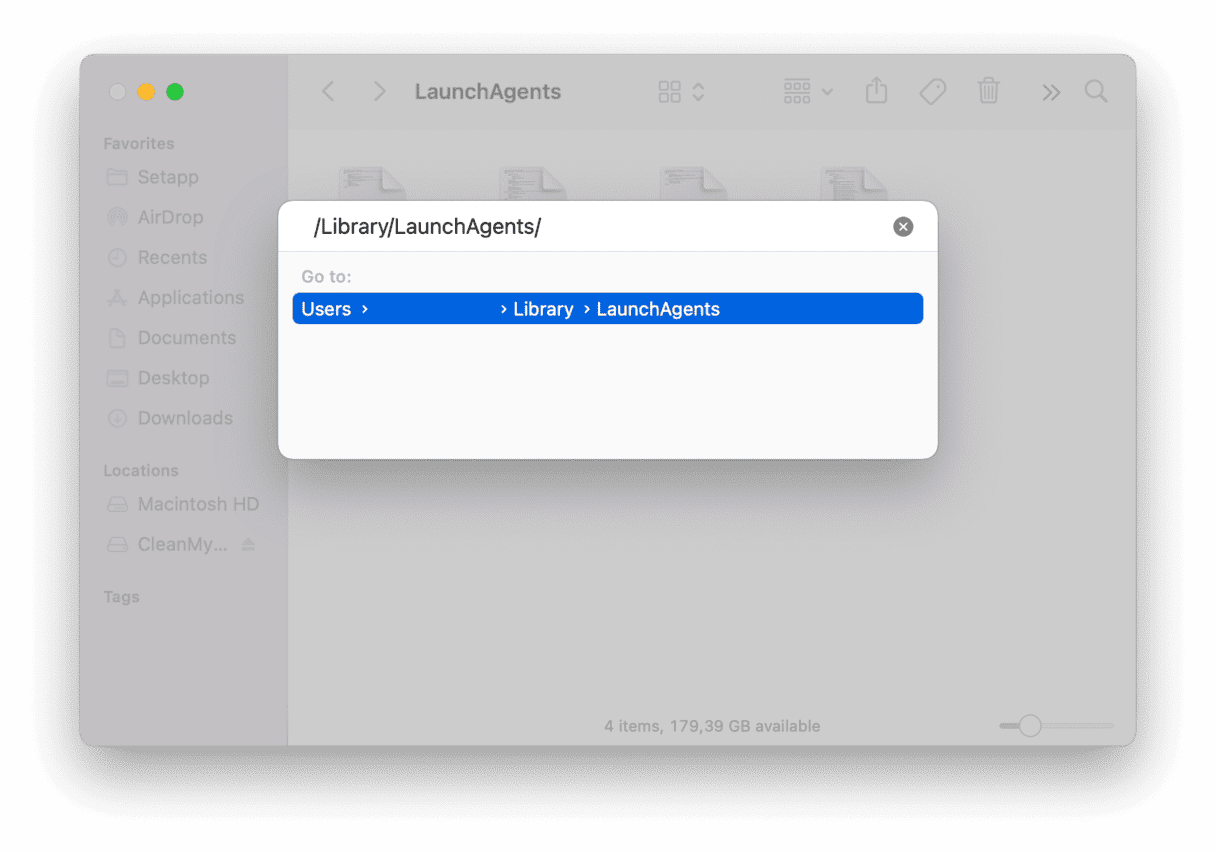
/Library/Library/LaunchAgents/Library/LaunchDaemons/Library/Application Support/Library/Preferences/Library/Caches
- Trash any items related to Parallels.

You’ve now uninstalled Parallels from your Mac. Since it can be time-consuming, there is a much easier way — delete it automatically with a dedicated tool.
How to completely uninstall Parallels on Mac with CleanMyMac
The app we use for uninstalling apps and removing all associated files is CleanMyMac. It’s easy to use and shows exactly all the apps we’ve ever installed on our MacBooks.
Here’s how to use its Uninstaller tool:
- Download and open CleanMyMac — get it here for free.
- Go to Uninstaller in the sidebar.
- Select the box next to Parallels Desktop.
- Click the Uninstall button. That’s all!

To make sure that no cache or temporary files are left after you remove Parallels, consider using CleanMyMac’s System Junk module. If you want to free up disk space, use it to delete tons of unnecessary files stored on your computer.
As you see, uninstalling Parallels is easy. The real trouble comes when you need to remove its leftovers. If you don’t want to navigate your Mac looking for those, you can try using CleanMyMac to delete them. The Leftovers tab in the Uninstaller module will show you all the remaining files that take up some space.