Time Machine is one of the most important built-in features — it automatically backs up all of your files on an external drive and lets you restore them if they’re ever deleted.
But sometimes, Time Machine won’t back up, and you’ll encounter one or several of the following issues:
- Backing up ends in an error (e.g., “The operation couldn’t be completed.”)
- The “Preparing Backup” stage never ends.
- Time Machine cannot detect an external drive.
Luckily, there are 7 quick ways to fix it. Let us show you them all.
What to do if Time Machine backup failed?
Unfortunately, many Mac users have reported that they’re having difficulty backing up with Time Machine after upgrading their computers to the latest macOS version. But there are other reasons, too:
- Inadequate space: the drive is full or has too little storage for an initial backup, even if it is empty.
- Interrupted process, especially if Mac went to sleep during the backup.
- Corrupted ".inProgress" Files: improperly closed previous sessions (it may also make Time Machine backup stuck at "preparing")
Whatever the reason, check out our tips for troubleshooting when Time Machine won’t back up your files.
1. Wait a bit
In terms of backing up, patience means everything. If Time Machine backup takes too long when you just set it up, it’s normal, especially if you have gigabytes of files to back up. It’s best to let it back up overnight.
If, however, the backup hasn’t progressed or the preparation stage hasn’t finished, proceed with the remainder of the troubleshooting tips we’ve prepared for you.
2. Stop the current backup
If waiting for a while hasn’t helped, and you encountered one of the issues we outlined above, it’s time to stop the current backup. Here’s how:
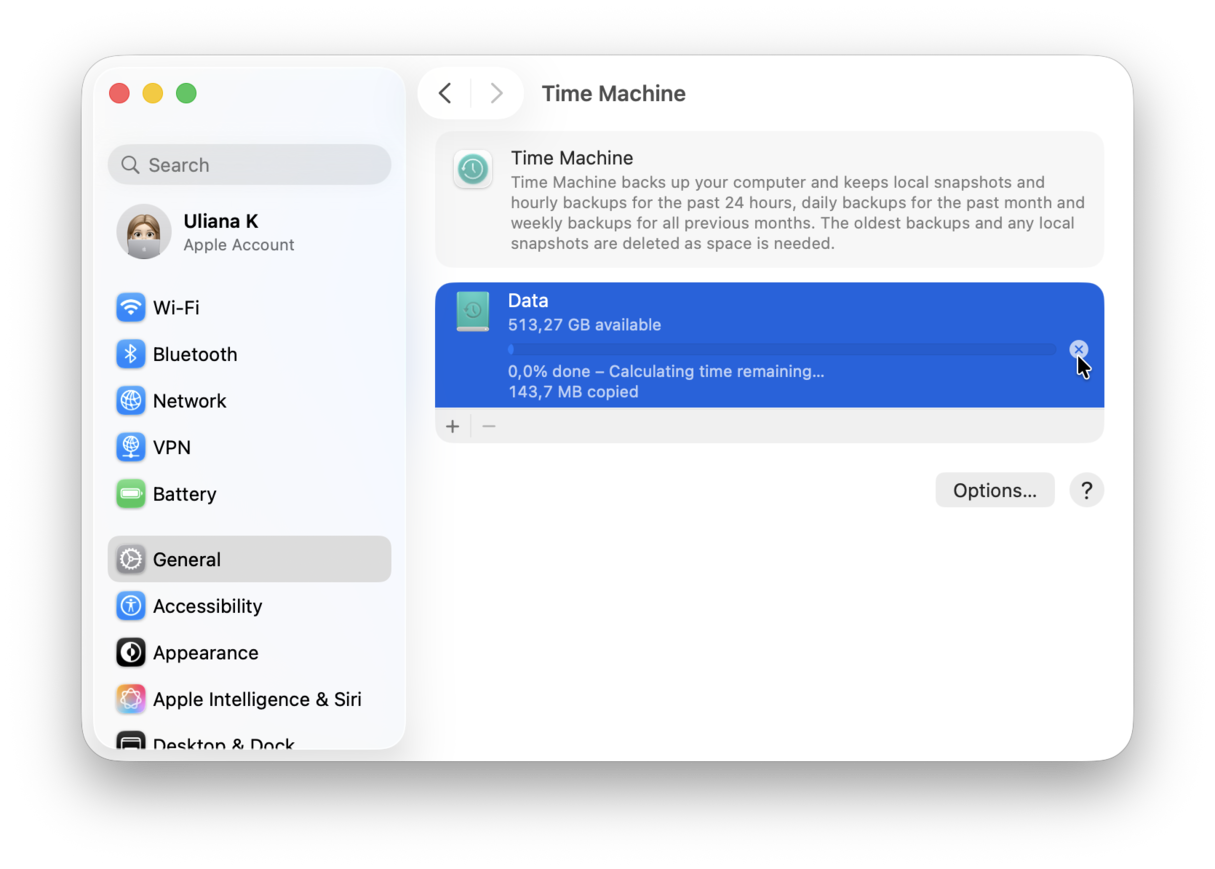
- From the main Apple menu, go to System Settings > General.
- Click Time Machine.
- You’ll see the progress bar — click x to stop the backup.
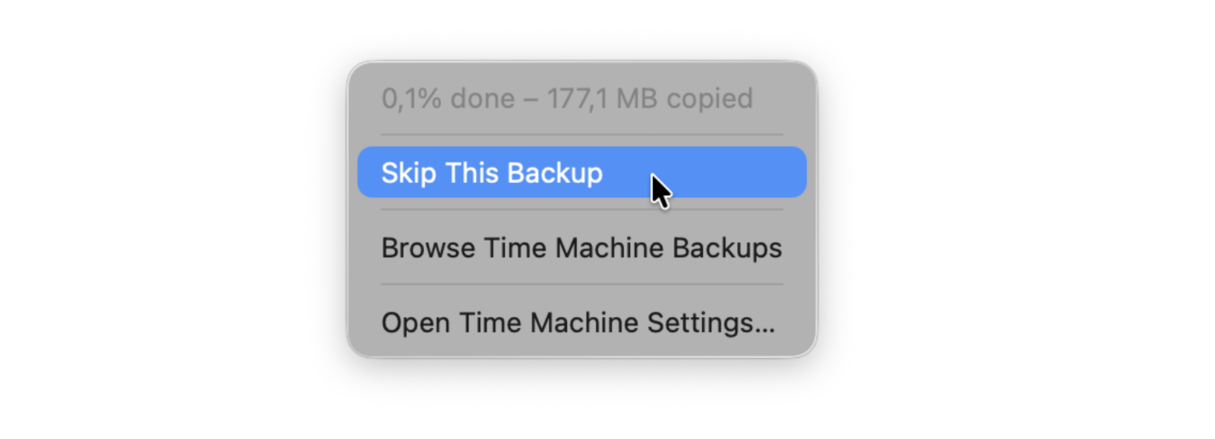
- Alternatively, from the menu bar, click the Time Machine icon and click Skip This Backup.
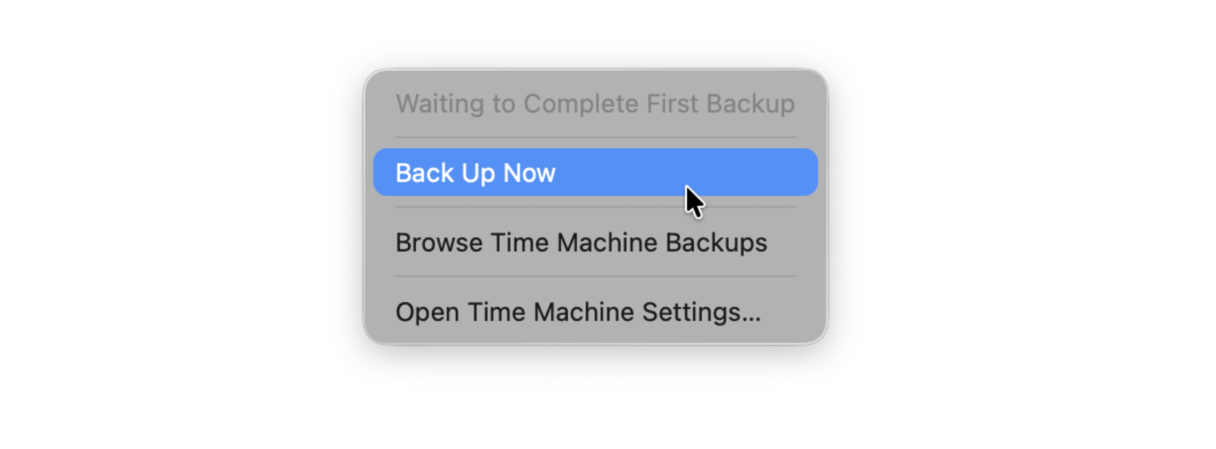
- Now, from the menu bar, click Back Up Now to initiate a new backup.


If, for some reason, you cannot see the Time Machine icon in the menu bar, navigate to System Settings > Menu Bar and select the checkbox next to Time Machine.

3. Make sure your external hard drive is compatible with Time Machine
One potential problem that may prevent Time Machine from performing backups is that your external hard drive is formatted incorrectly, making it incompatible with Time Machine.
While Windows FAT and NTFS are used as the default file system for many external drives, Time Machine can’t use them — it requires a native macOS format.
To determine the format of your external hard drive:
- Connect your external drive to your Mac.
- In the Finder, right-click the drive from the left sidebar and click Get Info. You can also use the keyboard shortcut Command-I.
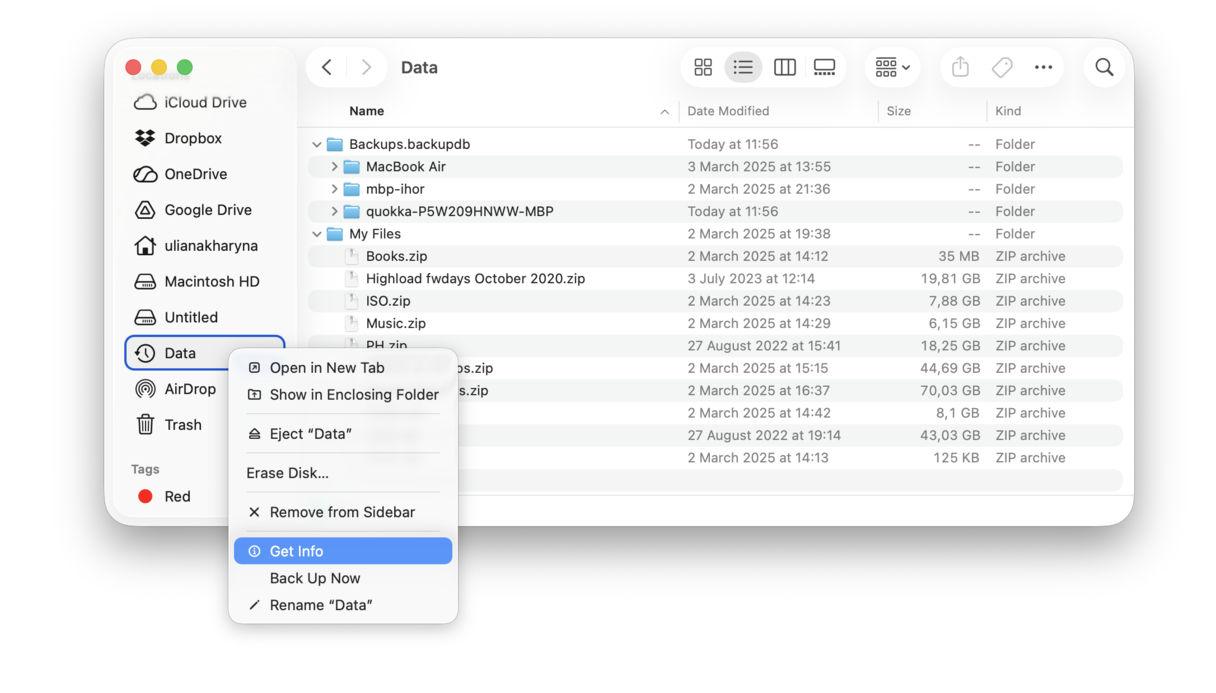
- Your drive’s format will appear in the list of general information next to Format:
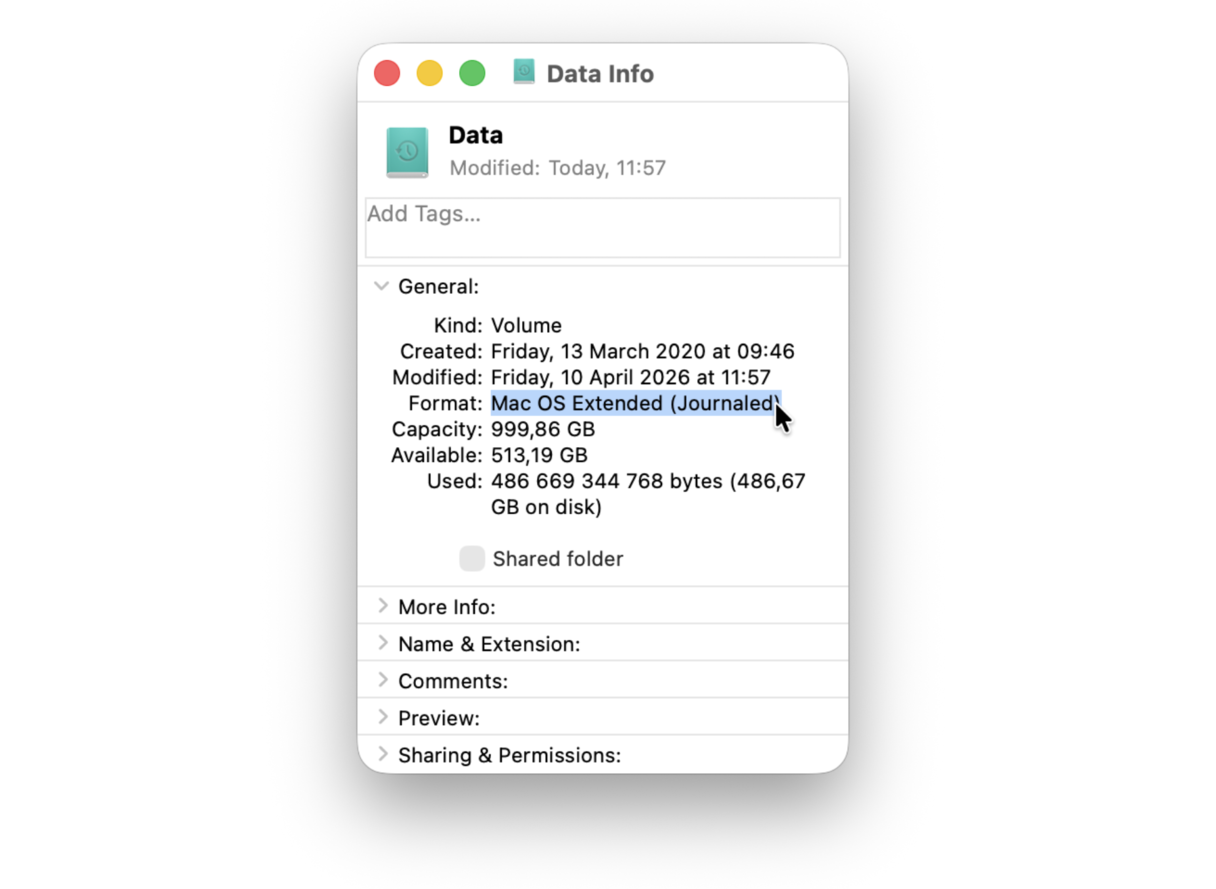


If your external drive is in one of these unsupported formats, you’ll need to reformat it correctly before it’s used to back up your Mac. In order to work with Time Machine, your external drive needs to be formatted as Mac OS Extended (Journaled) with a GUID Partition Table (GPT).
Important: Back up your MacBook or any important information stored on your external drive to another drive or iCloud first. Reformatting means losing all data.
Here’s how to format your external drive using Disk Utility:
- Connect your external drive to your Mac.
- In the Finder, go to Applications > Utilities > Disk Utility.
- In Disk Utility, select your external drive from the list on the left.
- Select Erase from the top of the window.
- In the pop-up window, you have the option to rename your drive and change its format. Change the format to Mac OS Extended (Journaled) and click Erase.

Now that your external drive is in a compatible format, you should be able to back up to it with Time Machine.
4. Exclude large files from the backup
Sometimes, Time Machine backup fails because of the large files you’ve tried to include. To see if that is the case, we recommend excluding them from the backup:
- Open System Settings and go to General > Time Machine.
- Click Options and click “+” to add an item that will be excluded from the backup. You can select an entire folder or individual large files. You can remove these files later by clicking the “—” button, and they will be backed up again.

Excluding large files from a backup helps save space on your external drive in addition to possibly solving issues with Time Machine. But have you ever thought about what these large files are? Do you really need them? We recommend checking it and removing anything you do not need from your Mac.
Of course, you can use the Finder to hunt down these files, but there’s a much faster way if you use CleanMyMac. It scans your Mac for all sorts of clutter, including large files and files you haven’t opened for months. What’s the point in letting them hog your computer’s storage if you do not open them anyway?
Here’s how to use CleanMyMac:
- Get your free CleanMyMac trial.
- Open the app and go to My Clutter.
- Click Scan, and wait for it to complete.
- Now, click Review All Files and remove large unneeded files.

This way, you will quickly reclaim space on your Mac and ensure that no unneeded files are backed up.
Why use CleanMyMac
- With the help of the My Clutter feature, on average, users find and remove 84 items: large or forgotten files, duplicates, or similar images
- Along with unnecessary files, you can use the Cleanup feature to remove junk files (lodged, cache, etc.): on average, users find and remove 10+ GB of safe-to-delete junk files after the first scan
- Allows to uninstall apps and delete leftover files with a few clicks with the help of the Applications feature: on average, users find and remove 5 app-related items (unnecessary apps or leftovers)
You can test all these and 20+ more tools for 7 days at no cost — get your free trial here.
5. Exclude Spotlight from indexing Time Machine backup
Sometimes, issues with Time Machine backups may be due to Spotlight indexing the data found on the disk. If that is the case, excluding Spotlight from indexing Time Machine backup may help. Here’s how to do it:
- Go to System Settings > Spotlight.
- Click Search Privacy.
- Click + and find the backup folder.
- Click Choose to exclude it.

6. Delete local snapshots
Another possible reason why Time Machine won’t backup is the conflict with corrupt local snapshots. To fix it, delete local snapshots and try backing up again:
- Open Terminal.
- Type:
tmutil listlocalsnapshots /(note the space before /) and press Return. - Paste
tmutil deletelocalsnapshotsfollowed by the name of the snapshot you want to delete and press Return — it would be something liketmutil deletelocalsnapshots 2022-12-16-001600(the name of the snapshot will vary on your Mac). - Repeat it for all the snapshots you want to delete.

7. Clean up Time Machine and back up again
Time Machine uses some extra files to help it work. Sometimes, when Time Machine fails, it leaves some files around that it was using temporarily to help it work. Safely deleting these files and “cleaning up” Time Machine may fix any issues you’re having with backups.
To do this, you’ll need to first turn Time Machine off:
- Open System Settings and go to General > Time Machine.
- Click Options and select Manually from Back up frequency.

Next, clean up Time Machine’s working files:
- Open the Finder.
- Go to your external hard drive.
- Open the “Backups.backupdb” folder and move the file ending in “.inProgress” to the Trash.
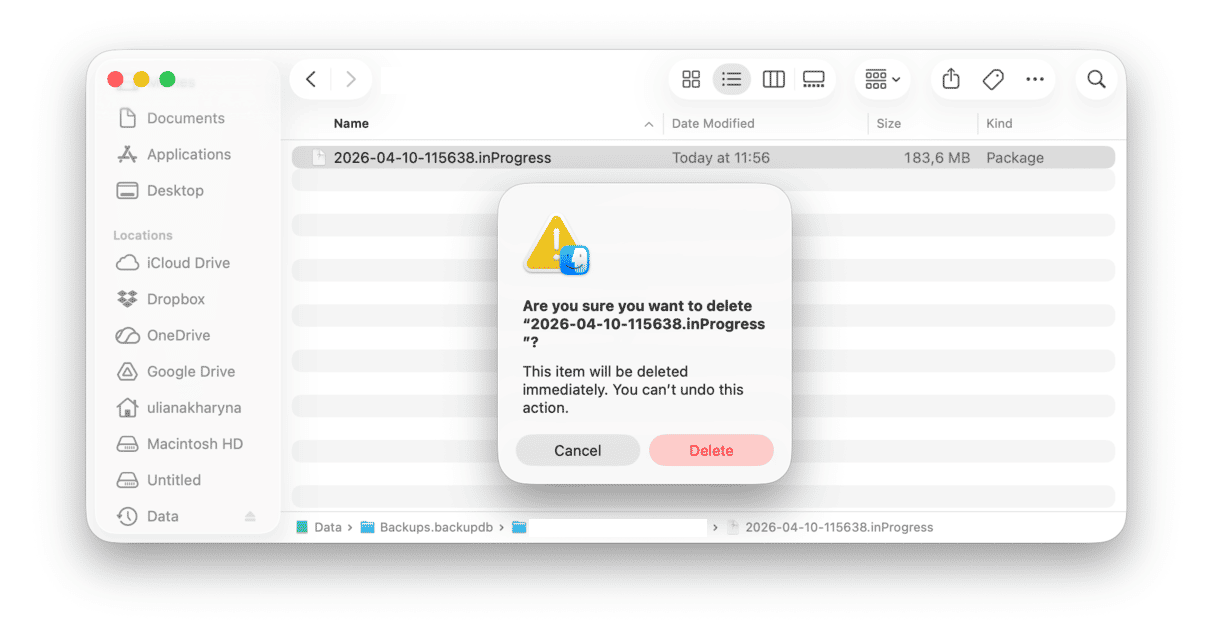
- Empty the Trash.
- Restart your Mac.

After this, turn Time Machine back on and start a new backup.
Bonus tip: What to do it Time Machine won't backup to NAS
If you back up your Mac to a network-attached storage (NAS), and the backup fails, here are a few fixes to try:
- Remove and re-add your backup destination in System Settings > General > Time Machine.
- Check your network: Ensure stable connection and that both your Mac and NAS are connected to the same network.
- Restart your MacBook and NAS.
- Reconnect NAS via SMB (enable SMB3).
- Ensure proper user permissions: NAS should have read/write permissions for the shared folder.
- If you use Synology, ensure the shared folder has a set quota and is set to "Time Machine."
- Avoid Non-ASCII Characters: Make sure that your Mac name and NAS share name do not contain special characters.
Quick recap
If Time Machine won't backup, here are the most effective ways to fix it:
- Wait overnight.
- If stuck, stop the backup and retry.
- Verify disk format (it should be Mac OS Extended (Journaled)).
- Exclude very large files from the backup and Spotlight from indexing Time Machine backup.
- Delete corrupt snapshots or remove .inProgress files.
As you see, Time Machine backups can fail for various reasons. But fortunately, however annoying, this issue is rarely too difficult to solve. Hopefully, one of the tips above helped fix it and back up all of your important files. Thank you for reading, and stay tuned for more Mac updates.
Frequently asked questions
What macOS versions are compatible with Time Machine backups created in newer macOS?
If you create a Time Machine backup in a macOS version newer than Big Sur, you cannot restore it to an older macOS via Migration Assistant. It is because of the difference in supported formats — in older macOS versions, external drives were formatted to HFS+. However, you can still restore individual files, even though full system restoration is not supported.
How does Time Machine decide which files to back up?
During the first backup, all files are backed up. During subsequent ones, only files that are new, modified, or have a newer date than the previous backup are backed up, meaning that not all files are re-copied. It is done to speed up backups and make them space-efficient.
How much storage space should my Time Machine backup disk have?
Ideally, it should be twice the capacity of your Mac's drive to ensure adequate space for multiple backups. If it is too small, macOS will notify you about choosing a larger disk and even recommend a specific size of the preferred drive. However, you can still use a drive smaller than your Mac's storage if it is enough for the actual data you store on your MacBook. Still, such drives may not have enough space for subsequent backups.
Why is my Time Machine backup so slow?
Time Machine backups are intended to be slow to avoid interrupting your work. Other reasons include initial backup magnitude, antivirus scanning files before they are backed up, VPN and Firewall enabled, connecting an external drive through a USB hub, Wi-Fi/Ethernet issues (if you back up your MacBook to a NAS), or using an old USB 2.0 drive.
What should I do if my Time Machine backup disk can't be unmounted?
In most cases, it means that the backup has not finished. So, wait for it to finish or stop the backup. Also, close any files open in the Finder. Finally, use Disk Utility to force unmount it or restart your MacBook.
How do I fix the "files were unavailable" Time Machine error caused by locked/encrypted files?
The easiest way to fix it is to ensure the Mac is active during the entire backup process. Either use it all the time or change sleep/lock screen settings to prevent Mac from going into sleep mode or locking.