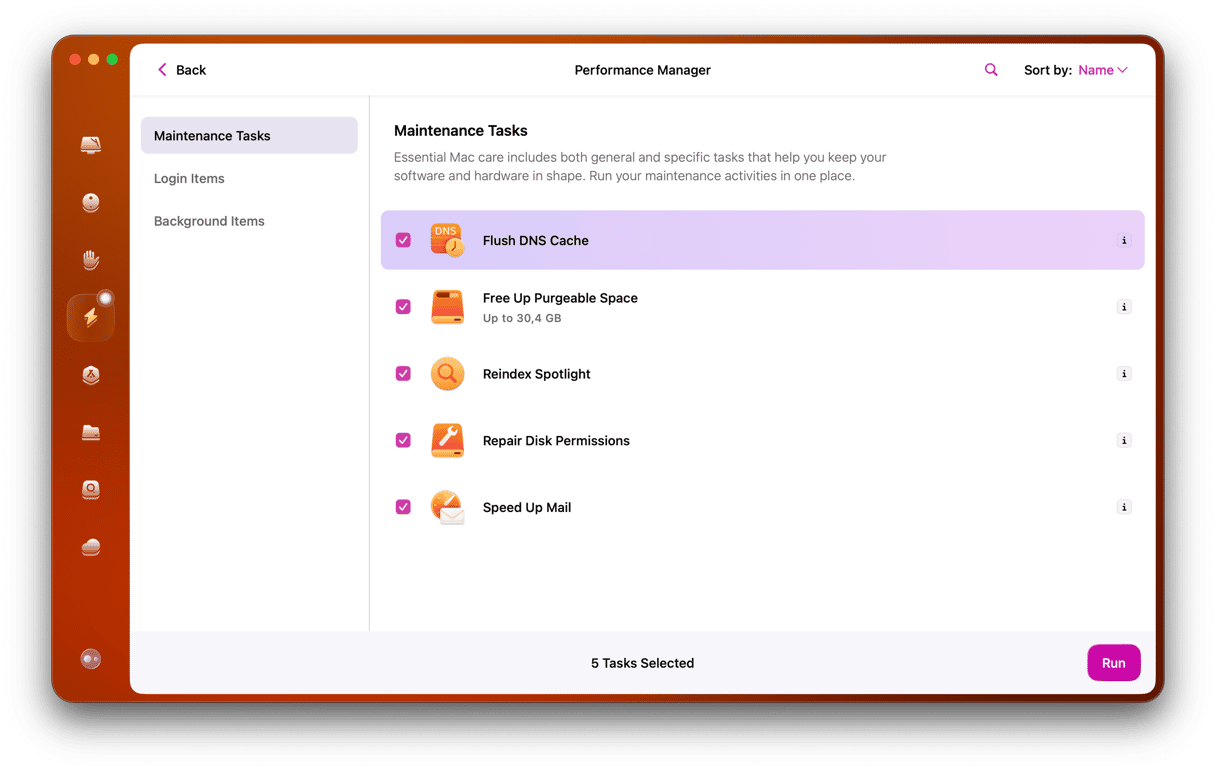
Did you know that updating your Mac is the first thing to do when it starts to run slowly? To ensure it is in its top shape, you need to update both the operating system and all the apps you use. Keep on reading, and you’ll learn how to update your Mac and apps and how to address the most common error message encountered when trying to update macOS. Let’s dive in!
How to prepare Mac for update
Updating your Mac is usually glitch-free and straightforward, but it’s better to take some time and prepare it. Here are a few things to do:
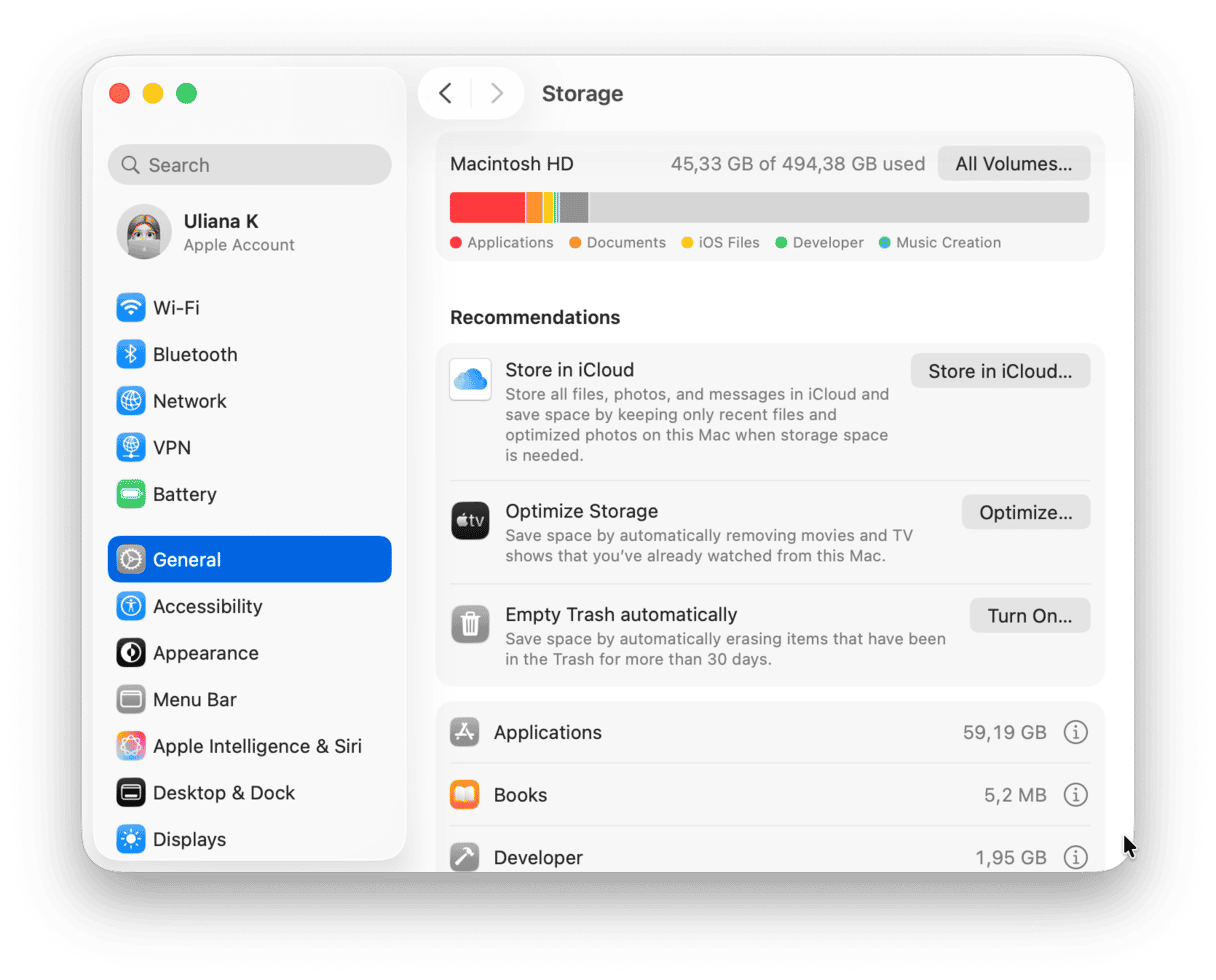
- Make sure you have enough free space (at least 10-20% of the storage capacity). Go to System Settings > General > Storage to check. See recommendations and categories below the colored graph to reclaim some space.
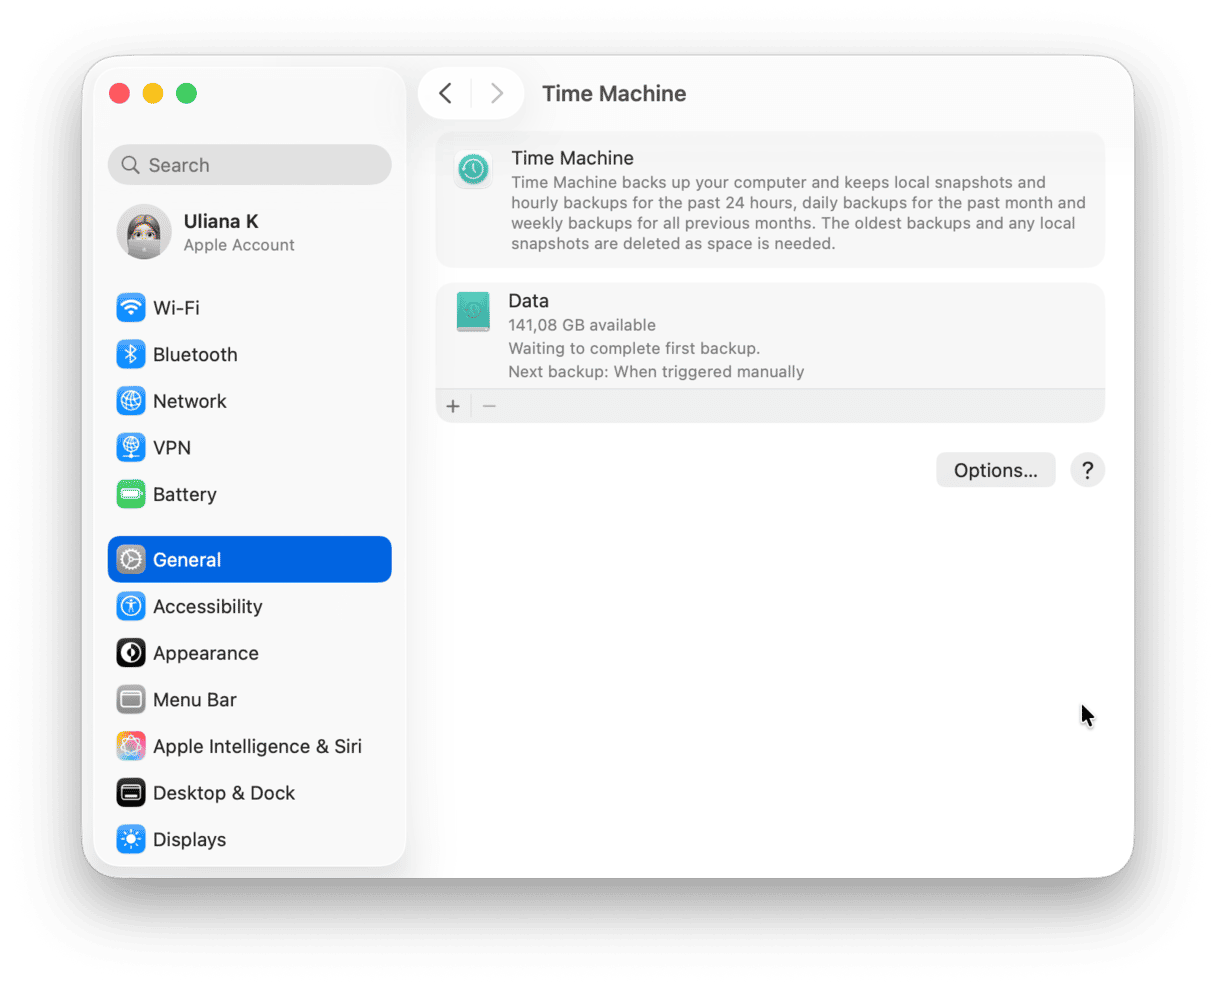
- Back up your Mac. Preferably, use Time Machine. You can set it up in System Settings > General > Time Machine.
- Check your internet connection. When you click “check for updates,” your Mac connects to the servers of the software developer. If your internet connection is slow or not working, it won’t be able to connect and may even return a message telling you there is no update available. So, make sure that your internet connection is fast and stable. To fix any issues, restart your router and your Mac and check again. You may need to contact your broadband provider if you could not fix it.
How to update Mac
The method for updating macOS is slightly different for Macs running macOS Ventura or later than it is for earlier versions. We’ll show you both.
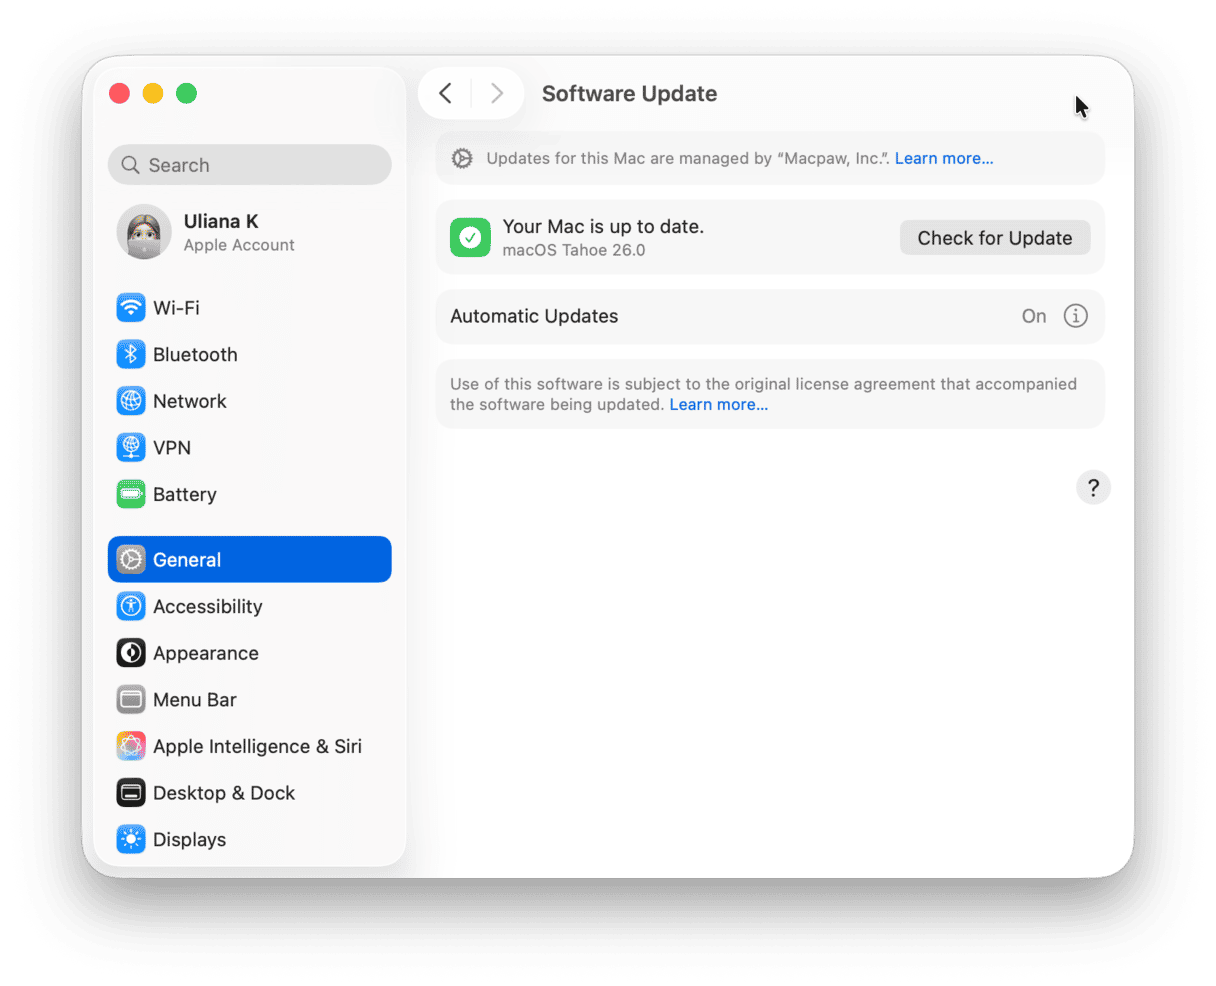
Here’s how to install MacBook software update on a Mac running macOS Ventura or later:
- Click the Apple menu and navigate to System Settings.
- Select General, then Software Update (If there is an update available, it may also be highlighted on the main System Settings screen).
- Wait for macOS to check for an update, and if there is one available, follow the onscreen instructions to install it.
If you have a Mac with pre-macOS Ventura, follow these steps to update Mac operating system:
- Click the Apple menu and choose About this Mac.
- Click Software Update.
- Wait for it to check for an update, and if there’s one available, follow the onscreen instructions to install it.
Note: Whichever version of macOS you’re running, there will be an option to install updates automatically. It’s a good idea to turn this on so that you don’t have to remember to update manually.
How to update apps on Mac
There are a couple of different ways to update apps on your Mac, depending on where you downloaded them from.
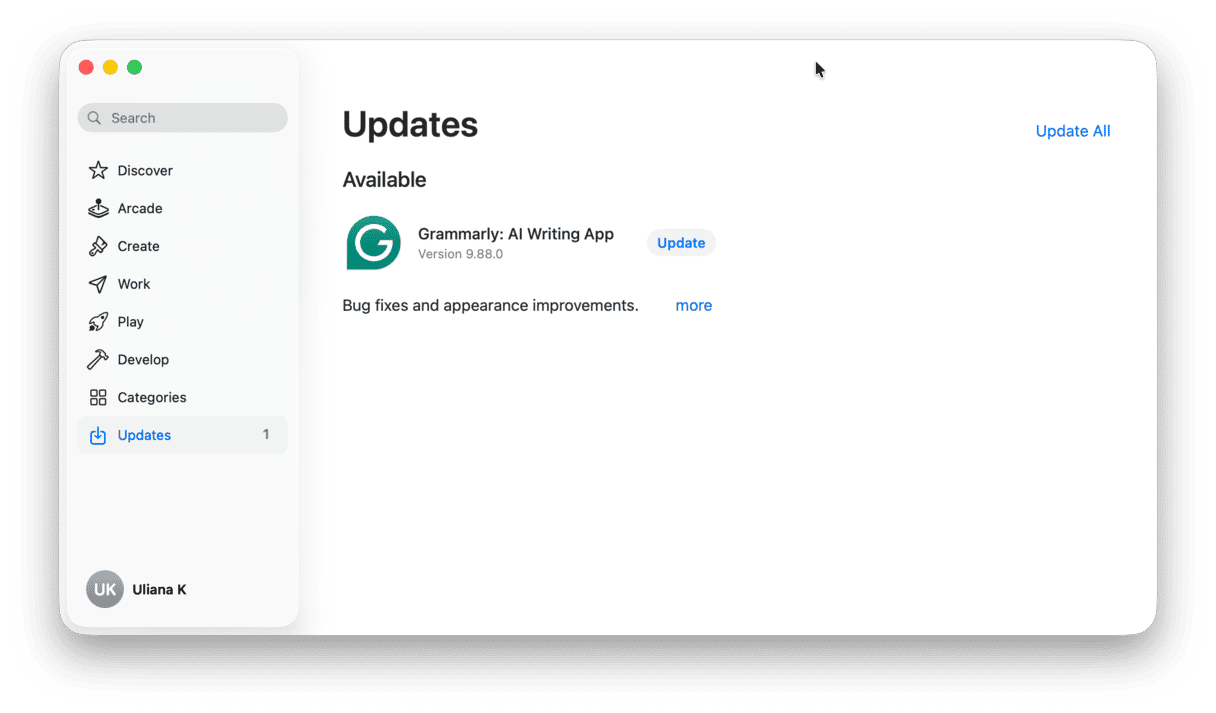
Apps you downloaded from the App Store need to be updated using the App Store. Luckily, it’s easy to do it:
- Open the App Store app.
- Click the Updates section in the sidebar.
- Either click Update all or click Update next to each app you want to update.
- To update apps automatically, click on the App Store menu and choose Settings, then select the box next to Automatic Updates.
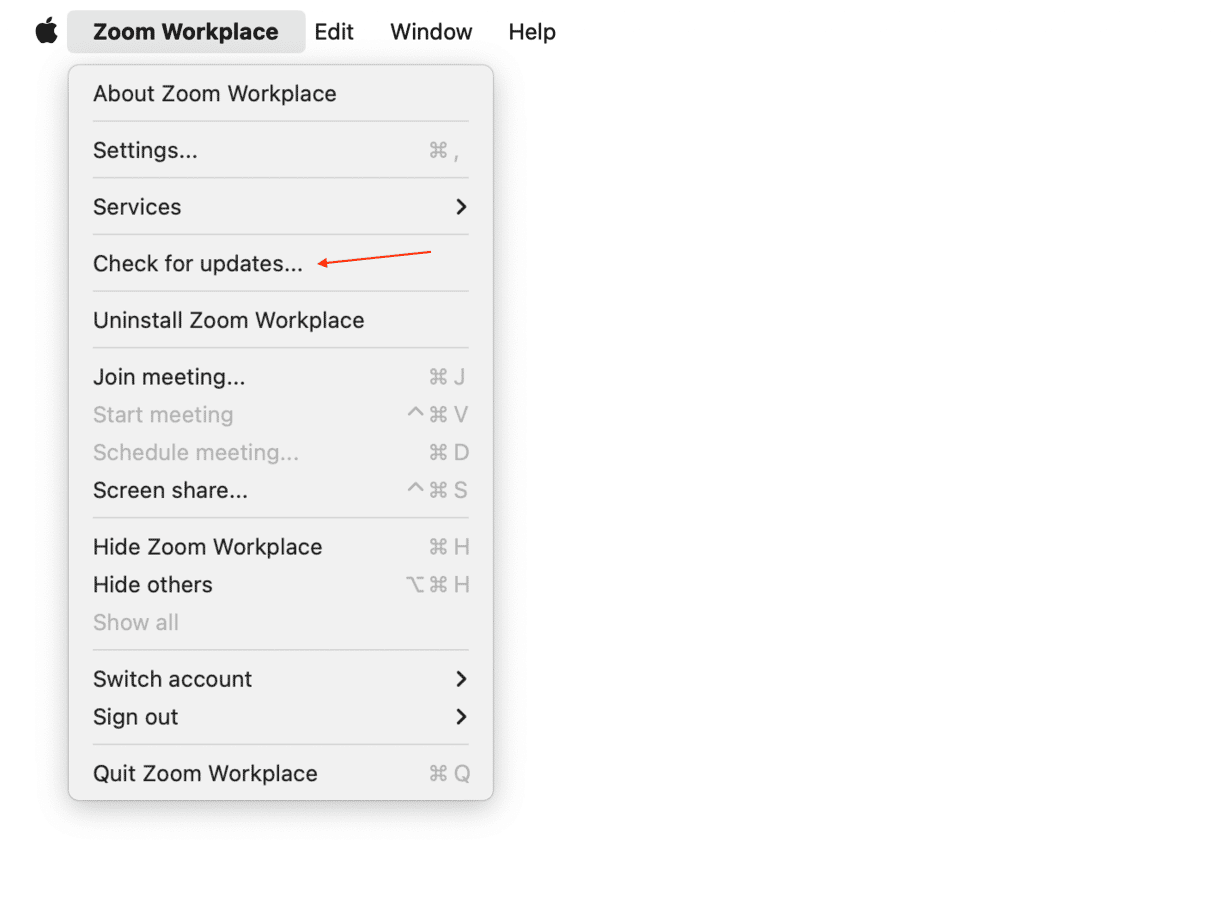
Apps you downloaded directly from the developer can be updated from the app itself. Here’s how:
- Open the app you want to update.
- Click the app name in the menu bar.
- Select Check for updates.
- Wait for the app to check, and if there is an update available, click install or relaunch.
If you want updates to be installed automatically, select the box ’Automatically download and install updates in the future’ or something similar if this option is available. Usually, it is somewhere in settings.
The easiest way to update all your apps
If updating all the apps you use one at a time seems like a lot of work, there is a much easier way than opening them in turn and checking for updates — CleanMyMac and its Applications feature.
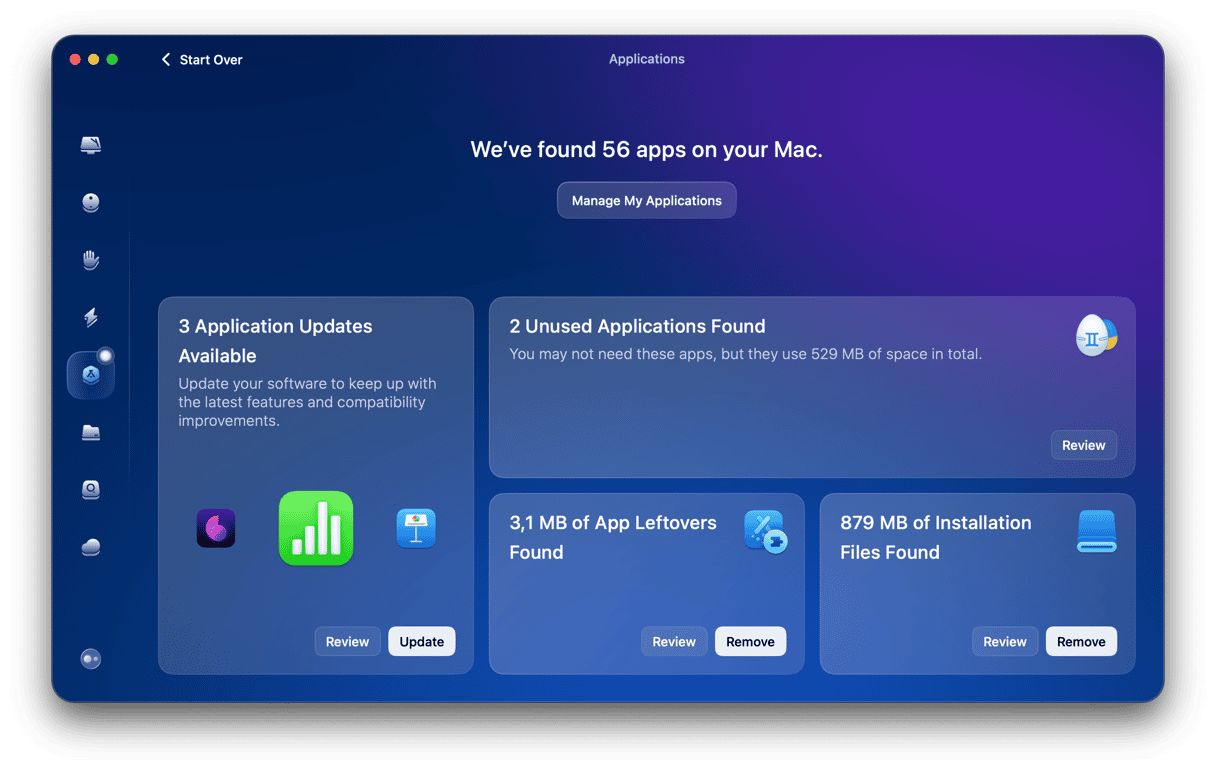
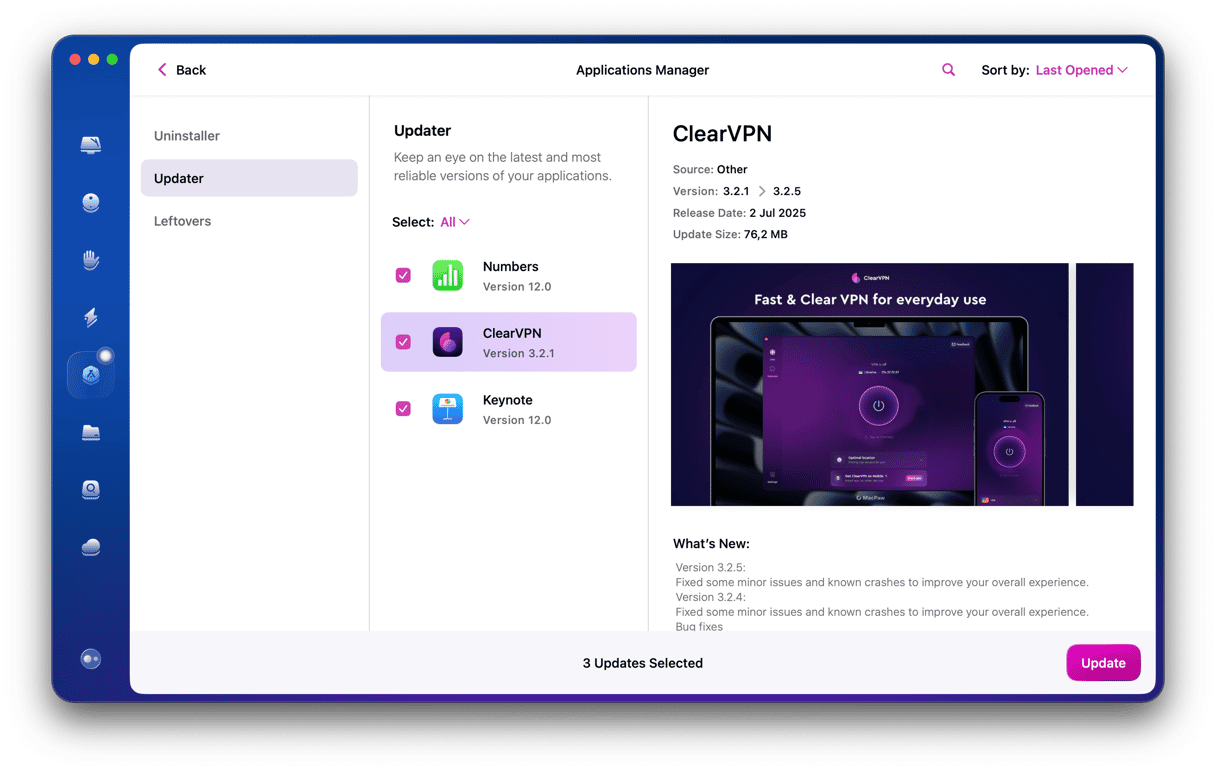
It scans your Mac, notes all the apps that are installed, and then checks with their developers to see if there are any updates available. You can than install all available updates with a click or you can click on each app and read about the new features in the update.
Just follow these steps to update apps in one click:
- Get your free CleanMyMac trial — you can test it for 7 days at zero cost.
- Open CleanMyMac and click Applications > Scan.
- To update all the apps for which it has found updates, select Update.
- Alternatively, click Manage My Applications > Updater. From there, you can update individual apps by selecting them and clicking the Update button.
Alternatively, you can go to the developer’s website, looking for the support section and searching for the latest update, then downloading it, and installing it manually.
If you need more tips on how to update your apps, check out this handy guide.
Updating your Mac is an important part of maintaining it to keep it running smoothly and safe from malware. If you do it regularly — or better still, automatically — it won’t take very long. Follow the steps above to perform Mac system update and fix any problems you encounter.
Frequently asked questions
Why update your Mac?
There are lots of reasons why you should update your Mac. Here are the most important ones: having the latest security updates installed, helping your MacBook run without a flaw, and ensuring that your apps are less likely to conflict with the macOS or each other, and so they are less likely to crash.
How to check which version of macOS you have?
To check which version of macOS your Mac is running, click the Apple menu and choose About This Mac. You’ll see a window open and list some information about your computer. Your currently installed macOS version is at the bottom of that window.
Why won’t my MacBook update?
The most common causes include poor internet connection, insufficient storage, and hardware incompatibility. If your Mac is older than 7 years, you won’t be able to upgrade it to the latest macOS version available. You can check compatibility on Apple’s website on the webpage of a particular macOS version.
Why is my MacBook taking so long to update?
Most likely, you have an internet connection issue. Move your Mac closer to the router or use an Ethernet cable if you can. At the same time, it may be slow because the update itself is large (e.g., you’re trying to install a major update like from macOS Sonoma to macOS Sequoia) or Apple’s servers are overloaded. In such instances, all you can do is just wait.
How do I know what the latest macOS version available is?
Go to apple.com, click Mac at the top of the window, then macOS (it is usually at the very bottom of the webpage). If you want to know what the latest macOS version that you can install on your Mac is, go to the Software Update section in System Settings.


