If you’re looking for ways to streamline your photo editing while taking advantage of pro-level features, you may want to check out Snapseed. This free app includes more than 29 beautiful filters, the ability to edit RAW files, and fun effects like curves, double exposure, and HDR. Here’s how to use Snapseed editing tools to take your photos to the next level.
Using filters in Snapseed
Whether you post your photos on Instagram or Facebook, send them to your friends, or print them to hang on your wall, you have likely used some sort of filter to edit your photos. Filters are great because they (a) are incredibly quick and easy to use and (b) give your photos a cohesive look when you share them on social media.
Get rid of edited pics you don’t like
As you experiment with Snapseed, you’ll be saving several copies of the same photo with different edits. Use CleanMy®Phone to find those duplicate shots and bulk-delete them. The app will even recommend your best shots to save.
How to apply a filter in Snapseed
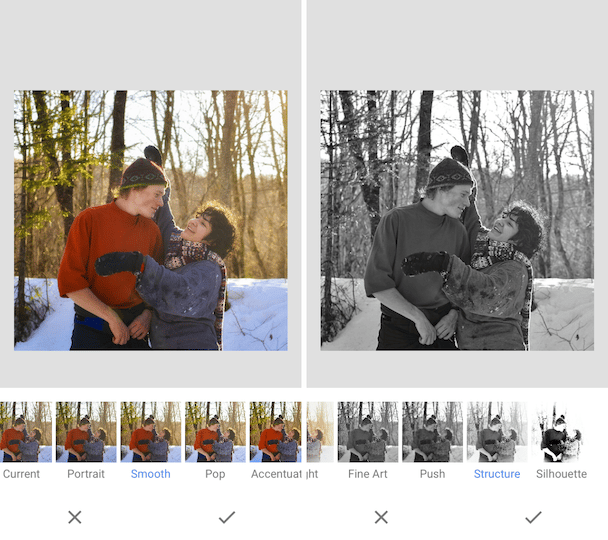
Just about every photo-editing app has its own set of filters, but we love the filters available on Snapseed. Here’s how to use Snapseed filters to subtly or dramatically change your photos.
- When you open Snapseed, the first thing the app will ask you to do is to choose a photo to edit. Tap on the giant + and choose a photo to start the process. Your photo will appear on the screen with a robust selection of filters below.
- Tap a filter to apply it to your photo. When you find one you like, tap the checkmark at the bottom of the screen.
- Once the filter has been applied, you can remove it by tapping the arrow at the top of the screen and then tapping Undo.
- You can also apply multiple filters. Apply one filter and then tap the checkmark. Apply another and tap the checkmark. Continue in this vein until you love what you see. If you really love the results you’ve created with multiple filters, you can use them to create your own. Tap the checkmark to save your work, then scroll through the filters until you get to the +”.
- A pop-up screen will appear, encouraging you to “Save this look.” Give your filter a name and tap OK to save it for later.

An overview of great Snapseed filters to try out
The best way to find your favorite Snapseed filters is to head over to the app and try them out. Here are some of our favorite Snapseed filters for beautiful results.
- Smooth: This is a great filter for portraits, adding subtle highlights around faces, and evening out skin tone.
- Pop: This filter bumps up the saturation and highlights while adding a subtle HDR effect. It’s great for buildings, landscapes, and flat lays.
- Morning: This is a great landscape filter, giving your photo a nice warm glow as if the sun is coming up on your scene.
- Structure: This is a black-and-white filter that is fabulous at retaining detail. Use it for portraits, cityscapes, and close-ups.
Using Snapseed editing tools
Yes, the fastest way to edit your photos is with Snapseed filters, but what if you want more control or more advanced editing tools? For a free app, Snapseed’s editing tools are incredibly robust. From basic to advanced, here are some tips for using Snapseed editing tools.
How to adjust contrast, brightness, and saturation
- Open Snapseed and choose a photo to edit.
- Tap Tools.
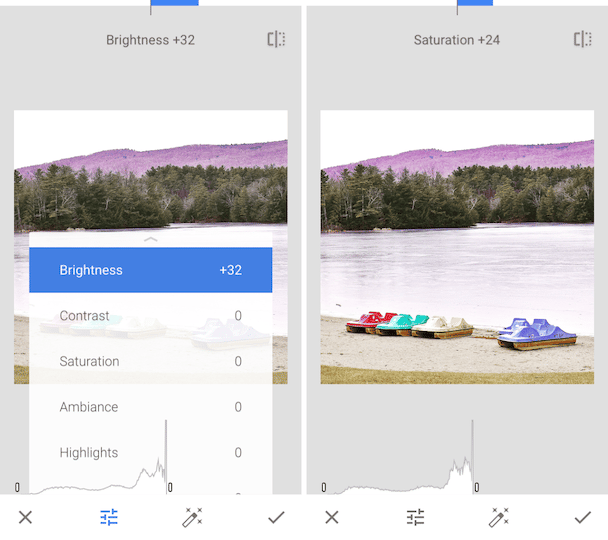
- Tap Tune Image to open the adjustment panel, then tap the slider icon.
- A window will open with the following options: Brightness, Contrast, Saturation, Ambiance, Highlights, Shadow, and Warmth.
- Choose Contrast and move your finger to the right or left across your photo. Moving to the left will decrease the contrast, and moving to the right will increase the contrast.
- To move on to the next adjustment, tap the slider icon and choose what you want to work on. Slide your finger across your photo to make your adjustment.
- To see before and after versions of your photo, hold your finger on the bisected square in the top-right corner of your screen.
- When you are finished making adjustments, tap the checkmark.
How to brighten or darken the background in Snapseed
- Open Snapseed and find the photo that you want to edit.
- Tap Tools and then Brush.
- Tap Exposure and then use the arrows to increase or decrease the exposure.
- Slide your finger across your photo to act like a brush. Wherever your finger touches, the exposure will be lightened or darkened based on your preferences.
- You can zoom in for fine detail work by sliding your thumb and forefinger away from each other across your photo. Tap the brush again to continue lightening or darkening areas of your photo.
How to blur the background using Snapseed
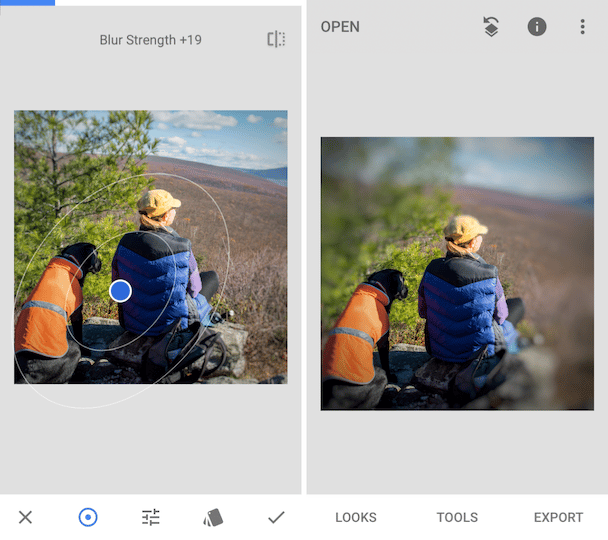
A blurred background is useful for featuring a prominent subject and creating depth.
- Open the photo you want to edit within the Snapseed app.
- Tap Tools, and then scroll down and tap Lens Blur.
- A circle will appear over your photo to highlight your main subject. You can drag this photo around until it is positioned over your subject. Pinch your fingers together to make the circle smaller or pull them apart to make the circle bigger or elongate the shape.
- Tap the slider icon to adjust the blur strength, transition, and vignetting in your photo.
- When you are finished, tap the checkmark.
How to fix perspective and composition
There are various Snapseed editing tools that will help you improve your composition, including Perspective, Crop, and Expand. Here’s what each of these tools can do for your photos.
- Crop: The Crop tool is useful for changing the size of your photo, cutting out parts of your photo around the edges that you don’t want, or enlarging the prominent features of your photo. With the Crop tool, you can choose a predetermined size or crop it free-form using your fingers to drag the lines at the edge of your photo.
- Expand: The Expand tool can also be used to enlarge your photo. Tap the Expand tool and then choose Smart to fill in the edges with a similar background. The White and Black options will create a frame in the color that you choose.
- Perspective: Choose the Perspective tool and use your fingers to move across the photo. Swiping up will make the perspective shift as if you are looking at it from a lower point of view. Swiping down will have the opposite effect. Swiping from side to side will have a similar effect, changing the point-of-view from right to left. Any gaps that are created in your photo are automatically filled in to match the background.
How to edit portraits with Snapseed
There are several tools that can be used to edit portraits in Snapseed, including Portrait, Head Pose, and Healing. Here’s an overview of how they work and instructions for using them:
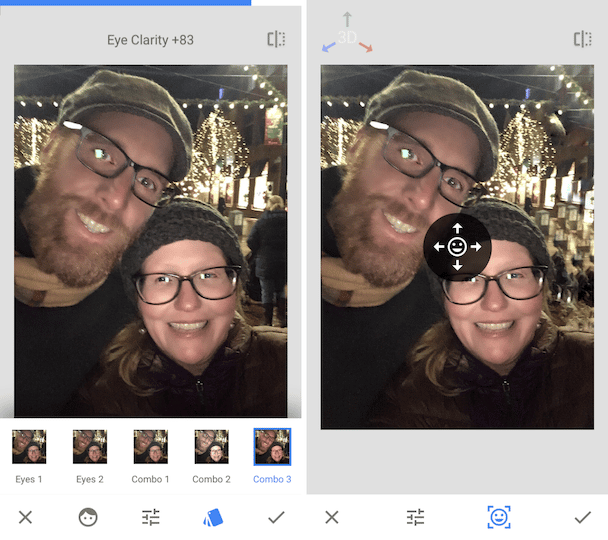
- Portrait: The Portrait tool includes ready-to-use filters that are suitable for portraits, including filters for smoother skin and improved eye clarity. Tap the face icon to choose a skin tone, then use the slider tool to increase or decrease Face Spotlight, Skin Smoothing, and Eye Clarity. Once you are finished, tap the checkmark to save your photo.
- Head Pose: This tool uses 3D technology to change the tilt of your head for a more flattering image. Drag your finger across the screen to change your head position. You can also tap the slider to increase or decrease pupil size, smile, and focal length. This is a great tool for making subtle changes, but be careful — making big changes will cause your portrait to look unnatural.
- Healing: Want to erase a less-than-desirable aspect of your photo? From a rogue photo bomber to a tiny blemish, the Healing tool can get rid of it. Just choose Healing and tap on the bit of the photo you want to erase. If it is a very small blemish, use your fingers to zoom in before tapping on the blemish to remove it.
Snapseed is one of the best free editing apps for iPhone, enabling you to edit your photos like a pro without spending hours to get it right. Play with some of its intuitive editing tools, and you’ll be hooked!


