System Settings in macOS is the key to making changes to a whole raft of different settings on your Mac. Everything from changing your desktop background to sharing files and folders is configured using System Settings.
Where is System Settings on Mac?
System Settings on Mac is an application that, unlike other macOS tools, such as Disk Utility and Terminal, lives in your Applications folder — not in the Utilities folder. You can open it from there like any other application. It’s also in the Dock.
And if you don’t like either of those options, you can use the Apple menu > System Settings route by clicking the Apple logo at the top left of the screen and choosing it from the menu.
Once you’ve opened it, clicking any tool will allow you to change the settings for that category. So, to change your desktop background you’d choose the Wallpaper section, or to set display resolution or configure multiple displays, you’d click the Displays tab.
How to use the General pane in System Settings
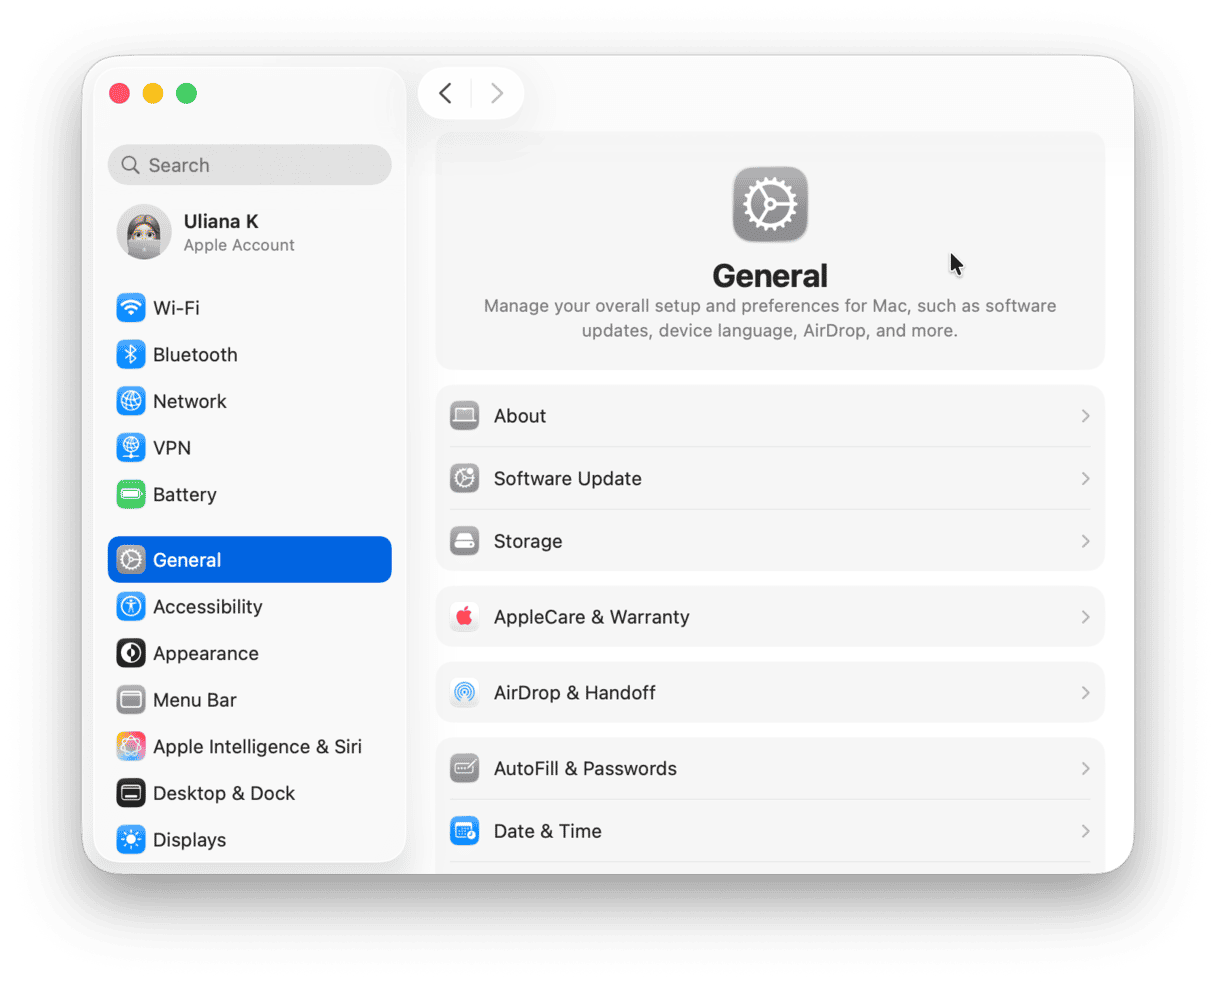
The General pane is home to a number of settings that don’t belong anywhere else. Here, you can find information about your Mac, its storage capacity, and software version. You can also set up language, date, and time from the General pane as well as customize sharing settings or reset your Mac.
You can also configure AirDrop and Handoff from here. Perhaps more usefully, the General pane is also where you set up Time Machine and manage Login Items.
Share your Mac’s data with another computer
The Sharing pane in the General tab allows you to share a range of different data and services on your Mac with other computers on the same network. The three most useful are Screen Sharing, Printer Sharing, and File Sharing.
Screen Sharing allows you to share your Mac’s screen with another computer so that you can view its display and control it remotely from another computer. This is particularly useful if you want to set up a Mac mini without a monitor and control it from another Mac or if you want to help troubleshoot problems on someone else’s Mac.
To enable Screen Sharing, click the Sharing pane and click Screen Sharing > i. Choose which user accounts to allow access to, click Done, and turn it on.
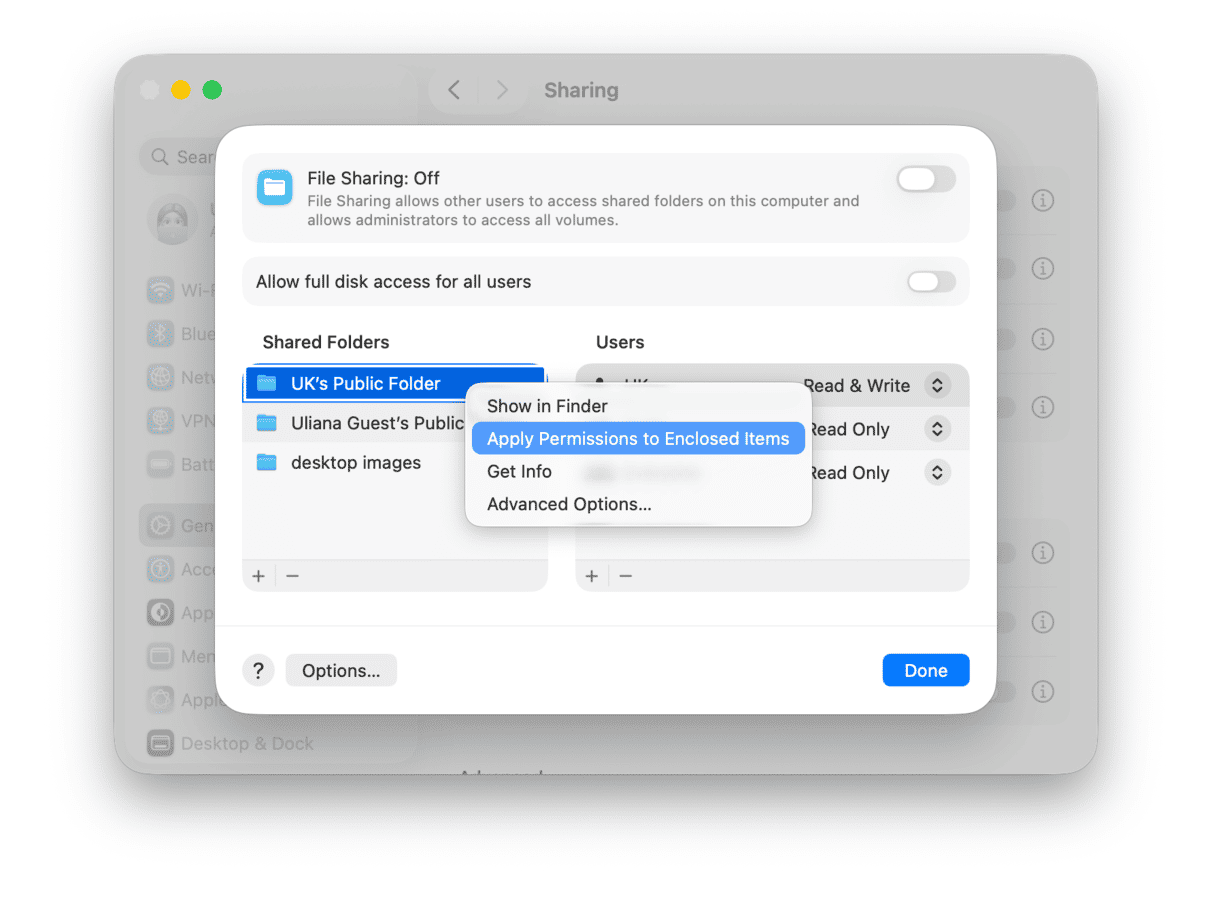
File Sharing allows folders you choose to be shared with other users. Set it up similarly to Screen Sharing, but choose privileges in the Users window. If you want to access the folders over a network, click Options to choose how they’re shared.
If you have a printer directly connected to your Mac, you can share it by turning on Printer Sharing and choosing the printer.
Manage Login Items
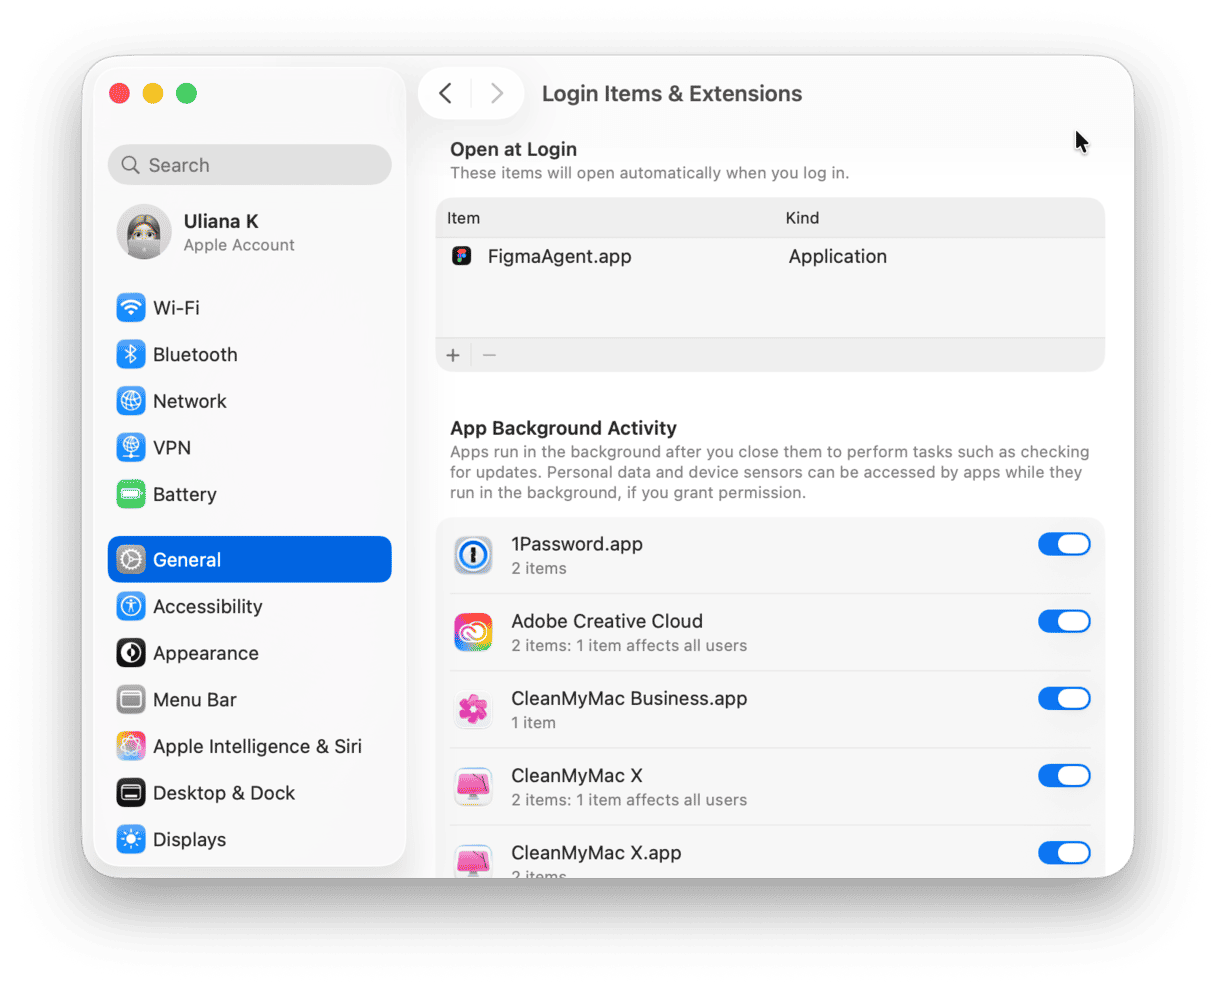
Sometimes, apps configure themselves to open automatically at login. If you no longer want them to do that, click Login Items & Extensions in the General tab. Click the one you want to remove and click the - at the bottom of the window.
Tip: If you want to see the list of all your login items and remove them in a click, use CleanMyMac. Go to Performance > Scan > View All Tasks > Login Items to manage the apps that launch at startup or Background Items to manage what is running in the background.
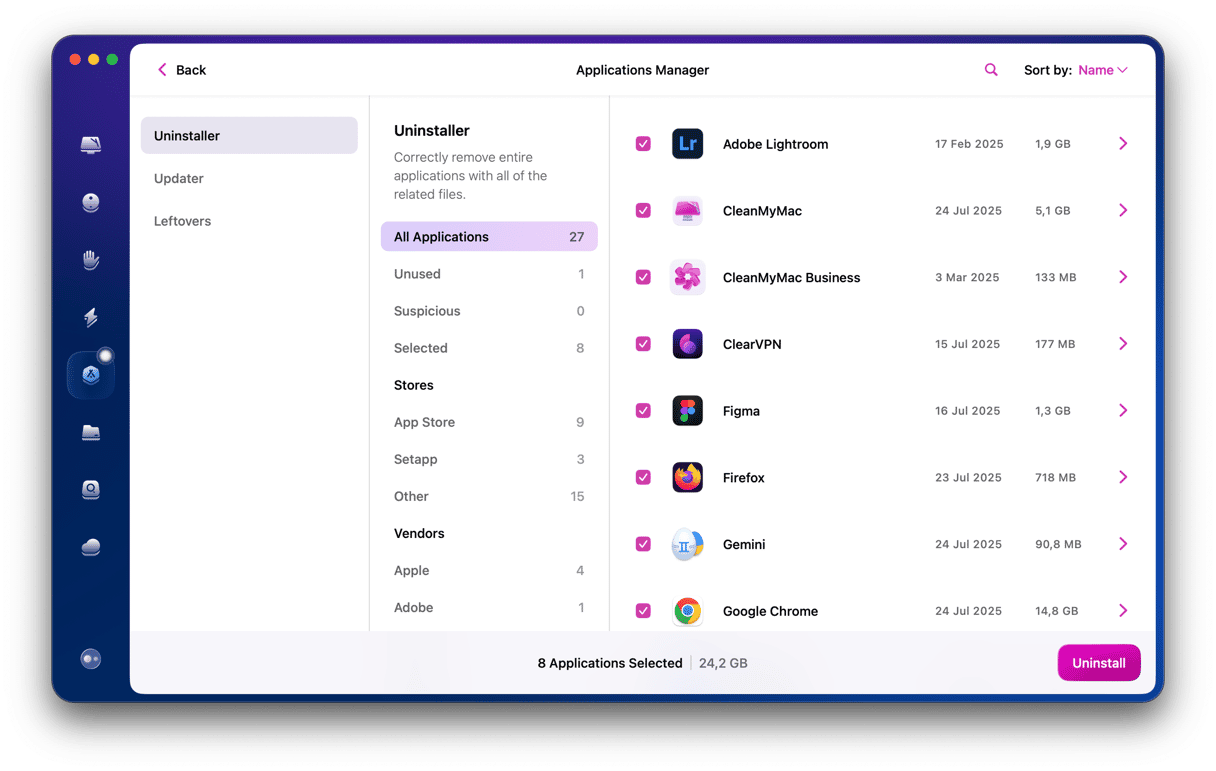
If you want to uninstall applications altogether, rather than just stop them from launching automatically, use a dedicated Applications feature that will remove the application and all its associated files from your Mac and the click of a button.
How to change your desktop and screen saver in System Settings
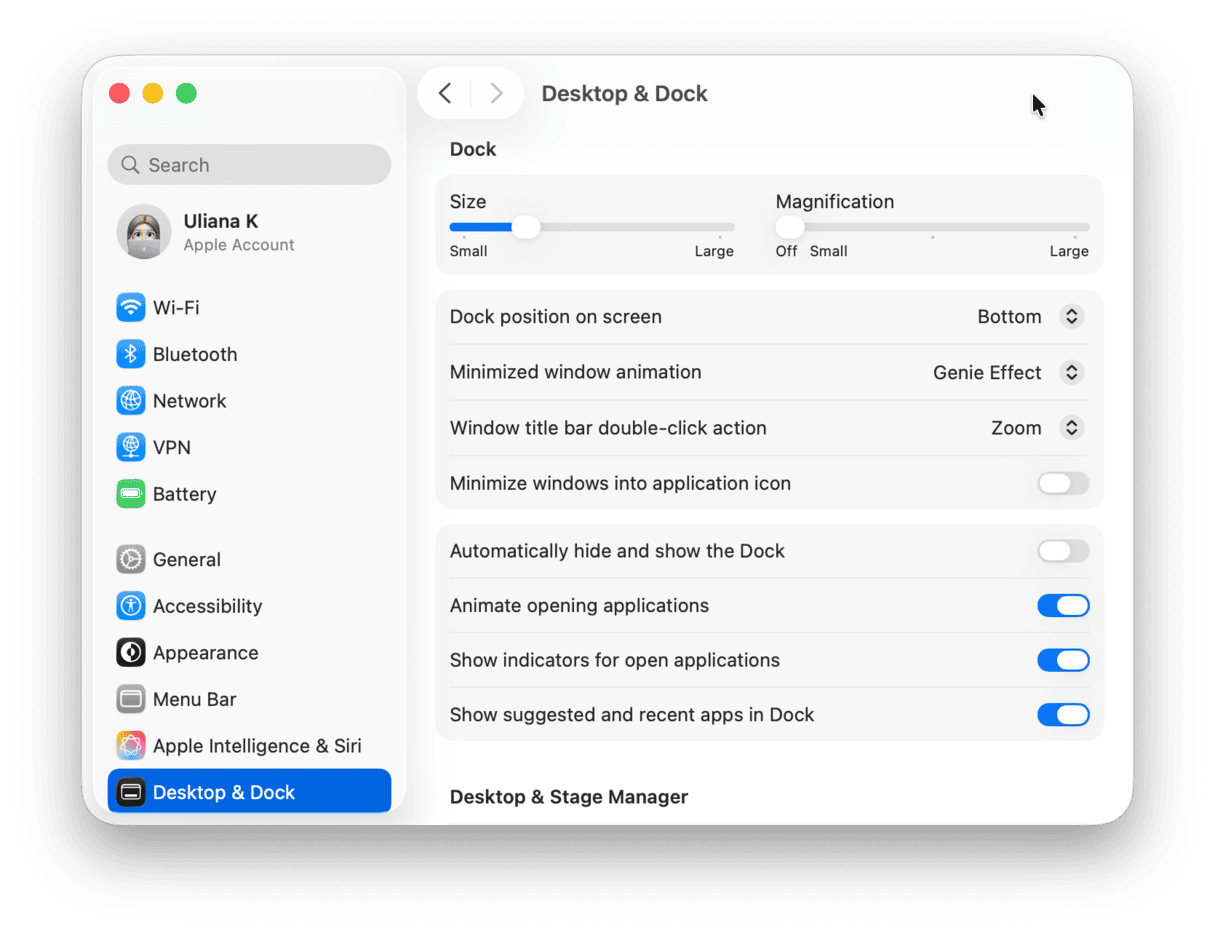
Desktop & Dock
- Click Desktop & Dock.
- Customize the size and position of the Dock on the screen and any effects or animations you may like.
- From here, you can also set up menu bar and Mission Control.
- Perhaps the most useful feature is selecting a default web browser among all those installed on your Mac so that you do not have to look for respective options in browser settings.
- The most interesting option is Stage Manager, as you can turn it on and off from here as well as customize it. It is the new feature that was introduced in macOS Ventura to boost productivity and make switching between apps easier.
Wallpaper
- Open Wallpaper.
- Select wallpaper from built-in options.
- You can add a folder or photo album to select from custom options.
Screen Saver
- Click the Screen Saver section.
- Choose a Screen Saver from the list.
- Choose whether you want to show it with clock.
- Quit System Settings.
How to configure Privacy & Security in System Settings
The Security & Privacy pane in System Settings allows you to manage which applications have access to personal data. And if you want to be able to download apps from places other than the App Store, select App Store and identified developers under Security.
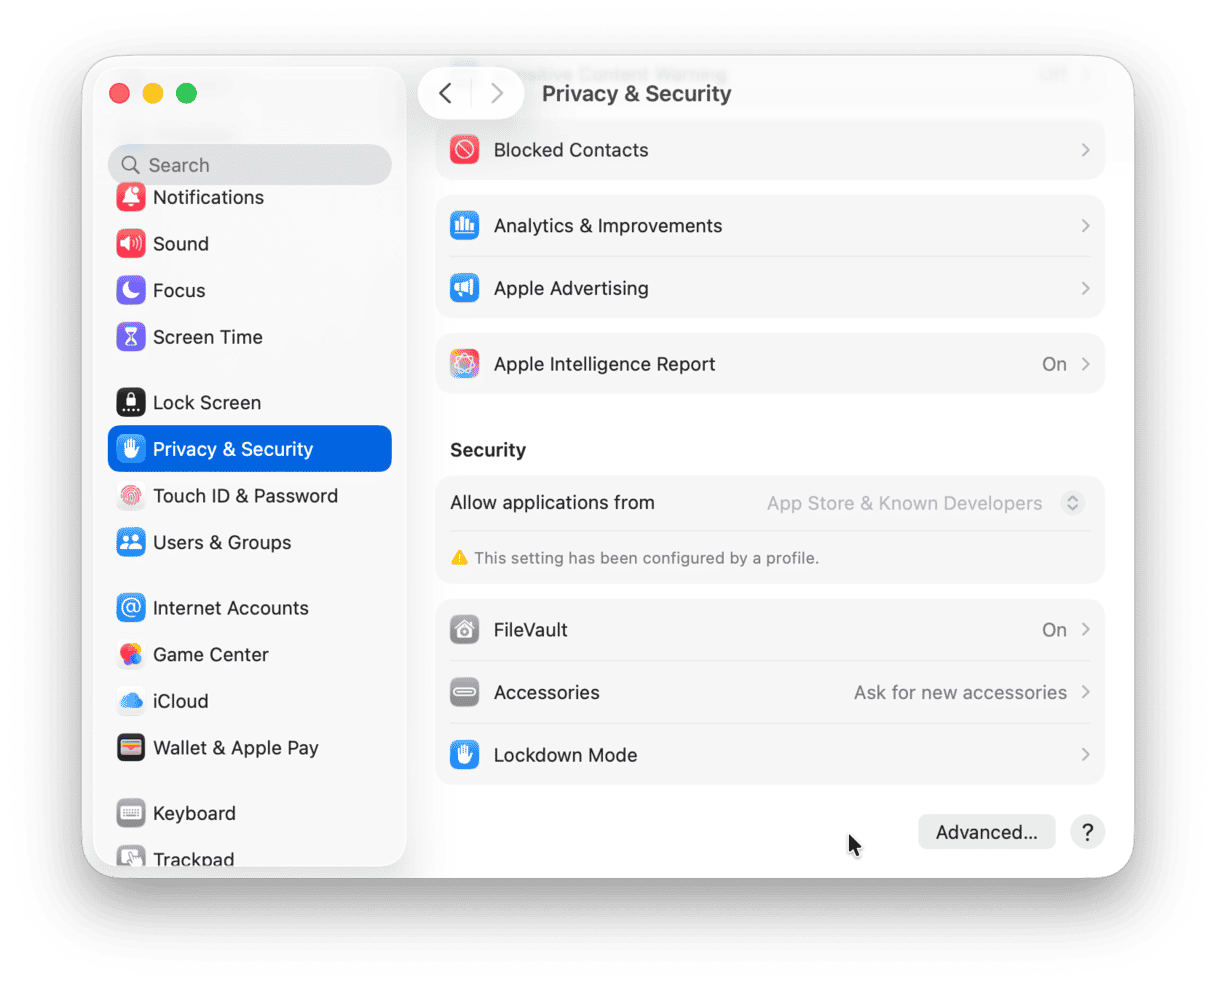
You can also turn on FileVault. FileVault allows you to encrypt files stored on your hard drive. However, it has a couple of downsides. One is that encrypting files consumes resources and may make your Mac run more slowly. The other is that if you forget your password and secure key, you’ll lose access to your files permanently.
Enable Apple Intelligence
New macOS versions come with built-in AI features. As long as you have a Mac with Apple silicon, you can go to System Settings > Apple Intelligence & Siri and enable these features here.
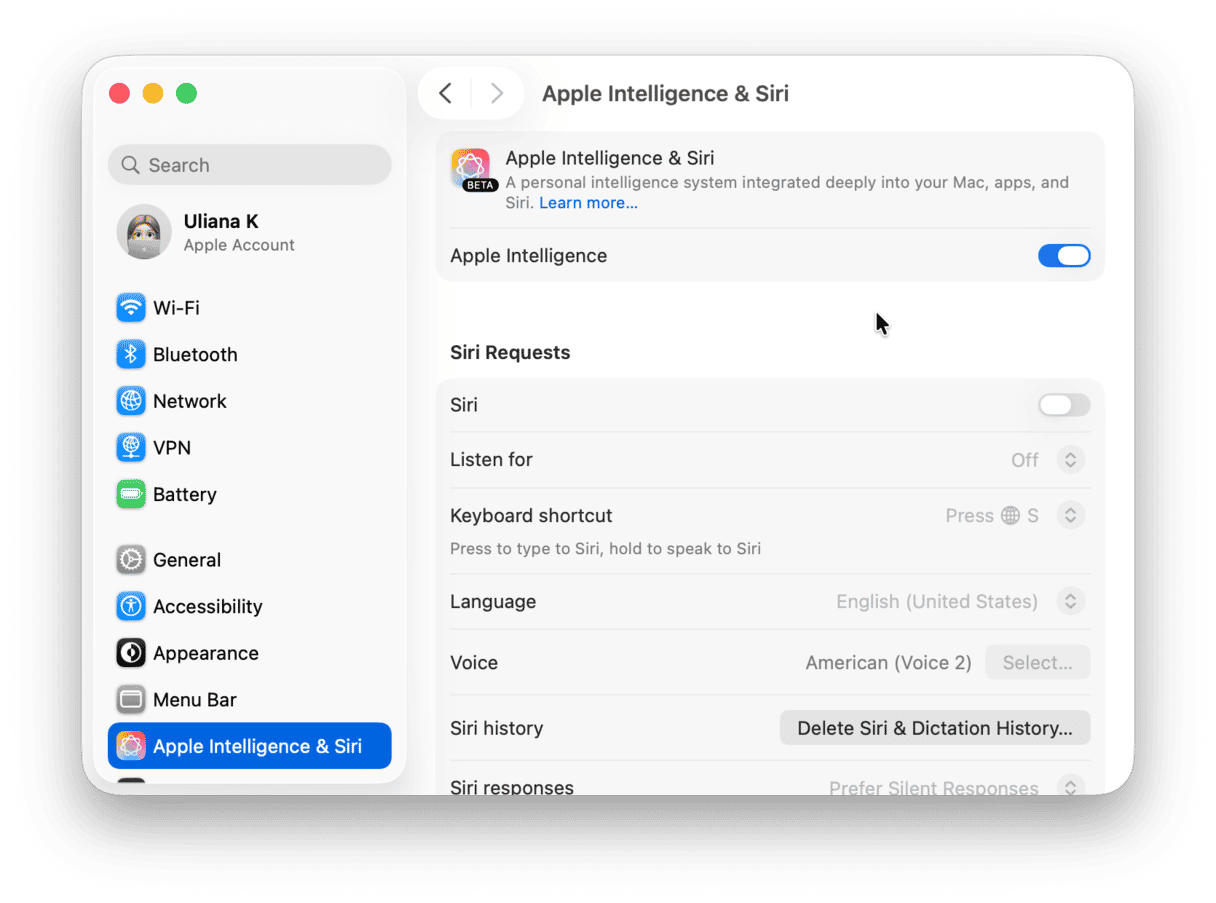
The same section contains Siri settings. You can turn it on or off, choose Siri voice, and set up Siri language.
How to change password via System Settings
To change your password, click Touch ID & Password > Change under Password. Type in your old password, then the new one, twice. Input a password hint if you think you’ll need one.
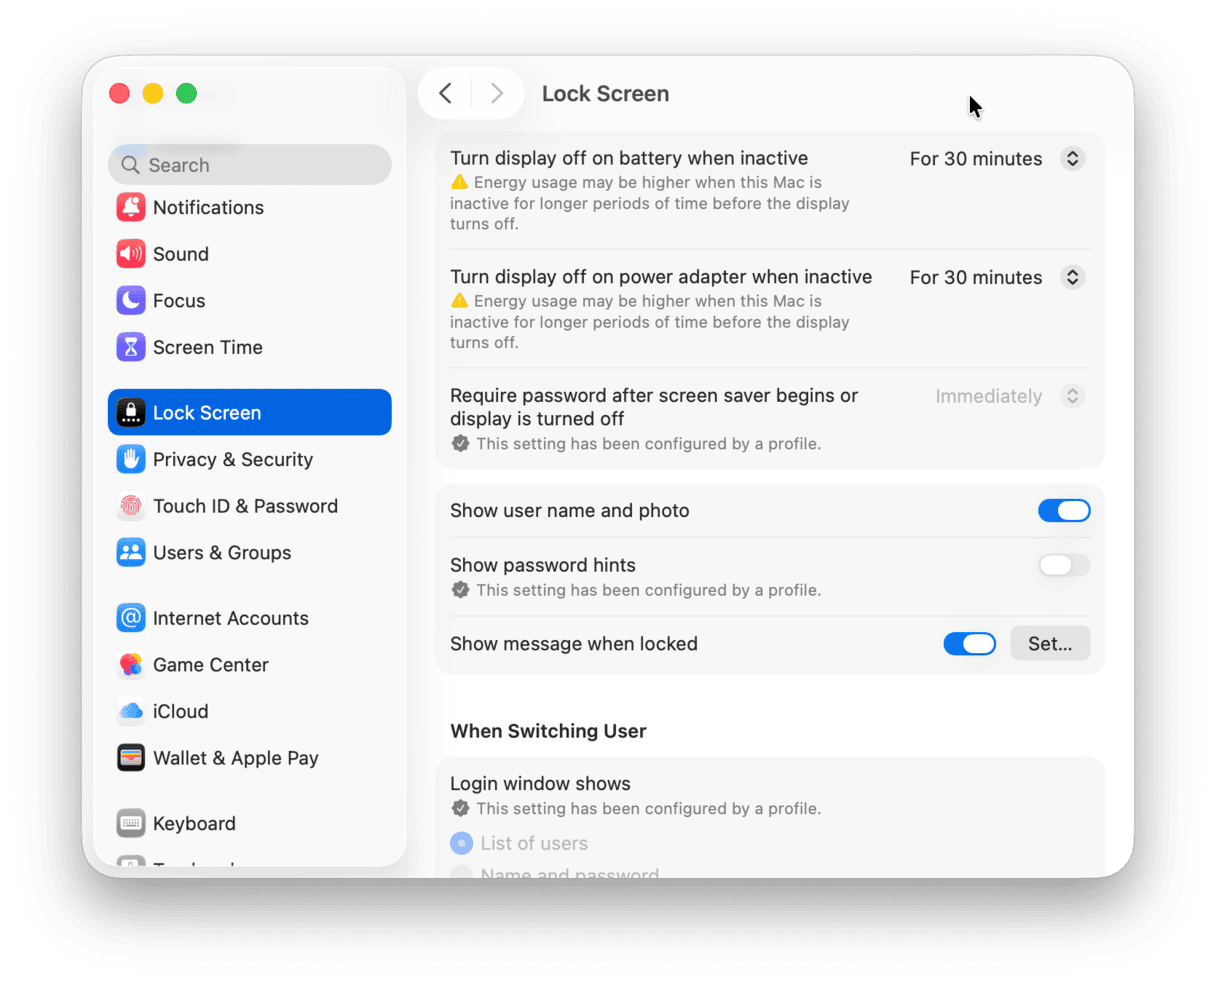
Now, navigate to Lock Screen. From there, set the amount of time after your Mac goes to sleep that you need to type in your password. Also, if you want to add a message to the lock screen, click Set next to Show message when locked and type the message. If you have an Apple Watch, select the box to allow it to unlock your Mac.
Configure Notifications in System Settings
App notifications can be very useful. They can also be intrusive and annoying. You can control which apps can issue notifications and how they do it by going to the Notifications section in System Settings. In this tab, you can click each app one by one and choose options for how Notifications are displayed or turn them off completely.
Tip: If you want notifications about potential problems with your Mac, such as memory reaching capacity, high disk temperature, or disk trouble, use a great app CleanMyMac. Its Menu App will alert you as soon as it detects any issues. CleanMyMac is very easy to set up and use and will help keep your Mac healthy. And if it detects that you’re running out of usable memory, you can free up RAM at the click of a button.

Change Spotlight settings in System Settings
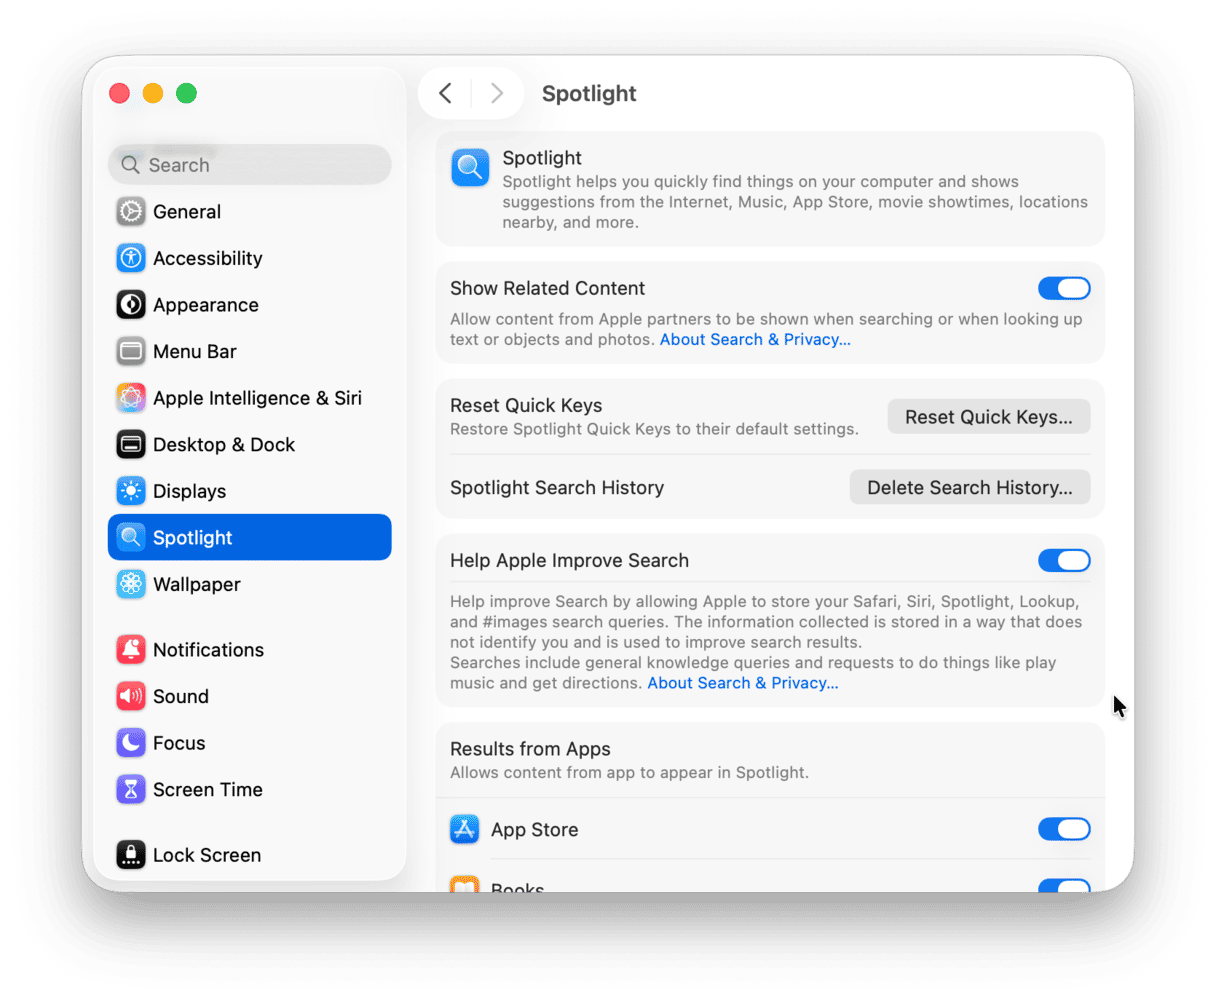
Spotlight, the tool that allows you to search both your Mac and the world beyond, is incredibly useful. But you can make it work better for you by changing some of its settings:
- Click Spotlight in System Settings.
- Under Search results, disable any categories you don’t want to appear in results.
- To exclude folders on your Mac from Spotlight searches, click Search Privacy tab and drag the folders onto the window.
Fix typos automatically using the Keyboard pane in System Settings
The Keyboard section has a number of settings that allow you to control how your Mac’s keyboard operates. You can set the speed at which keys repeat when you hold them down, change keyboard shortcuts, and set up Dictation so you can speak to your Mac rather than type.
One of the most useful Keyboard settings is in the Text tab where it allows you to specify how to correct common typing errors. For example, if you regularly type ‘teh’ instead of ‘the,’ you can make it correct that automatically. Here’s how to use it:
- Go to System Settings > Keyboard.
- Under Text Input, click Text Replacements.
- Click +, type the mistake you often make in the Replace column, then type the text you want to replace it with in the With column. Click Done.
- You can also use this feature to allow you to type abbreviations and have your Mac replace them with the full text.
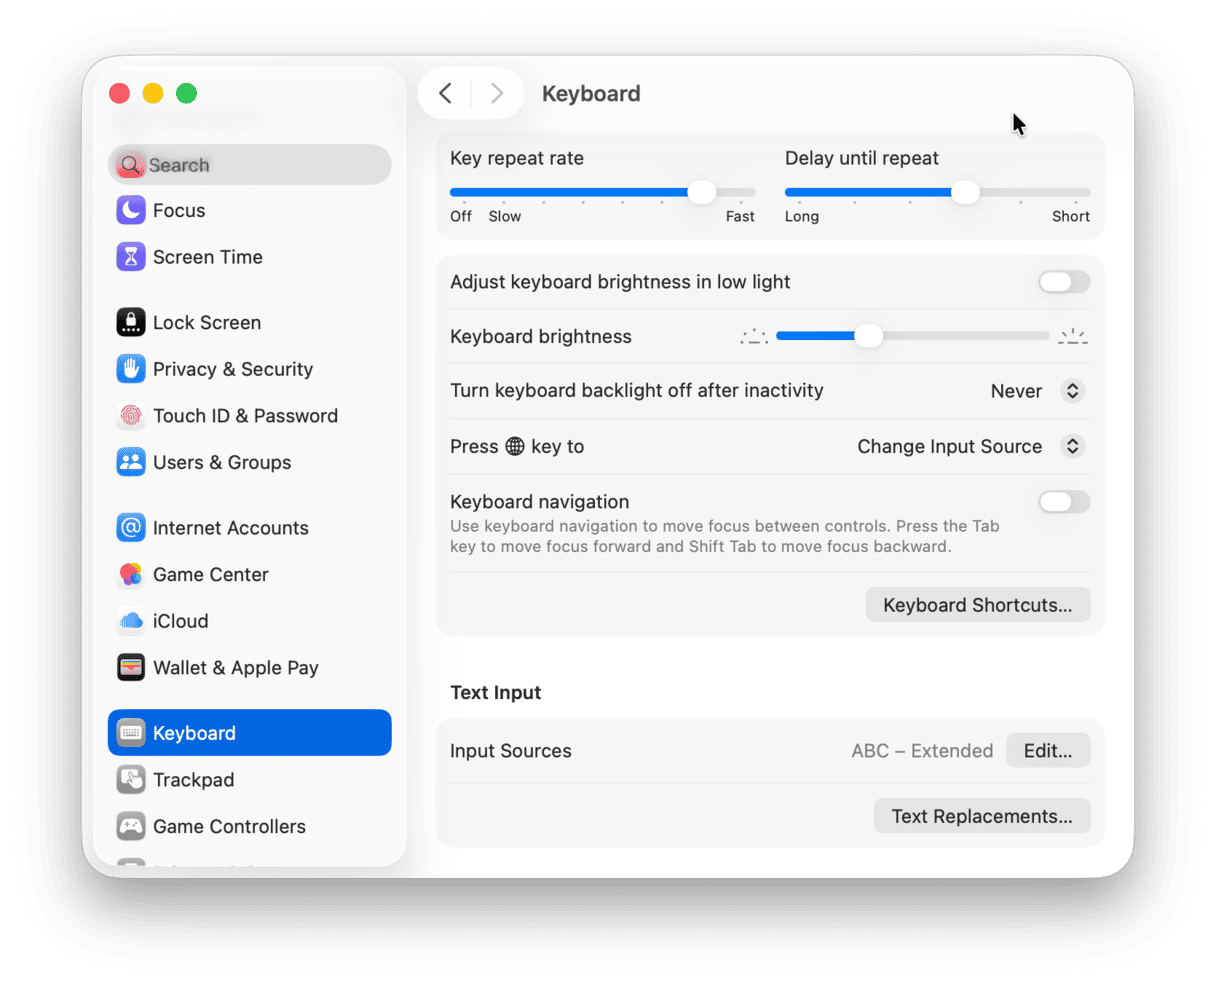
If you click Edit next to Input Sources, it allows you to choose whether to correct spelling automatically, which dictionary to use, and how to format quote marks. And you can add additional input source languages by clicking + and choosing a language. If you click Input Source in menu bar, you’ll be able to easily swap between languages.
Set up a printer in System Settings
- In System Settings, click the Printers & Scanners.
- Click Add Printer, Scanner, or Fax.
- Any printer connected to your Mac, AirPrint printer on your Wi-Fi network, or wired printer on a network you’re connected to will show up in the window.
- Click the one you want to add and click Add.
- If you have connected multiple printers, click the Default Printer menu and choose the one you want to use as the default.
Add a Gmail account in Internet Accounts
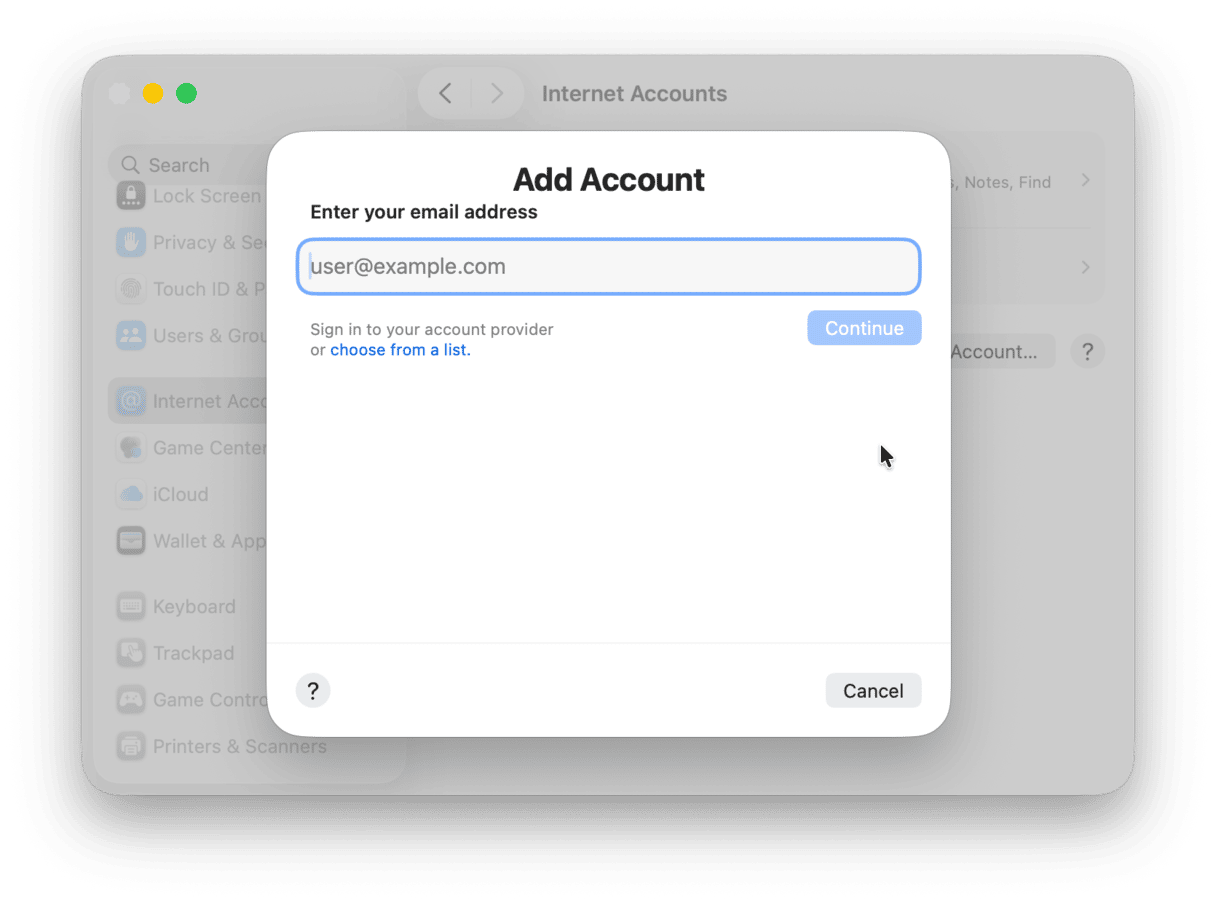
The Internet Accounts tab is where you can add email or social media accounts to your macOS user account. The email accounts will show up in Mail, while the social media accounts will be available in other apps or when you choose to share something using Share Sheets.
- Click Internet Accounts.
- Click Add Account and enter your email address.
- Click Continue > Open Browser.
- Sign in in the browser window that opens.
- When the account has been added, select the items that you want to use with this account.
As you can see, System Settings has some very useful features for setting up and configuring your Mac. While there are lots of options, it’s not difficult to use, and nothing you can do there will harm your Mac. Use the tips above to get your Mac configured and running exactly the way you want it.


