As a dedicated iPhone user and photographer, you already know that saving storage space is a top priority. No matter how massive your iPhone storage is, it’s not unlimited. In response, Apple has unveiled a solution to all those high-quality photos taking up too much space on your phone — a new image file format called HEIC.
Designed to take up less space on devices with newer operating systems starting with iOS 11, HEIC files are an asset to iPhone photographers but a bit of a hassle for everyone else. Here’s what you need to know about what is HEIC file, including how to convert HEIC to JPG or PNG.
What is a HEIC file?
HEIC stands for High Efficiency Image File, Apple’s new image container format that compresses photos in order to save space. HEIC image files are available on iPhone 7 and later models running iOS 11 or later operating systems. Under most circumstances, you won’t even notice the file format of your photos, but occasionally, you may run into technical difficulties when transferring photo files from your iPhone to your computer or cloud storage.
If you do run into problems when transferring photos, we’ve got solutions that will save you time and headaches.
Is HEIC better than JPG?
The short answer is yes. HEIC is better than the JPG file format. Not only is the file size half that of a standard JPG, but the image quality is better, too. The biggest drawback to using HEIC files is that they aren’t supported by every device — at least, not yet. While we wait for the technology to catch up, we have to deal with the headache of transferring HEIC photos to JPGs for use with some applications.
How to delete HEIC photos on iPhone
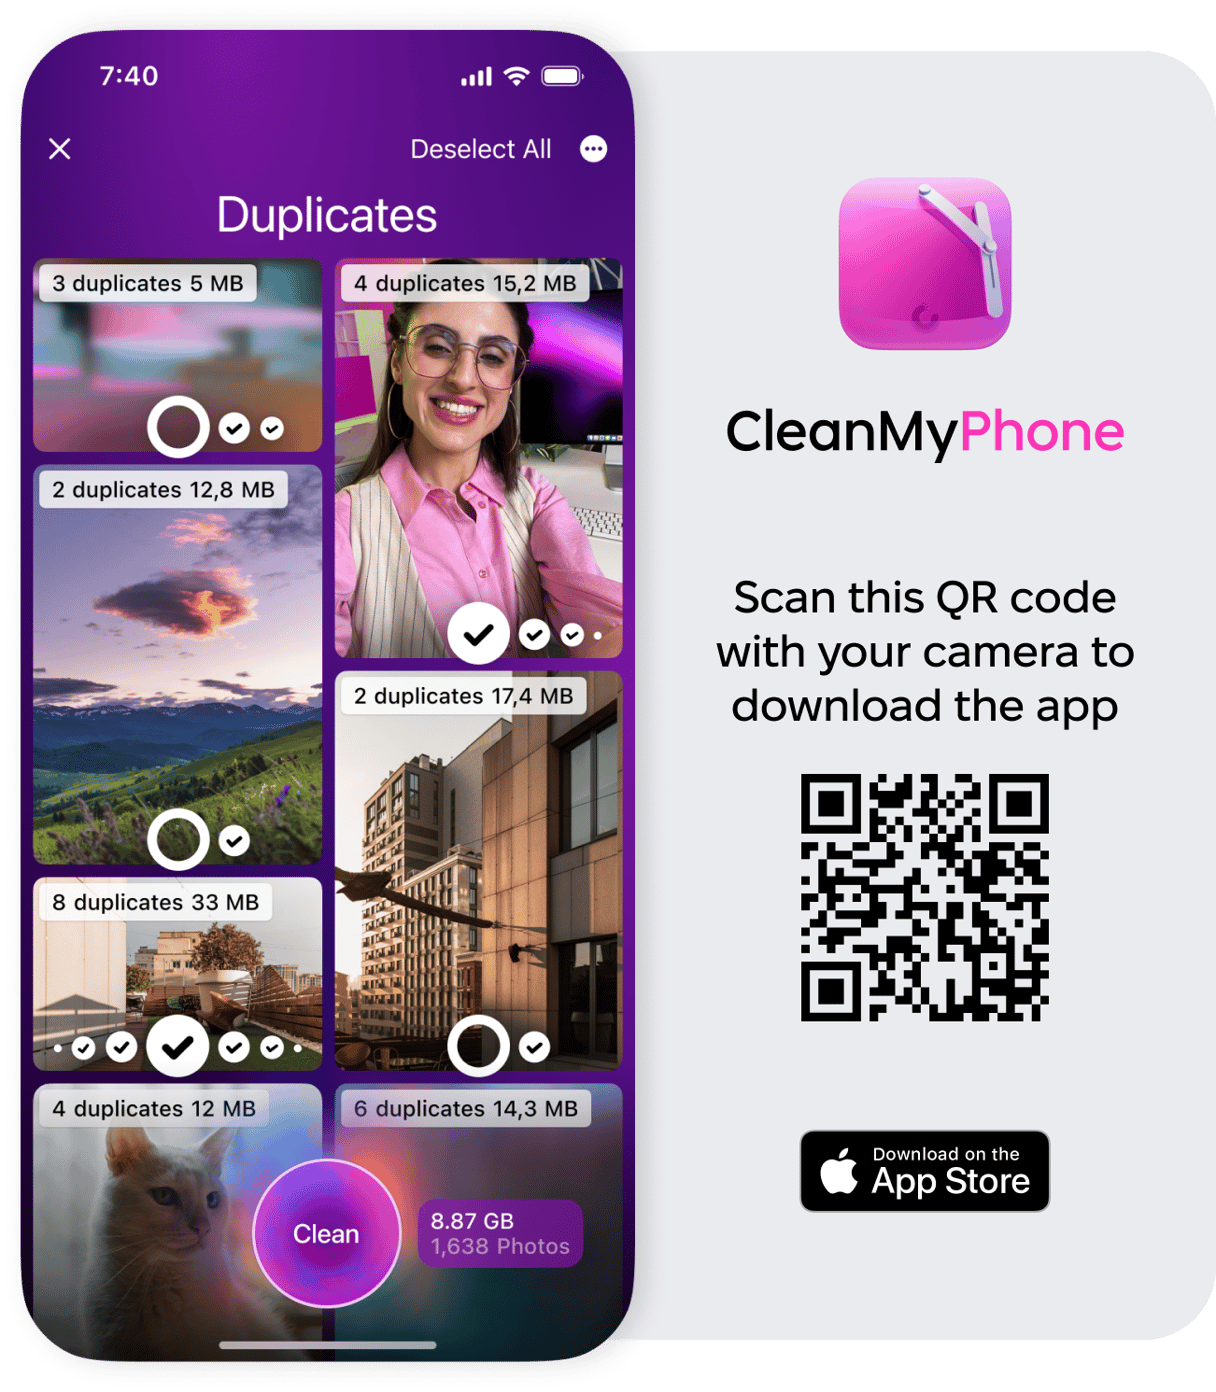
You can do it manually, but clearing photo clutter with CleanMy®Phone will save you space and transfer time. The app will detect and delete similar photos, duplicates, old screenshots, and more with a few taps. This applies to every image format, including HEIC photos.- Download the app.
- Go to Declutter to delete duplicates.
- Then, go to Organizer to clean similar photos in each category.
If you still want to delete your photos manually, here is a perfect guide on how to organize your camera roll so it's easier to pick what's needed and delete what's not.
How to turn HEIC into JPG on iPhone
How to save an iPhone photo as jpeg? Well, if you took a picture, there is no way you can turn it to JPG format on iPhone, only via specific websites.
If you don’t want to deal with the hassle of converting your HEIC photos to JPGs when you need to, then you can certainly change the settings on your iPhone so that it stops using the HEIC format. Just remember that you will be giving up smaller file sizes and better-quality images for the sake of convenience. Don’t say we didn’t warn you!
If you still want to stop using HEIC files on your iPhone, here’s how to do it:
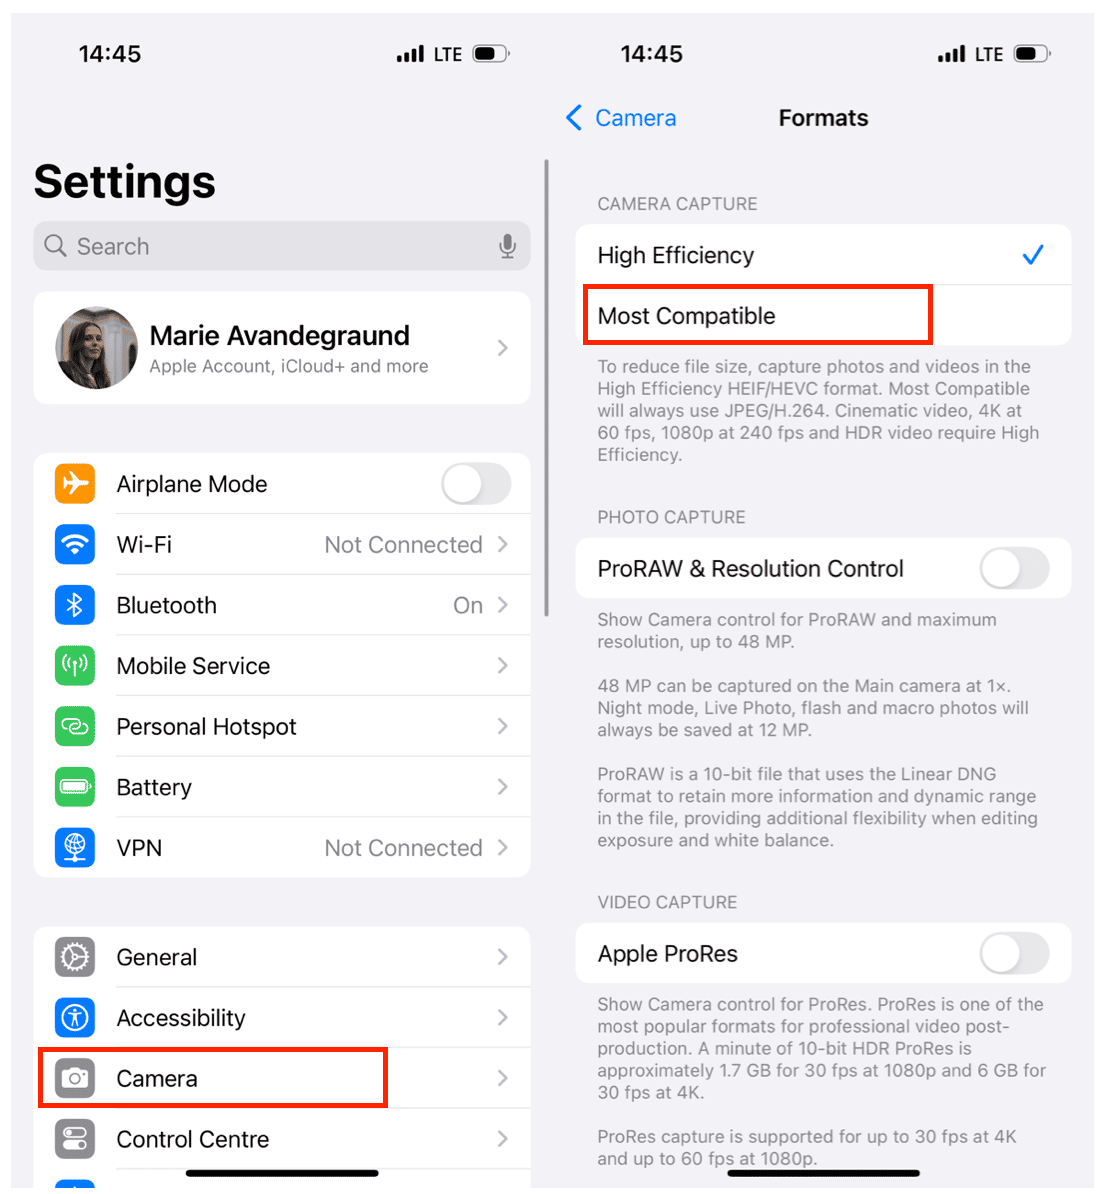
- Navigate to your iPhone’s settings, scroll down, and tap Camera.
- Tap Formats.
- Tap to switch from High Efficiency to Most Compatible.
That’s it! Now, you’re on your way to saving space on your phone while taking as many photos as you want.
How to transfer HEIC photos as JPEG
Fortunately, it’s pretty easy to transfer your HEIC image files to a Mac or PC. All you have to do is set up compatible file sharing in your iPhone’s settings. Here’s an easy step-by-step guide.
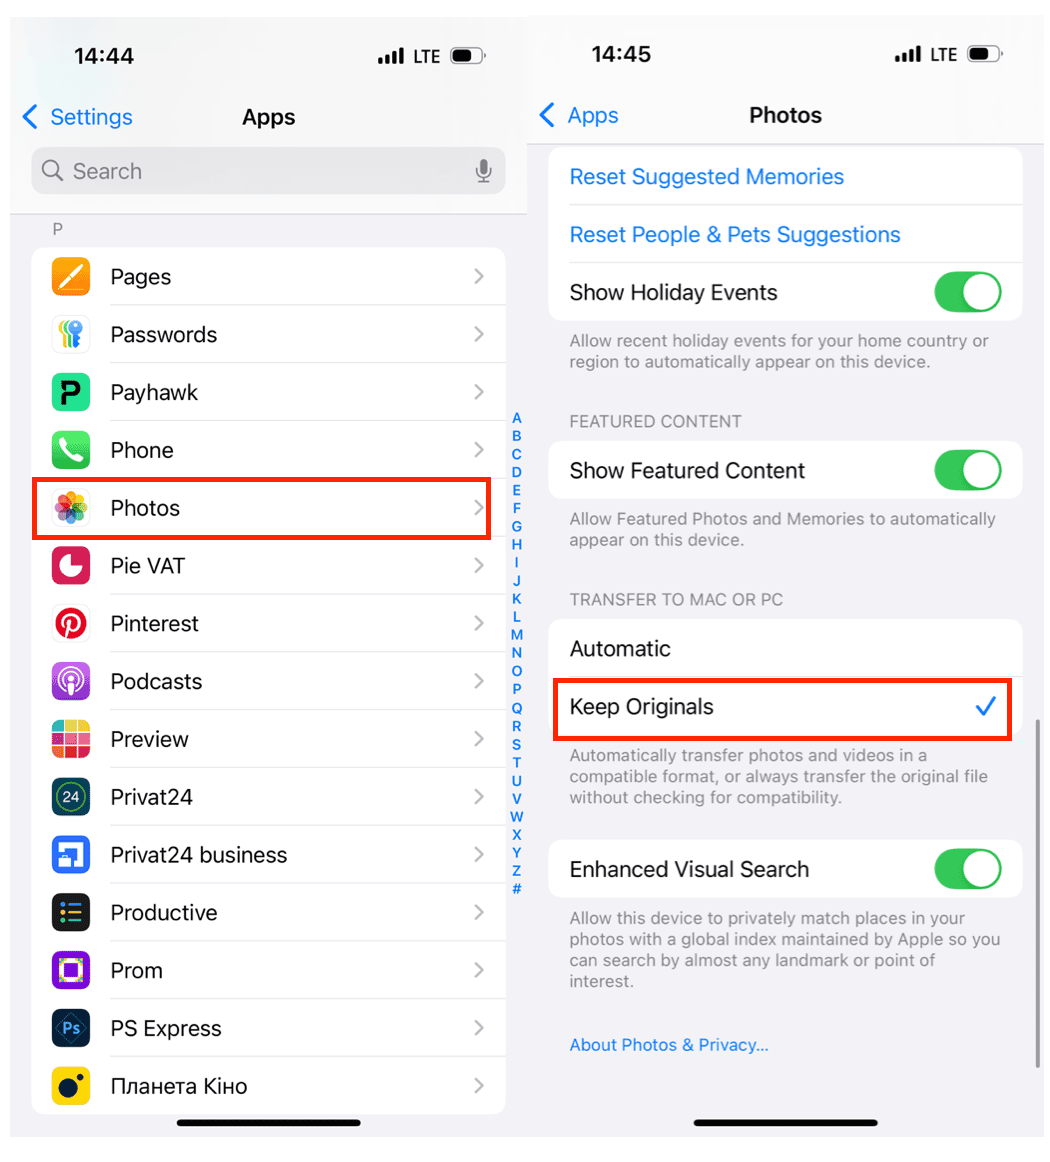
- Navigate to your iPhone’s settings.
- Tap Photos.
- Scroll down to Transfer to Mac or PC and tap on Keep originals. This will transfer photos and videos in a compatible format. Photos will become JPGs before transferring.
How to convert HEIC to JPG or PNG
In most cases, transferring photos from your iPhone to your computer will be simple and automatic, but not always. Some applications, cloud servers, and software haven’t caught up with HEIC technology. In these cases, you will have to manually convert your files from HEIC to whatever file format you need — JPG, PNG, or PDF.
Can Photoshop and Lightroom open HEIC files?
Photoshop and Lightroom are both incredible tools for photographers, and fortunately, as long as you’ve been updating your computer and your Photoshop and Lightroom apps, you should be fine when it comes to opening your HEIC files.
If you’re using a Mac, you have to be running High Sierra 10.13 or later, plus Lightroom CC 1.4 or Lightroom Classic CC 7.4. Photoshop users who upgraded to Photoshop Elements 2019 will be able to open HEIC files in the RAW editor. Windows users who want to edit HEIC files will need to be running Windows 10 or later and using the Lightroom and Photoshop versions mentioned above.
How to convert HEIC file to JPG on Mac
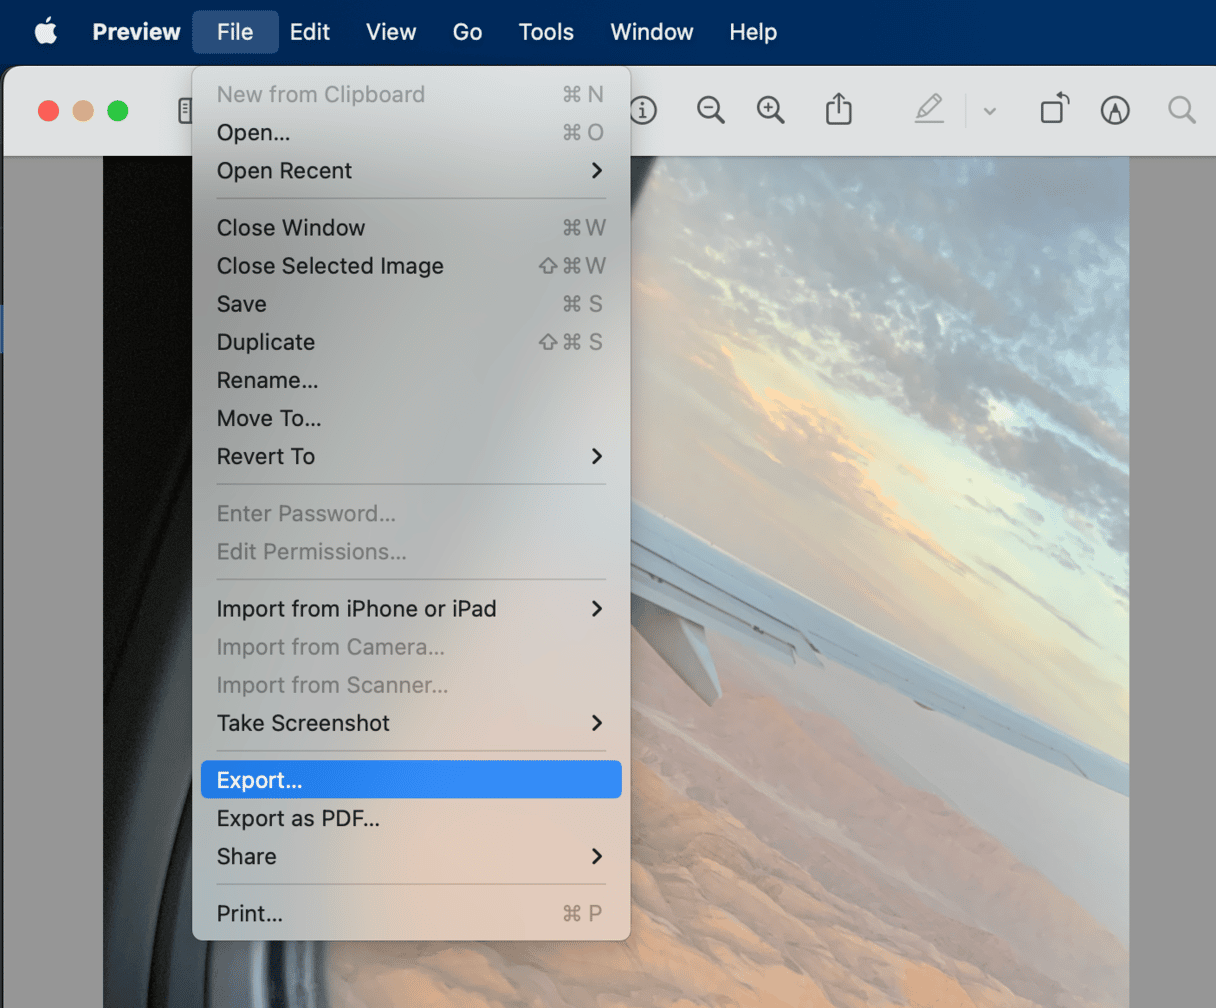
Converting your HEIC image file to a JPG on your Mac couldn’t be easier. The simplest way to do it is with macOS Preview. You can also convert your HEIC file to a PNG or PDF using this method.
- Open your HEIC image file in Preview.
- Click File and choose Export.
- Under Format, choose the file type that you’d like to convert your image to — JPG, PNG, PDF, or TIFF.
- Click Save.
How to convert HEIC to JPG on Windows
If you’ve upgraded to Windows 10, the easiest way is to use the built-in iOS setting to transfer your photos from your iPhone to your computer in a compatible format. You can also email HEIC images as attachments from an iOS device to your computer, and they will be automatically converted into JPGs.
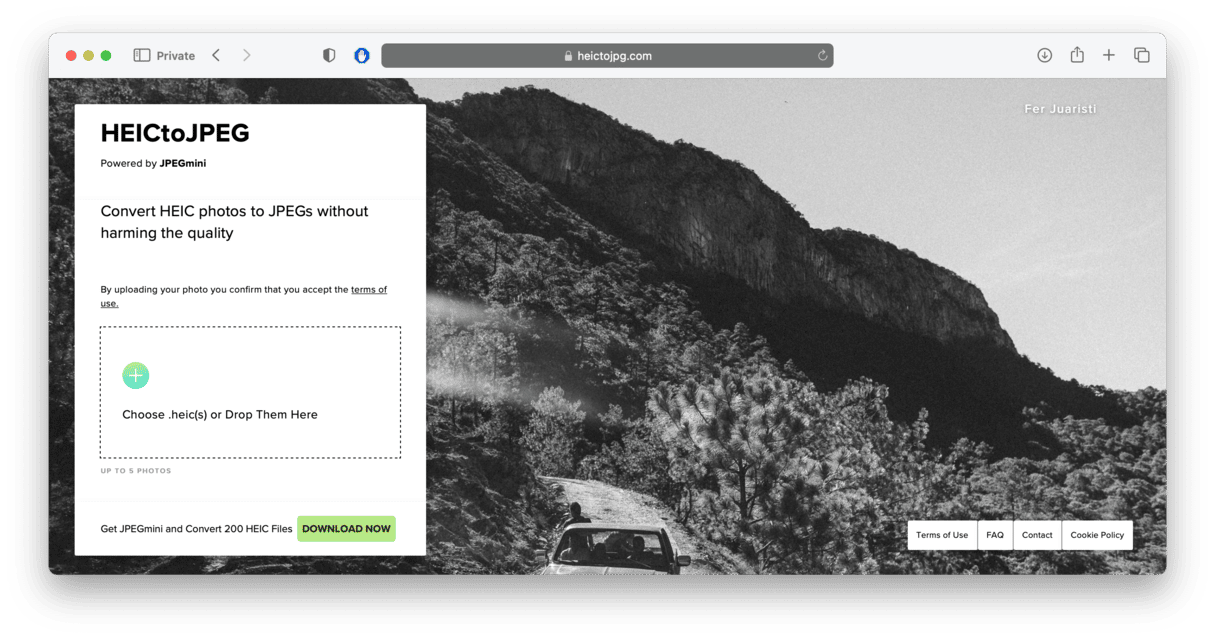
If, for some reason, you end up with a HEIC file on your Windows computer that needs to be converted, you can do it through your browser on one of several online converter tools. With HEICtoJPG, you can convert up to 50 HEIC images to JPGs at a time. This doesn’t convert images to any other types of files, just JPG.
- Visit HEICtoJPG on your Windows computer.
- Click in the box to choose the images that you want to convert.
- Tap Convert to save your photos in the new format.
As annoying as it may be to convert HEIC files to more compatible image files for use on your computer, technology is quickly catching up. HEIC images may become the file of choice in the future, especially since the storage and quality are so much better than other image files.


