Transferring files from either Mac to Mac or iPhone to Mac used to be cumbersome and, if we’re being honest, a bit of a headache. Going from phone to computer required getting out the old USB cable. While Mac to Mac would involve some type of flash drive or email if the files were small enough.
But thankfully, all Apple devices have the AirDrop feature. It leverages both your Bluetooth and Wi-Fi network to wirelessly and seamlessly transfer files between your devices.
This article will explain just exactly what AirDrop is. And it will teach you the best ways to use AirDrop and how you can customize your settings to save your AirDropped files exactly where you want them on your Mac. So, keep reading!
What is AirDrop?
If you’re still not sure what AirDrop is, simply put – it’s a way to send pictures and files wirelessly between your Apple devices. Sure, there are other ways you can send those to your devices, like over email or text. But usually, there’s a file size limit for email attachments, and texting them can sometimes compress your file.
So, the quickest and easiest way to transfer files is with AirDrop. But the one caveat is that you have to be within Bluetooth range. It’s not something that can be done remotely. Which isn’t typically a problem if you’re sending stuff from your iPhone to your Mac. You will probably only run into an issue if you want to transfer a file from your Mac to a friend’s.
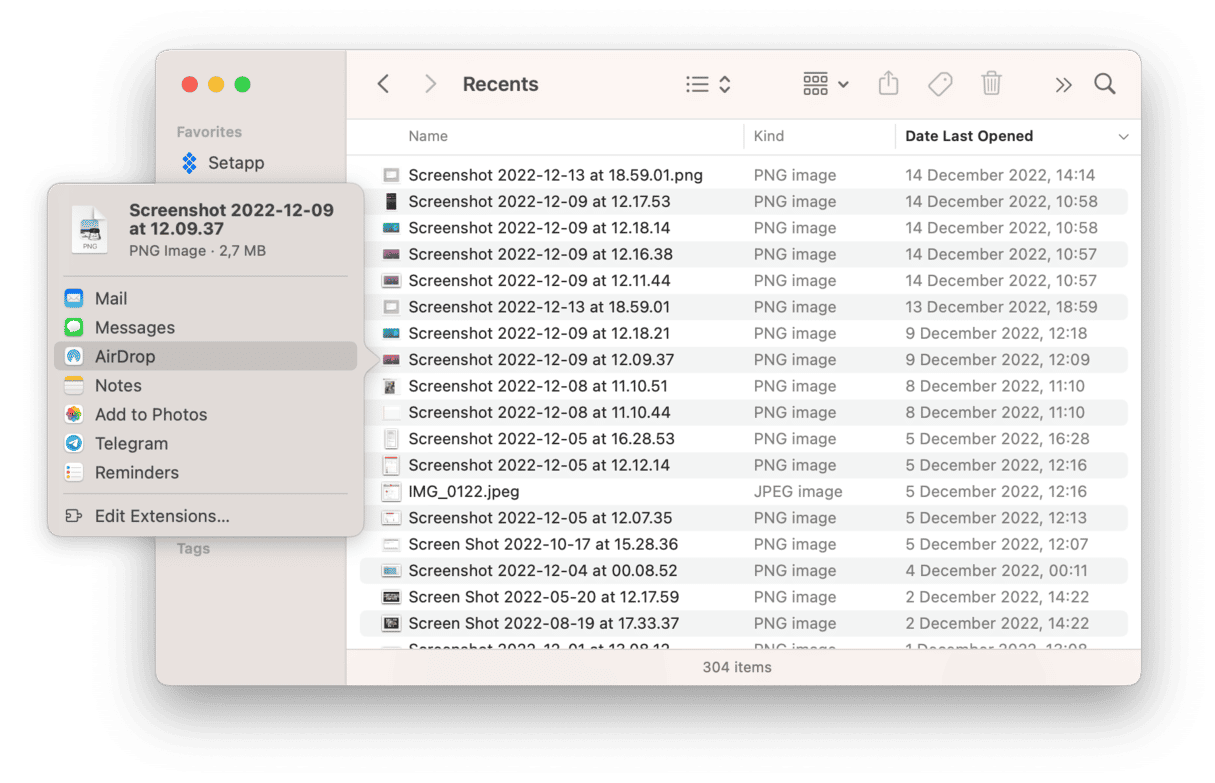
Additionally, if you’re just learning about AirDrop, then you might not realize just how simple it is to use. Typically, there will be an AirDrop option in the Share menu, or the more consistent way is to use Finder. Here are those instructions:
- Find the file you want to send.
- Right-click or hold down Control and click on the file.
- Select Share > AirDrop.
- Click on the device you want to transfer your file to.

Where do AirDrop files and photos go on Mac?
Unlike your iPhone, when you AirDrop file or pictures to your Mac, they all go to the same place – your Downloads folder. If you’re not sure how to find that folder, here’s what you can do:
- Open a new Finder window.
- Click Go > Downloads.
How to remove duplicate files and photos on Mac
Whenever you’re sending files, it’s easy to end up with a lot of duplicate files and photos. Maybe you had a problem transferring a file and sent it two or three times. Or you couldn’t find the file again, so you AirDropped it to yourself again. And then, again. And once more because it was just faster than looking for it.
The point is – it’s really easy to accumulate duplicates and waste storage space if you’re sharing files between devices. And manually looking for those duplicates to clean up after the fact can take a lot of time and be a major headache.
Thankfully, you can use a duplicate finder app like Gemini 2 to scan your Mac and help you quickly get rid of those files. A really great feature of Gemini is that you can choose to scan just your Downloads folder if you know you’ve been AirDropping a lot. Or, you can scan your entire hard drive to make sure you’re not wasting any space with duplicates.
Using Gemini 2 couldn’t be easier. After you have it downloaded and installed, you just need to follow these steps.
- Open Gemini 2.
- Click + > Choose Custom folder… > Downloads.
- Then, click Scan for Duplicates.

When it’s finished with its scan, you can remove all of the duplicates it finds with one click of the Smart Cleanup button. Gemini 2’s algorithm will automatically choose the best version of the file you should keep and delete the rest. Or you can click Review Results and preview everything Gemini found during its scan. Then, decide for yourself which copies you want to delete.
How to change AirDrop location on Mac
Because AirDrop is so deeply embedded into macOS and iOS, there are no settings that you can actually change. Which means every file you send to your Mac will automatically go into your Downloads folder. And there is, unfortunately, no way to change that.
I did a cursory Google search, and a few people have recommended different AppleScripts that will move AirDropped files to another folder once they’re on your Mac. I didn’t try any of them myself, so I can’t vouch for their efficacy. But, if you find an AppleScript you want to test out, I’d recommend you be very cautious with it and research who and where it’s coming from. The last thing you’d want to do is run a malicious script on your Mac.
Hopefully, after reading this article, you’ll stop using a flash drive, cloud storage, or email to transfer files and photos. AirDrop is not only easy to use, but it also preserves the original quality of what you’re sharing. And it doesn’t have to just be used with your personal devices. As long as a Mac or iPhone has AirDrop turned on and you are within Bluetooth range, you’ll be able to seamlessly share a file with them.

