Even though you might think you have plenty of space left on your Mac’s hard drive, you’d be surprised at just how fast that can fill up. Especially if you have duplicate files. Those will use up all your storage before you know it. This article will cover why your Mac is duplicating files and what you can do to clean them up.
What types of duplicates there are
When talking about duplicate files, there are actually two types: intentional and accidental. It’s important to make the distinction because there’s a good chance you want to keep those intentionally duplicate files.
- Intentional duplicates are files that you’ve created multiple backups or need to have saved in different folders. But because those files have the same name, any app would see them as unwanted files.
- Accidental duplicates are files that you’ve maybe downloaded multiple times or didn’t mean to save in various locations. Files that you only need one copy of, but because you have it saved in different folders across your hard drive, they’re now just taking up space.
Why you have duplicate files on Mac?
Duplicates can happen because of several different reasons. You read about some of them earlier. Most of the time, duplicate files are caused by the user. But unless you make a continued effort to stay on top of this stuff, duplicate files are just a part of using your Mac.
Why you have duplicate music and playlists in iTunes
Now, when it comes to the music and playlists you have in iTunes, there are a couple of unique reasons you might have duplicates. The most common reasons are that you have different versions of the same song or the same version appear on various albums. For example, a song might have an album version, a single version, an acoustic version, and maybe a live version.
On the other side of that, if you have duplicate playlists, that’s usually a result of syncing an iPhone, iPod, or iPad with multiple computers. In fact, syncing your device with multiple computers can cause a ton of issues like duplicate files, which is why it’s generally discouraged.

How to remove duplicate files on Mac
Removing duplicate files can be a bit arduous, but here are a couple tips to hopefully make it a little more manageable for you.
1. Manually search through your files
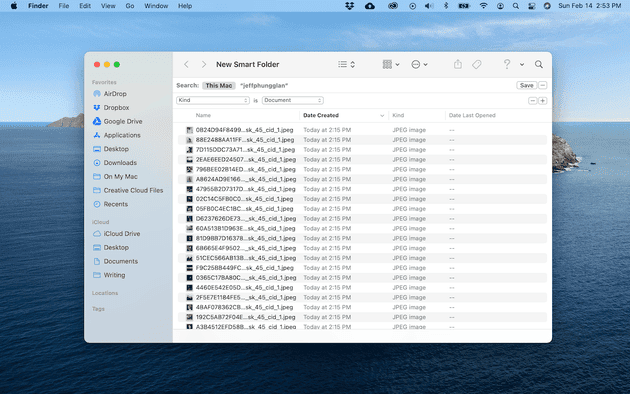
Going through all the files on your computer is going to take some time. But you can always create a Smart Folder in Finder to make it a little easier for you. Here’s how you can start using Smart Folders:
- Open a new Finder window.
- Click File > New Smart Folder.
- Select This Mac.
- In the top-right corner, click +.
- Change the first drop-down menu to Kind.
- Then, adjust the second drop to any of the media types listed.

Since your duplicate files will probably have the same name, click on the name column to organize your files in alphabetical order. This will make it a little easier to spot the duplicates as you scroll through them. When you’re finished searching through one type of media, just change that second drop-down menu.
2. Use a duplicate finder Gemini 2
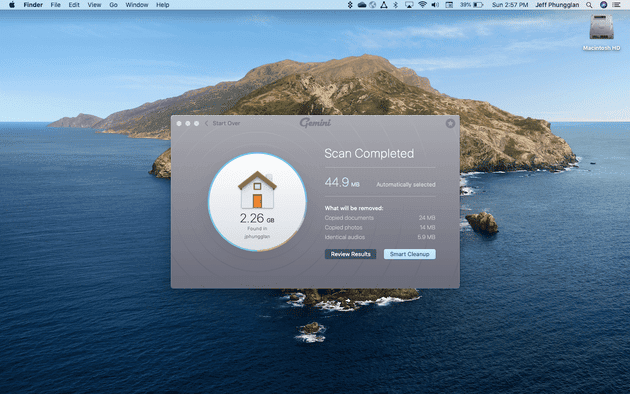
A little bit easier than manually searching through your files is using the duplicate finder, Gemini 2. It will scan your entire hard drive or just select folders looking for duplicates and then help you quickly get rid of them. Once you have Gemini 2 downloaded and installed, this is how easy it is to use:
- Download and open Gemini 2.
- Click + > Home Folder > Choose.
- Then, click Scan for Duplicates.

Gemini 2 will then scan for duplicates. When the scan is finished, you can click Review Results to go through the files yourself. Or you can let Gemini 2’s algorithm select the best version and delete all of the other copies by pressing the Smart Cleanup button.
If you’re looking to free up space on your Mac’s hard drive, it’s important to remember that after you use Gemini 2, you’ll need to empty your Trash. Otherwise, those files will still be using space on your computer.
3. Show duplicates in iTunes/Music
Earlier you read about all of the different versions of a song you might have on your computer. Depending on how much you love that track, you might want to keep all of those versions. But if you don’t, there’s a feature that makes it easy to see all those duplicate songs.
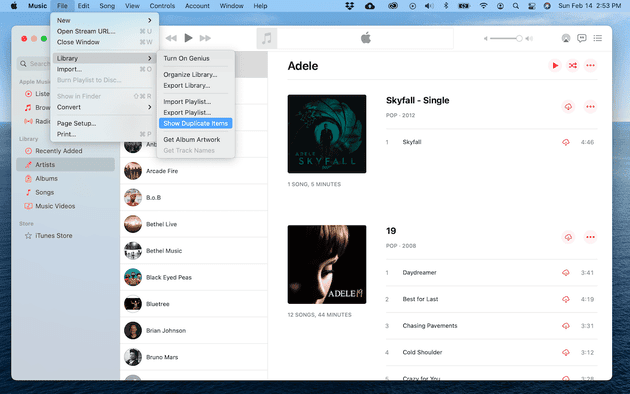
Starting with macOS Catalina, Apple rebranded iTunes as the Music app. But these instructions for showing your duplicates apply to both:
- Open iTunes or the Music app.
- Click File > Library > Show Duplicated Items.
- Select the song(s) you want to delete.
- Right-click or hold down Control and click.
- Then, click Delete from Library.

4. Get rid of duplicate pictures using Smart Albums
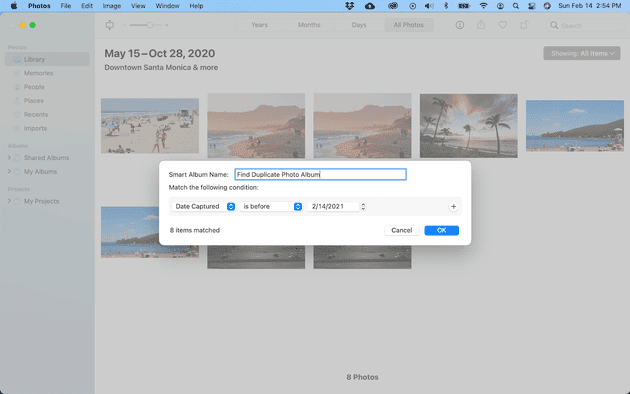
Pictures are another area you might have duplicates. Whether you’ve edited a picture or downloaded the same one multiple times, Photos tries to prevent duplicates, but sometimes they sneak through. But, similar to Smart Folders in Finder, you can use Smart Albums to help you spot those duplicates. Smart Albums help narrow down your entire library, so you’re only going through a small selection of pictures and not the thousands you probably have in your library.
Follow these instructions to get started with Smart Albums:
- Open Photos on your Mac.
- Click File > New Smart Album.
- In the pop-up window, name your Smart Album and set the filter criteria.
- Select the pictures you want to delete.
- Right-click (or hold down Command and click) on any of those images and click Delete.
- A window will pop up. Click Delete to confirm.
- In the sidebar, click Recently Deleted.
- Click Delete All in the top right corner.

Duplicates are just a part of using your computer. No matter how diligent you might try to be, sometimes they’re unavoidable. And if you don’t have a system in place to periodically clean them up, they’re going to eat up a lot of hard drive space. Hopefully, this article has helped give you some tips to keep your Mac storage clean.


