Wi-Fi has become perhaps the most important technology of all those that we rely on daily. What’s the first thing you do when you check into a hotel room, arrive at a new office, or even visit a friend? Ask for the Wi-Fi password, right? Without Wi-Fi, connecting phones, tablets, and laptops to the outside world is much more complicated. So, when your Wi-Fi isn’t working, it’s a big issue. In this article, we’ll look at possible Wi-Fi issues in macOS Sonoma and show you how to fix them.

Identify the problem
The first step in solving macOS Sonoma Wi-Fi problems or any other issue is to identify the problem and what it’s affecting. Is it just the app you’re using, your Mac, or all the devices on your network? Is Wi-Fi slow or not working at all? Once you know that, you know where to start trying to fix it. For example, if you’re using Chrome and it suddenly stops loading pages, it could be a Chrome-specific problem that restarting it will fix. So, here is how to determine the problem.
1. Restart the application
This is the simplest and the least disruptive possible fix, so it’s a good place to start. If the application is a web browser and restarting it doesn’t work, you can also try emptying its cache (usually found in the browser’s privacy and security settings).
2. Reboot your Mac
If the problem is affecting more than one application or restarting the application doesn’t work, the next step is to restart your Mac. This will clear out temporary files and, on Apple silicon Macs, perform a check of your boot disk and fix any problems it finds.

3. Check your other devices
Is it just your Mac that’s having Wi-Fi issues, or is it affecting other devices connected to the network? If other devices are affected, it’s likely to be either your Wi-Fi router or broadband connections. Check the cable between your router and broadband socket, restart your router, and check if that fixes the problem. If that doesn’t work, try moving your router away from walls, the ceiling, or electrical appliances like a microwave. If that doesn’t fix the issue, check with your broadband provider if there is a network problem in your local area or its wider network.
Fix macOS Sonoma Wi-Fi issues
By now, you should have a good idea whether the Wi-Fi problems you’re having are affecting just your Mac, just specific applications in macOS Sonoma, or all devices on your network. We’ve explained what to do if the problem is application-specific or affects the whole network. Now, let’s focus on your Mac.
1. Switch Wi-Fi off and then on again
It’s the oldest advice in the book, but often it works, and you don’t need to do anything else.
- Click the Wi-Fi icon in the menu bar or on Control Center and select Wi-Fi.
- Toggle the switch at the top of the menu to off.
- Wait for a few seconds and then turn it on again.

2. Turn your router off and on again
If the trick with Wi-Fi didn’t help, it’s time to rule out issues with your router. The easiest way to do that is to power it off, wait at least 2 minutes, and power it on again. To do it, use the On/Off button on the back of the router. While you’re waiting, make sure that all of the cables are connected correctly and properly, just in case.
3. Flush the DNS cache
Often, when your Mac won’t connect to the internet, the problem is a DNS issue. DNS is the service your Mac uses to translate URLs into IP addresses so that it can navigate to a website. Your ISP sets the DNS server in your router, and your Mac uses that to find IP addresses. Your Mac stores information about IP addresses for sites you visit often in a cache file, so it doesn’t have to look them up each time. However, that cache can get corrupted, causing problems for your Mac. The solution is to flush the DNS cache. The easiest way to flush the DNS cache is to use CleanMyMac — its Performance tool has an instrument that allows you to do it with a couple of clicks. Get your free CleanMyMac trial. Install the app and follow the steps below:
- Open CleanMyMac and click Performance in the sidebar.
- Run a scan and click View All Tasks.
- Select the box next to Flush DNS cache.
- Click Run.

Sometimes DNS servers run into problems, and that stops your Mac from accessing the internet. Fortunately, you don’t have to stick with the DNS server used by your ISP; you can choose another. One of the best and most popular is Google’s DNS. Here’s how to switch to that on your Mac.
- Click the Apple menu and choose System Settings > Wi-Fi, then click Details next to your Wi-Fi network.
- Click DNS.
- Use ‘-’ to remove the existing DNS address.
- Click ‘+’ and type 8.8.8.8. Click OK.
- Quit System Settings.
If that doesn’t work, sometimes renewing the DHCP lease can help (DHCP allocates your Mac’s IP address). To do that, click TCP/IP above DNS and select Renew DHCP Lease.
4. Delete and reconnect to Wi-Fi network
Sometimes, the above tricks may fail to solve your issue. Don’t worry; we have other fixes for you. This time, we recommend deleting Wi-Fi network and reconnecting to it. It may help solve some minor glitches with Mac setup if they cause the problem.
Here’s how to delete Wi-Fi network:
- Open System Settings > Wi-Fi.
- Click Details next to your Wi-Fi network.
- Click Forget This Network > Remove.
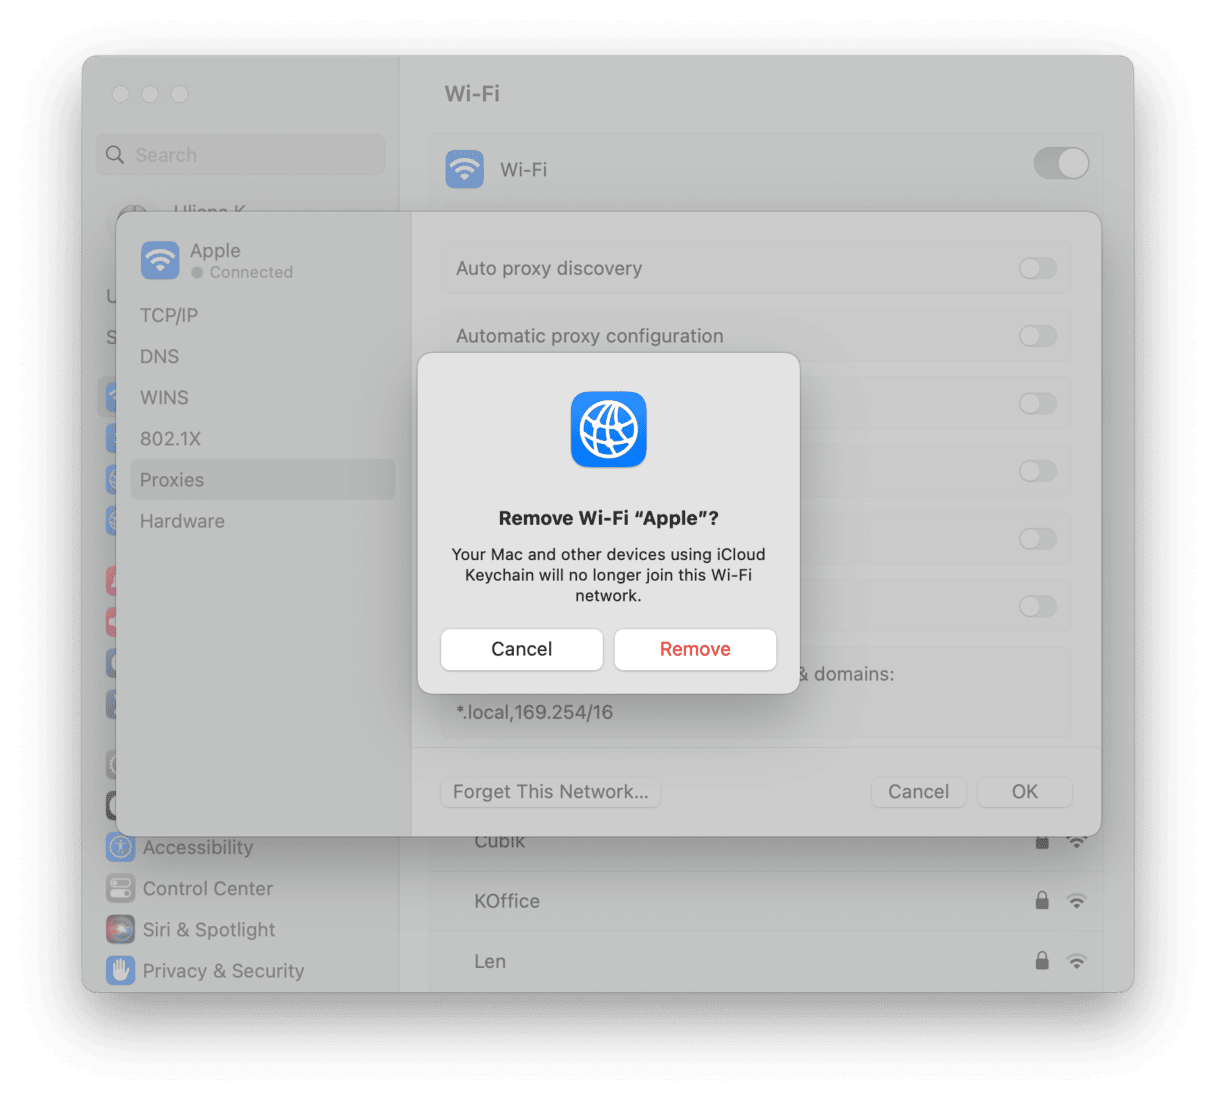
Now, find the name of the network you’ve just removed under Other Networks. Click Connect next to it and enter the password to reconnect to it.
5. Turn off the Firewall
Sometimes, it is the firewall that causes issues with Wi-Fi, so it’s worth checking if that is the case. Just follow these steps:
- Open System Settings and go to Network.
- Click Firewall and turn it off.
Remember to turn it back on as an additional online security precaution.
6. Clear out old Wi-Fi networks
Did you know that your Mac keeps a list of all the Wi-Fi networks you connect to and syncs that with iCloud? That means that every Wi-Fi network you’ve connected to is stored, even if the network is unsecure. The rationale is that it makes it easier for your Mac to connect next time you’re within range of the network. But that’s not what you want if the network is not secure. And it can cause problems when you want to connect to a different network. The solution is to delete all those old networks. So, go to System Settings > Wi-Fi and delete all networks you do not connect to. To do if, follow the steps outlined in tip #4.
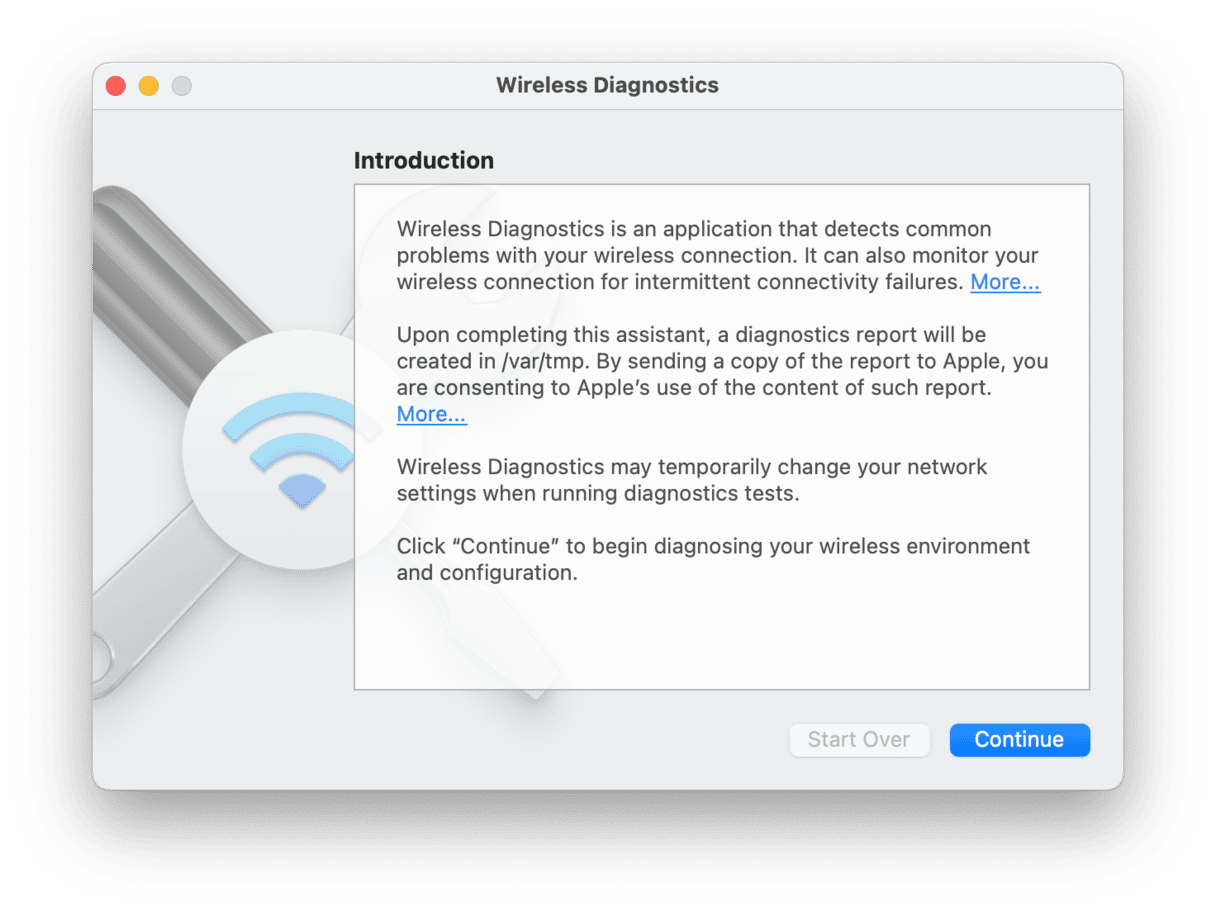
7. Run Wireless Diagnostics
If none of the above helped, you may want to know what is wrong with your wireless network. Luckily, there is a built-in tool that can do the job — Wireless Diagnostics. Not only does it detect all the problems with your network, but it can also solve them right away. Here’s how to use this smart tool:
- Find the Wi-Fi icon in the menu bar and click it with the Option key pressed.
- Click Open Wireless Diagnostics.
- Click Continue, and wait for the diagnostics process to complete.
Bonus tip: Check your apps and extensions
If you have apps monitoring the network or otherwise interfering with it — e.g., Little Snitch or a third-party VPN — they may cause macOS Sonoma Wi-Fi issues. To check if that is the case, uninstall the app. If it helped, you know now that the network filter or VPN was at the heart of the problem.
You can now visit the developer’s website to find out whether an update compatible with a new macOS version has been released. If it is available and you need that app, download it once again and check if it still causes issues.
Outdated browser and network extensions may also cause similar issues. So, check them as well.
macOS Sonoma Wi-Fi problems are not common, and it’s likely that slow Wi-Fi or Wi-Fi not working at all has another cause. Follow the steps above to identify the problem and its cause. Once you’ve done that, you can fix it.


