We rely so much on Wi-Fi to do about anything on our Macs that it's a serious problem when we get disconnected. Happily, Wi-Fi problems on macOS Ventura are rare, and when they do occur, they are usually straightforward to fix. In this article, we'll explain the most common Ventura Wi-Fi issues and tell you how to fix them.
Identify the problem
You first need to find out whether the problem is with an application, your Mac in general, or your router. Follow these steps to discover which it is.
1. Restart the app you're using
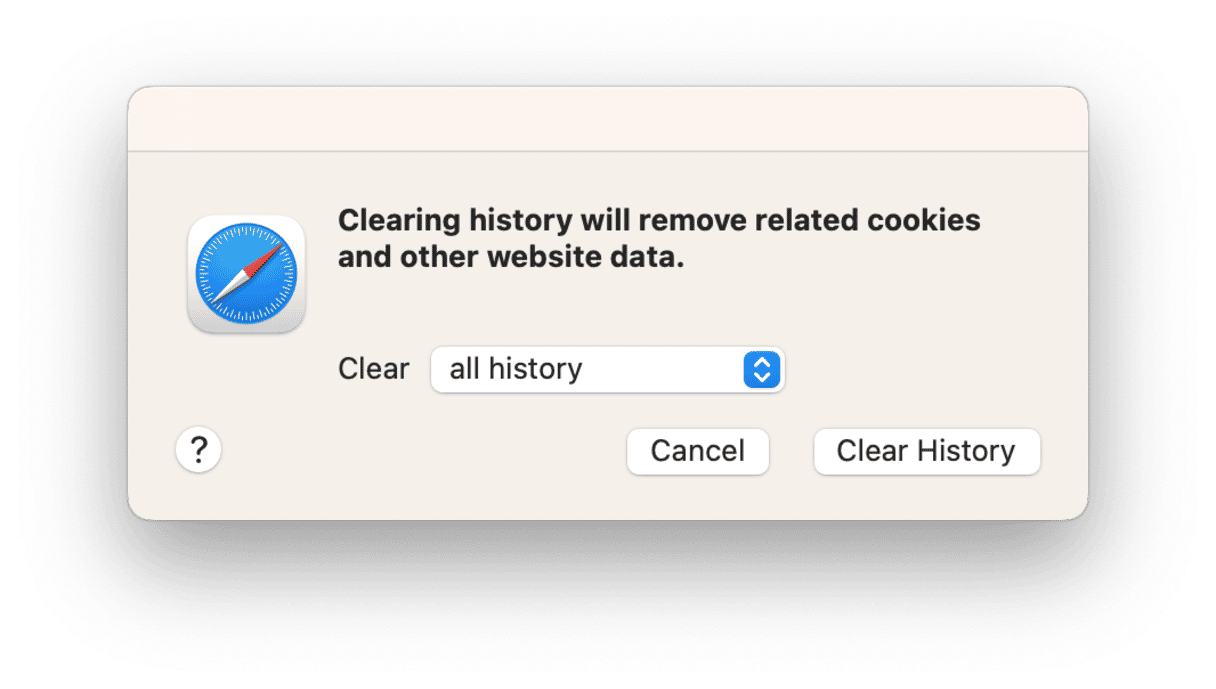
If you're only having problems with one application, say Safari or Twitter, restart that application. If this application is a web browser, you should also clear out browsing data to make sure the issue won't appear again. In Safari, go to the Safari menu > History > Clear History. Select the time range and click Clear History to erase browsing information.
2. Restart your Mac
If the problem occurs with more than one application, restart your Mac. This will clear out temporary files and could be all you need to do to solve the problem.
3. Try a different device
The problem may be with your router rather than your Mac. Try using another device, such as a smartphone or tablet. If that works, you can confirm the problem is with your Mac. If it doesn't, it's probably your router. If the other devices don't connect to the internet, restart your router and try again. If none of your devices work after that, contact your broadband provider.
By now, you should know whether your Mac is the problem. If so, follow the steps below to fix Wi-Fi problems in macOS Ventura.
How to solve the Wi-Fi problems on macOS Ventura
1. Switch Wi-Fi off, then on again
Seriously. Sometimes this is all you need to do! Click the Wi-Fi symbol in the menu bar and toggle the switch to turn it off. Wait a few seconds and switch it on again. While you have that menu open, ensure your Mac is connected to the correct Wi-Fi network; if not, connect to the correct one.
2. Flush your Mac's DNS cache
If, among all your devices, only your Mac has a Wi-Fi issue, then you know that the problem is with your Mac. The next step is to flush its DNS cache. DNS is the service your Mac uses to match URLs to IP addresses. For websites you regularly visit, your Mac stores the information, so it doesn't have to look it up each time. If there's a problem with that cache, it could prevent your Mac from connecting to websites.
The easiest way to flush your Mac's DNS cache is to use an application called CleanMyMac, which has lots of modules that can fix performance problems on your Mac. You can download it for free here.
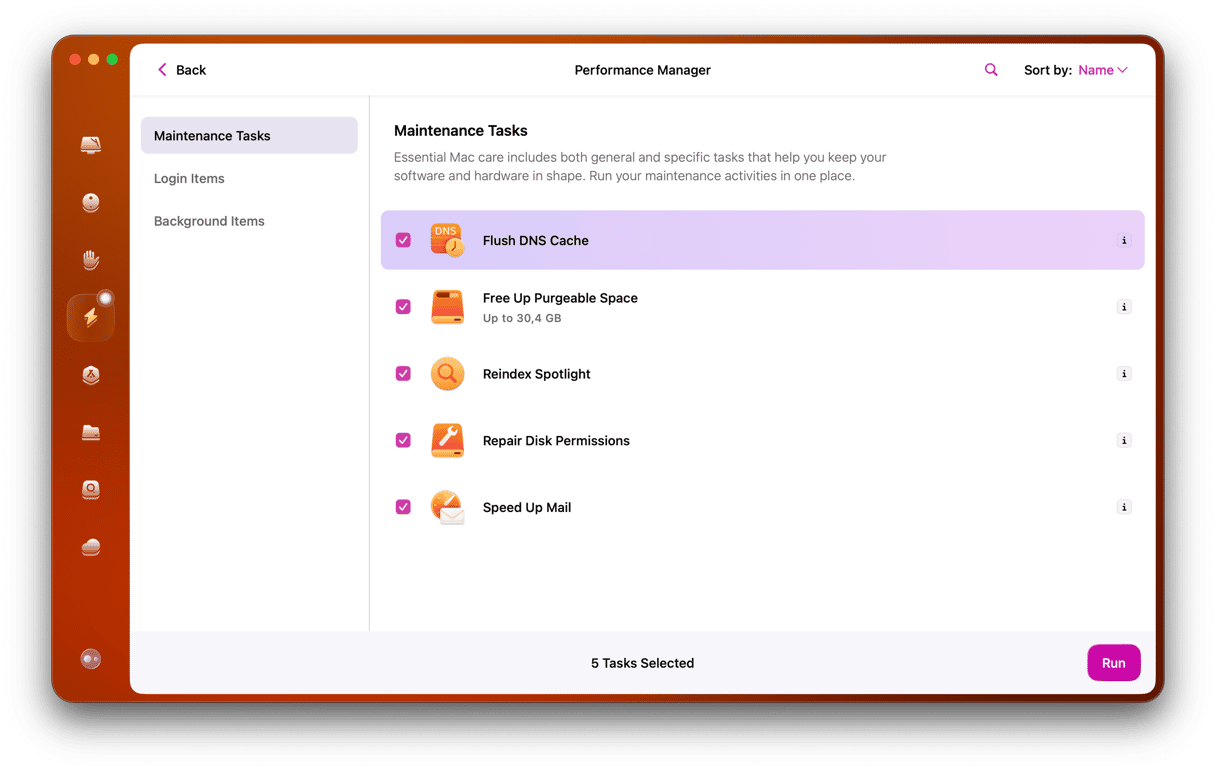
- Open CleanMyMac and choose Performance in the sidebar.
- Click Scan > View All Tasks.
- Check the box next to Flush DNS cache.
- Click Run.
3. Change DNS server
If flushing your Mac's DNS cache doesn't solve the problem, there is one more DNS change you can make. Your Mac is probably configured to use your broadband provider's DNS server, so try a different one. Did you know that Google provides free DNS servers? Here's how to switch:
- Go to Apple menu > System Settings > Wi-Fi and click the 'i' next.
- Click DNS.
- Use '-' to remove existing DNS addresses.
- Click '+' and type:
8.8.8.8 - Press Ok.
- Quit System Settings
If you're already using Google's DNS server or don't want to change, you can try renewing the DHCP lease. That can sometimes fix DNS-related problems.
4. Reset Mac network settings
If you still have connectivity problems on macOS Ventura, consider resetting your network settings — this should wipe network system files and completely reset the Wi-Fi module. Here's how to do that:
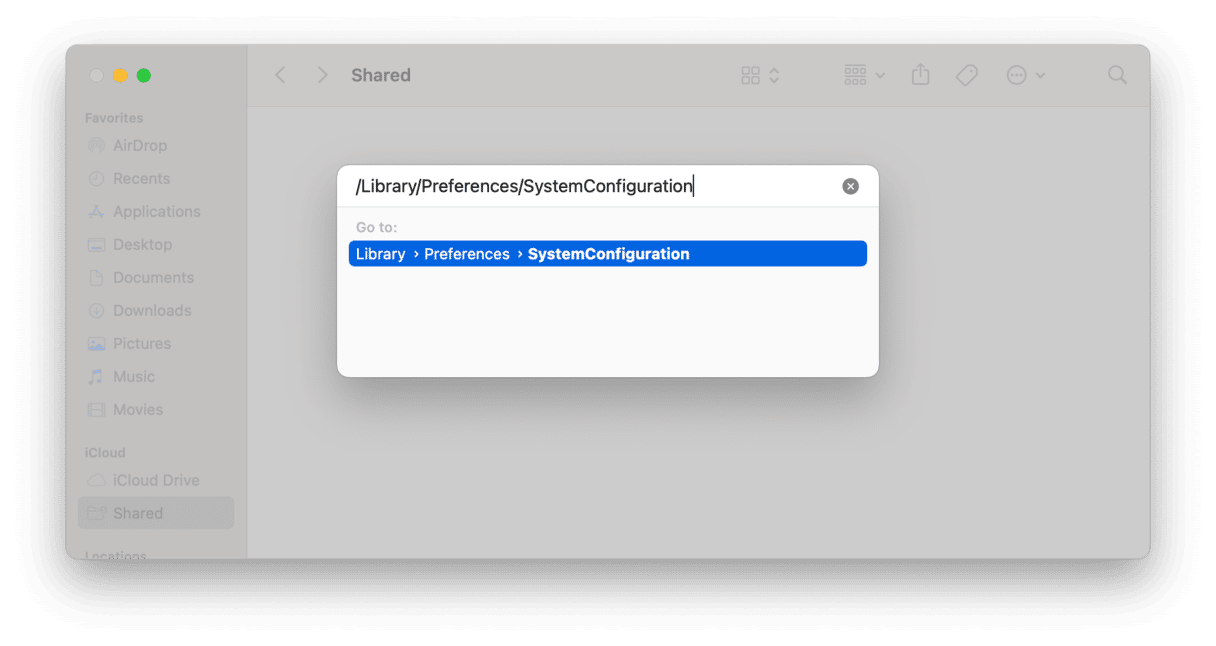
- Turn off Wi-Fi on your Mac.
- Open Finder and press Command-Shift-G.
- Paste this location and click Go:
/Library/Preferences/SystemConfiguration - Select these files and move them to Trash:
- com.apple.airport.preferences.plist
- com.apple.network.eapolclient.configuration.plist
- com.apple.wifi.message-tracer.plist
- NetworkInterfaces.plist
- preferences.plist
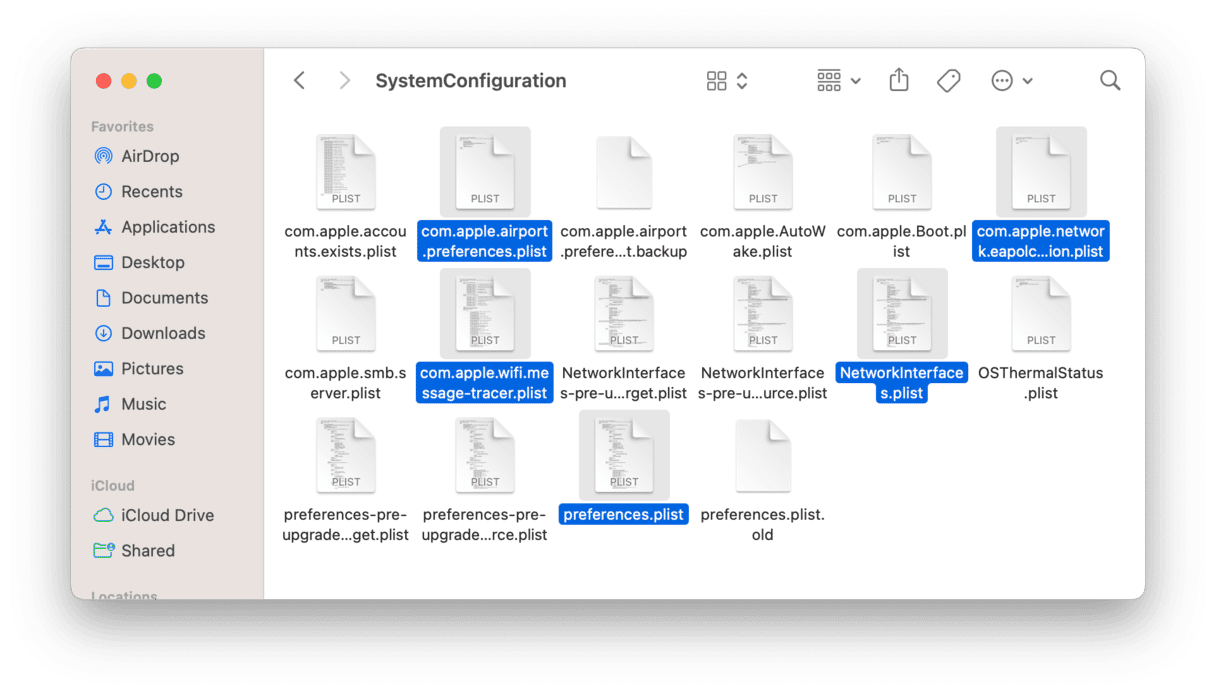
After these files are deleted, restart your Mac and try connecting to your Wi-Fi network.
5. Remove unsecured Wi-Fi networks
Did you know that when you connect to a Wi-Fi network, your Mac 'remembers' that network forever? That's handy if it's a network that you regularly use, like one at the office or in college. Although open Wi-Fi hotspots are not exactly secure — your data may get intercepted while you're browsing the web. If you have connected to insecure networks in the past and are within range of them in the future, your Mac will try to connect to them. So, it's a good idea to remove old Wi-Fi networks. You can do it manually, but if there are lots of them, it's much easier to use CleanMyMac to do it. Here's how.
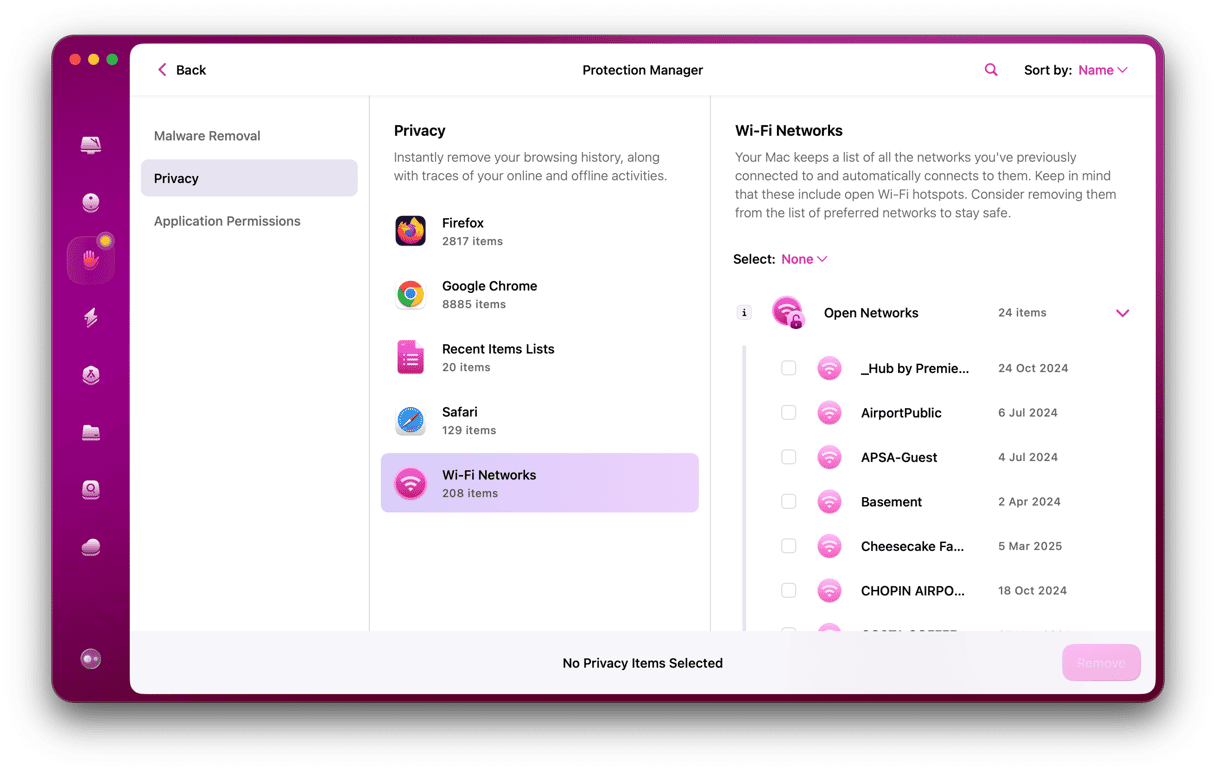
- Open CleanMyMac and choose Protection.
- Click Scan > Manage Privacy Items > Privacy and then select Wi-Fi Networks.
- Click the arrow next to Open Networks to display the networks and select them all.
- Click Remove.
6. Reinstall macOS Ventura
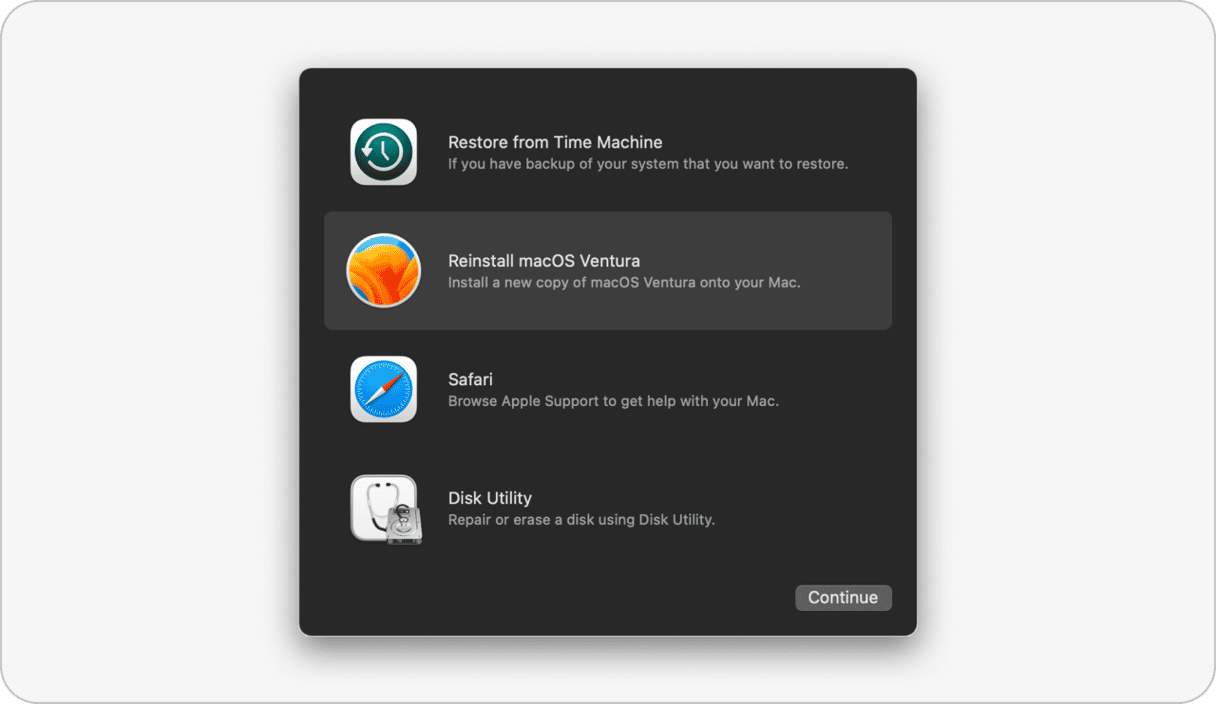
As a last resort, and only if nothing else works, you can try reinstalling macOS Ventura. You'll need to restart your Mac in recovery mode and choose "Reinstall macOS" from macOS Utilities. You can learn more about recovery mode, including how to start your Mac in Recovery, here.
Before you reinstall macOS Ventura, it's a good idea to back up your Mac. The best way to do that is to use the built-in Time Machine, which will make restoring settings and data easier afterward.
There are several reasons your Mac may have Wi-Fi issues with macOS Ventura. The first step in solving them is identifying whether the problem is with your Mac, your router, or your broadband provider. Once you've done that, you can fix them. Follow the steps above, and you should be connected again in no time.

Frequently Asked Questions
What is the easiest way to reset Wi-Fi in macOS Ventura?
If Wi-Fi is not working, try switching it off and on. If that doesn't help, change the DNS server, reset Mac network settings, or reinstall macOS Ventura.
What is the DNS server?
The Domain Name System (DNS servers) convert URLs and domain names into IP addresses, which browsers use to load internet pages. Every device connected to the internet has its IP address, which other devices use to locate the device.
How to change the DNS server to fix Wi-Fi on Mac?
Did you know that Google provides free DNS servers? Here's how to switch: Apple menu > System Settings > Wi-Fi and click the 'i' next to the network's name. Then click DNS and use '-' to remove existing DNS addresses. Click '+' and type: 8.8.8.8, then press OK.


