How to remove PowerSuite from Mac

Before you remove PowerSuite
Some suspicious apps are able to slip by most anti-malware software and go unnoticed. But, if you’re on Mac, there’s a tool designed specifically to fight such apps.
So here’s a tip: before you try other solutions, download the free version of CleanMyMac X. This is a new Mac antivirus that has been previously recommended by places like Forbes and notarized by Apple. You can use it to quickly delete PowerSuite and any other apps that might be slowing your Mac down.
Features described in this article refer to the MacPaw site version of CleanMyMac X.
PowerSuite is an app that promises to remove duplicate files, clean up disk space, and get rid of junk files. But, it installs itself on computers by using less-than-honest methods and could be cause for alarm. So, if it just mysteriously showed up on your computer, you’re not alone. Don’t worry, though. This article will explain how it likely got there, how you can remove it, and what you can do to make sure it doesn’t install itself again.
Why is PowerSuite on my Mac?
First things first, how did PowerSuit end up on your computer? The app uses a method called “bundling” to install itself on your Mac. That’s right, PowerSuite just helps itself to your Applications folder by sneaking in with other apps you actually want to install.
The best way to prevent bundling attempts is only to install apps from trusted sources. The other thing you should always remember to do is check the “Custom” or “Advanced” installation tabs when using a new app. Typically, if there are other components involved in installing the app, they’ll be listed in this section, and you’ll be able to choose not to install them.
How to remove PowerSuite manually
Fortunately, it’s fairly easy to uninstall PowerSuite if it’s already on your Mac. All you need to do is follow these steps:
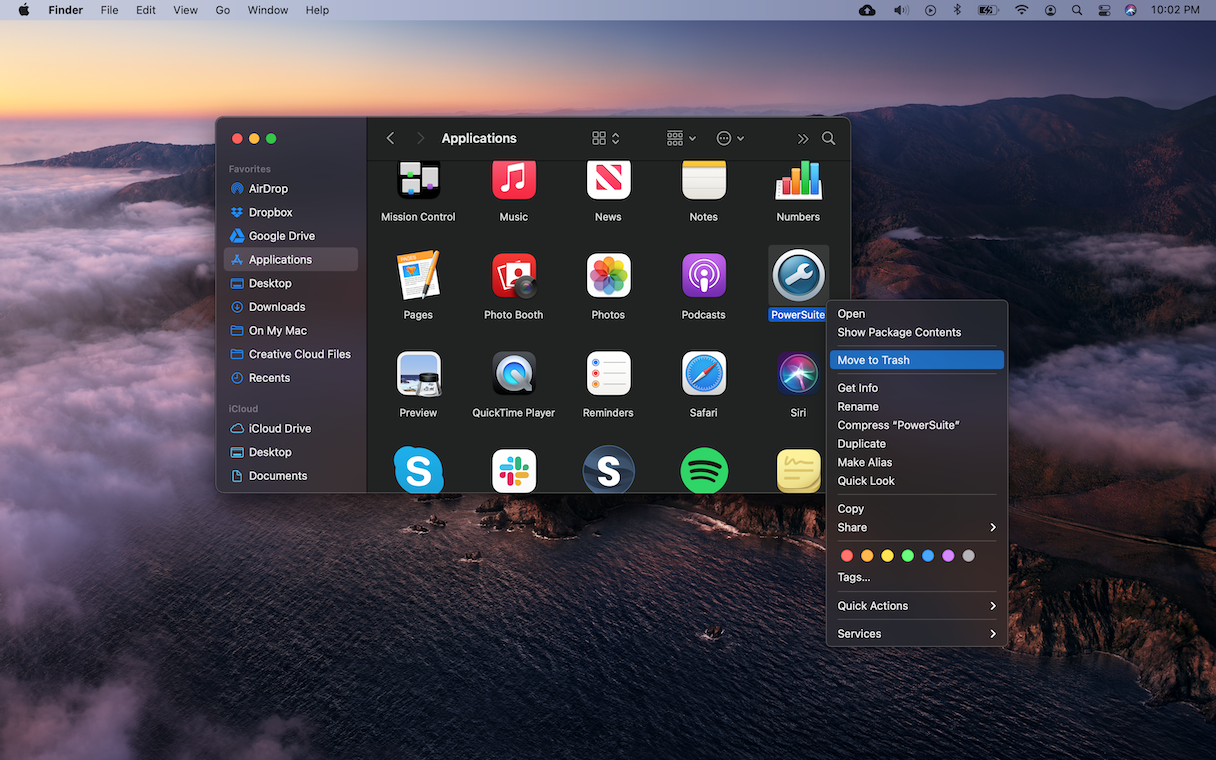
- Open a new Finder window.
- Click Go > Applications.
- Find PowerSuite.
- Right-click or hold down Control and click on the icon.
- Then, click Move to Trash.
If you’re running into any issues deleting the app, it may be because it’s running in the background. Here’s how you can force quit PowerSuite:
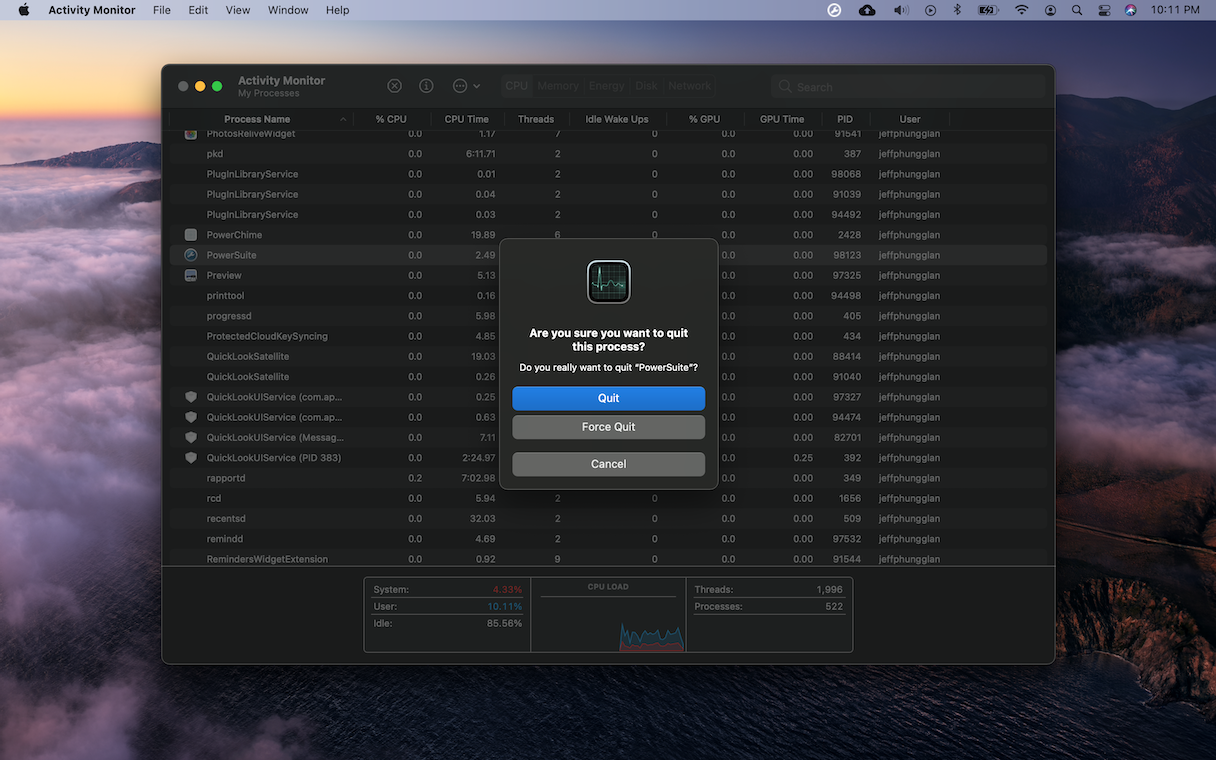
- In Finder, click Go > Utilities.
- Double-click on Activity Monitor to open it.
- Find PowerSuit in the list and click the X icon at the top of the window.
- Then, click Force Quit.
After you force quit, then you can follow the steps up to delete it from your Applications folder. And don’t forget to empty your Trash so you can get it off your computer for good.
Get rid of PowerSuite using CleanMyMac X
Even if you manually uninstall PowerSuite, there are still support files that might get left behind. But, if you let an app like CleanMyMac X help you out, it will remove the app and all associated files. It was designed to look for Mac-specific malware, like PowerSuite.
Once you have it downloaded and installed on your computer, here’s how you get rid of any malware on your Mac:
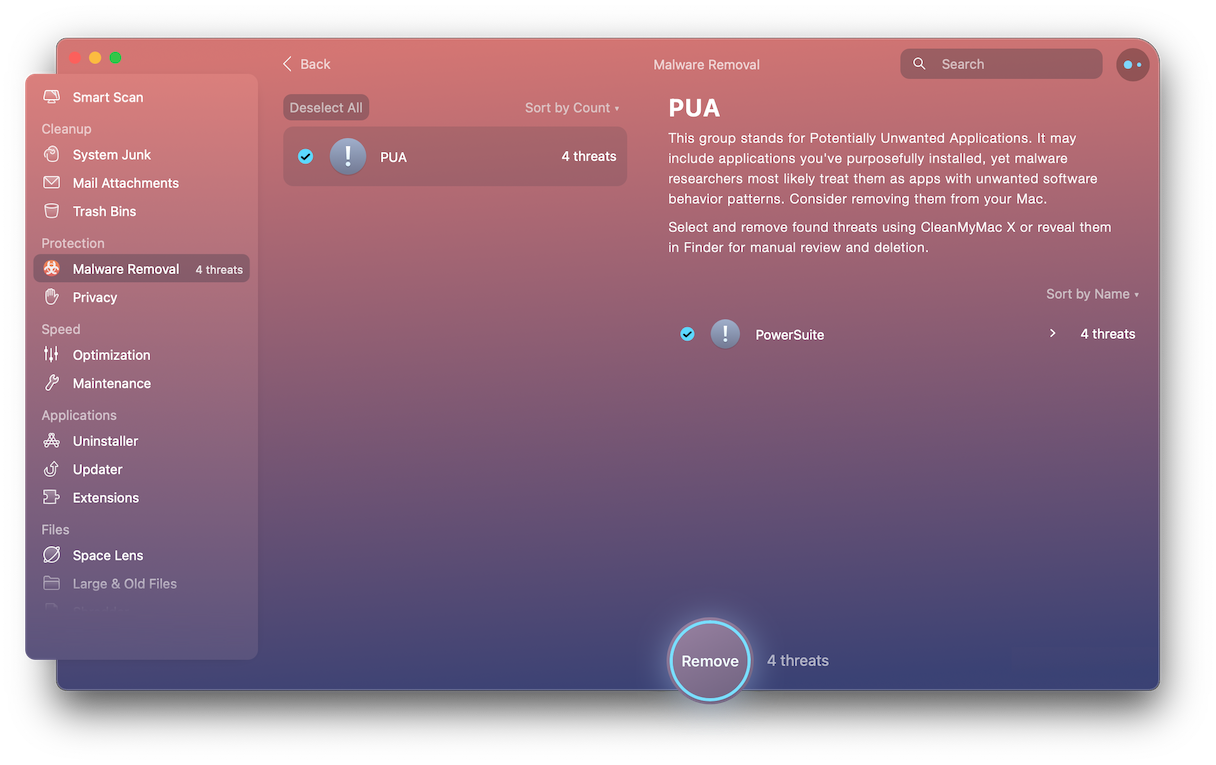
- Open CleanMyMac X (download its free version here).
- In the sidebar, click Malware Removal.
- Click Scan.
- Then, when the scan is complete, click Remove.
And that’s all there is to it. It’s that easy to clean up your Mac from any suspicious apps. The best part is CleanMyMac X will actually monitor your computer in real-time. So, if you do accidentally download and install malware in the future, it will show you a notification to let you know. That way, you can proactively safeguard yourself against these harmful apps.
Because PowerSuite attempts to sneak onto your computer and does perform accurate scans of your computer, many antiviruses will classify it as a potentially unwanted application. So, hopefully, after reading this article, you’ll at least attempt to remove it manually. Or better yet, maybe you’ll use the dedicated tool to get rid of it completely from your computer.
Please note that the article is provided “as is” for informational purposes only. We do not make any warranties regarding the manual removal of the virus. You have to understand that as a user, you are fully responsible for changing your Mac’s configuration.