For most people, not having access to the Library is not a problem. Most of us don’t need this level of access. But for some, it’s useful — even essential — so not having access can cause a problem. Not only that, but for those who’ve suffered any kind of malware, ransomware, adware, or other infection, gaining access to the Library is the most effective way of forever eradicating a serious problem that has infected your Mac.
In this article, we cover how you can gain access to your Library folder.
How to access the Mac Library folder?
Although this skill isn’t essential for everyone, some power users need to know how to find a Library on a Mac. If you want, you can even show the Library folder in a Mac permanently so that you never need to wonder where it is and why you can’t access it.

The Library folder, also known as a directory, has long since been a go-to location for Mac users when an application misbehaves. It is often easier to go to the source of a problem and fix it directly than to troubleshoot an issue. Before you do that, you need to access this hidden directory.
There are a couple of ways to make this visible, whether or not you want this to be permanent or only visible as needed.
To make this change permanent, follow these instructions:
Finding Library via Terminal
- Open Terminal, which you can find in /Applications/Utilities or open via Spotlight or Siri.
- Enter the following command in Terminal:
chflags nohidden ~/Library. This changes the flag visibility to on, thereby making Library a visible folder.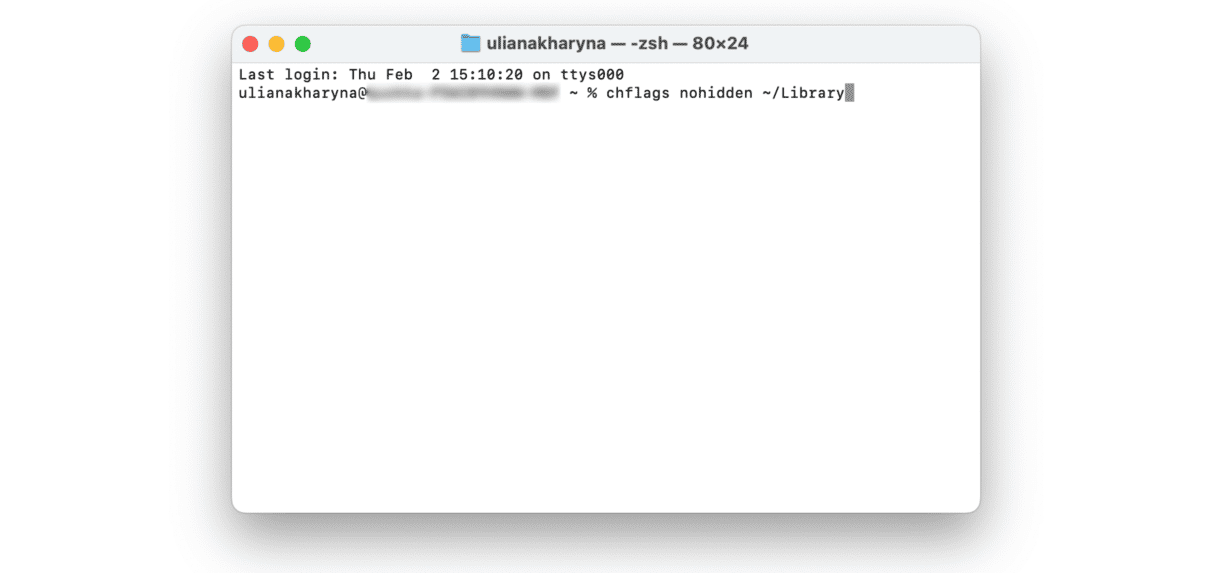
- Press Return.
- Quit Terminal.
- Now Library should be visible in the Finder and should sit alongside other folders and files.
- If you ever want to undo this change, use Terminal to input this command
chflags hidden ~/Libraryto hide the Library again.
The path Apple recommends
Another way to make Library visible, although not permanently visible, is to follow another set of instructions that Apple recommends.
Apple prefers people not to make regular use of Terminal. There is too much of a risk that something unexpected and fairly catastrophic could go wrong. Plus, making the Library permanently visible could have the same impact. So taking the “Apple recommended” approach means that Library will only appear as long as you keep the Finder window for the Library folder open.

Here is how you can temporarily view files in the Mac Library:
- Either within Desktop or with the Finder window open, hold down the Option key and select the Go menu.
- The Library will be listed as one of the items in the Go menu.
- Double-click on Library, which will open the Finder window containing the contents of the Library folder.
- Once you close that window, the Library folder will be hidden again. This method is only temporary and designed to give you immediate access.

Another similar method for older macOS versions is to follow these steps to view the Library:
- Open the Finder window.
- Click View > Show View Options.
- Place a checkmark in a box to Show Library Folder.
Now you should be able to access and open the Library folder on a Mac with ease and to do this whenever you need it.
How to peek underneath your macOS
Apps like CleanMyMac will scan your Mac, unveiling hidden files and folders. All you have to do is run a scan using the Space Lens feature. It will build a storage map of your drive letting you see all the files stored on your Mac.

CleanMyMac can also look for files that can be safely removed with just a few clicks. These are old system and log files that reside in the most distant places of your Library folder.
If you do not want to remove any system junk, you can use another tool that comes with CleanMyMac — My Clutter. It lists large and old files, duplicates, and similar images. This way, you can find not only those files that take up the most space but also those you may have forgotten about.

Get your free CleanMyMac trial. Run a few scans and cleanups your Mac tidy in no time.
Okay. Hope you found your Library folder and learned something new about your Mac. Stay tuned for more Mac tips.