How to set up Apple Business Manager
Apple devices have been rapidly taking over the enterprise environment. Growing not just in the number of computers, but also phones and tablets. Almost every user in your organization likely possesses 2 to 3, if not more, Apple devices. Which leaves IT admins and team leaders asking themselves, “How do we manage all of these?”
That’s where Apple Business Manager, or ABM, comes in. Keep reading, and I’ll explain what exactly ABM is. You’ll also get some clarity to help you decide if it’s right for your company. And if it is, how you can get started.
What is Apple Business Manager
Let’s start with what Apple Business Manager is, and just as important, what it’s not. ABM is an online portal for IT admins to help configure new Apple devices you order, automatically set them back up after you wipe them, create managed Apple IDs, etc. In theory, it’s supposed to be your one-stop shop for managing all of the Apple services within your organization.
Before you jump into setting up your account, it’s important to remember that Apple Business Manager is not a mobile device or remote manager. Although, it can work hand in hand with one of those platforms. For instance, if you’re using a service like JAMF or Kandji, ABM can help you enroll devices into those platforms, but ABM won’t replace them.

How to enroll in Apple Business Manager
Decided to set up Apple Business Manager for your organization? Great. Well, buckle up because this is going to take some time. In fact, it’s so involved that Apple breaks it up into three processes.
1. Enroll your organization
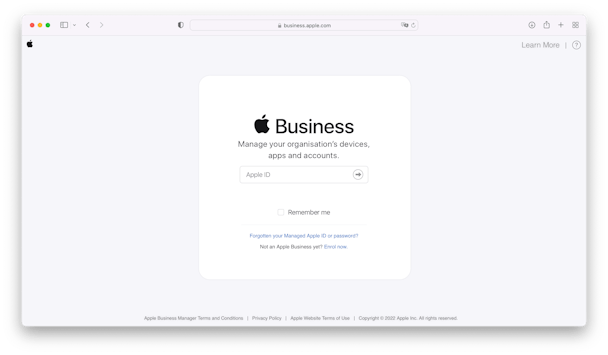
- Go to https://business.apple.com/.
- Click Enroll.
- Put in the following info for your organization: data Universal Numbering System, aka D-U-N-S Number, country or region, phone number, website URL, time zone, language.
- Enter your information: you First and Last name, a work email address hasn’t been used as an Apple ID for any other Apple service or website, role/job title.
- Next, you’ll need to enter information for a verification contact: name, work email address, role/job title.
- Click Continue. Review the information carefully and click Submit.
- Check for an Apple Business Manager email with the subject, “Your enrollment is in review.”
While Apple is reviewing your application, they’ll reach out to your verification contact by phone and confirm all the information you provided. While this is in process, it’s important to make sure your email does not filter messages from @apple.com and that you’re returning calls ASAP. All of this will just ensure there are no delays in the process.

2. Confirm enrollment and grant administrator access
After Apple confirms your information with the verification contact, that contact will receive an email from Apple Business Manager with the subject, “Thank you for verifying your organization.”
You should also receive a similar email with the subject, “Thank you for verifying your organization.” Review the message and follow the steps below:
- Click the “Confirm [name of person]” button to let that person be an administrator of Apple Business Manager. Note: This is the name of the person who initially enrolled in Apple Business Manager.
- If you don’t want this person to be an administrator, click the “choose someone else” link.
- Enter another person’s information.
- Then, click Submit.
After all of this is done, the person selected to be the administrator will receive an email with the subject line, “Enrollment Complete.”
3. Complete the enrollment process
When you’ve finished the enrollment process, and your organization has been approved, you’ll be able to create managed Apple ID and approve all the terms and conditions.
- Open the mail message from Apple Business Manager with the subject line, “Enrollment Complete.” Click “Get Started.”
- Enter an email address for you to use as your Managed Apple ID. Important: This can be your work email address as long as you haven’t used it with any other Apple services or websites.
- Enter a secure password, then confirm it. Then, confirm your name and date of birth.
- Enter your SMS-enabled cell phone number, then select how you would like to obtain secondary verification. Click Submit. Note: You’ll be required to verify both your email address and your phone number.
- Click the link in the email to verify your email address. Enter the SMS verification code you received on your phone. Click Verify.
- After accepting the terms and conditions, you should immediately create at least one additional administrator account if something happens with the other account.
How to manage devices
One of the most significant benefits of using Apple Business Manages is how simple and streamlined it makes deploying new Macs. In fact, you can order a new one and have it shipped directly to your user without anyone from the IT team involved.

The process for setting this up is so simple. After you enroll in the program, here’s all you’ll need to do:
- Assign at least one user admin privilege in ABM.
- Link your MDM server(s).
- Then, select an MDM server for your devices.
- Now assign individual users to each device.
The first time a user turns on that device, the MDM policies, configurations, restrictions, and controls will be automatically downloaded and installed.
Note: For iPhones, iPads, and Apple TVs, you’ll still need to set them up physically with Apple Configurator 2.
How to add a device to Apple Business Manager
If you’re just setting up your Apple Business Manager account and have an existing inventory of devices that you need to add, you’re in luck. Adding Macs when you purchase them isn't the only way to do it. There are two more ways to get your Apple devices into your ABM account.
- As I said earlier, iPhones, iPads, Apple TVs, and Macs can all be added using Apple Configurator 2.
- Macs can also be added using Apple Configurator for iPhone.
When you assign a device to a user in ABM, there’s a 30-day provisional period. Meaning it has 30 days to begin the enrollment process with your MDM.
For iPhone, iPad, iPod touch, or Apple TV devices, this period starts after the device:
- gets disconnected from the Mac running Apple Configurator 2
- has been restarted
- is successfully assigned to and enrolled in an MDM server linked to Apple Business Manager
Note: If the device you’re setting up is already enrolled in your MDM and currently in use by a team member, do not select the “Activate and complete enrollment:” option in Configurator 2.
For Mac computers, the provisional period begins after the Mac:
- restarts
- is successfully assigned and enrolled in an MDM server linked to ABM
Apple Business pricing
Are you ready for some really great news? Using Apple Business Manager is free of charge when I’m writing this. Seriously! You can set up your account without paying a dime.
But with that being said, Apple has announced something called Apple Business Essentials. It works hand-in-hand with ABM, but it has additional benefits like iCloud storage, IT repairs, and complete onboarding. Those features are great for small businesses, and their plans start at $2.99/device. They also offer multi-device plans for each of your users.
There’s a lot to love about Apple Business Manager. It takes a lot of the heavy lifting off your team to get devices ready for new users. As many companies are still growing, being aware of this great opportunity can dramatically change the experience and how your organization approaches IT. From device deployment to iCloud backups, it offers everything you need to keep your company up and running.


