When the first Harry Potter movie was released in 2001, animated photos were a seemingly magical concept. That is, until 2014 when the new iPhone 6 came along with something new and exciting: Live Photos. Now, they are no longer a privilege of wizards—almost anyone with an iPhone or iPad can take, edit, and share a Live Photo. In this guide, we'll show you how.
What is a Live Photo on an iPhone?
A Live Photo is a 12-megapixel picture that includes 1.5 seconds of animation before and after the static image. So if you’re taking a photo of flowing water or a moving car, a Live Photo will capture those few seconds of movement. Every iPhone from the iPhone 6 onwards has this feature built-in, as does every iPad, including the iPad Pro.
How to use Live Photos on iPhone
It’s important to remember that Live Photos aren’t the same as videos — they are photos that include a small amount of movement. That means you’ve got some limitations as to what you can do with them, compared to videos.
How to take a Live Photo
Taking a Live Photo on an iPhone is simple. All you need to do is this:
- Launch your Camera app
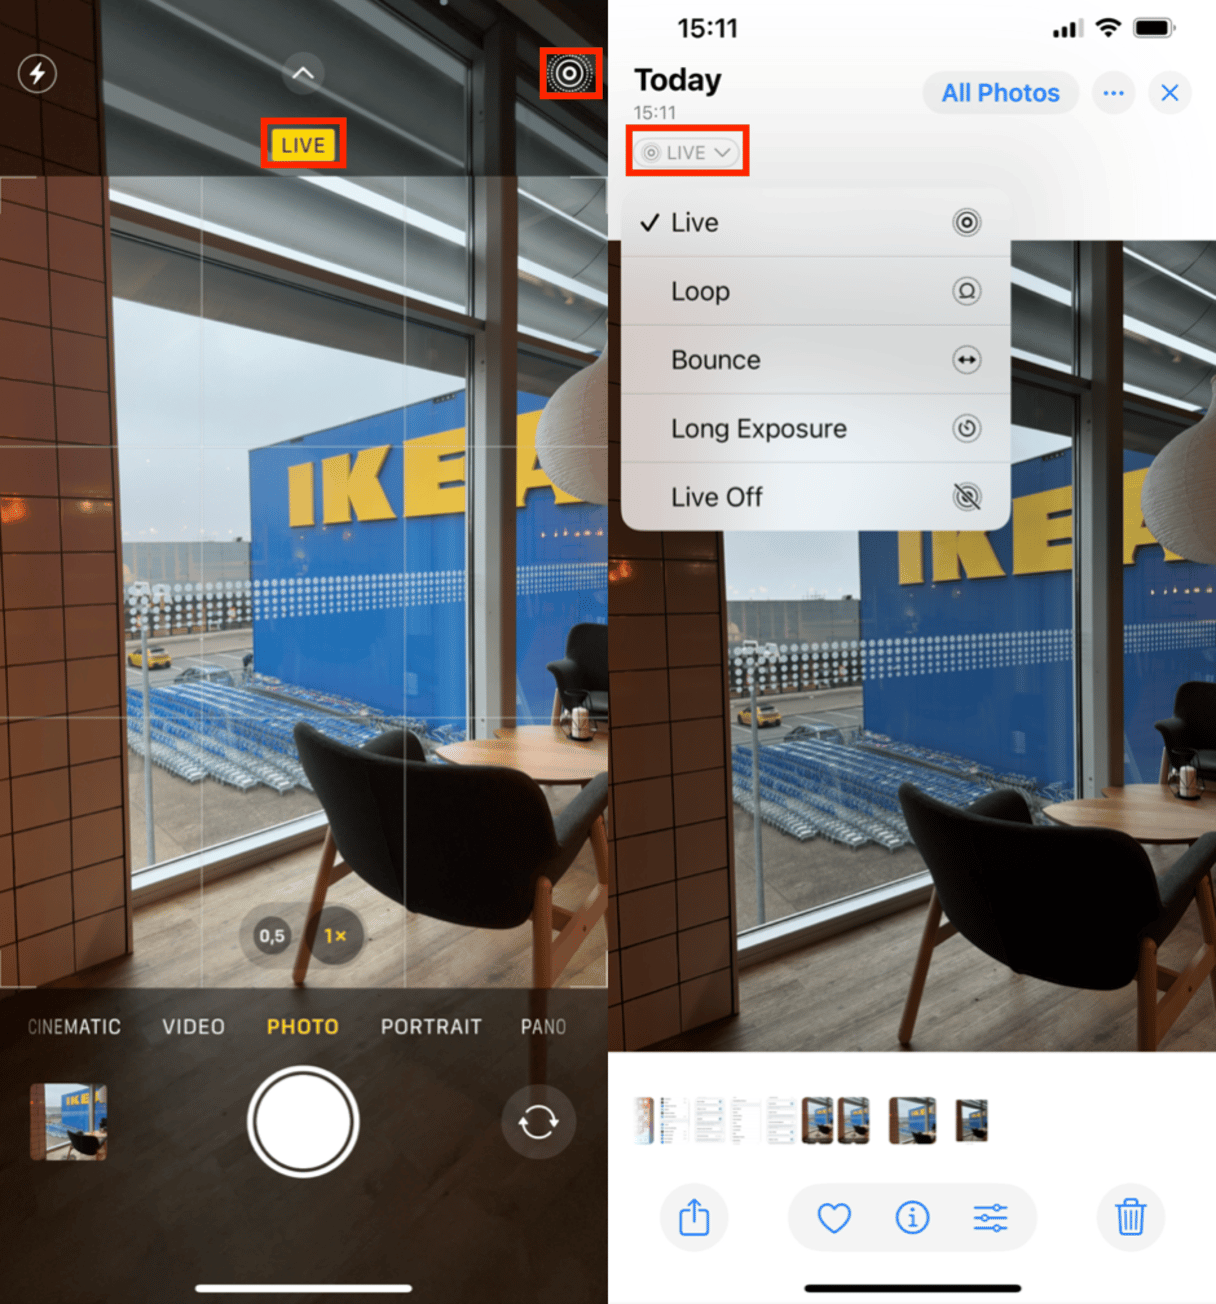
- In the top center, find a round symbol that looks like a set of diffusing rings and tap it. The symbol will turn yellow, which means the feature is on.
- Keep the setting in place and take the shot — or a few, as most people like to do.
- Later, to see the live photo, go to Photos App and you'll see that Live Photos have an indication "Live" in the upper left corner.
How to turn on or off Live Photos on iPhone
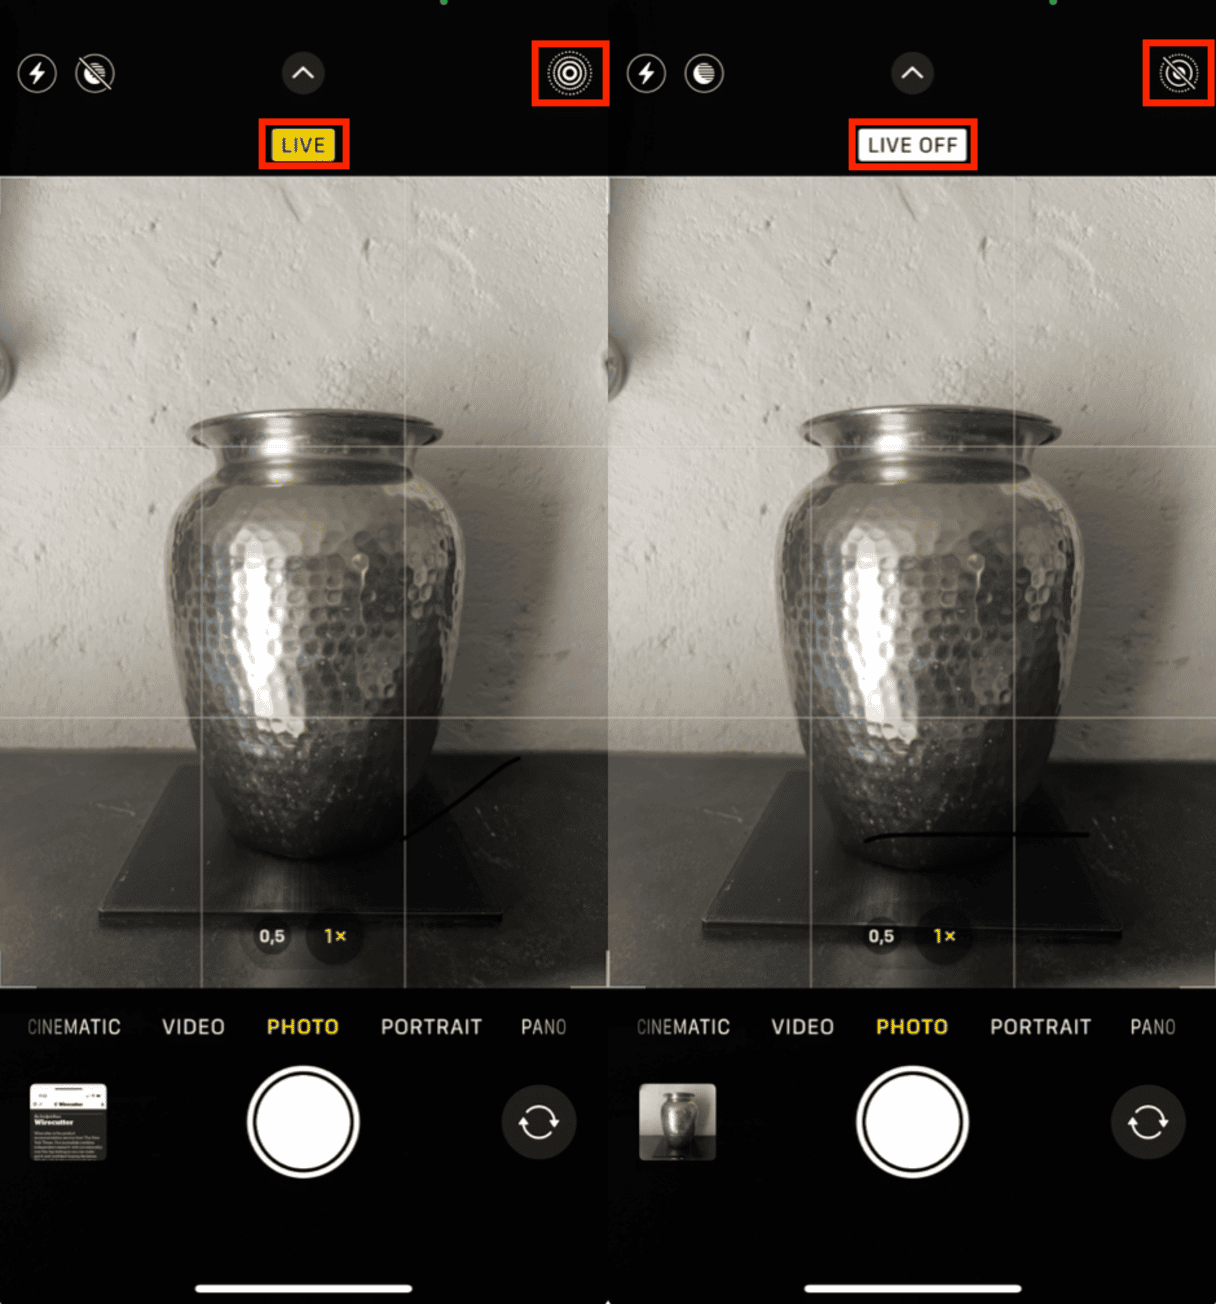
Of course, not every photo needs to be live. To turn this setting off, just tap the diffusing rings symbol at the top of your iPhone Camera, and it will switch back to the static image mode—nice and easy. You will see the indication Live and Live Off.
Do live photos take up more space?
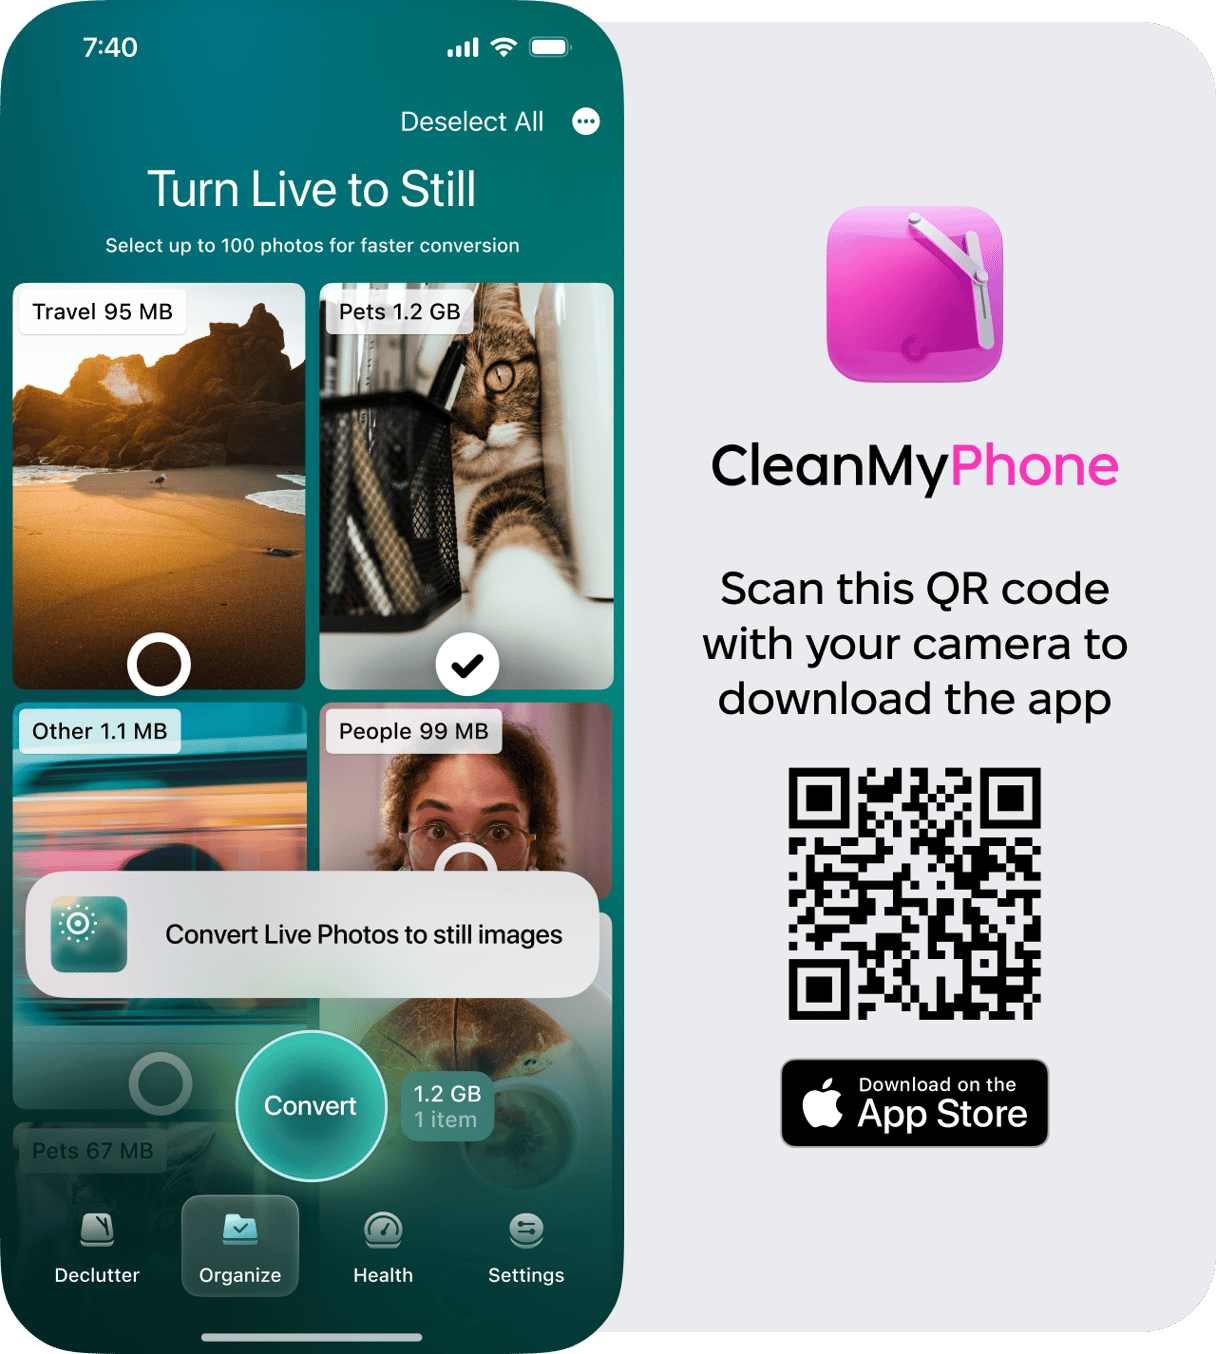
Every Live Photo takes up twice as much room as a still pic, since it’s made up of a 12-megapixel JPG image with a ~15 FPS MOV file. Plus, it requires keeping your hand steady for 3 seconds to capture what you want, so you’ll probably end up taking several live pics until you get that shot right. Over time, if you take enough Live Photos, your iPhone or iCloud storage can get pretty full of them. Using the iOS app CleanMy®Phone, you can easily convert Live Photos to Still. Here’s how to use it:
- Get CleanMy®Phone on the App Store.
- Tap Organize.
- Once the app finishes scanning and categorizing your photos, you’ll see a neat list of folders, such as Travel, People, Pets, etc.
- Tap photos your want to convert.
- The app will save the still photo while the Live version will go to the Recently deleted folder.
How to edit and share Live Photos on iPhone
Editing and sharing Live Photos works seamlessly with iMessage and native iOS editing tools. However, if we’re talking about posting the moving pictures online, ensuring people can view them with the animation can be a little more difficult.
This section covers how to edit Live Photos, share them via messaging apps or on social platforms, and turn them into something else, such as GIFs or Boomerangs.
How to convert Live Photo to still
With a Live Photo, you can either use it as an animated pic or save just one moment out of those 3 seconds of movement. Extracting a still from a moving image is pretty easy. Here’s how you do that:
- Launch the Photos app.
- Find the Live Photo you want to use.
- Tap Live in the upper left corner.
- From the dropdown choose Live Off.
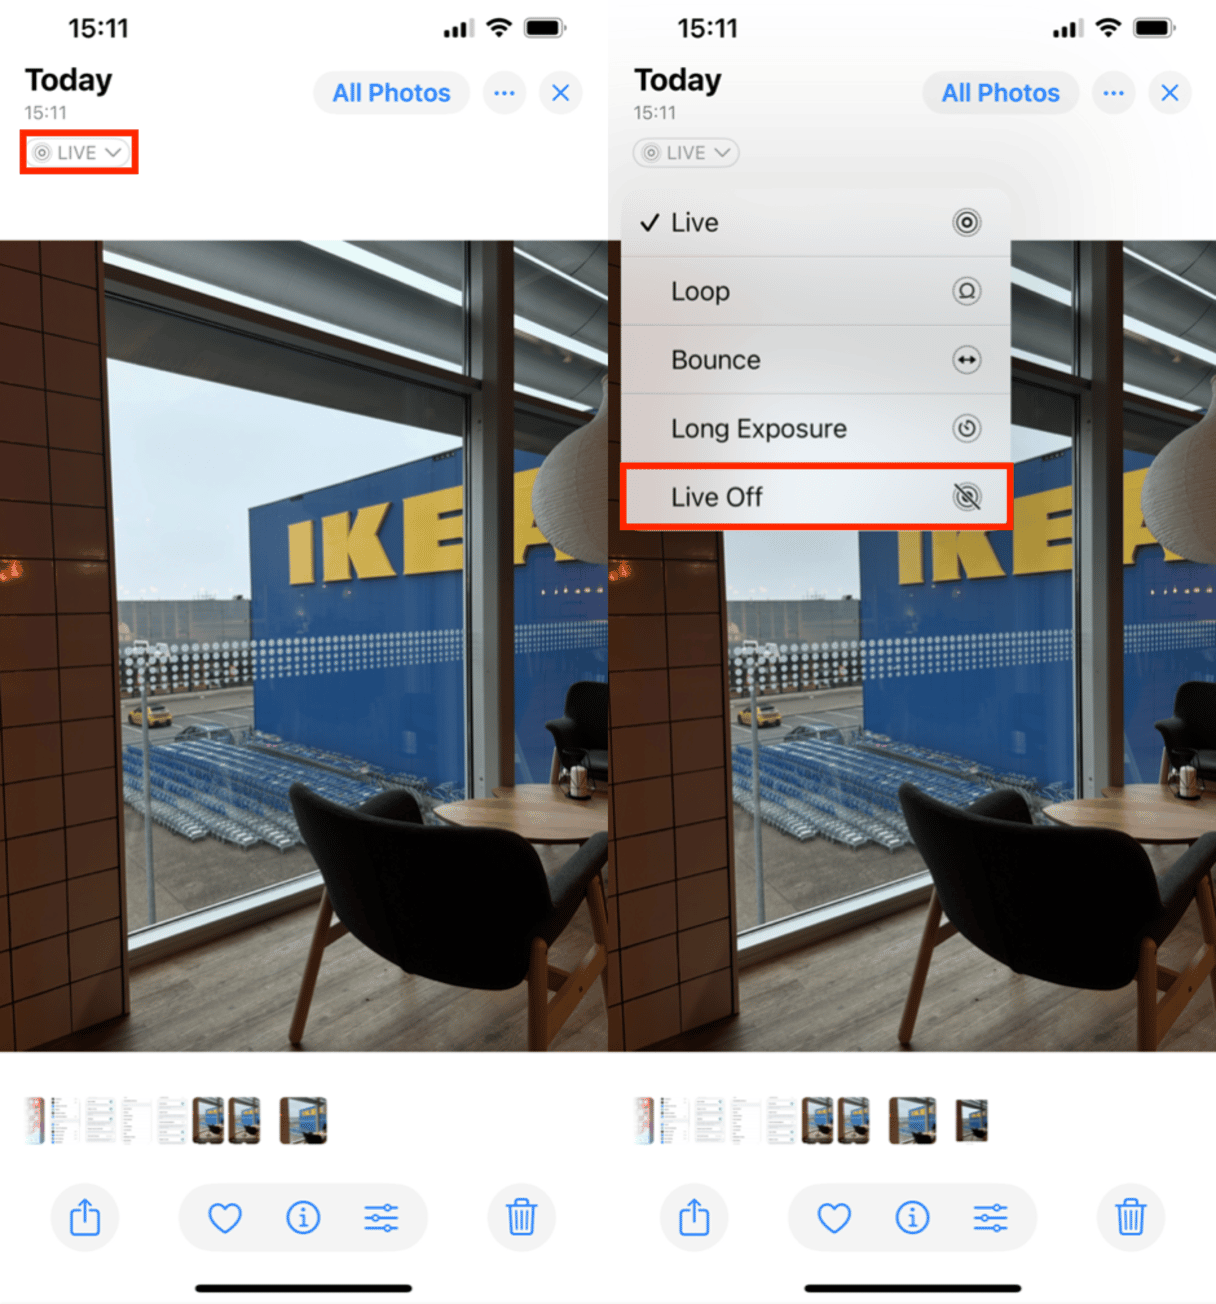
Now the still part of the Live Photo should appear in your library next to the original.
How to edit a Live Photo on iPhone
If your iPhone is running iOS 11 or later, you can add effects in the iOS Photos app. The same applies when you've synced the Lives to your Photos library on Mac.
In the Photos app, swipe up when you’ve reached the image you want to edit, then select from the following options.
- Loop: Similar to Boomerang, makes a Live Photo into a short loop that you can share or post online, provided you share it the right way (see below)
- Bounce: Make your Live Photos rock back and forth creating something eye-catching for your friends on social media
- Long Exposure: Capture time and movement the way you normally would with a pro-level DSLR camera. Turn fireworks or meteors into beautiful blurs across the night sky and waterfalls into transcendent timeless moments.
Beyond these special effects for Live Photos, you can edit one just like you edit regular images in the Photos app: apply filters, adjust contrast and saturation, crop, rotate, and so on. Just tap Edit in the top right-hand corner to access all the tools.
How to share Live Photos
Once you’ve got a Live Photo you want to share, there are dozens of ways you can do that, depending on what apps you’re going to use. If you want to share it with someone who’s got an iPhone, just use iMessage, and the animation within the photo won’t be affected. However, if you want to send it using a third-party messenger, such as WhatsApp, you need to take a few extra steps to ensure others can see a Live Photo, not a still image.
Below we’ve covered the extra steps needed to post a Live Photo on Instagram and Facebook and to send it via WhatsApp.
How do you post a Live Photo on Instagram?
- Open the Instagram app and tap the ”Add Story” icon in the top left-hand corner of your Instagram Stream
- Swipe up to select the Live Photo you want to use
- Upload the Live Photo, then press and hold on the screen; 3D Touch will create a Boomerang
- Post the Boomerang to your story
It is something of a workaround, and it does take a little more time, but this way you can use Live Photos on Instagram, which works wonders for the likes!
How do you post a Live Photo on Facebook?
- Open the Facebook app
- Create a new post, selecting the Photo/Video option
- Select the Live Photo you want and make sure the Live icon in the bottom left is activated — otherwise only a still image will be posted
- Post the image
- To view the moving photo on Facebook, press and hold it
Facebook doesn’t group these into a separate album of Live images, so you might want to create a new album for any Live Photos you post.
How do you send a Live Photo using WhatsApp?
To share using WhatsApp or other messengers, make sure they support GIFs. If that’s the case, you can use the editing options in the Photos app to make a Live Photo “bounce,” effectively turning it into a GIF.
Here’s how you send a live pic via Whatsapp:
- Open the Photos app
- Choose the Live Photo you want to edit
- Swipe up and apply the feature you want: Bounce or Loop will give the photo a quality similar to a GIF
- Now you can open WhatsApp or another messaging app that supports GIFs
- Select the chat
- Tap the “+” in the bottom left-hand corner and choose the Live Photo you just edited
- Press and hold on the screen; 3D Touch will ensure the pic is animated
- Select as a GIF and send
That’s it, now you can do anything there is to do with this fun iPhone camera feature. But don’t get carried away: Live Photos do take up a lot of space. So, if you start running out and don't want to spend ages going through your photo library, use CleanMy®Phone on your iPhone or iPad. That should keep your experiments with Live Photos from getting out of hand.
FAQs
Can you post Live Photos on Instagram?
Not directly, but you can convert a Live Photo into a video or Boomerang using apps or Instagram’s built-in tools before posting.
How to hear sound on a Live Photo?
Open the Live Photo in the Photos app, tap and hold it to play, and ensure your phone’s sound is turned on.


