Long exposure photography has long been a technique used by professional photographers to produce stunning landscape shots and light trails, but until recently the effect couldn’t be imitated with an iPhone. Long exposure shots require slow shutter speed, and while DSLR cameras can manage that with ease, iPhones just don’t have the hardware.
The good news is that long exposure photography with an iPhone is absolutely possible thanks to some iOS updates and third-party apps. Let’s take a look at long exposure photos and how you can achieve the effect using your iPhone.
What is long exposure?
Have you ever noticed the way crashing waves or waterfalls look silky smooth in some photographs? Or the way some photos capture the hustle and bustle of a city scene by showing the movement of cars and people, while the background remains crisp? These are examples of long exposure photography, and they are captured using slow shutter speed and a tripod to reduce camera shake. To achieve the long exposure effect using a DSLR or mirrorless camera, you would set your shutter speed to somewhere between 1/15 and 30 seconds, depending on the effect you’re after.

Can you take long exposure shots with an iPhone?
Your iPhone camera is not equipped for long exposure shots, because there is no way to set the shutter speed in the native Camera app. Fortunately, there are alternative ways to achieve those gorgeous light trails with your iPhone: either using a long exposure app or by converting Live Photos to long exposure shots. While the technique is totally different, you’ll find the effects very similar to what you would get using a DSLR.
How to create long exposure photography on iPhone
The two ways we'll cover in this post produce pretty good results, and which one you'll choose depends on your iPhone model and on how much control you want.
Keep just your best long exposure shots
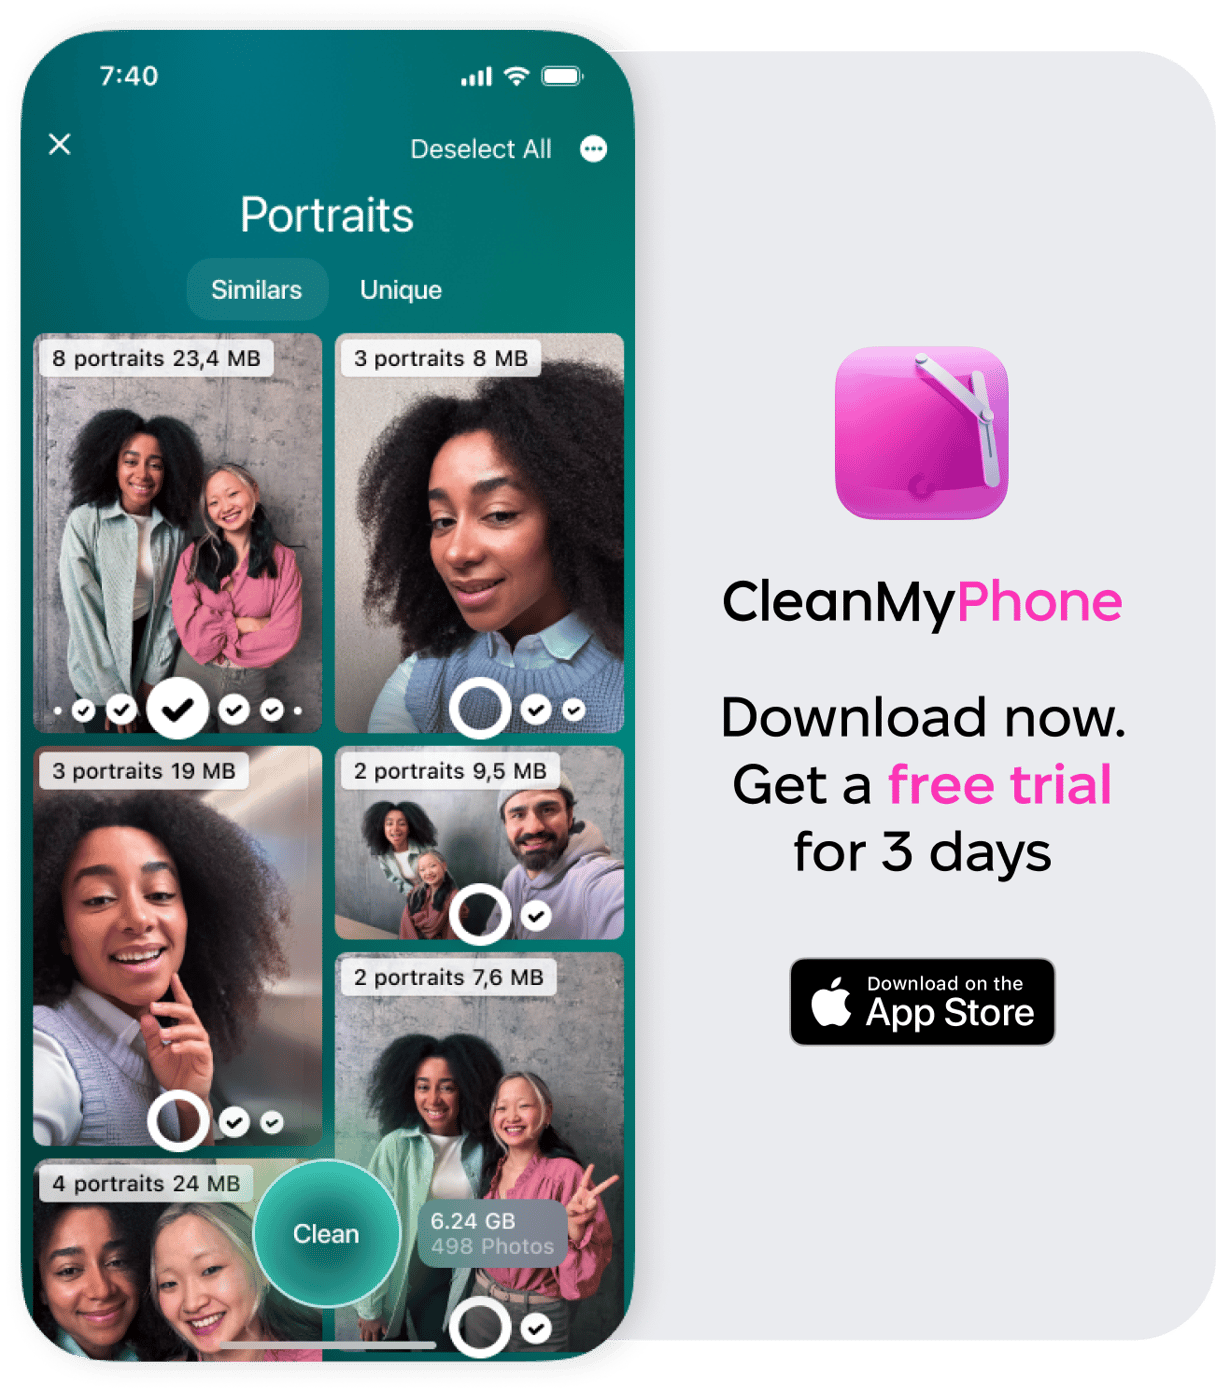
As you experiment with long exposure, you’ll likely create dozens of very similar photos — and only one or two in every batch will be good. You can quickly and easily delete these redundant shots using CleanMy®Phone for iPhone.
- Open CleanMy®Phone.
- Go to Organize module.
- Choose one category, for example, Portraits.
- Go through and select which similar photos you want to delete.
1. Convert Live Photos to long exposure shots
If you’ve ever used Live Photos, you’re already one step closer to achieving your long exposure goals. Never shot a Live Photo before? It’s basically a little 3-second video, perfect for those of you who forget to shoot actual videos with your iPhone camera. Live Photos are available on iPhone 6 and later models that are using iOS 11 and above.
For the long exposure part of the equation, you’ll need a moving subject and an iPhone tripod or a sturdy surface to set your camera. If you hold the phone in your hand, there’ll be too much camera shake and your photos won’t line up correctly. Since you’re just practicing, you can turn your water faucet on trickle to experiment with long exposure shots. Mount your iPhone on the tripod so that there isn’t any wobble and frame your shot.
When you’re ready, follow these steps to take a long exposure shot with your iPhone:
- Open the Camera app
- Turn on Live Photos (an icon with concentric circles at the top of the screen)
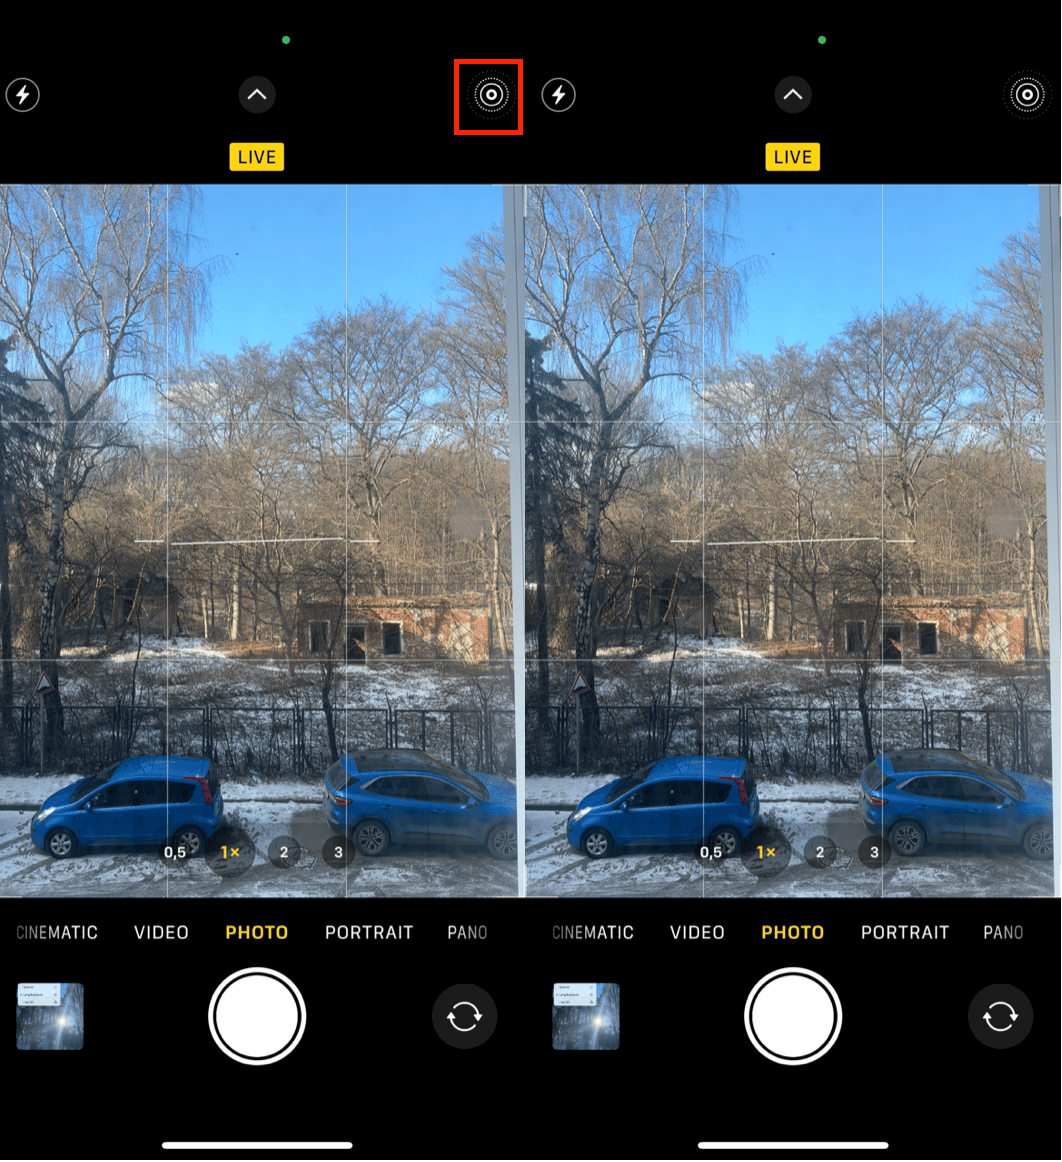
- Set the self-timer (a clock-shaped icon) for 3-10 seconds. Using the self-timer for long exposure shots reduces camera shake.
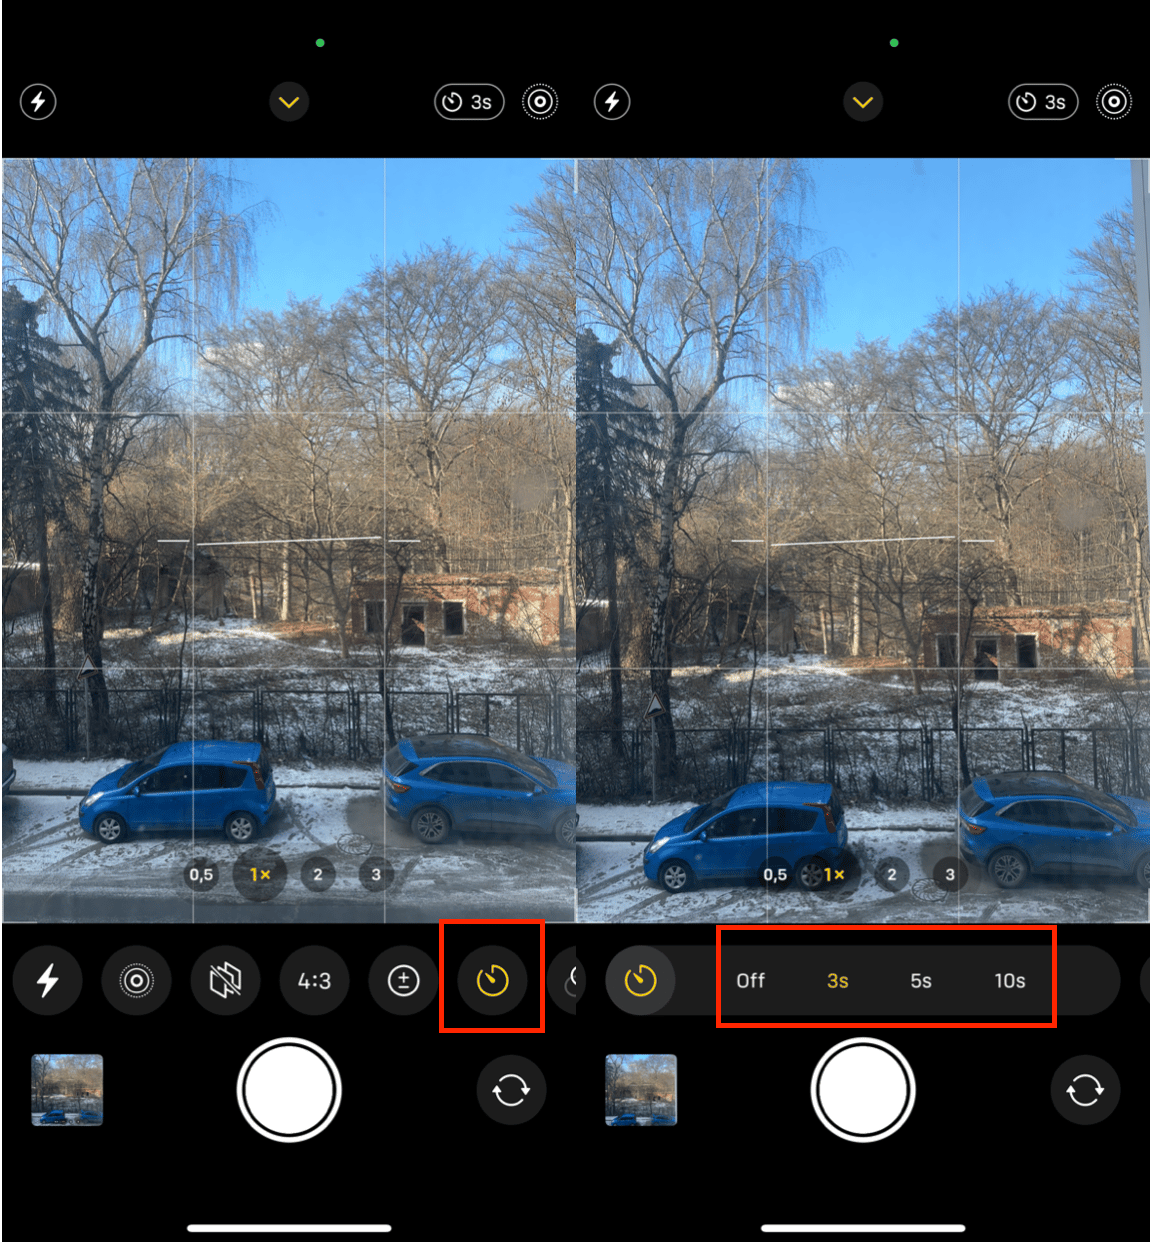
- Position your iPhone on a tripod and frame your shot.
- Tap the shutter button to take a Live Photo
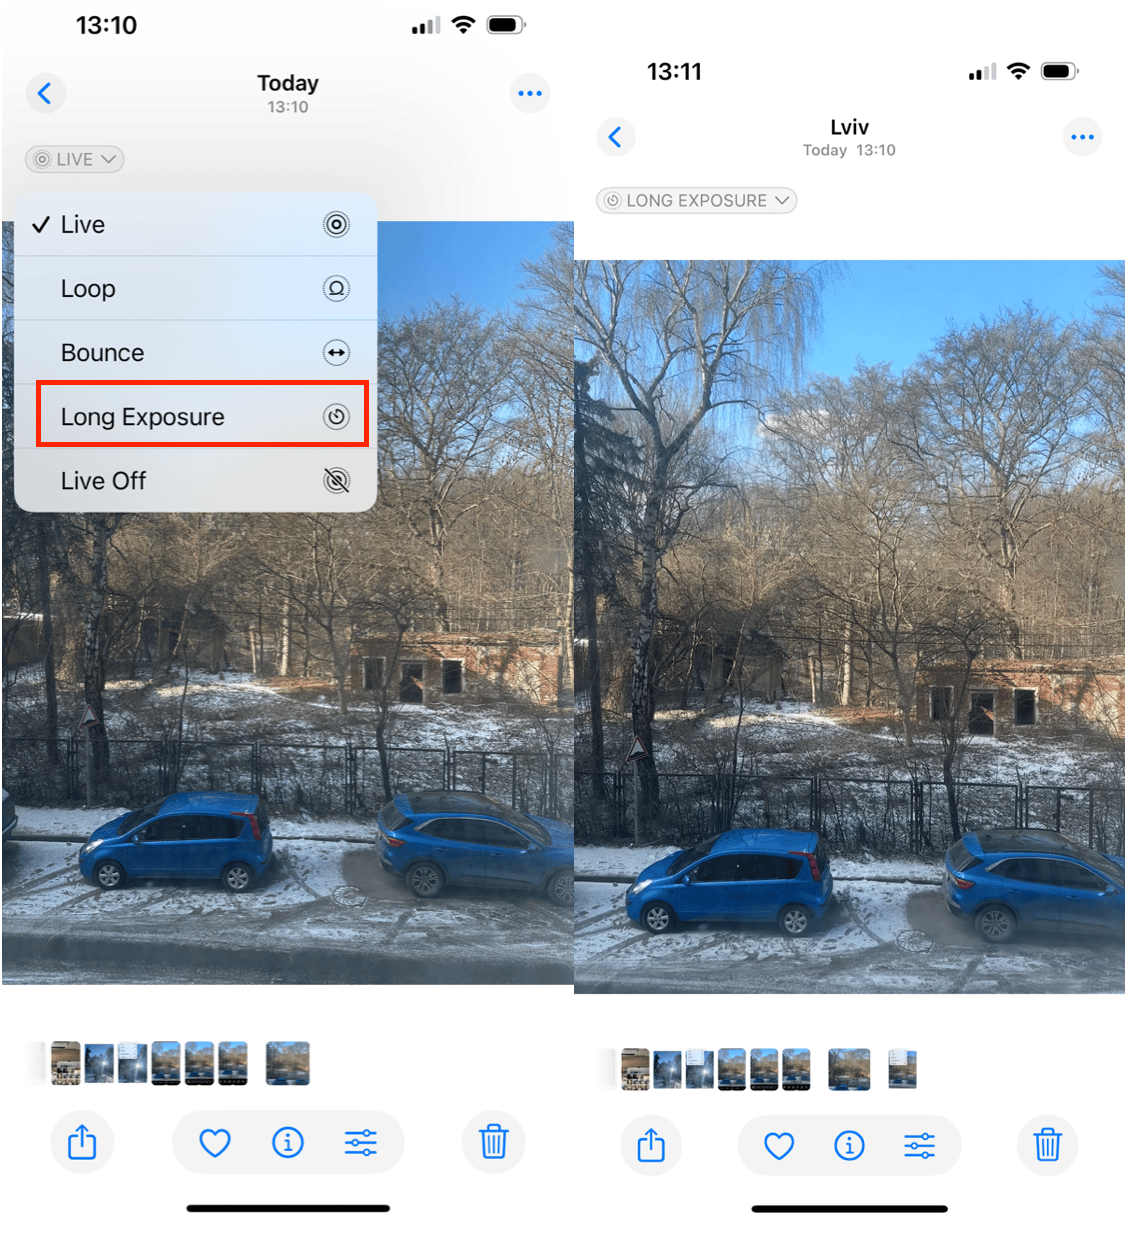
- Open the Photos app and find the photo.
- Tap LIVE icon in the top left corner.
- Choose Long Exposure from the dropdown. Tap on it to create your long exposure photo.
2. Use a long exposure photography app
If your iPhone is older than iPhone 6, or you just want to experiment with something different, there are lots of fun long exposure apps you can play with. As mentioned above, your iPhone cannot support long exposure shots because you can’t control how long the shutter stays open. Long exposure apps simply overlay multiple shots of the same scene to create the same effect as slow shutter speed. As with the Live Photo option above, you will need a tripod to achieve the best results.
Best long exposure apps for iPhone
When it comes to taking long exposure photos with your iPhone, several apps can help you achieve stunning results. These apps allow you to experiment with different settings and effects, making it easy to capture beautiful images without needing professional camera equipment. Here are some of the best long exposure apps available for iPhone:
- Slow Shutter Cam. Created by Cogitap Software, Slow Shutter Cam is the highest-rated slow shutter camera app for iPhone. You can choose from different shooting modes, shoot in Live preview, so you know if your settings are doing what you want them to do, and choose your photo’s resolution. This app is great for shooting everything from star trails to smooth and smoky waterfalls.
- ProCam 6. While Slow Shutter Cam is a fabulous app for iPhone long exposure shots, if you’re looking for a beefier tool with more controls and settings, you should check out ProCam 6. It allows you to shoot with slow shutter speed, but it also includes manual control of focus, white balance, and ISO, plus the ability to save your photo as a RAW file.
- Camera+. This one is very easy to use and learn, and allows you to use a simple slider to control your iPhone’s shutter speed, focus, and white balance. Camera+ also comes with a nice array of editing tools and a macro mode for close-up photography.
- ReeHeld. This app allows users to take long exposure shots without a tripod by leveraging advanced stabilization technology. ReeHeld captures multiple frames and merges them to create a smooth, long exposure effect. It's perfect for capturing motion blur and light trails on the go.
You don’t have to be a professional photographer to take beautiful long exposure shots. If you’ve never experimented with long exposure photography before, you’re in for a treat. Get yourself a decent iPhone tripod and start playing around with Live Photos or one of the camera apps mentioned above. And to master another great photography trick available on your phone, check out our guide to burst photos on iPhone.


