There are different ways in which you can boot your Mac to troubleshoot when it’s having problems. One option is verbose mode. Verbose mode is a way to boot your Mac with the command line showing. We’ll explain why and when you might want to use it.
What is verbose mode?
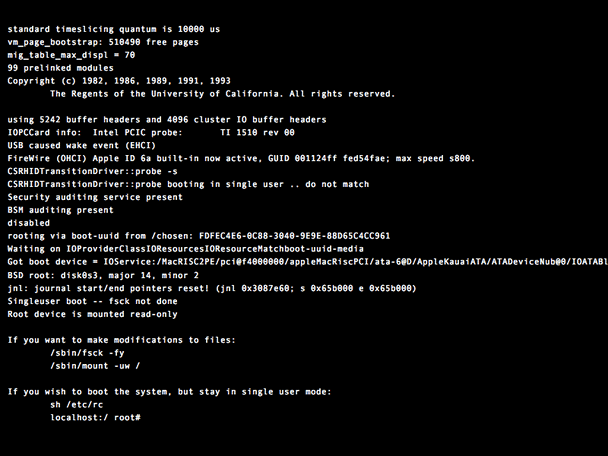
As its name suggests, the verbose mode is a method of booting up your Mac that, instead of an Apple logo and progress bar, displays text descriptions of precisely what’s going on behind the scenes. As each element loads and starts, it is described on screen.
By following the on-screen descriptions, you can sometimes work out where in the boot process a problem is occurring.
Of course, the messages aren’t written in easy-to-understand full sentences. And so, to understand them, you’ll need to either be familiar with Unix and its commands and terminology or frequently refer to Google. If you do understand Unix, however, the verbose mode is very useful.

What’s the difference between verbose mode and safe mode?
Safe mode loads only essential kernel extensions — the ones needed for your Mac to run. It doesn’t load, for example, login items or launch agents. Verbose mode loads everything but describes what it’s doing as it does it.
When should verbose mode be used?
There are a couple of reasons you might want to use verbose mode — assuming you’re not a developer:
- Your Mac is having trouble starting up.
- You have lots of peripherals connected and want to make sure the drivers for each of them are loaded properly.
How to boot your Mac in verbose mode
- Click the Apple menu and choose Shut Down.
- Restart your Mac, and as soon as it starts to boot, press Command-V (If your Mac plays a startup chime, press Command-V as soon as you hear it).
- Wait until you see white text on the screen and release the keys.
Your Mac will continue booting, displaying each item it loads and processes it completes as text until it has finished booting and displays the login window. You’ll need to watch carefully and note down anything you see that seems like it could be causing a problem.
How to boot your Mac in verbose mode by default
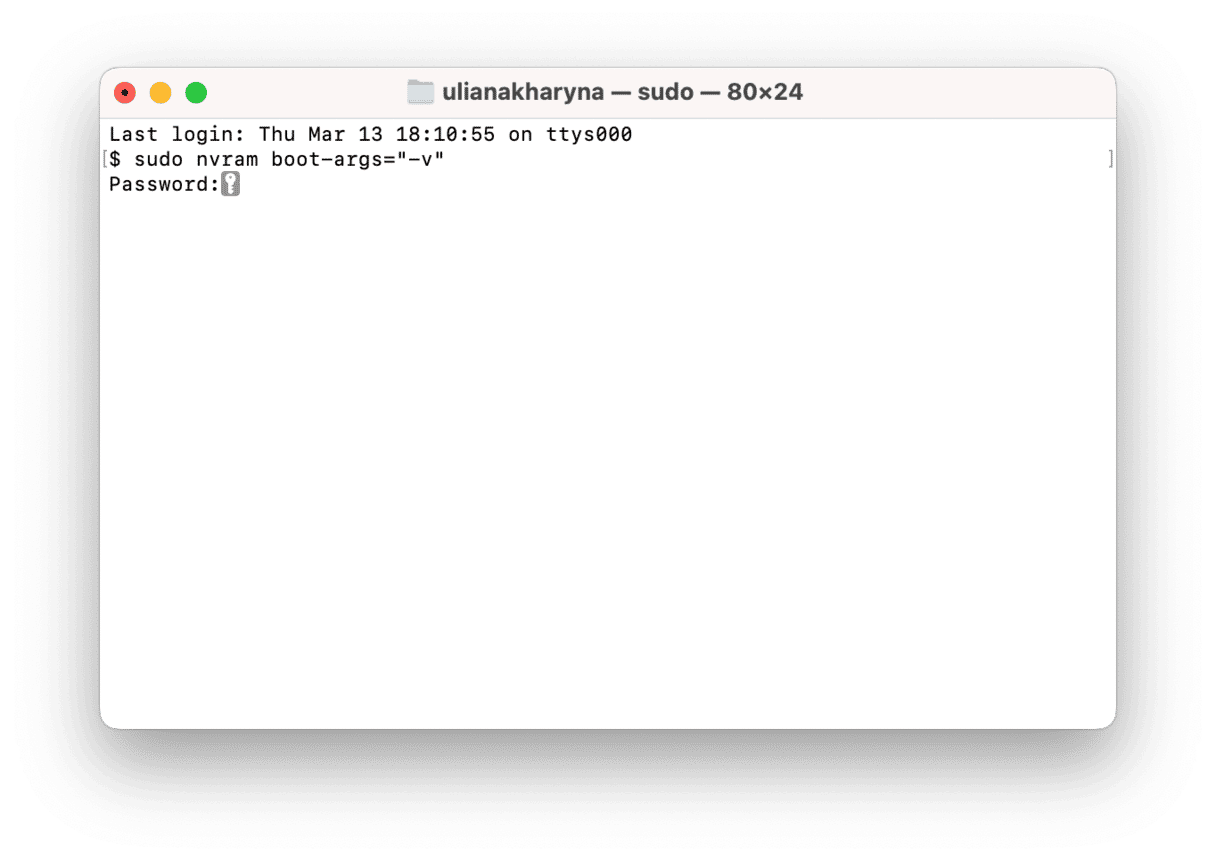
You can use Terminal to set your Mac up so that it always boots in verbose mode without you having to press Command+V. In fact, the steps described above would work for Intel-based Mac computers only; if you own a Mac with Apple silicon, you should take the following steps to enter verbose mode.
The circumstances under which you would want to do that are very limited, but if you do, here’s how to do it.
- Go to Applications > Utilities and launch Terminal.
- Type the following command:
sudo nvram boot-args="-v" - Press Return.
- Type in your admin password.
- Quit Terminal.

To disable booting in verbose mode, enter this command in Terminal:sudo nvram boot-args=
Tip: the same would work for an Intel-based Mac as well, meaning there are two ways to boot your machine in verbose mode for an Intel-based Mac and one way only for a Mac with Apple silicon.
How to use CleanMyMac to perform maintenance on your Mac
Using CleanMyMac to protect your Mac from malware, optimize its performance, or manage personal or sensitive data is just as easy. Each routine takes more than a few clicks. It can also uninstall apps completely, leaving no trace of them behind. Its Cleanup feature can free up several gigabytes of space — useful if your SSD is running close to capacity.
To run maintenance tasks with CleanMyMac:
- Get your free CleanMyMac trial.
- Install it and launch it from your Applications folder.
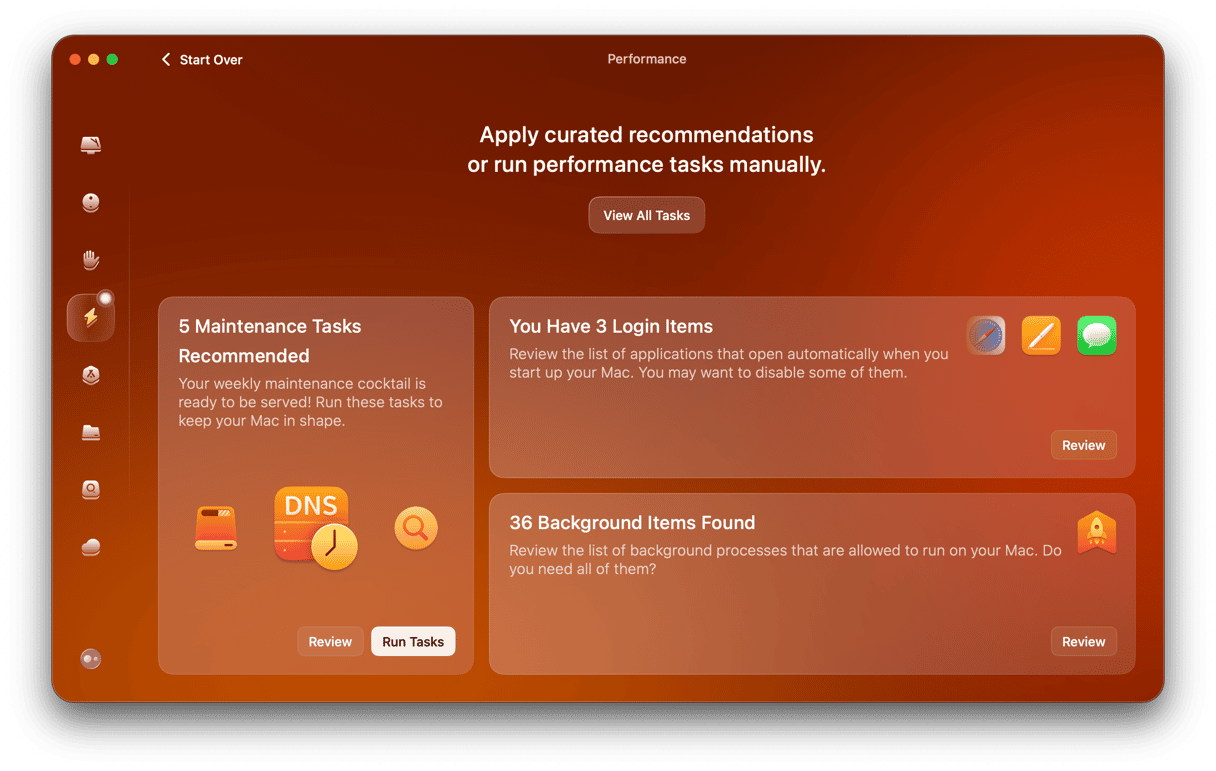
- Click Performance in the sidebar and run a scan.
- Click Run Tasks.

And if you want to clear up some storage, just go to Cleanup and click Scan.
Verbose mode is useful for detecting problems when your Mac starts up. It can also be used to make sure peripheral drivers are loading properly. It won’t harm your Mac, and it loads all extensions and other components, unlike safe mode. So, you can use it freely without worrying about it. If you’re looking for an easier way to identify and fix problems with your Mac, however, you should definitely give CleanMyMac a try.


