If you’ve been using an iPhone or Mac, or really any Apple product for that matter, you’re probably familiar with iCloud. It’s Apple’s cloud-based storage that makes it really easy to backup all of your information. But there’s a good chance you’ve received an annoying error message telling you your iCloud is full.
If that’s you, then keep reading. This article answers the question, “How do I see what’s in my iCloud storage?” And will also walk you through what you can do to free up more space.
How to check iCloud storage limit
Checking your iCloud storage limit is actually really easy. Since iCloud is native to macOS, you can do it from within System Preferences if you’re signed in. Here’s how you can check:
- Click on the Apple icon in the top left.
- Then, click System Preferences > Apple ID.
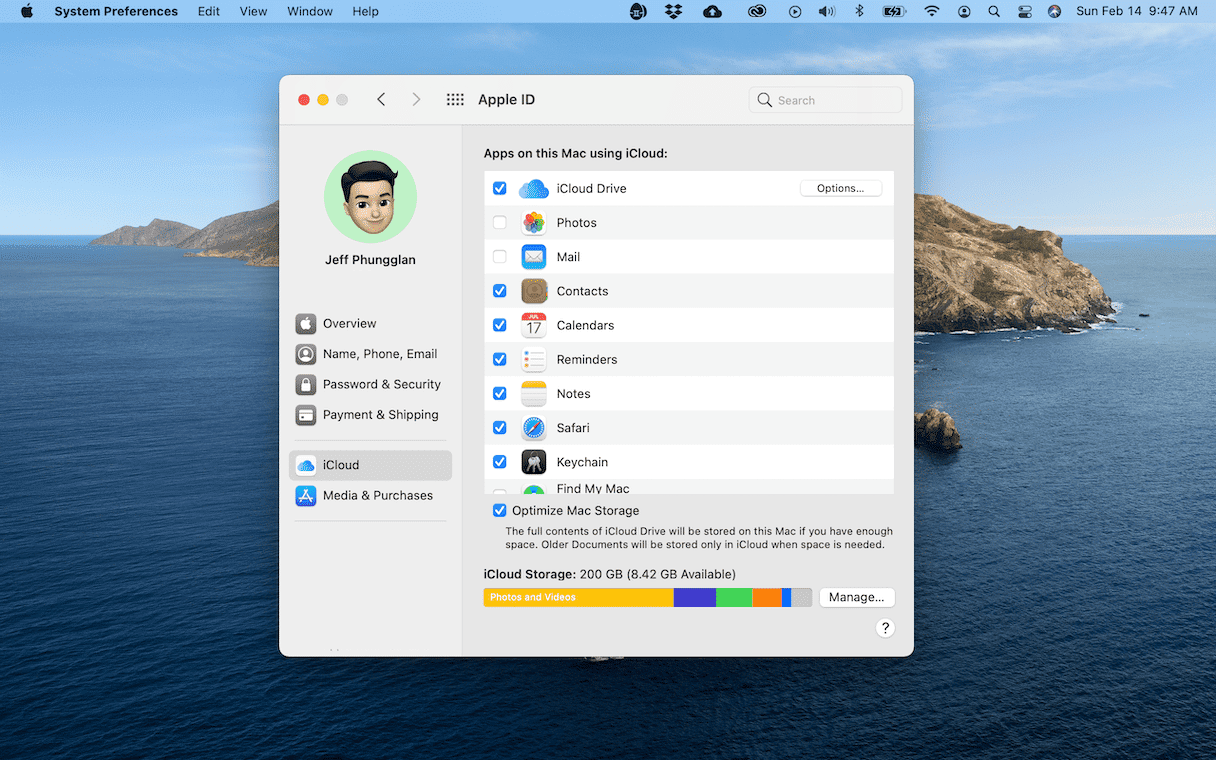
You’ll see how much space you have available at the bottom of the window and what’s taking up your storage.
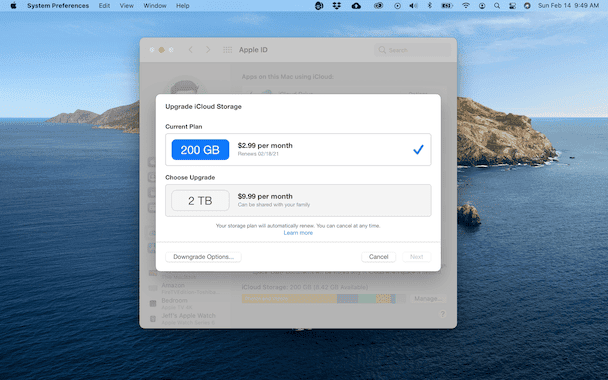
How much upgraded storage costs
By default, every iCloud account gets 5 GB of free storage. But I’m sure you’ll see that fills up pretty quickly. These are the options that are currently available at the time of writing this:
- 50GB - $0.99/mo
- 200GB - $2.99/mo
- 2TB - $9.99/mo
If you’re ready to go ahead and upgrade your account, this how you do it:
- Open System Preferences.
- Click App ID > iCloud > Manage > Change Storage Plan.
- Choose a plan.
- Click Next and then enter your Apple ID password.
How to see what’s taking up space in iCloud storage?
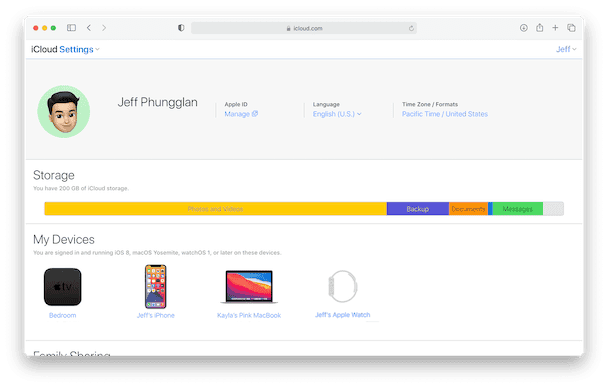
You check the bottom of the System Preferences window for a breakdown of what’s eating up your iCloud storage. But you can also get this same information from a browser on any device. This is how to check:
- Go to iCloud.com and sign in.
- Click Account Settings
How to free up space in iCloud
Bumping up against your iCloud storage limit is bound to happen sooner rather than later. But before you upgrade your plan, try a couple of these tips to try and save some space first.
1. Delete duplicates
Duplicate and similar files can waste a ton of space. And manually going through your file one by one can be a long and painstaking process. But if you have iCloud Drive or iCloud Photos syncing with your Mac, you can use the app Gemini 2. It scans your Mac’s hard drive or lets you choose a specific folder and helps you quickly get rid of the duplicates.
Here’s how simple Gemini 2 is to use:
- Download and install Gemini 2.
- Open the app.
- Click the + > Choose Custom Folder.
- Select iCloud Drive in the pop-up and click Open.
- Then, click Scan for Duplicates.
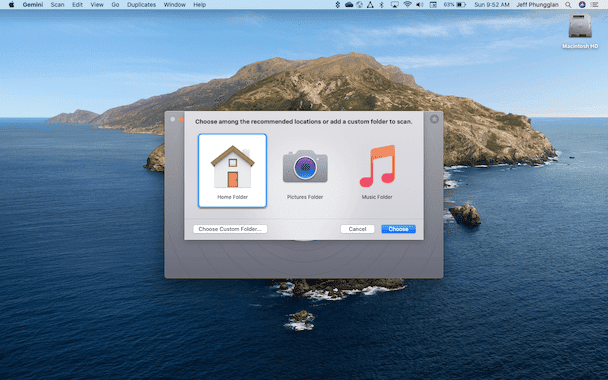
After the scan has completed, you can click Smart Cleanup to keep the files Gemini 2 thinks are the best versions and get rid of all of the other files. Or you can click Review Results to go through the files manually.
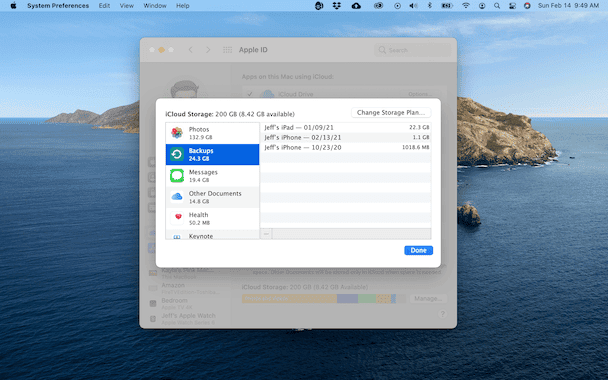
2. Remove old iPhone and iPad backups
If you’re not staying on top of your iCloud usage, it’s easy to accumulate old iPhone and iPad device backups. And not necessarily backups from weeks or months ago, but actually for old devices you don’t have anymore. Here’s how you can check and get rid of old backups from iCloud:
- Open System Preferences.
- Click Apple ID > iCloud > Manage.
- In the sidebar, click Backups.
- Then, select a backup from the list and click - in the bottom left corner.
3. Clean up iMessage conversations
Your iMessage conversations can take up quite a bit of space, especially if you share a lot of photos and videos. You can turn off iMessages on your computer, but it’s a bit aggressive. It deletes all of your messages from iCloud and turns off iMessage on all of your devices.
For the sake of this article, I’ll show you how to use your iPhone to find and get rid of your conversations that are taking up the most space:
- On your iPhone, tap Settings > [your name] > iCloud > Manage Storage.
- Then, tap Messages > Top Conversations.
- In the top right corner, tap Edit.
- Select a conversation to delete and then tap the Trash can icon.
The way iCloud is natively built into every Apple operating system makes it so incredibly easy to use. But if you’re always running out of space, then it can be more of a headache. Hopefully, after reading this article, you have a better understanding of how you can free up space on iCloud and manage your storage.


