If you have a handful of physical pictures or documents you want to digitize, a scanner is going to be your best friend. But the annoying thing about them, especially personal home scanners, is that they’ll typically save each photo or page of your document as a different JPG file. So, while you might have a seven-page contract you want to scan, that might leave you with seven different files on your computer. It can be cumbersome, to say the least, especially if you’re trying to share those documents as easily as possible.
Fortunately, it’s relatively simple to combine images into a PDF on your Mac. Keep reading. This article will explain how to do just that and what you should look out for if you’ve got a handful of documents to scan.
How to combine JPG into one PDF on a Mac
The good news is if you want to merge multiple JPG files into a single PDF, you can do it all with tools that come standard with macOS. In fact, you’ll only need to use the Preview app. For those that aren’t familiar with Preview, it’s the app that lets you look at pictures and PDFs without adding them to your photo library.
Now that we know what Preview is used for, here’s how you convert multiple JPGs to a PDF on Mac:
- Find a JPG file you want to combine and open it in Preview.
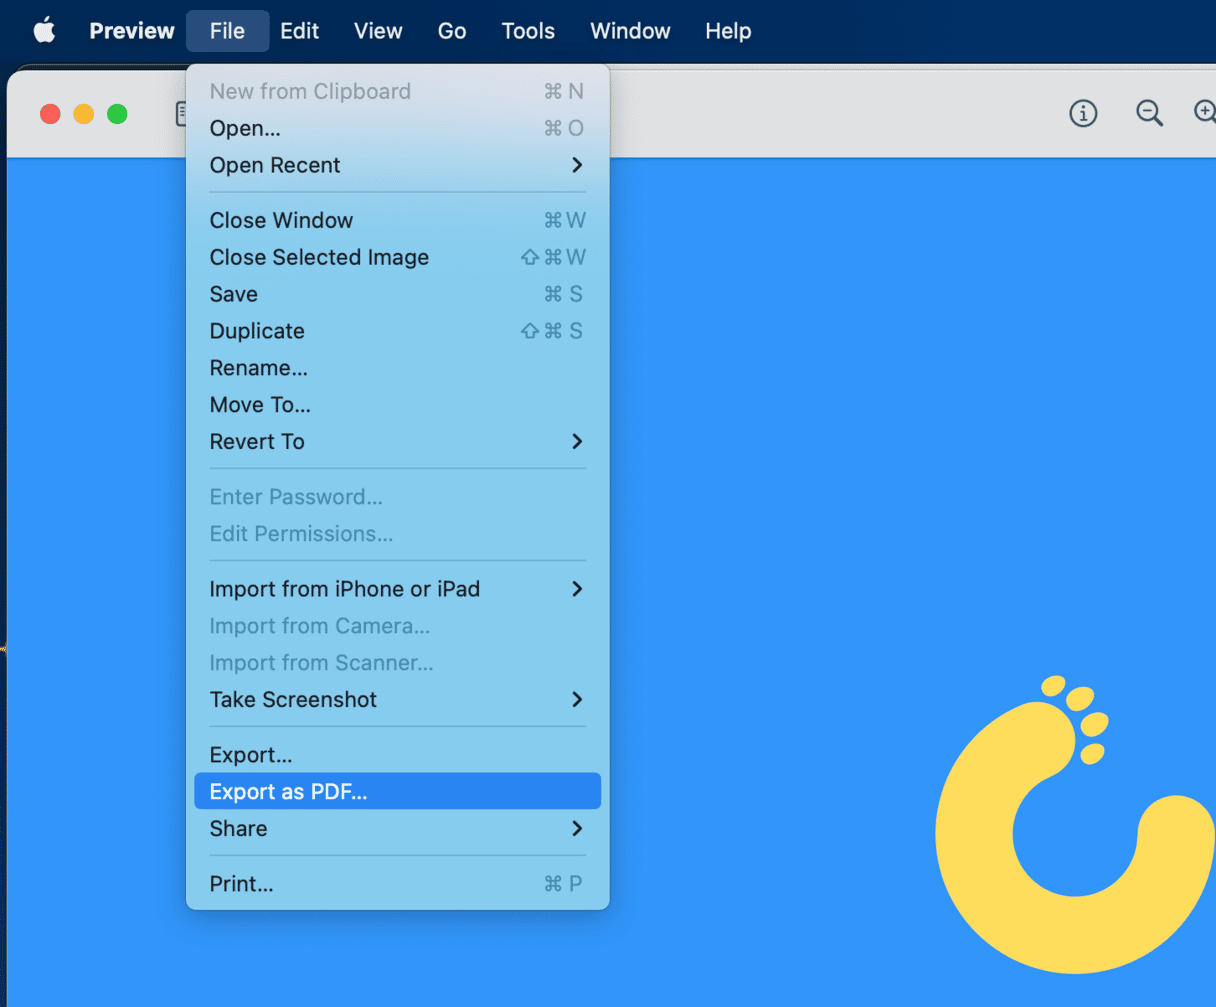
- Click File > Export as PDF.
- Then, find that new PDF you just made and double-click to open it.
- Open another JPG you want to merge with this PDF.
- Click View > Thumbnails in each of the windows.
- Drag and drop the JPG into the sidebar of the window with the PDF.

You can keep adding as many JPGs as you have until your PDF is complete. Just make sure to save the PDF before you close it. You can either press Command + S on your keyboard or click File > Save.
Now, you’ve mostly been reading merging JPG files. But if you have multiple PDF files you want to combine, you can do that as well. Just follow the instructions above, starting at Step 3.
After you combine JPGs to PDFs on Mac
When you’re done consolidating your image files into a single PDF, then you probably don’t need to keep those individual files anymore. They’re just taking up precious storage space on your Mac’s hard drive. But instead of just letting them sit there, you can use an app like Gemini 2 to help you scan for all those duplicate or similar files and help you quickly get rid of them.
After you download and install Gemini 2, just follow these steps:
- Open Gemini 2.
- Click + > Home folder.
- Then, click the Scan for Duplicates button.

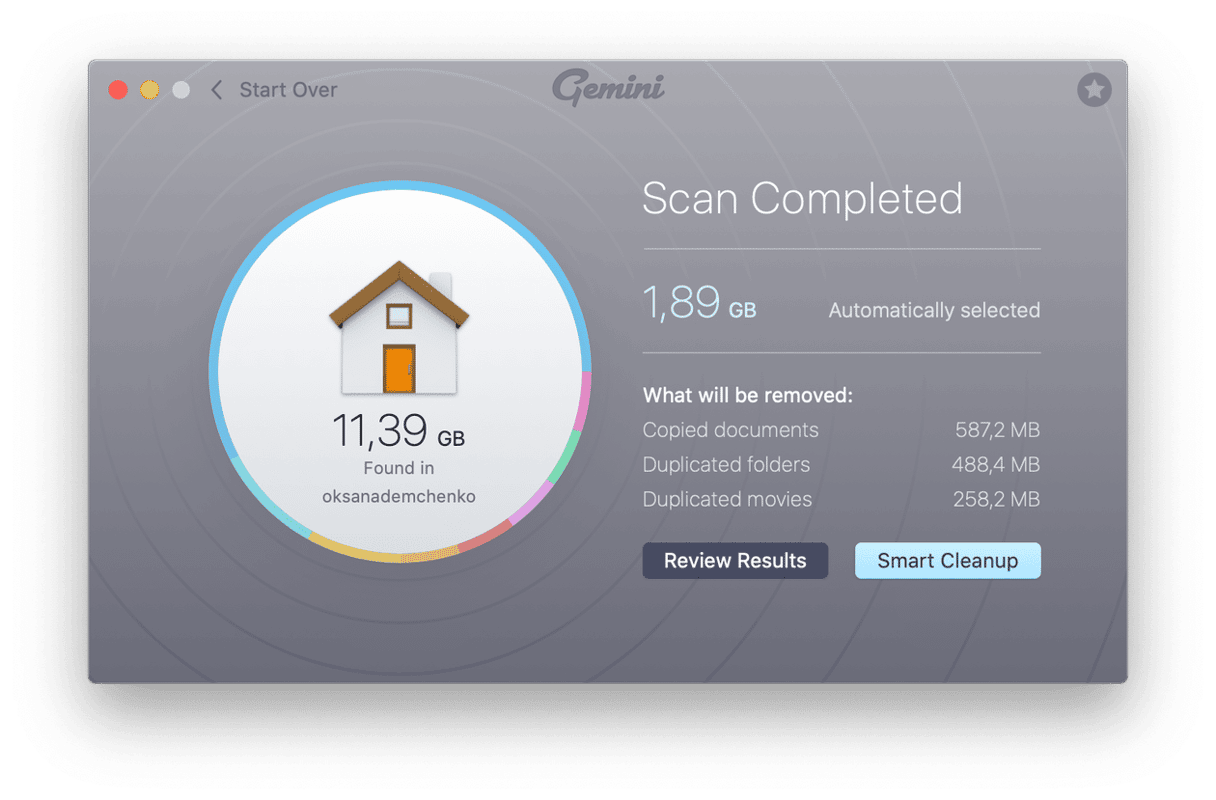
Then, when the scan is finished, you’ll have a choice to select either Review Results or Smart Cleanup.
If you decide to click Review Results, then you’ll be able to see every file Gemini 2 found. When you click on a file, the preview pane will open on the right side of the window. That way, you can go preview all of the files to see how they differ and decide for yourself which files you want to delete and which ones you want to keep.
And on the other hand, the Smart Cleanup button does just what it sounds like it does. It will get rid of all of your duplicate and similar files in one click. Gemini 2 uses an algorithm to select the best version of each of your files and delete the rest. Seriously, that’s all you have to do. Gemini 2 does all of the heavy lifting if you want it to.
Converting and combining your JPGs into a solitary PDF is so much less daunting than it might sound when you’re sitting down to do it for the first time. The Preview app makes it easy and convenient so that you don’t need to buy any additional software. You can just leverage the apps that come standard with macOS. And hopefully, after reading through this article, you’re feeling a little more confident merging your files into one PDF.


