PDFs are the universal standard for sending forms or non-editable documents. Every so often, you’ll need to upload a document, but the website doesn’t accept PDFs. Or maybe you just need a document in an image format. Whatever predicament you find yourself in, the good news is that macOS has a couple of features that make it really easy to convert one file or a batch of them quickly.
Keep reading because you won’t want to miss all of these tips. I’m going to show you the ins and outs of how to save a PDF to a JPG.
How to convert a pdf to a jpg
As with most things on your Mac, there are a couple of different methods you can use to turn a PDF into a JPG. But the two I want to show you depend on how often you need to do this. If this is just a one-off situation or you only need to convert a PDF every so often, then you’ll want to use this first method I’m writing about — Preview. But if this is something you’re going to have to do on a regular basis, then you might want to check out the Automator Quick Action later in this article.
Convert a PDF to a JPG with Preview
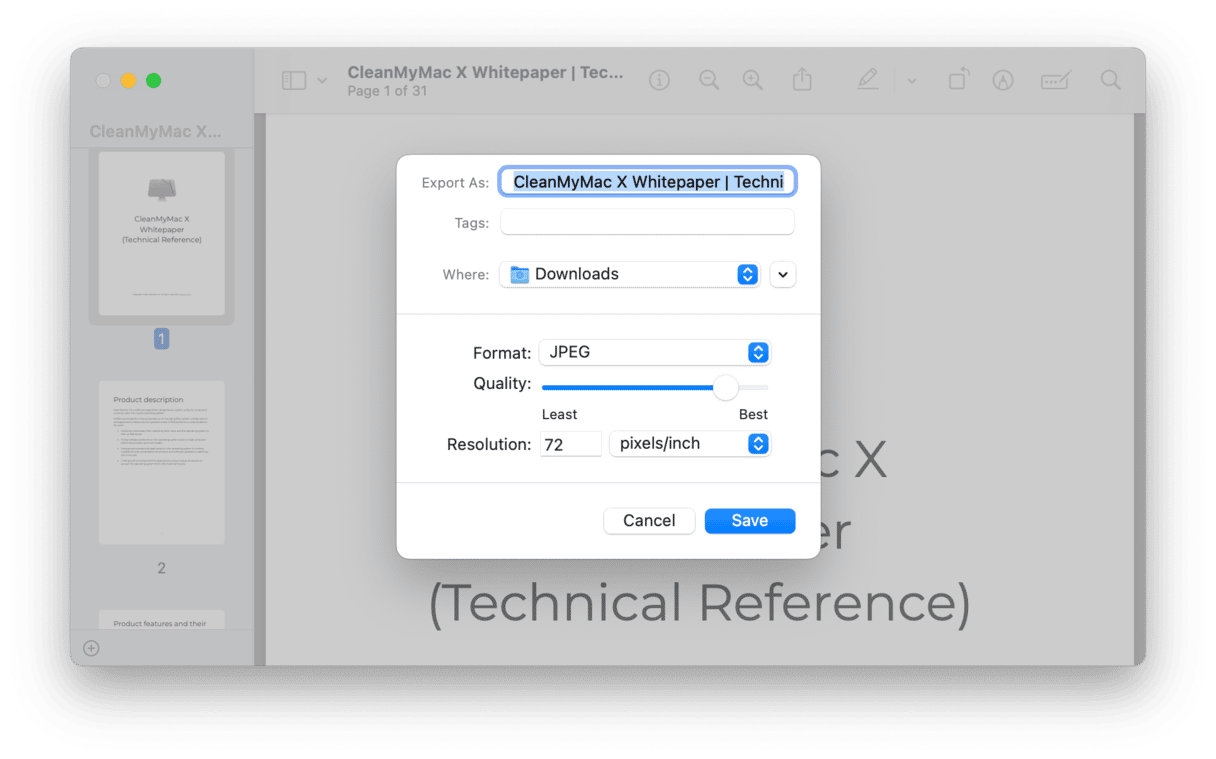
Using Preview to convert your PDFs is probably one of the easiest things you can do on a Mac. In fact, all you have to do is follow these steps:
- Find the PDF in Finder.
- Right-click on the file.
- Select Open With > Preview.
- Click File > Export.
- Set the Format drop-down menu to JPEG.
- Name the file and choose where you want to save the converted file.
- Then, click Save.

How to turn PDF to JPG with Automator Quick Actions
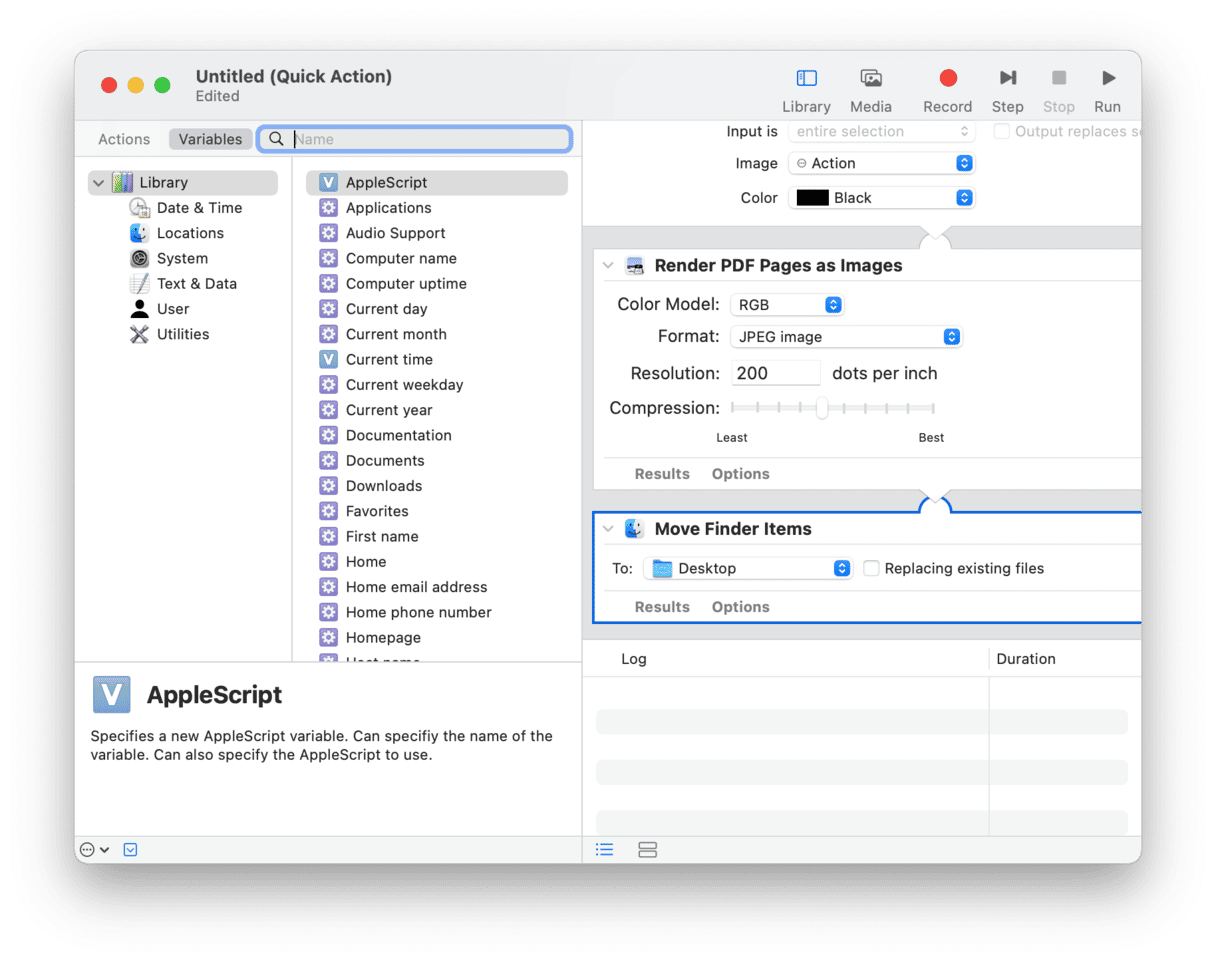
If you’re looking for a way to batch convert PDFs into JPGs, or maybe you need to convert PDFs regularly, then you might want to look at Automator to help out. You can create a “quick action,” which is a type of shortcut that you can access from anywhere on your Mac.
Now, if you haven’t used Automator before, don’t worry. It can seem a little intimidating the first time you open it, but just follow these steps, and you’ll be in great shape:
- Open Automator.
- Click New Document > Quick Action > Choose.
- Towards the top of the window in the Variables search field, type: Render PDF Pages as Images.
- Drag that over to the main workflow window on the right.
- Make sure the Format drop-down is set to JPEG.
- In the Variables search field again, type: Move Finder Items.
- Drag that into the workflow window after the Render PDF Pages as Images.
- In the To drop-down menu, select the folder you want to save your file in.
- Now, click File > Save.
- Name the quick action something like PDF to JPG.
- Then, in Finder, select the PDFs you want to convert and control-click on them.
- Click Quick Actions > PDF to JPG.

Don’t forget to delete the duplicates
The biggest problem with turning PDFs into JPGs is after the fact. Because now, you essentially have two versions of the same file. Which one do you keep? Well, that’s entirely up to you. But it can be hard to keep up with each of these copies, especially if you’re not saving them all in the same place.
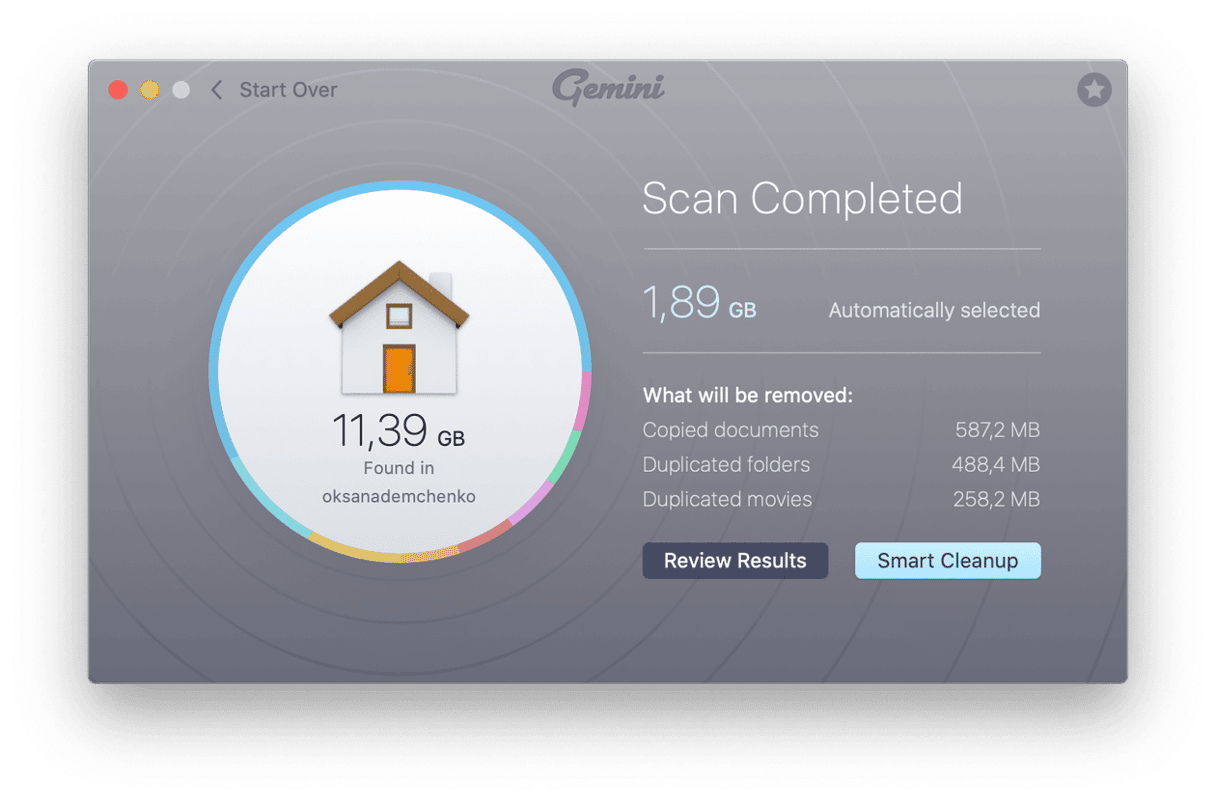
The fortunate news is that you can use the app Gemini 2 to help you with that. Gemini 2 will scan folders on your Mac and quickly remove duplicate and similar-looking files. Once you download Gemini 2 and install it on your Mac, you can follow these instructions to start cleaning up.
- Open Gemini 2.
- Click + > Home folder > Scan for Duplicates.
- Wait for it to finish. Then, click Review Results or Smart Cleanup.

If you want to see which files were found during the scan, click the Review Results button and preview each file to decide which ones to delete. However, if you want Gemini 2’s algorithm to decide for you, then you can get rid of those duplicates with just one click of the mouse. It’s honestly that simple.
macOS has some great native apps that will help you change a PDF into a JPG. Whether you’re just uploading a job resume and need Preview to help you convert a file one time, or you’re converting PDF reports using quick actions on a weekly basis. Changing a file time can sound scary and hard, especially if you’re not completely sure of how to do it yourself. But thankfully, Apple has created apps and workflows that make it simple for anyone to do.


