A PNG file, or a Portable Network Graphics file, is a popular type of image, especially when it comes to screenshots. One of the biggest benefits of a PNG is that it's lossless. Meaning it can be compressed and will still maintain quite a bit of its original image quality.
But, despite the popularity of PNG files, they're not always supported. So, you might find yourself in a situation where you need to know how to change a png to JPG. Well, you're in luck. This article will show you how to do just that using the default macOS app, Preview, as well as popular online tools like PNG2JPG and CloudConvert.
How to convert png to jpg with Mac Preview app
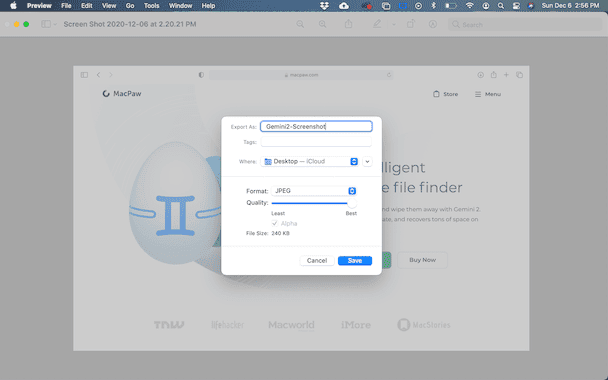
Using the macOS app, Preview is probably the easiest and most straightforward way to convert a png to jpg on Mac. Just follow these steps to get started:
- Open Preview and then find the PNG in the popup window.
- Click File > Export.
- Name your file and select a location to save it.
- Change the format dropdown menu to JPG and adjust the Quality slider.
- Then, click Save.
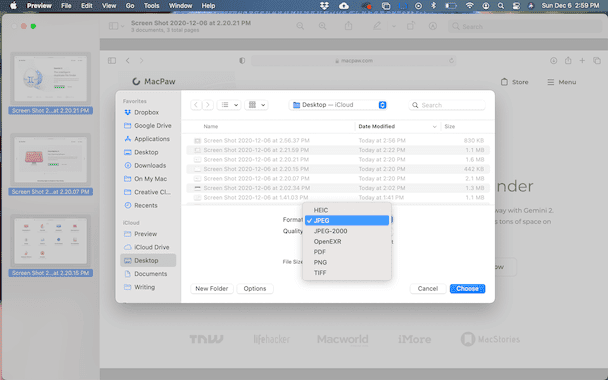
You can also use Preview to convert multiple PNG files at the same time with these directions:
- Open the Preview app.
- In the popup, hold down Command on your keyboard and select all the files you want to convert.
- Click on one of the thumbnails in the left sidebar.
- Press Command + A on your keyboard.
- Click File > Export Selected Images…
- Then, click options and select JPEG from the dropdown menu and adjust the Quality slider.
- Select where you want to save your pictures and click Choose.
How to convert a png to jpg with online tools
Even though using the Preview app to convert your picture is so simple, you might not like the final image quality. Fortunately, there is no shortage of options when it comes to free online converting tools. Two of the more popular converters include PNG2JPG and CloudConvert.
1. PNG2JPG
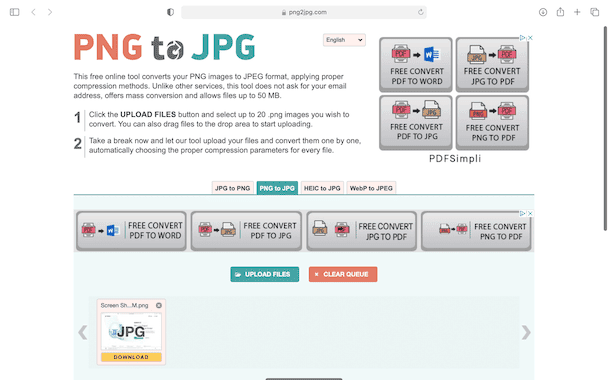
Delivering on the promise of its name, PNG2JPG will quickly convert your images. You can work on up to 20 files simultaneously, as long as they're all under 50 MB. And it supports a wide range of file formats, so you can use this tool to change other non-PNG pictures.
Here's how you convert your image using PNG2JPG:
- In your browser, go to png2jpg.com.
- Click the PNG to JPG tab.
- Then, click Upload File and select the PNG(s) you want to convert.
- After it processes, click Download.
2. CloudConvert
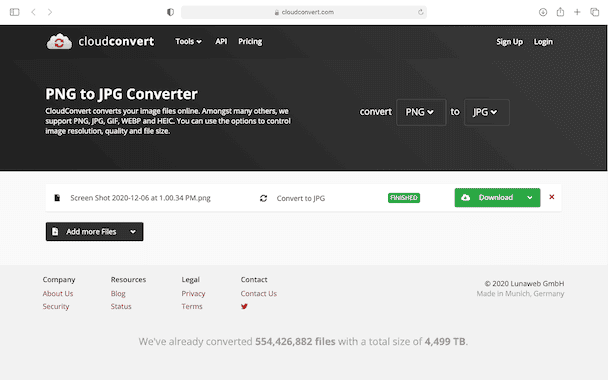
Another online tool is CloudConvert. It's free to use and gives you slightly more options than PNG2JPG, but you're limited to 25 conversions per day. If you need more, you can upgrade to one of their paid tiers and unlock even more features. CloudConvert is actually a really powerful tool and can be used for a myriad of different types. It's not limited to only images and pictures.
Follow these steps to start using CloudConvert:
- Go to CloudConvert.com in your browser.
- From the dropdown menus, select convert PNG to JPG.
- Click Select File > From my Computer, find your file(s), and click Choose for Upload.
- Then, click the wrench icon if you want to make any adjustments to the picture.
- When you're happy with the settings, click Convert.
- Click Download.
Figuring out how to convert a PNG to JPG on Mac can sound intimidating at first. And even more so if you don't have any idea where to start with it. Hopefully, after reading this article, you better understand how to change your image's format and feel confident doing it.


