If a picture is worth a thousand words, then a GIF has to be worth a million. The short, looping photos are perfect for those moments when words alone won’t do. While a simple text can lack emotion or tone, GIFs give you the chance to send a facial expression or a visual response. It really is no surprise to see just how popular GIFs have become. Especially now, popular messaging apps have integrated ways to make it easier to search for and send them.
But, there are moments when you might wish you could make your own GIFs. Don’t worry. This article will show you how to convert videos into a GIF or how to create your very own on your Mac.
What is a GIF file?
Before you jump into making a GIF, it’s important to understand what exactly it is. Because while it looks more like a video, GIFs are actually closer to photos. In fact, some GIFs can be static.
The file acronym stands for Graphics Interchange Format. It was designed to be a lightweight and universal way to share pictures. But it was quickly replaced by PNGs which can compress images better and support transparent backgrounds. That being said, you can probably figure out the one thing GIFs do that PNGs can’t. Yup, it’s motion and animations. GIFs are capable of bringing life into situations that static images just can’t compete with.
Unlike videos, GIFs don’t require a video player or a plug-in. This is why they’re used so frequently on websites because it doesn’t matter what browser you’re using – GIFs will always work.
How to make a GIF on Mac from scratch
Finding the perfect GIF to respond with can require a lot of search and patience. Sometimes, you might even think it would be easier just to make your own. Well, creating a GIF on your Mac might not be as headache-inducing as it sounds.
The first thing you need to do is make all the frames of your GIF. Think of it as individual pages of a flipbook. Chances are you’re using an app like Photoshop to create those frames. So, the first way I’ll show you how to make a GIF is with Photoshop.
- On your Mac, open Photoshop.
- Click File > Scripts > Load Files into Stack.
- Select all the photos you want to use for your GIF and click Open.
- Then, click ‘Ok’ to import photos.
- From the menu bar, select Window > Timeline.
- Choose ‘Create Frame Animation.’
- In the top right of the Timeline panel, click the menu icon.
- Select ‘Make Frames From Layers.’
- From the bottom of the Timeline panel, click the repeat menu, then select ‘Forever.’
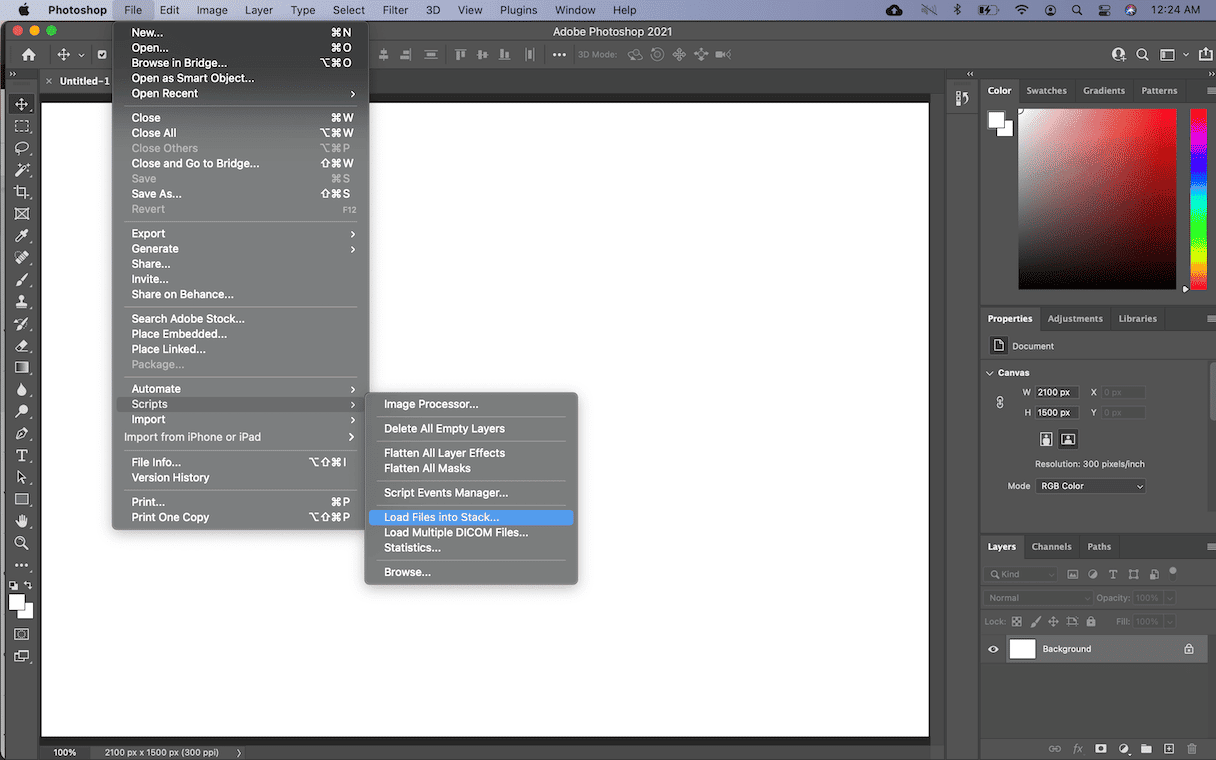
Then, once you have all of your frames loaded into Photoshop, you can press the spacebar on your keyboard to play the GIF.
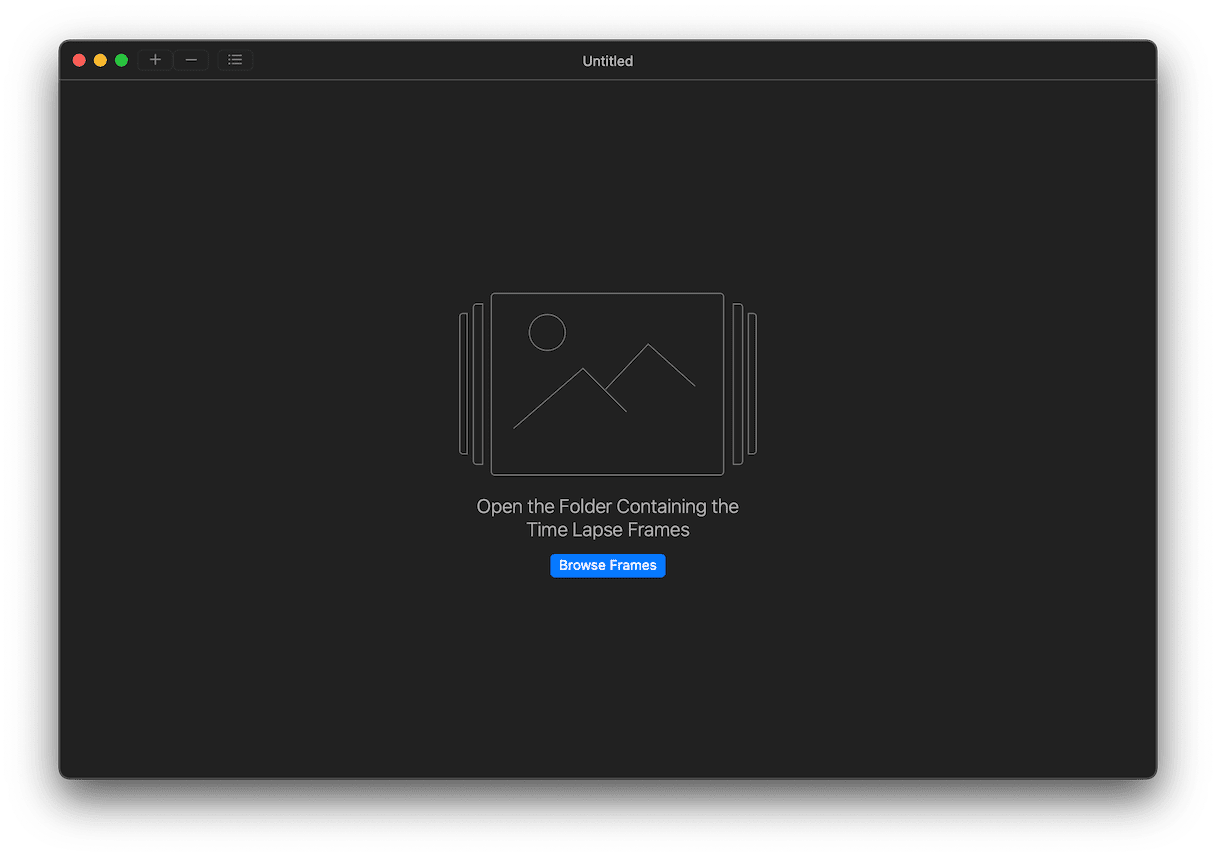
Maybe you don’t have Photoshop, don’t worry – there’s another, perhaps more straightforward way to create a GIF. You just need the apps GlueMotion to make a video and Permute to convert the video into a GIF.
Once you have those apps download and installed on your Mac, just follow these steps:
- Open GlueMotion.
- Click ‘Browse Files.’
- Select the images you want to turn into a GIF.
- Put the pictures in the order you want, then click ‘Edit Frames’ in the top right.
- Check the deflickering effect, if you’d like to use it.
- Then, select the file type you want to export it as.
- In the top right, click ‘Export Timelapse.’
- Choose the folder you want to save your Timelapse in.
- Open Permute.
- Click File > Open.
- Find the video you just exported and click ‘Open.’
- In the drop-down menu, select GIF Animation.
- Click the play button.
How to convert other image formats to GIF
Fortunately, making one from scratch is not the only way to create GIFs. You can convert a movie or video file into GIF too. But doing that will depend on what format your video is in.
How to turn an MP4 into a GIF
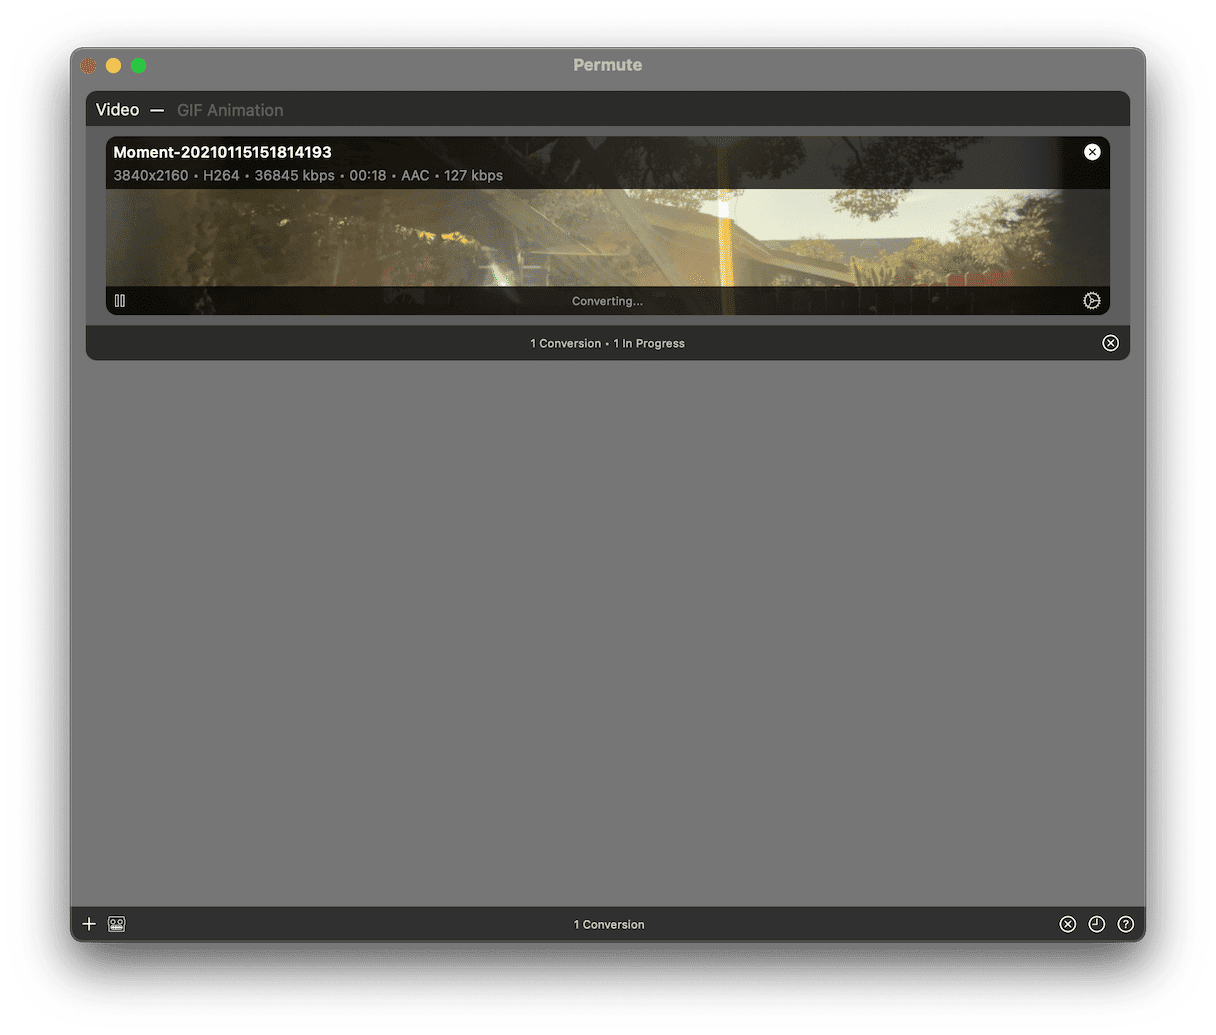
Converting an MP4 into a GIF requires the app Permute, which you read about in the last section. But, to save you from figuring out where to start in the instructions above, you can just follow these steps once you have your MP4 ready:
- Open Permute on your Mac.
- In the menu bar, select File > Open.
- Find your video file and click ‘Open.’
- Set the drop-down menu to ‘GIF Animation.’
- Then, click the ‘play button in the video’s container.
How to Convert a MOV to GIF
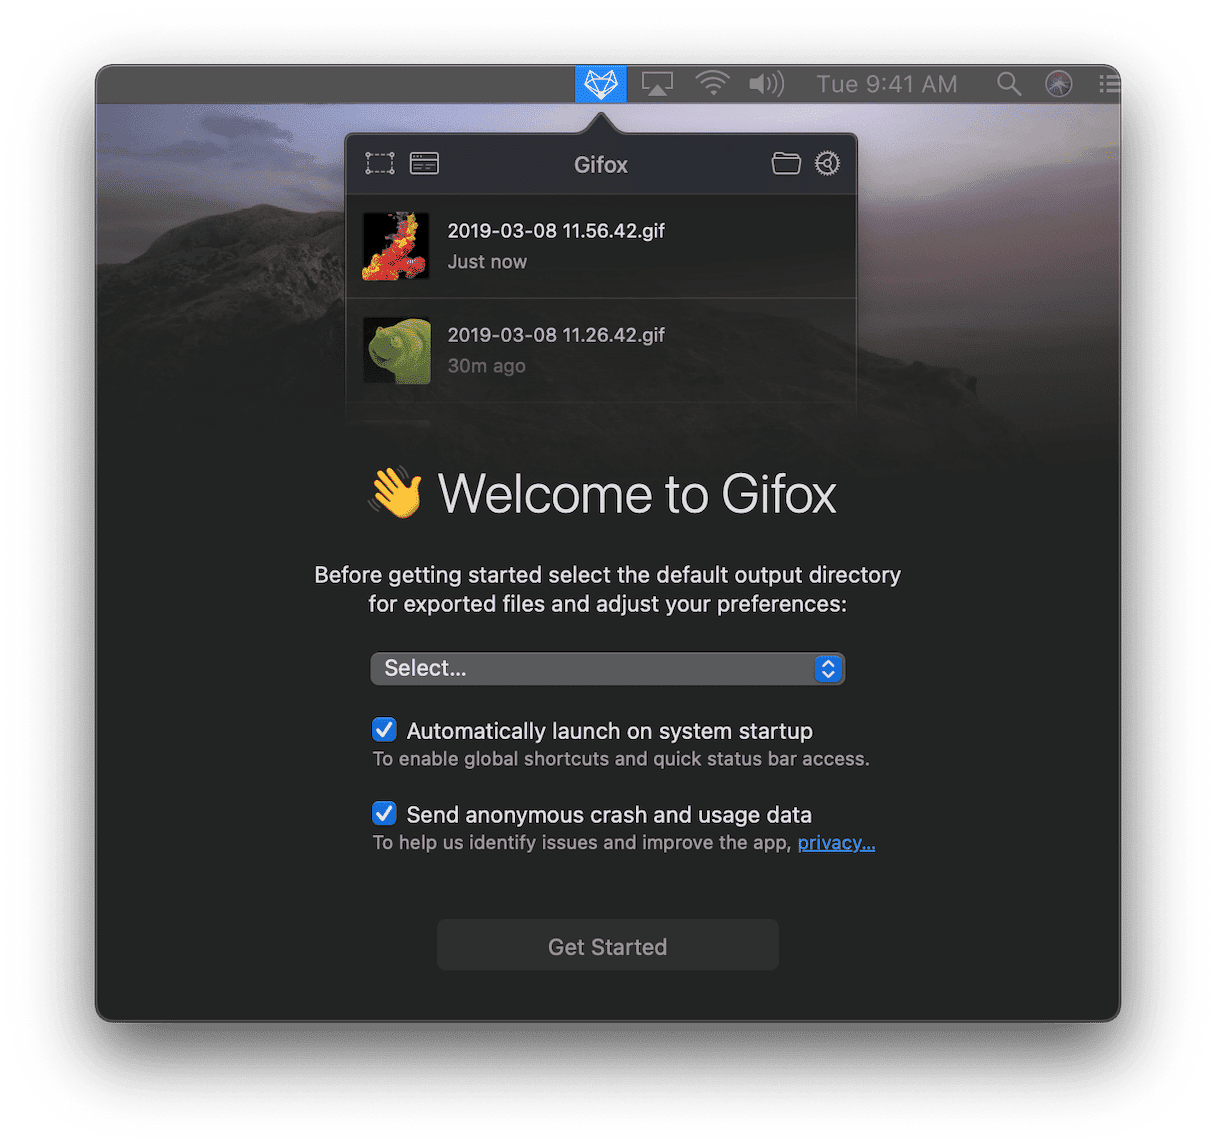
You can also use another incredibly easy-to-use app called Gifox to turn your MOV files into GIFs. Once you have it downloaded and installed on your Mac, this is all you need to do:
- Open Gifox.
- In your menu bar, click on the Gifox icon.
- Click the top of the window where it tells you to add a video from your Mac.
- Find and select the video you’d like to use for your GIF.
Seriously, that’s it! And Firefox can actually do a lot more than just convert videos. One of the other great features is that you can use it to capture screen recordings as GIFs as well. You’re definitely going to want to play with all of Gifox’s features after you finish converting your MOV.
How to keep your image library clean
When you start making your own GIFs, you’re going to end up with a lot of similar files. And that’s especially true if you’re creating them from scratch. Once you have the GIF made, do you really need to keep all of those individual frames?
Manually going through your image library and removing the duplicate and similar-looking pictures could take you a couple of hours. Instead, you could use a duplicate finder app like Gemini 2. It scans either your entire home folder, or you can select a specific folder looking for duplicates to help you quickly get rid of them. And the best part is you can try it for free.
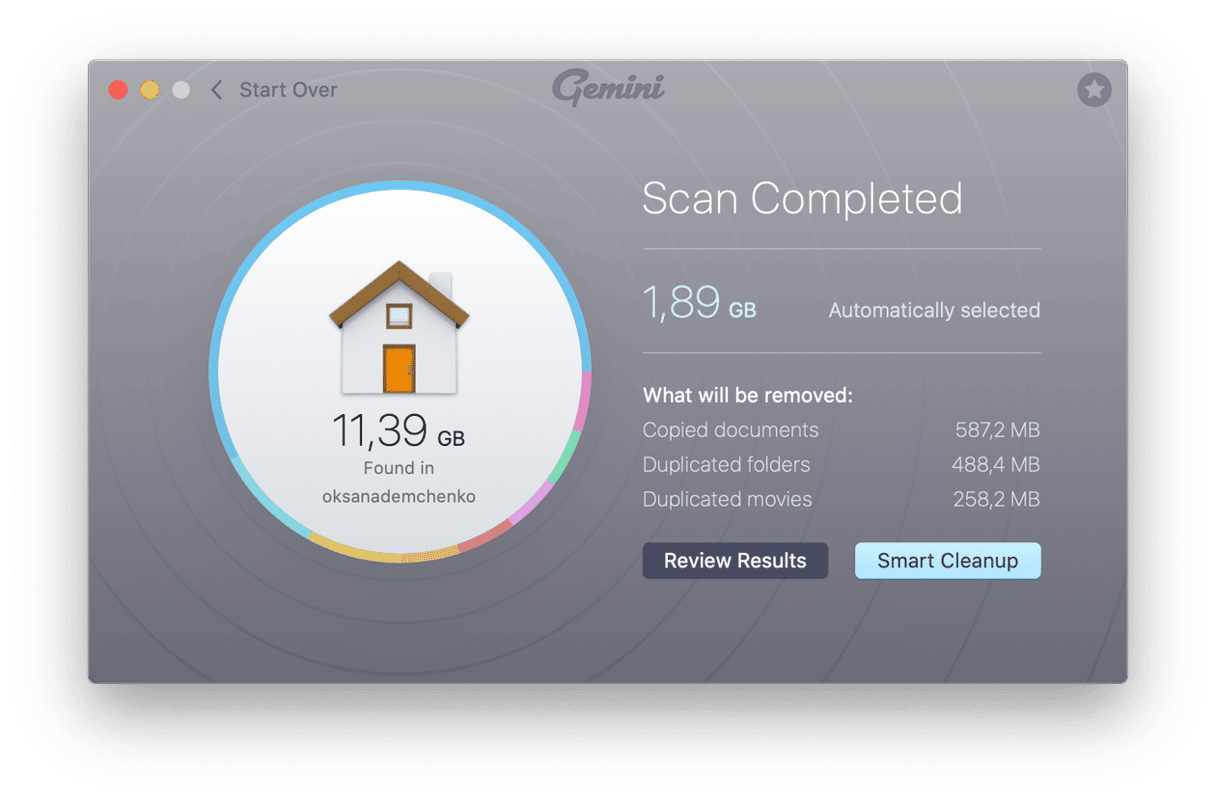
Once you have it downloaded, here’s all you have to do to clean up your image library:
- Open Gemini 2.
- Click + and either click Pictures folder or Choose Custom Folder.
- Then, click Scan for duplicates.
When the scan is finished, you can delete all of your duplicates just by clicking the Smart Cleanup button. Gemini 2’s algorithm will select the best version of your file and get rid of the rest, so you don’t have to think anymore about it.
But, if you would like to decide for yourself, you can click Review Results. It will let you preview all of the files it found, and then you can select the versions you want to move to the trash.
How to play a GIF on Mac
As you read earlier, one of the benefits of GIFs is how universal they are. They don’t need any special plug-ins or video players to work. So, you might be wondering why when you try to open a GIF on your Mac, the Preview app just displays all of the frames instead of playing it. Well, the simple answer is Preview doesn’t support videos. But, fortunately, you can still play GIFs using one of your browsers. Here’s how you do that:
- Find the GIF you want to play in Finder.
- Right-click or hold down control on your keyboard and click on the GIF.
- Select Open With > Safari.
A new window or tab should open, and the GIF should start playing in the middle of it.
Not only do GIFs add more fun and levity to your text conversations. But, they’re also a great way to share animation or motion when video files just aren’t possible. Thanks to how lightweight and universal GIFs are, you can use them on websites, so you don’t have to depend on special plug-ins or worry about video codecs. Every browser, messaging app, even Apple Mail knows how to play a GIF. So, whether you just want to add some simple motion or you want to share the perfect reaction, simply put – GIFs are the best. And now you know making them can be just as fun as sharing them.


