Did you recently get a new iPhone? Perhaps you upgraded, or your last one had an untimely demise. Either way, in this situation you’ll be grateful for iCloud backing up and syncing all of our stuff. Especially your pictures. But now you’re probably wondering how to get those photos from iCloud.
Well, keep reading, and we’ll go over all that — and cover some things you should try to avoid.
How to get photos from iCloud
To retrieve your photos from iCloud using Safari on your iPhone, follow these updated steps:
- Open the Safari browser on your iPhone.
- Go to iCloud.com.
- Log in with your Apple ID and password.
- Tap on the "Photos" icon.
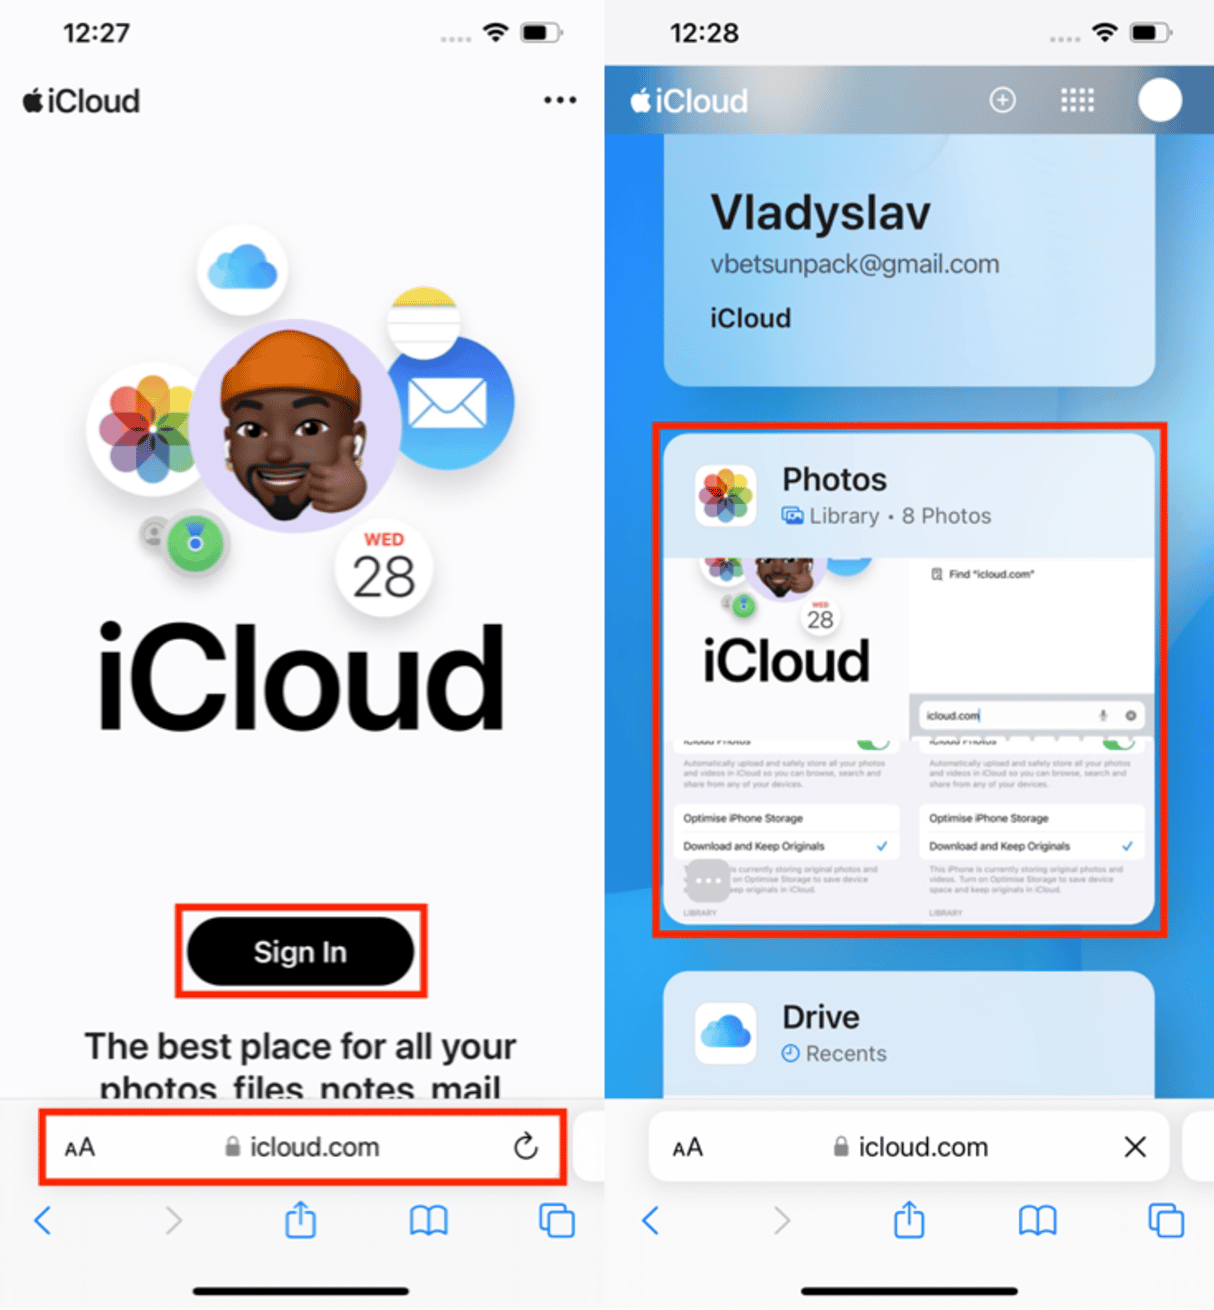
- Browse through your iCloud Photos and select the photos you want to download.
- Tap the "Select" button at the top right corner.
- Choose the photos you wish to download.
- Tap the "More" button (three dots) at the bottom right corner.
- Select "Download" from the options.
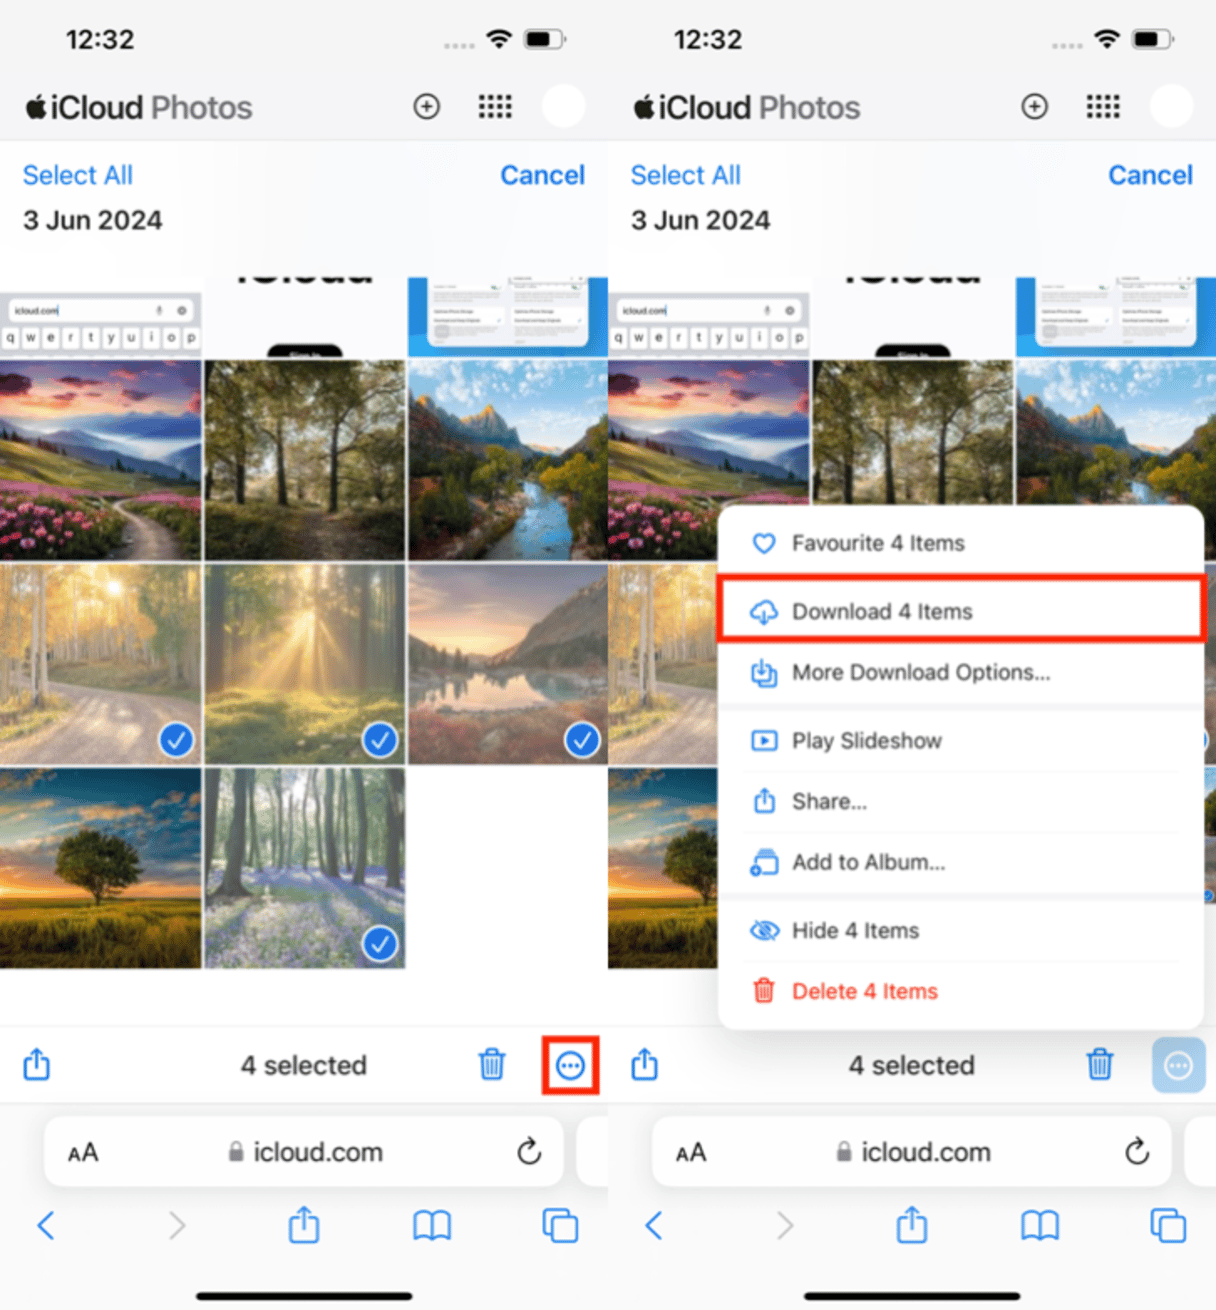
The selected photos will be downloaded to your iPhone and appear in your Camera Roll.
How to get old photos from iCloud
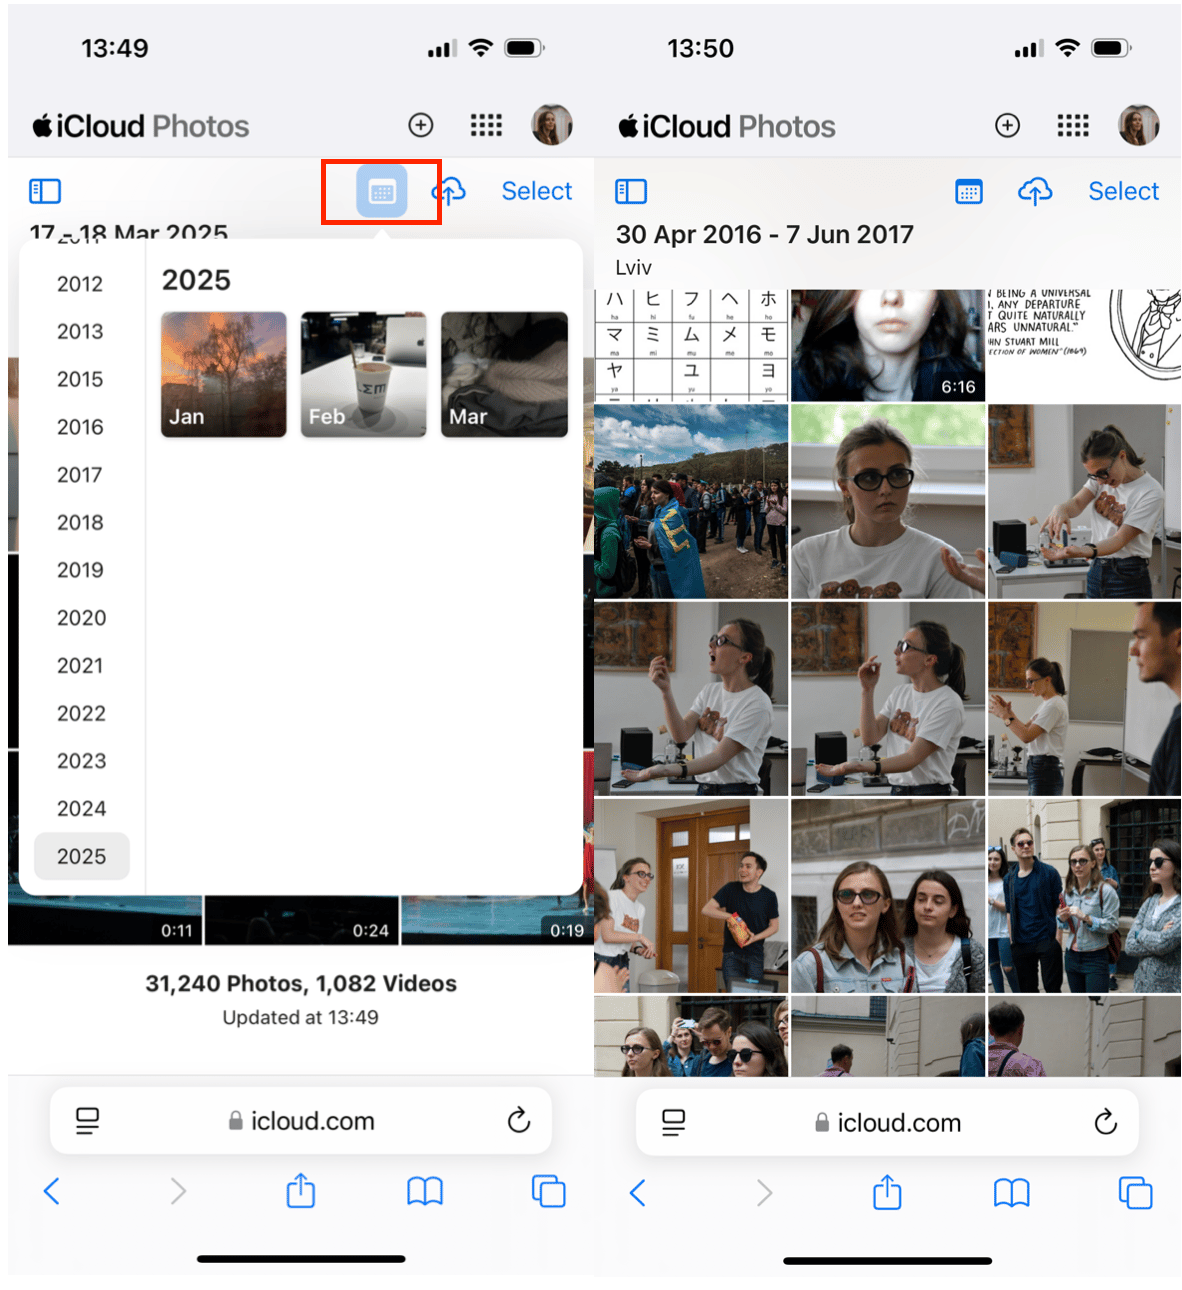
To access and download specific photos from iCloud directly on your phone, you can use the Photos app to navigate through your images by date. This is particularly useful if you're looking to retrieve photos from a specific year or event. The process is the same as we described before, just click on the calendar icon for specific timelines.
Check if you have enough space to download all photos from iCloud
If you want to download your entire iCloud photo library to your iPhone, ensure you have enough storage first. If you’ve been using iCloud for a while, then there’s the possibility that your photo library is too large to fit on your iPhone. Before attempting to download all your iCloud photos, a good practice is to scan them for redundant pictures, like similar shots, old screenshots, and the like.
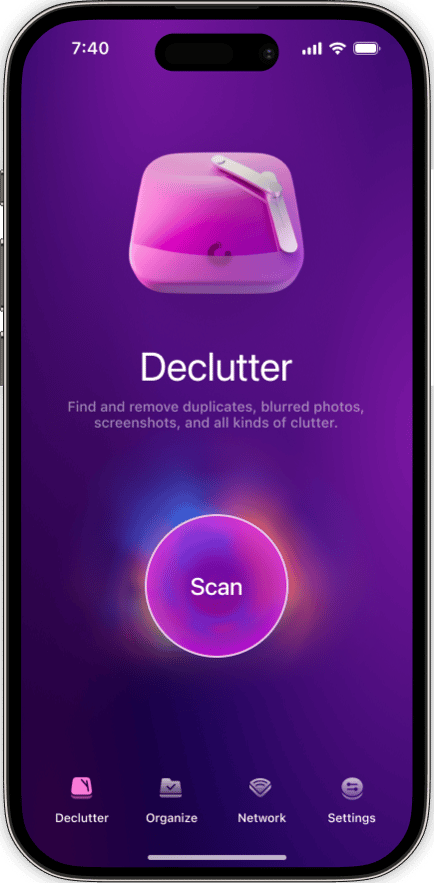
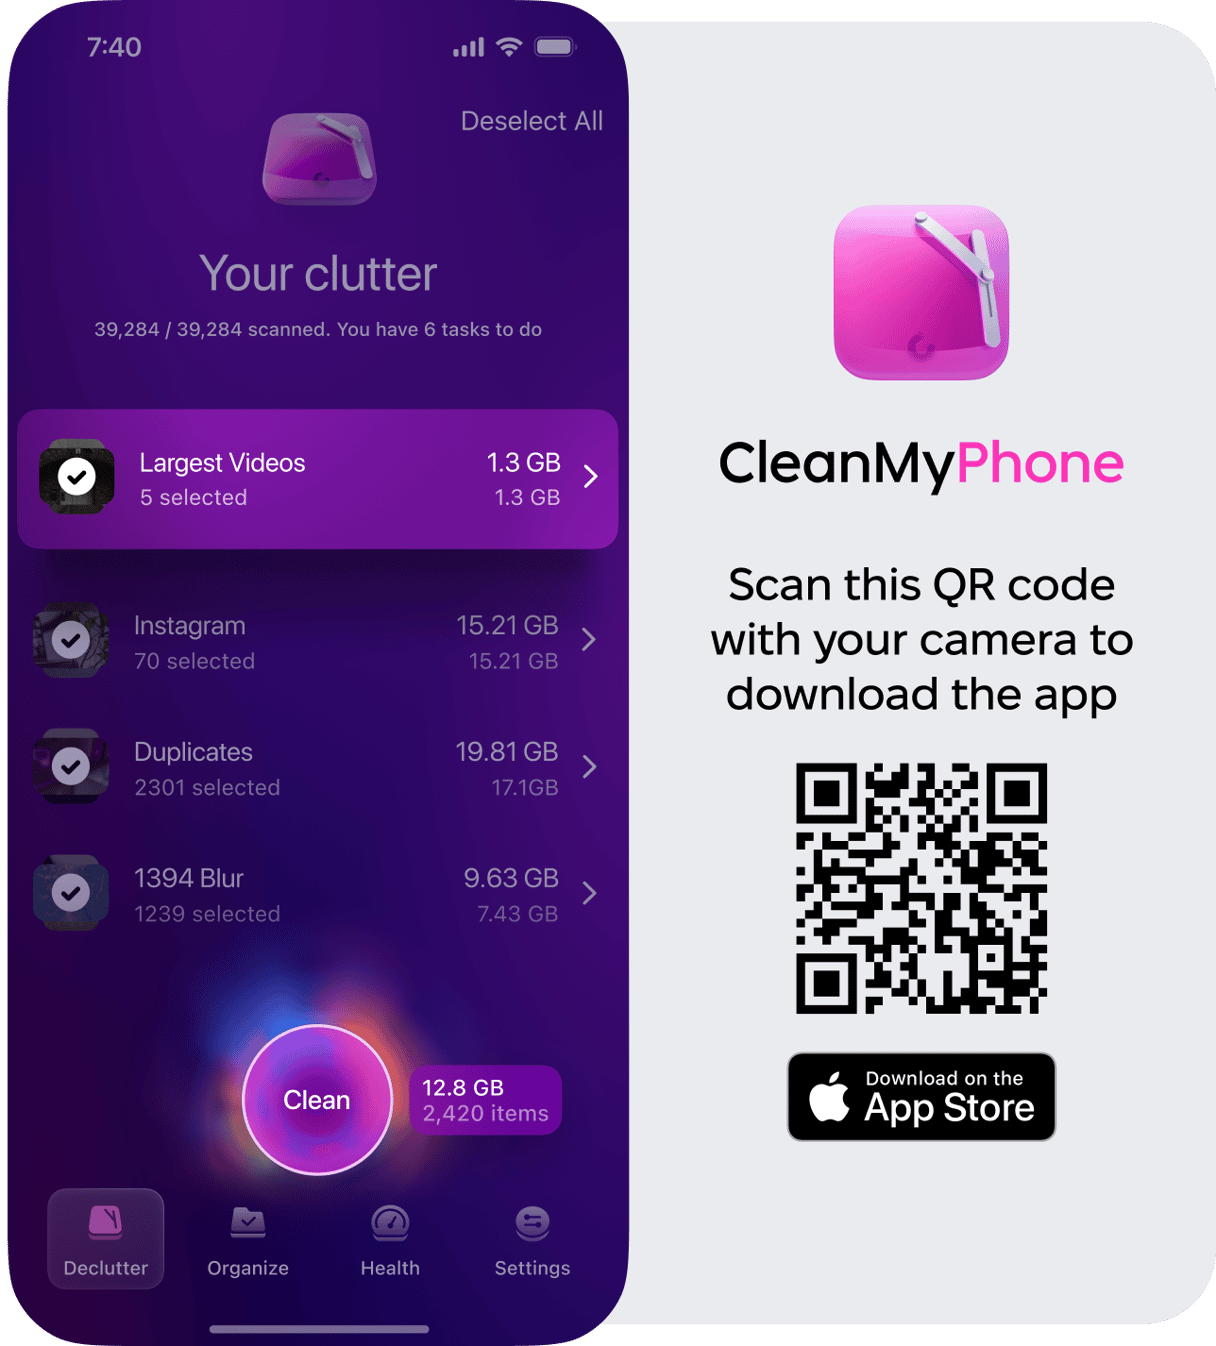
To do that, download CleanMy®Phone and run a scan. CleanMy®Phone will analyze the previews of your photos stored on your iPhone and help you quickly delete unwanted photo clutter. The removed images will be automatically deleted from iCloud, freeing up valuable space for you.
Here’s how it works:
- Download CleanMy®Phone
- Allow CleanMy®Phone to access your photo library.
- Choose the Declutter tab – the fastest way to clean storage.
- You’ll see the following folders: Duplicates, Largest Videos, Screenshots, Blur, Screen Recordings, and others.
- Start with Largest Videos and review the videos the app suggests deleting.
- The clean all unwanted pics from other folders.
- Tap Continue and go back to the main screen of the app.
- Tap Organize and then Scan to categorize all your photos and remove similar images.
How to download all photos from iCloud?
If you’re reading this to learn how to get pictures from iCloud to iPhone, then you’re in luck — it couldn’t be easier.
- Open the Settings app on your iPhone.
- At the top of the screen, tap on your name/Apple Account.
- Select iCloud.
- In the iCloud settings, select Photos.
- Toggle on iCloud Photos.
- Select Download and Keep Originals.
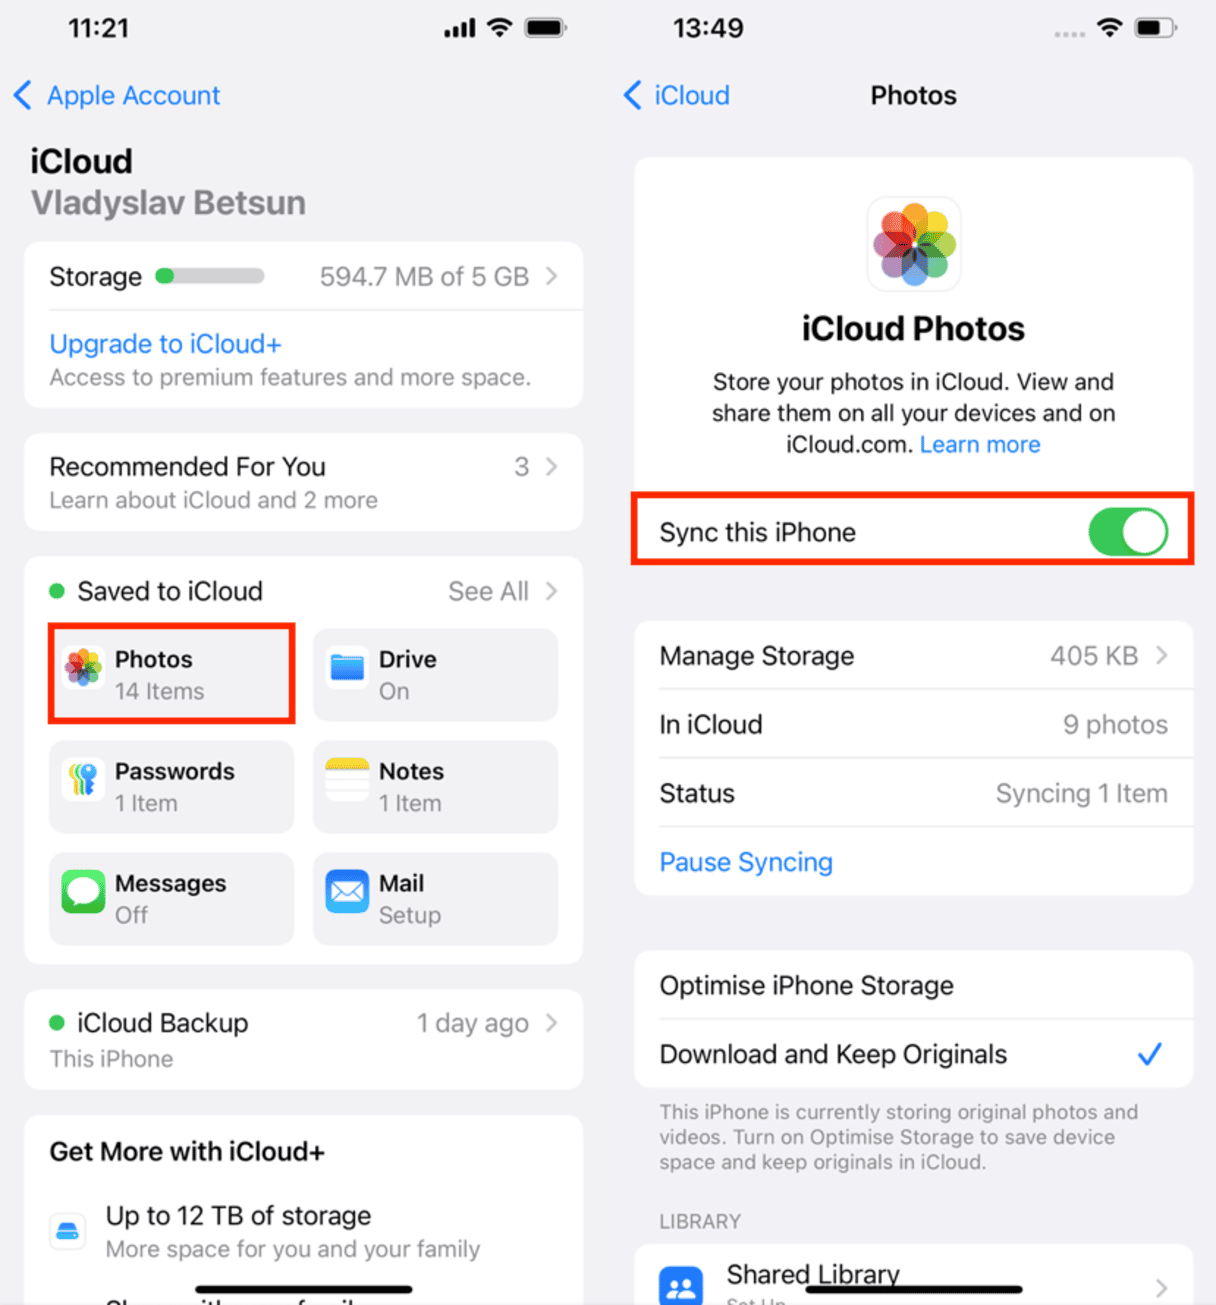
Note: If you opt for Optimize iPhone Storage, it will reduce the resolution of your photos.
How to download photos from iCloud if you lost your iPhone
If you've lost your iPhone and need to recover your photos, iCloud makes it easy to regain your memories. Here's how to get photos back from iCloud:
- Get a new device. Obtain a new iPhone or use another iOS device.
- Set up the device. Turn on your new device and follow the setup instructions until you reach the "Apps & Data" screen.
- Restore from iCloud Backup. Select "Restore from iCloud Backup." Sign in with your Apple ID and choose the most recent backup that contains your photos.
- Wait for restoration. Allow the device to complete the restoration process. Depending on the size of your backup and your internet connection speed, this may take some time.
- Check your photos. Once the restoration is complete, open the Photos app to ensure all your photos have been restored.
Following these steps, you can easily recover photos from iCloud even if you've lost your iPhone. This process ensures that all your memories are safely transferred to your new device.
Downloading pictures from iCloud to iPhone couldn’t be simpler. Whether retrieving only one photo or your entire library, you’ll be glad you have everything backed up to iCloud. And if you're trying to figure out how to upload your photos to iCloud, we've got a guide to that as well.
FAQs
1. Where do downloaded photos go on the iPhone?
Downloaded photos from iCloud go directly into your iPhone's Photos app, where you can view them in the Library or Albums section.
2. Why are pictures not downloaded on my iPhone?
One common reason photos might not download is that your iPhone may not have enough free storage. To free up space, download CleanMy®Phone, which can help you clean out unneeded files and make room for your photos.
3. How do you find old photos on iCloud?
To find old photos on iCloud, log into iCloud.com on your browser, click on "Photos," and browse through your photo library by date. Alternatively, you can also view them through the Photos app if iCloud Photos is turned on for your device.


