While there are hundreds of photo editors for iOS on the App Store, one is often overlooked: your iPhone’s very own Photos app. Photos can handle all the basics from changing brightness to cropping and rotating and just about everything in between. If you never really thought about using the native photo editor, check out this guide on how to edit photos on iOS 18.
How to edit photos on iPhone with updated Photos app
To access the photo editing feature, start by opening the photo you’d like to edit in Photos. Then tap Edit in the upper right-hand corner. From there you’ll have access to the following tools:
- Crop
- Rotate
- Auto Enhance
- Light
- Adjust
- Black and White
- Filters
- Markup (Draw & Add Text)
Let’s take a look at these controls, and remember to stay in the editing mode as you follow the instructions.
Before you start editing app on iPhone
Chances are, you always take several photos of the same thing and then pick just one photo to edit and share. With CleanMy®Phone, you can clear unwanted similar pics and keep the best, like those you’ve fine-tuned.
- Download CleanMy®Phone.
- Wait until the app scans your gallery.
- Go to Organiser module.
- Choose category and get rid of similar images.

How to edit size and rotation
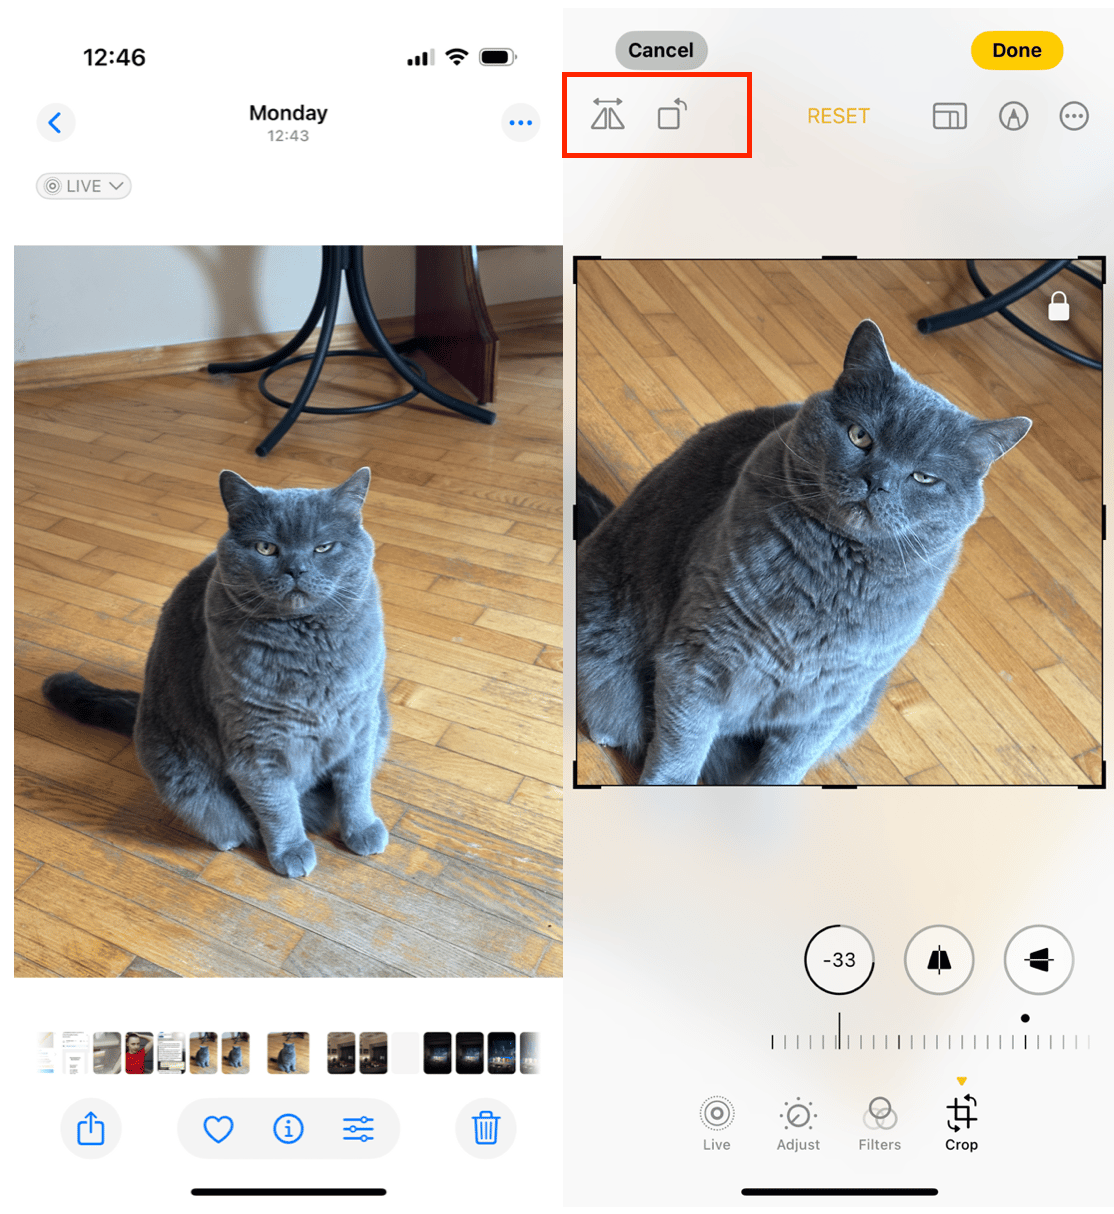
One of the most basic yet extremely handy tools in the app is Crop/Rotate. Rotate lets you quickly straighten the subject of your photo or the horizon, while the Crop tool allows you to remove unwanted outer areas from the pic.
How to rotate a photo on iPhone
This comes in handy when your composition is a little off — for example, the horizon needs straightening. Here’s what you do:
- Tap the Crop/Rotate icon that looks like a little box with two arrows
- Hold and drag the wheel under the photo left and right
- Tap Done to keep changes, Reset to start over, or Cancel to discard all changes
How to crop a photo on iPhone manually or using preset aspect ratios
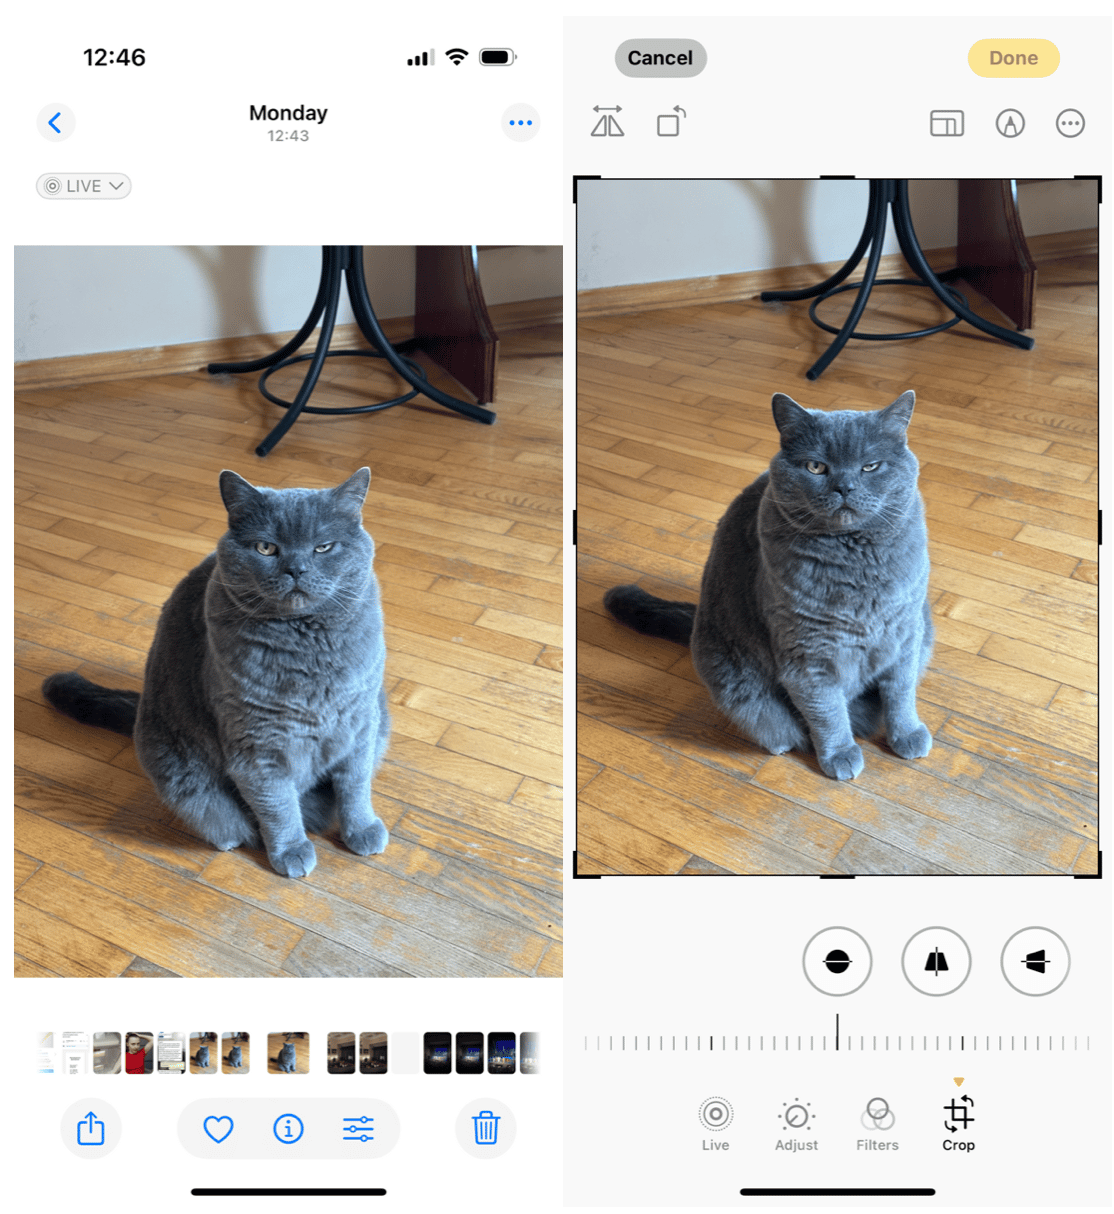
When you need certain objects out of the shot — like a stranger’s elbow in a photo of your friends — the Crop tool is perfect for the job. Here’s how to use it:
- Tap the Crop/Rotate icon that looks like a little box with two arrows
- Use two fingers to zoom in on the subject or use one finger to move the corners of photo inwards
- Tap Done to keep changes, Reset to start over, or Cancel to discard all changes
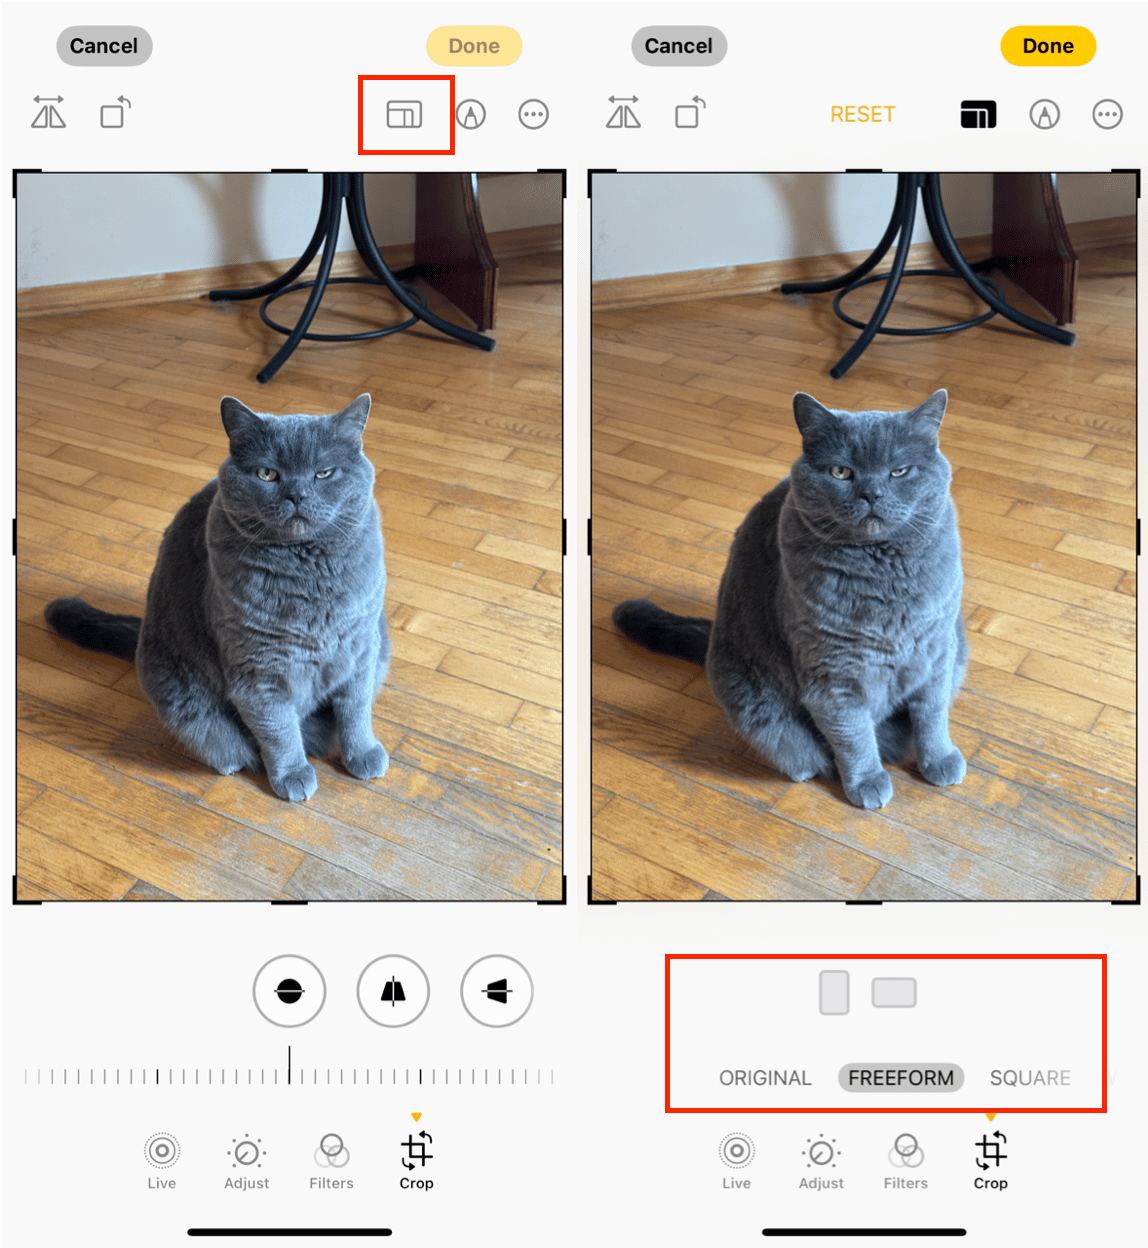
Now, to crop your shot while preserving its original aspect ratio or, on the contrary, change the aspect ratio to a specific value (make it square, for example), do the following:
- Tap the Crop/Rotate icon that looks like a little box with two arrows
- Tap the multiple-box icon in the lower right-hand corner
- Choose the desired aspect ratio
- Use two fingers to zoom in on the subject or use one finger to move the corners of photo inwards
- Tap Done to keep changes, Reset to start over, or Cancel to discard all changes
How to enhance iPhone photos
Apple has taken a lot of the hard work out of photo editing by giving you premade filters and the Auto Enhance feature. These two tools are particularly handy when you don’t have the time to fiddle with color and contrast and just want your phone to do all the work.
How to use quickly enhance a photo with Auto Enhance:
- Tap the wand icon in the upper right-hand corner
- Tap Done to keep the changes or Cancel to discard them
It’s important to note that the Auto Enhance effects are usually subtle, changing the brightness, contrast and sharpness very slightly. Filters, however, can give your shot and entirely different look.
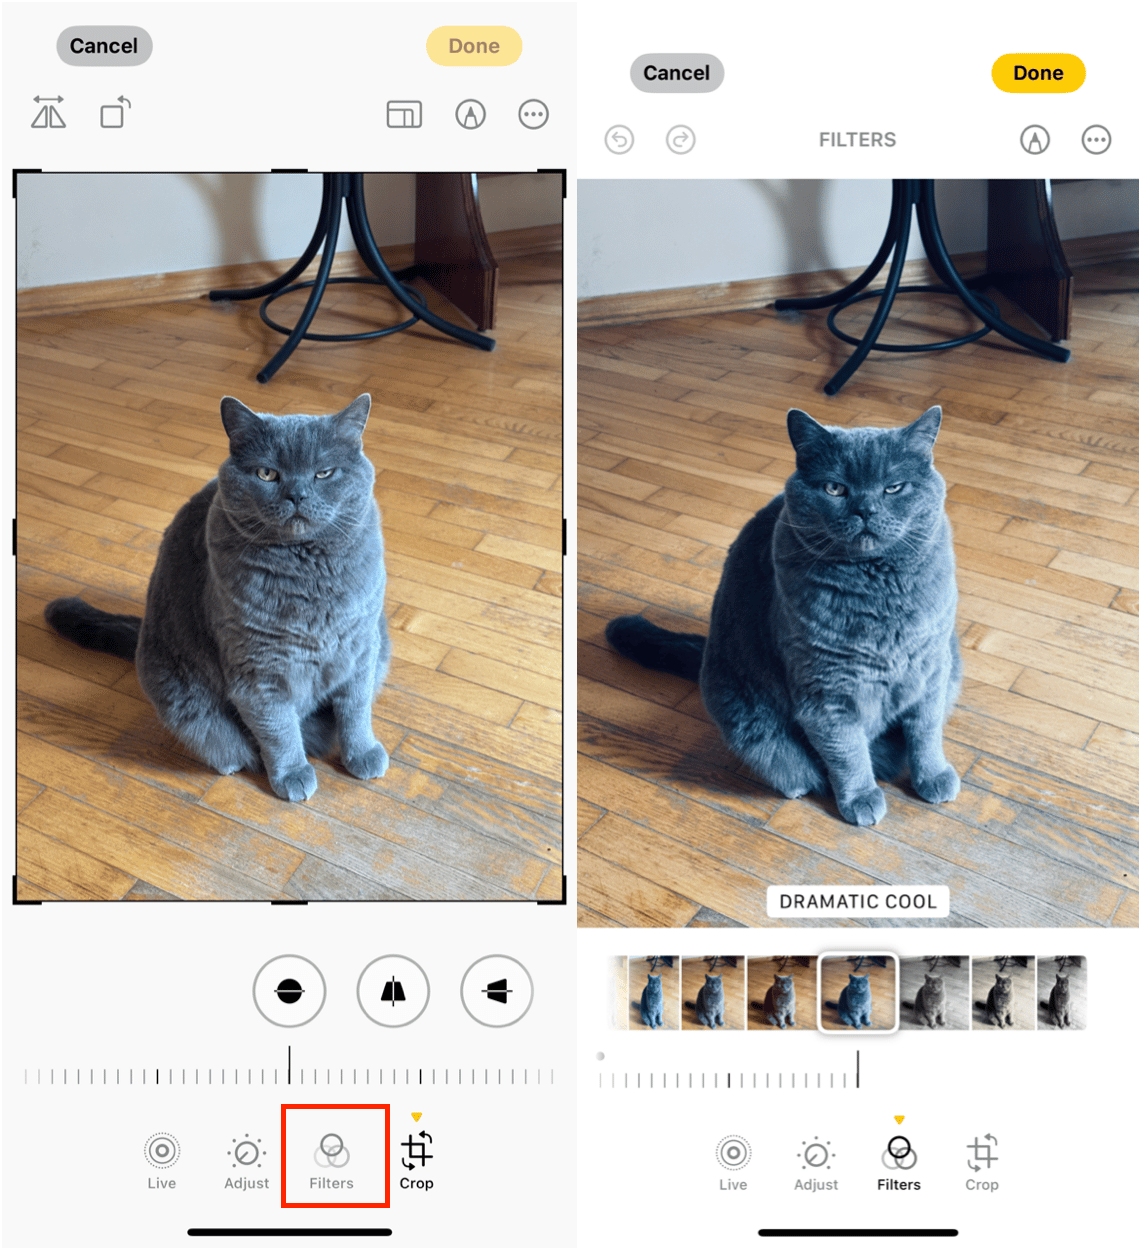
How to add a filter to a photo:
- Tap the three circle icon under your photo in editing mode
- Tap on each filter to apply it
- Tap Done to keep the changes or Cancel to discard them
If your photo looks fine, but the background is a bit off, Photos won't help you much, so check out these background photo editors we've picked.
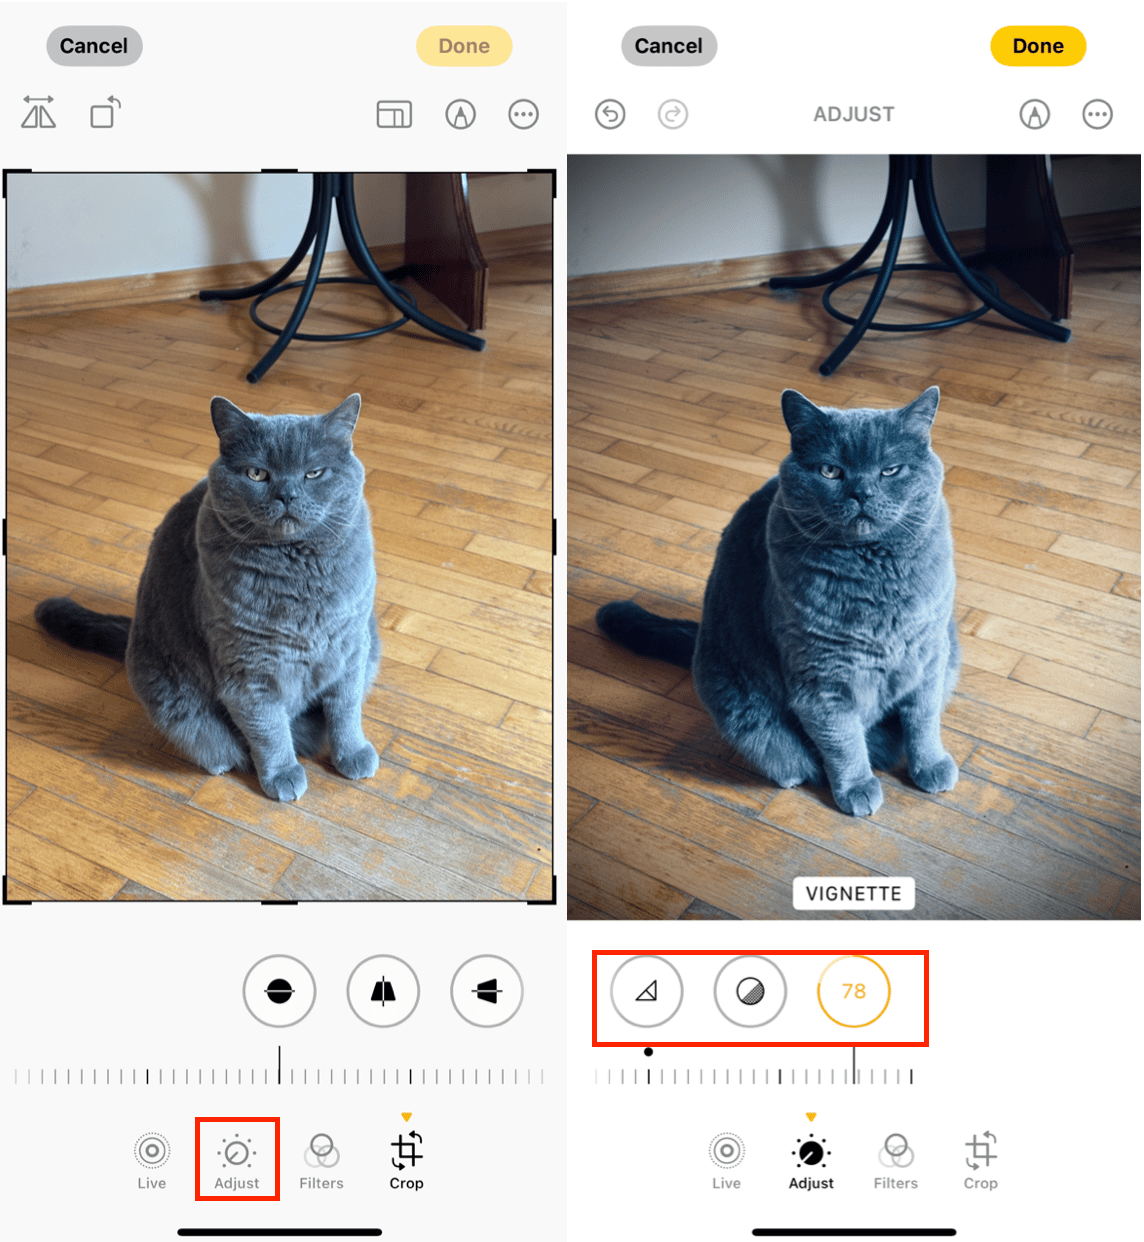
How to Adjust warmth, contrast, and brightness
If you find that Auto Enhance and Filters aren’t doing your photo justice, you can adjust contrast, and brightness manually. Although manual editing is more time consuming, you have more options this way.
Here are the tools you can use to edit photos on iOS 18:
How to draw on photos on iPhone
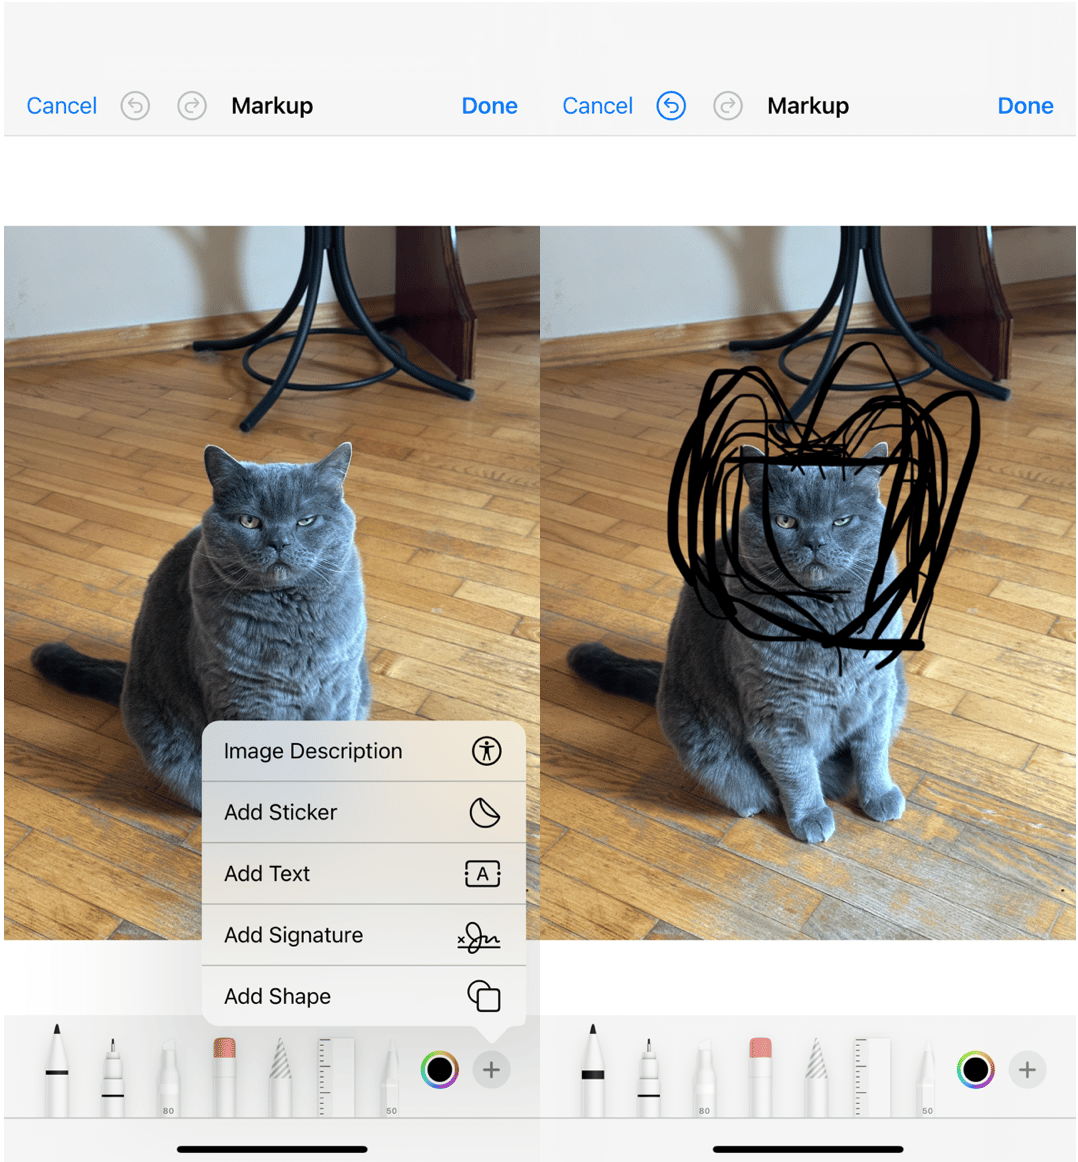
One of the newer features in Photos is the Markup tool. It allows you to add text and even your handwriting to your photos without using any third-party apps. The Markup tool comes in handy when you need to mark something on a photo, add a comment, or just draw a doodle on a pic for fun.
- Tap the three dots in a circle icon above your photo
- Choose the Markup tool
- Select one of the three pens
- Tap on the photo and, without breaking contact, drag your finger or stylus across it to draw
- Tap Done to keep changes, Cancel to discard all changes, or Undo to undo the latest edits
There are several different sizes and colors of “pens” in Markup, and you can increase or decrease the thickness and transparency of the line. Text color, size, and style can also be changed. The lasso tool allows you to move drawings, and the eraser will delete them. Like all the tools above, Markup is available after you open a photo and tap Edit in the top right-hand corner.
How to add text to a photo on iPhone
In the same tab, you can also add more customisation to your image. For example, you can add Text or Sticker.
- Tap the three dots in a circle icon above your photo
- Choose the Markup tool
- Tap the blue plus in the lower right-hand corner
- Tap Text
- Tap on the text box that appears and hit Edit
- Type your text and tap Done
- Tap Done to keep changes, Cancel to discard them, or Undo to undo the last edits
Reverting to the original
Sometimes you look at an edited photo and decide that it was better off in the beginning, or that you want to start afresh and edit it differently. If at any time you want to remove all edits and revert the image back to the original, you can do so by reopening the Edit feature and tapping Revert in the lower right-hand corner. However, if you find yourself a bit lost with how many images you have and need help with managing your edited images, read this guide on how to organize photos.
Overall the iOS Photos app is a simple and effective tool that lets you quickly edit photos on your iPhone without a more complicated third-party editor. Plus, it doesn’t decrease the quality of your photo like many other apps do. Hopefully, Photos will keep gearing up on editing tools and will someday become a full-fledged photo editor. In the meantime, it’s perfect for quick basic edits. Give it a go.


