External hard drives are incredibly useful for expanding the amount of storage available on your Mac, transferring files between Macs or Mac and PC, and archiving files you no longer need regular access to. And if you use Time Machine, you can use an external drive to store the backups it makes. Most of the time, you just plug them in and they work. But what happens if, when you plug one in, an external drive is not showing on your Mac? We’ll show you how to fix it. The solutions here are also good for an external SSD.
Why my external hard drive is not showing up on Mac
There are a number of possible reasons an external drive might not show up when you plug it into your Mac:
- Your drive is not plugged in properly.
- The cable or USB port is faulty.
- The format is incompatible with your Mac.
- There’s a problem with the drive or the data on it.
How to fix it when an external drive is not showing up on your Mac
As always, when you’re trying to solve a problem on your Mac, it’s best to work through solutions by trial and error, starting with the easiest fixes and those most likely to work. With that in mind, follow the steps below in order.
1. Check the basics
Before moving to more complex solutions, try the easiest fixes first:
- Check if the drive is powering up. If the hard drive you’re trying to connect is bus-powered (that means it doesn’t have its own power supply), does it spin up, or does a light come on when you plug it in? If it does, that suggests that the connection is secure and the cable is working.
- Check that both ends of the cable are securely connected.
- Try a different USB cable. If the cable is connected securely, the next most likely cause of a problem is that the USB cable is faulty.
- Try a different USB port on your Mac. If the hard drive or SSD is connected to a hub or dock, connect it directly to your Mac instead.
- Restart your Mac from the main Apple menu.
One of these quick tips could fix the glitch right away. If none helped, jump to the next steps.
2. Check the Finder’s Settings
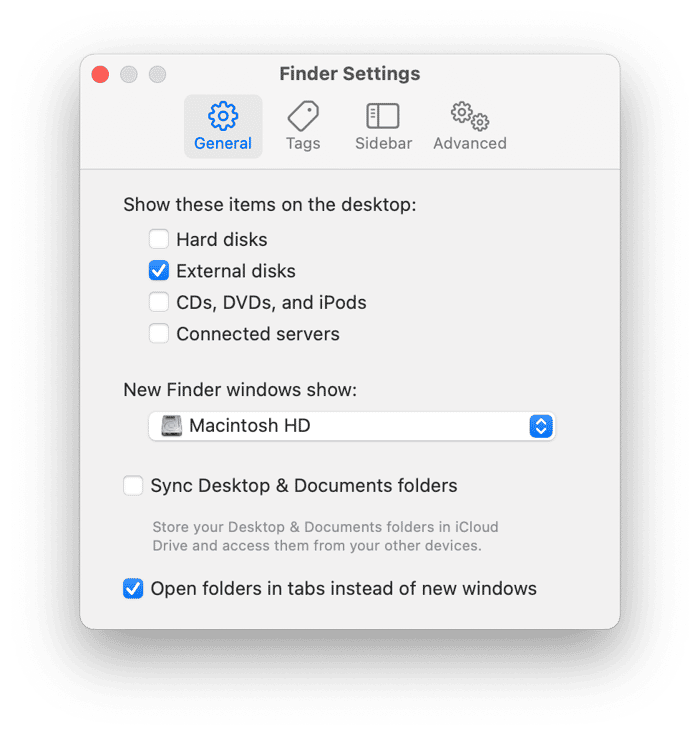
If the drive is visible in the sidebar of a Finder window but not on the desktop, click the Finder menu, choose Settings > General, and check the External Disks box.
3. Mount the drive
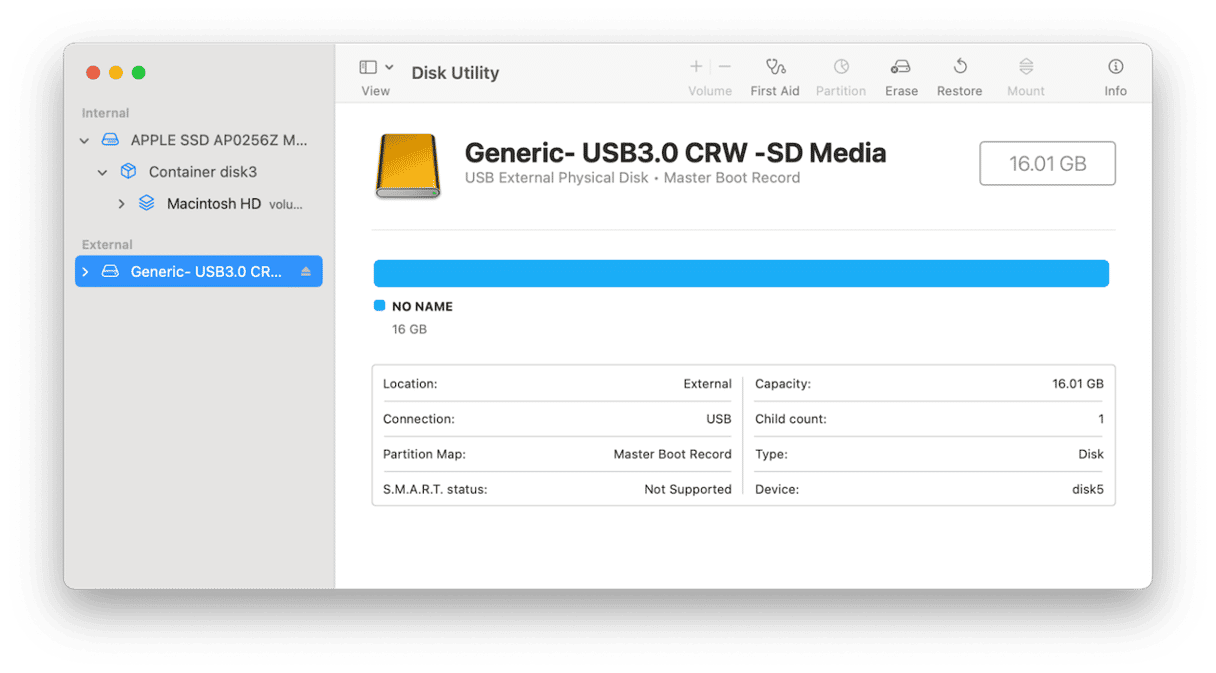
If the drive seems to have power but isn’t showing up in the Finder window sidebar or the desktop, try mounting it in Disk Utility.
- Go to Applications > Utilities and open Disk Utility.
- If the drive is visible in the sidebar, select it.
- Choose Mount in the toolbar.
4. Run First Aid
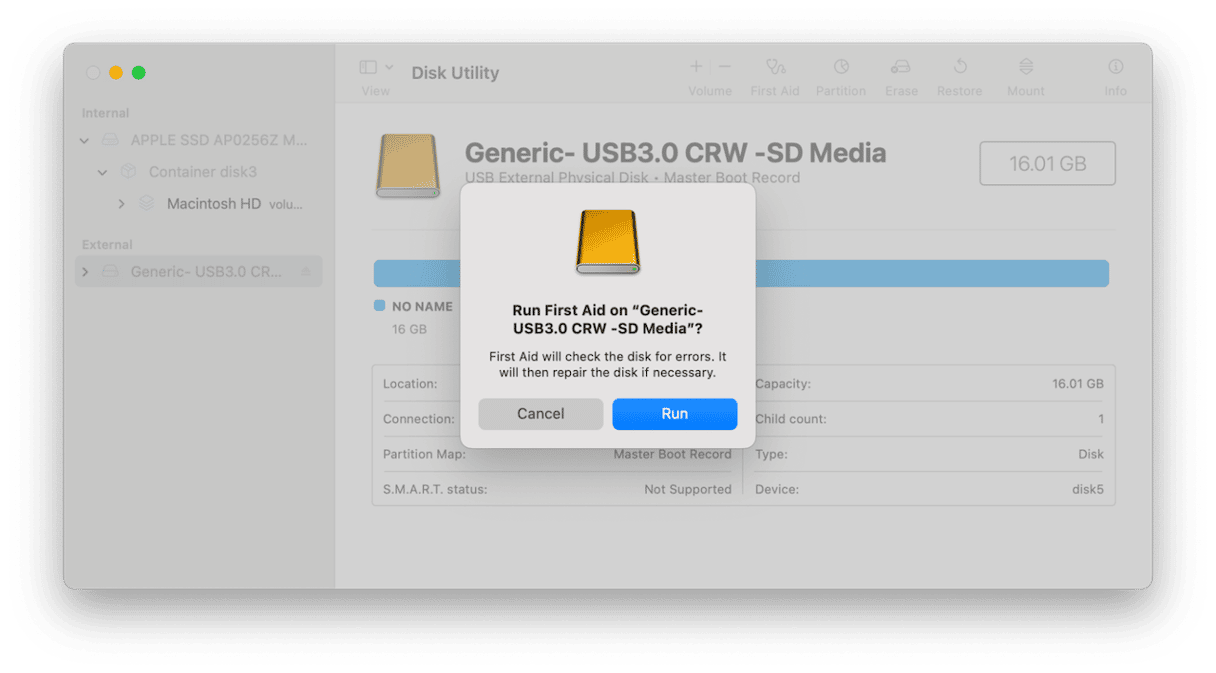
If the disk won’t mount, the next step is to run First Aid in Disk Utility. Select the drive in the Disk Utility sidebar and click First Aid in the toolbar. Wait for it to finish.
5. Check if your Mac sees the drive
If the drive doesn’t appear in Disk Utility, it could be that your Mac has recognized it and is trying to fix a problem with it. To find out whether your Mac can see it, use System Information:
- Click the Apple menu and choose About This Mac > More Info.
- At the bottom of the window, click System Information.
- In the window that opens, click USB. The drive should be listed there. If it’s not, it suggests a hardware fault with the drive.
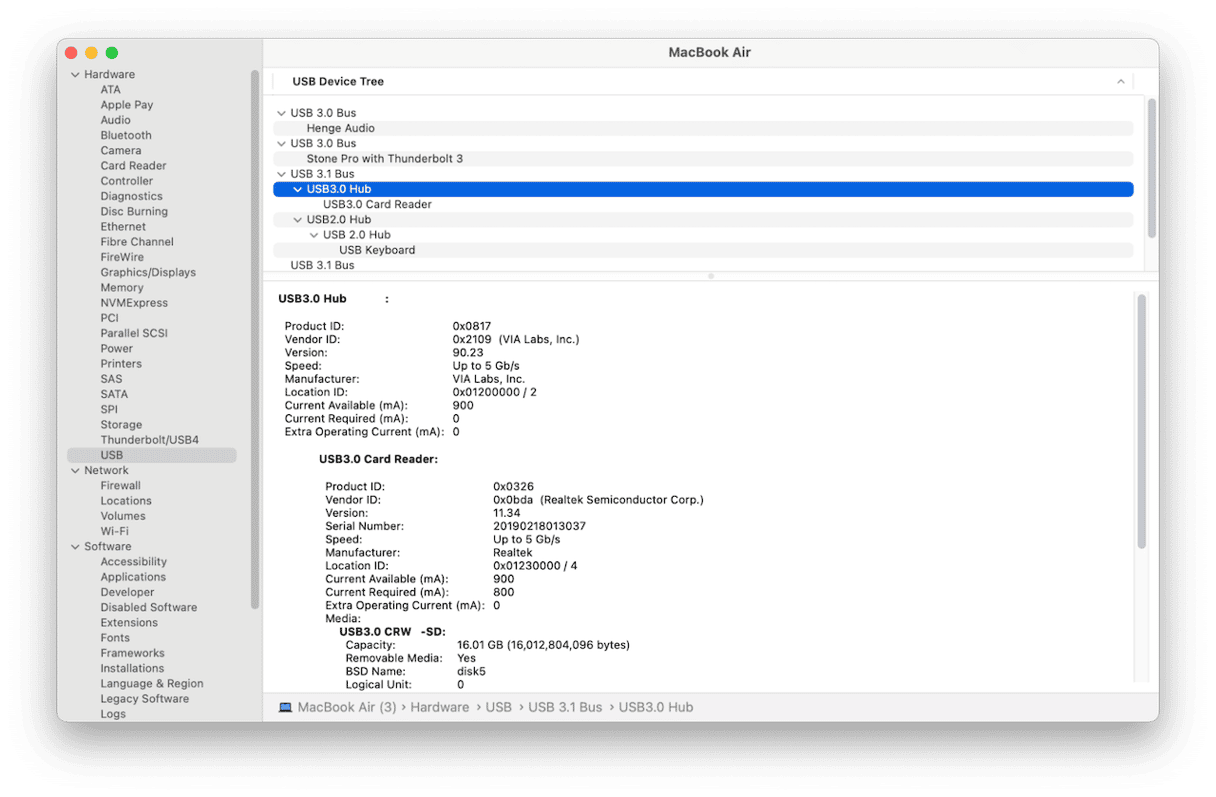
If the drive appears in System Information, the next step is to stop your Mac running the process that is preventing it from mounting.
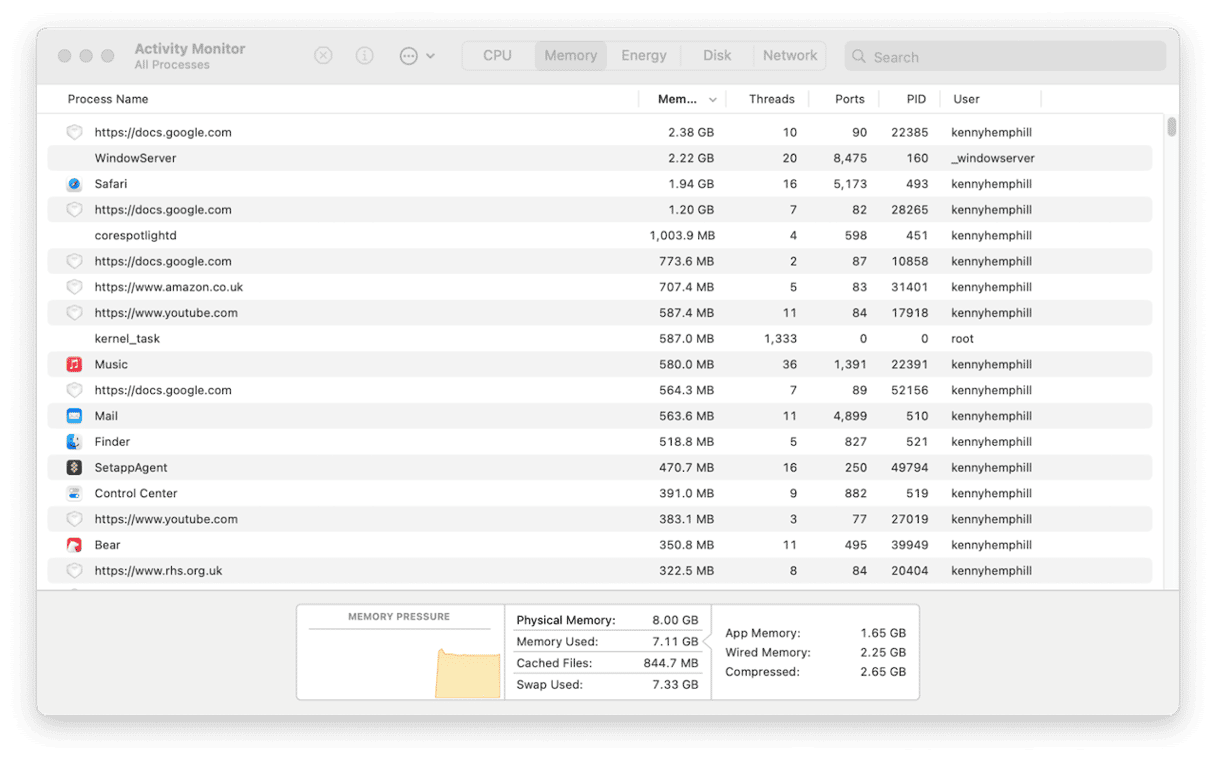
- Go to Applications > Utilities and launch Activity Monitor.
- Use the search bar to search for the process ‘fsck_hfs’
- If it appears, select it and click the ‘x’ in the toolbar to quit it.
Once you’ve stopped that process, try mounting the external drive in Disk Utility again. If it doesn’t work, the next step is to try to force your Mac to mount the drive using Terminal:
- Go to Applications > Utilities and open Terminal.
- Type: diskutil list and press Return.
- You should see a list of connected disks. Look for the external drive that won’t mount and take note of its identifier (e.g., disk2, disk3, etc.).
- Type:
sudo diskutil mount /dev/disk2(replace disk2 with the identifier you noted in step 3). - Press Return.
- Type your admin password and press Return.
If that doesn’t work, you can try mounting individual volumes on the disk. To do that, use the same sudo diskutil mount command, but replace disk identifier with a volume identifier (eg disk2s1)
If the disk or volume still won’t mount, try repairing the disk in Terminal. To do that, use this command followed by Return: sudo diskutil repairDisk /dev/disk2 (replacing disk2 with the correct identifier).
6. Reformat your drive
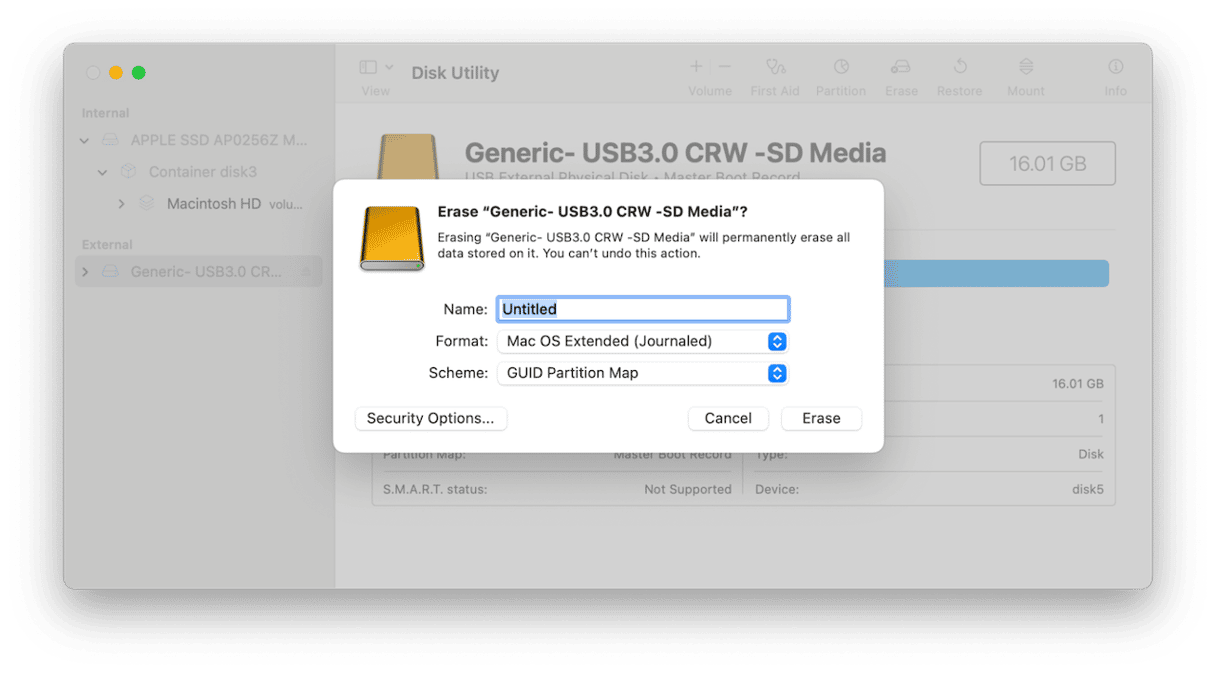
If you get an error message when you connect a drive telling you that your Mac can’t read it because it’s in a format it doesn’t recognize, the only way to make it work with your Mac is to use Disk Utility to erase it and reformat it. However, before you do that, you should copy any data you need from it onto a different disk. You will need to do that on a computer that can read the format used by the disk. Once you’ve copied the data you need, plug the drive back into your Mac and follow the steps below:
- Open Disk Utility and select the disk in the sidebar.
- Click Erase.
- Give the drive a name.
- Choose GUID partition from the Scheme menu.
- Choose APFS or macOS Extended (Journaled) from the Format menu.
- Click Erase.
- When it’s finished, you will have an empty drive you can use with your Mac.
Got a problem with an external hard drive not showing up on your Mac? The problem could be the drive, the cable or a software issue with your Mac. Follow the steps above to identify the cause of the problem and fix it.


