The transition from hard drives to solid-state storage on both portable and desktop Macs has meant a significant reduction in storage space for most of us. That, in turn, has meant that many of us now have at least one external hard drive, SSD, or USB stick on which to store files. But those drives too quickly fill up, so it’s useful to know how to clean up an external hard drive.
This article is your easy-to-follow guide on how to format an external hard drive on Mac. And before we dive into more details, first, you need to initialize that disk.
How to initialize external hard drive
Let’s say you get a brand-new external hard drive, or you own one already but never had the chance to use it. When connecting to your Mac for the first time, you’ll be required to go through the disk initialization process. What it means is Mac uses its own language to read the disk in order to give access to the user’s content.
Now, macOS usually initializes the external drive automatically, or it might require you to click Initialize button to start the process. But if this is not happening or you receive the message indicating an uninitialized disk, these might be the main causes:
Your partition is lost
Your connection is unstable or lost
Your hardware is damaged
Your file system is corrupted
Your Mac might be infected with a virus
To fix it, try restarting your Mac, reconnecting the external hard drive, reinstalling/upgrading macOS, or formatting the disk.
How to format an external hard drive on Mac
Let’s figure out how to format the following types of volumes:
- USB drive or flash stick
- External hard drive
- Internal hard drive
How to format a hard drive for Mac using Disk Utility
Apple’s Disk Utility is the tool you need to format and erase your drive. But before that, you’ll have to decide: are you erasing just a volume on your drive or your main startup drive? The latter contains your macOS, and if you erase it without a prior backup, you’ll be in trouble. So make sure you back up your data first.
Okay. Suppose you’d like to format a hard drive that is your startup drive. Then, you’ll need to start your Mac in a recovery mode.
To start up your Apple silicon-based Mac in Recovery:
- Shut down your Mac.
- Press the power button on your Mac and hold it until “Loading startup options” shows up.
- Click Options, then hit Continue.
- Click an administrator account and hit the Next button.
- Type in your password and click Continue.
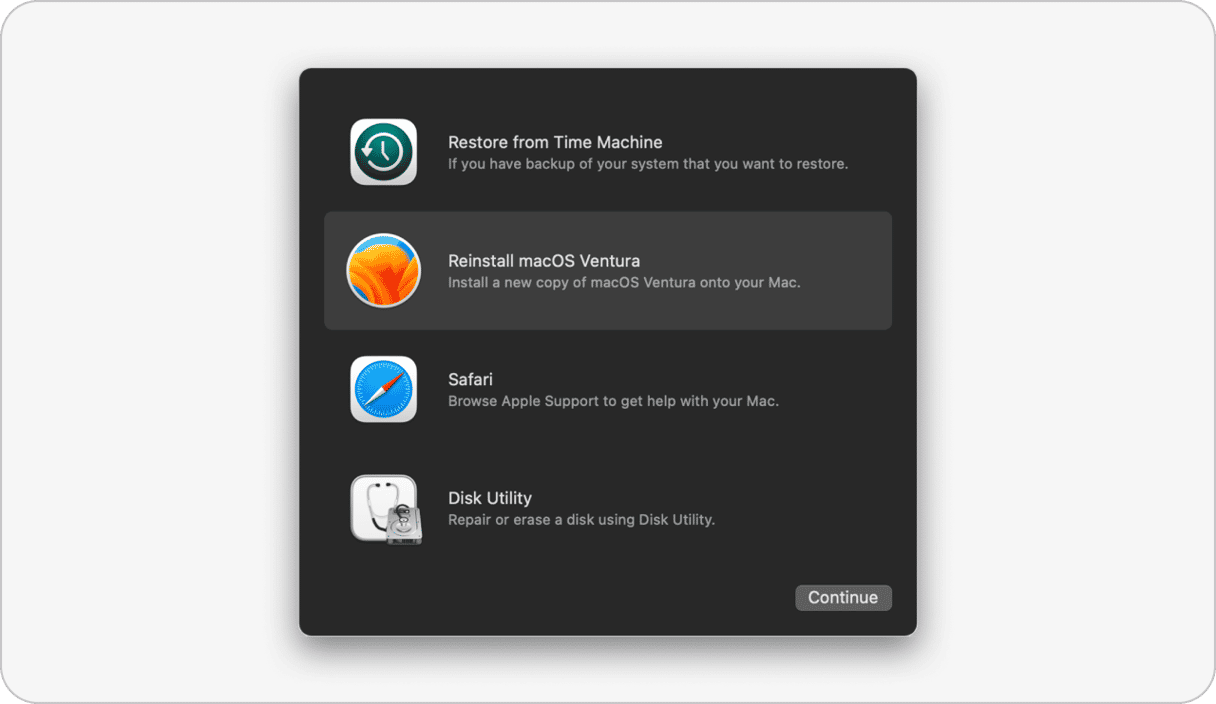
To use macOS Recovery on Intel-based Macs:
- Shut down your Mac and turn it back on.
- Upon the startup, press and hold Command-R.
- Release the keys when the Apple logo appears.
- Choose an administrator account, enter your password, and click Continue.
You are now in macOS Utilities. To format a hard drive for Mac, choose Disk Utility in the list and click Continue.
But if you only need to format a volume (or a partition), you can access Disk Utility without entering a recovery mode.
- Open the Launchpad in the Dock.
- Type in "Disk Utility" in the search field.
Here it is, Disk Utility, where you can easily format the external hard drive for Mac or any connected drive.
_1611064247.png)
Select the drive you would like to format and click "Erase" at the top of the pane. The same works for any type of drive, be it a USB stick or external storage. Please, be extra careful and pay attention to what is actually selected.

How to clear space on a Time Machine hard drive
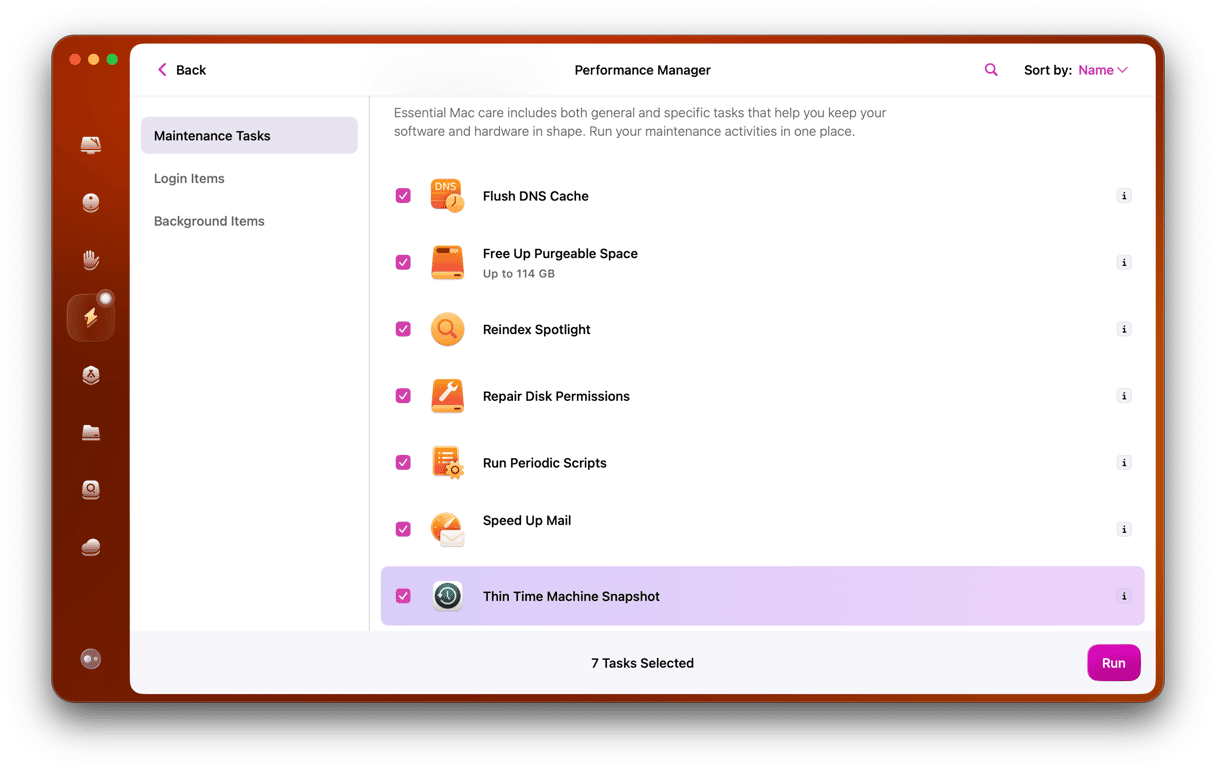
If you use an external hard drive for Time Machine and find that it’s running out of space, you may need to delete older backups. Time Machine will normally warn you when free space is low and offer to delete backups automatically.
If it doesn’t, you can do it yourself from within Time Machine, using Terminal, or using an app like CleanMyMac that has a module designed specifically for slimming down old Time Machine backups. Follow our guide on how to thin Time Machine snapshots.
How to reformat an external hard drive safely
If you’re looking to format or reformat an external hard drive on your Mac, there are a couple of safety precautions.
1. Make sure you’ve got a backup option
Your Mac’s hard drive may contain a number of partitions, including a separate partition for the macOS itself. If you accidentally format a part that contains your operating system, you’ll have problems. But if that’s what you aimed to do, proceed with caution. To prepare the backup, plug in an external drive with enough free space on it. Then, run Time Machine from your Launchpad.
2. Pick an appropriate file format
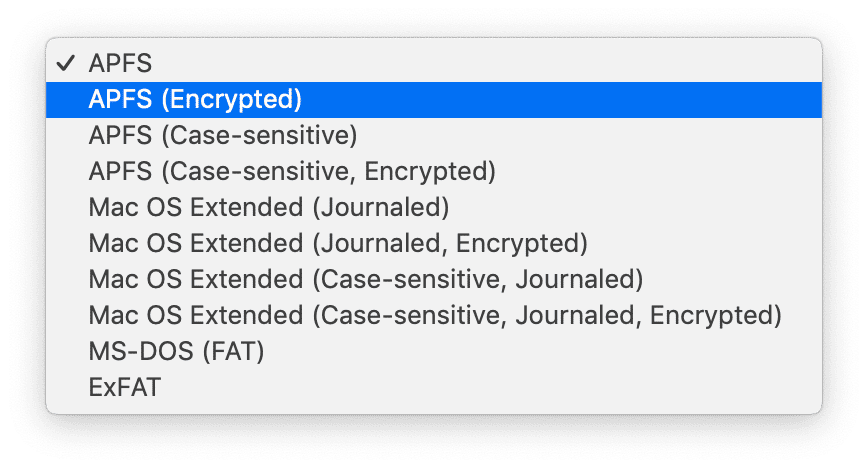
Disk Utility will make you choose between APFS and Mac OS Extended. Here are a few more considerations:
- APFS is a preferred format for newer macOS versions.
- ExFat format can be read both by Mac and PC — a good option for data exchange.
- If your external drive is used with an older Mac that runs High Sierra or an older system, again, choose Mac OS Extended.
If you want to erase the volume securely, select Security Options and choose them. If your Mac is a new one with an SSD drive, the Security Options may not be available.
3. What if you can’t reformat an external hard drive on your Mac?
In some cases, Disk Utility will not show your external drive. You can try one of the following:
- Use a different cable
- Shut down your Mac and unplug all peripherals.
- Try to format Mac external hard drive again.

Free up space on all your drives at once
When your drive is in use and you constantly move files on and off, some micro files are left as a residue. These junk files may cause errors and prevent data from copying. By deleting them, you’ll quickly free up lots of space.
Below are two ways of removing files from your drives: the easy way and the manual one. Choose the one you like!
You can manually identify the largest files on a drive-by setting the Finder to list view and sorting files by size (click on the top of the Size column). However, you need to do that for every folder on the drive. Old files are another good candidate for deleting, or at least moving somewhere else. If you haven’t opened a file in six months or more, chances are that you won’t need it very often. You can use the same method to identify old files by sorting on Date Modified. Again, you’ll have to do it for every folder, so it could be time-consuming.
A much quicker way to identify and delete large and old files from your external hard drive or USB flash drive is to use a dedicated app like CleanMyMac.
Remove files with CleanMyMac
CleanMyMac has a utility designed specifically to identify files occupying lots of space and those that haven’t been opened for a while.
- Get your free CleanMyMac trial and open the app.
- Choose Large & Old files tab.
- Choose the disk and click Scan.
- You can go through files one at a time or click on the categories to the left of the list to filter them.
- When you find a file you want to delete, check the circle next to it.
- Click Remove.
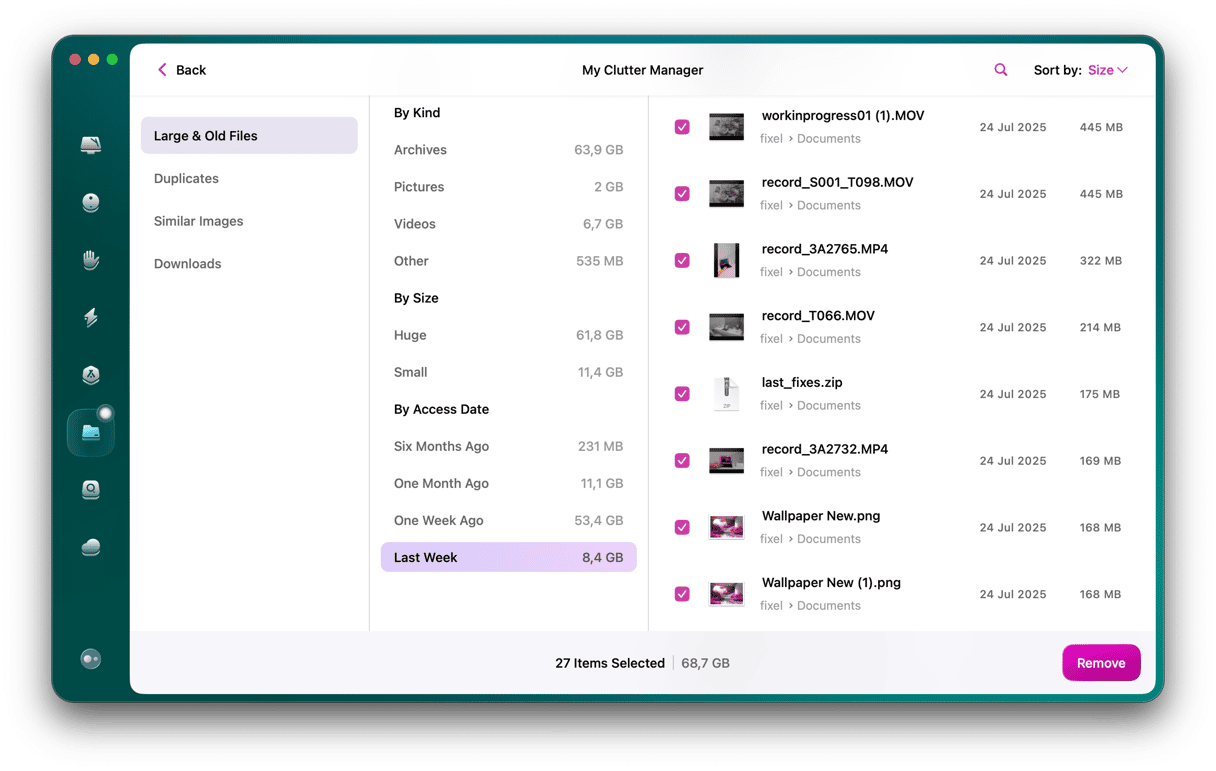
A nice way to discover some surprise items on your drive!
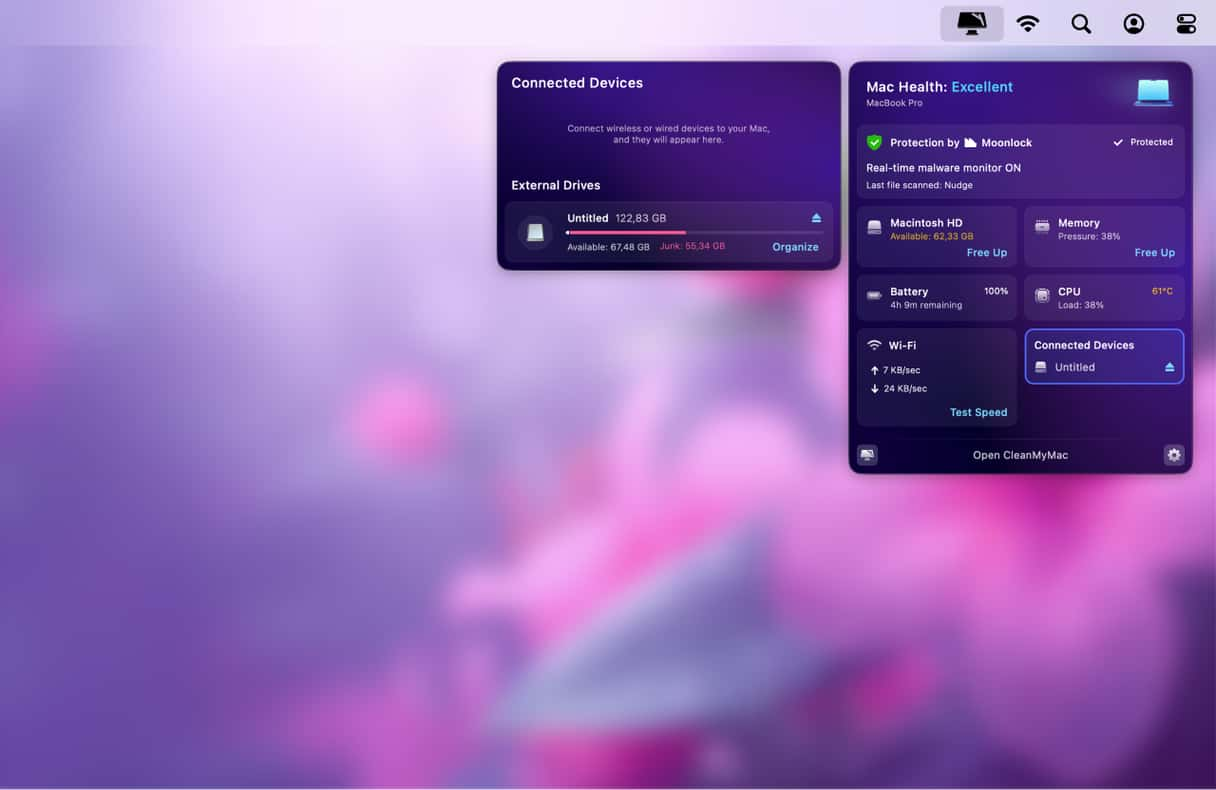
Another tool that comes with CleanMyMac is Connected Devices. This smart tool can scan all of the external drives connected to your Mac to find and safely remove junk files. It can also identify which files take up the most space on your drive, so you can delete them.
Here’s how to use it:
- From the menu bar, click a little iMac icon.
- Click Connected Devices bottom right.
- Click Organize to see the visualization of files and folders by size. Alternatively, hover the mouse pointer over Junk and click Clean Up to remove it.
There are lots of options for freeing up space on an external hard drive, depending on what you use it for. One of the quickest ways is to use CleanMyMac to remove large and old files. That way, you can reclaim the maximum amount of space for the minimum effort.
Thanks for reading, and stay tuned!


