Open a Finder window on your Mac and navigate to any folder, and inside, you’ll see a mix of files and folders. The folders will be blue, and when you click them, they’ll open and reveal their contents. At least, that should be what happens. But what do you do if there are greyed out folders and files on your Mac? And what does it mean? What’s causing it? We’ll answer those questions and tell you how to fix greyed out folders and files on Mac.
Why are folders greyed out on Mac?
There are a few reasons why are files greyed out on Mac. The most likely is that you were in the process of copying the folder from one drive to another, and the process got interrupted. Perhaps the source drive got disconnected. Or there was a problem with the folder that prevented it from copying. That could result in a greyed out version of the folder appearing on your Mac, probably with the creation date of 24 January 1984 (the date the Mac was first launched).
A folder or file could also be greyed out if it’s on an external volume that your Mac is having trouble reading, perhaps because it has developed a fault. Or it could be on a remote server, and your Mac is having difficulty connecting to the server. Whatever the reason, what you’re seeing isn’t really a folder or file at all. If you double-click on it, nothing will happen. It’s just an image used in place of a folder or file while it’s being copied from one place to another.
How to prevent greyed out folders and other problems
The simplest way to prevent problems like greyed out folders and files on your Mac is to regularly maintain it. That includes repairing disk permissions, reindexing Spotlight, and flushing DNS cache, to name just a few. Doing that manually is a chore, not to mention that it is time-consuming. The best way to do it is to use an application that’s designed to help you keep your Mac working well.
We recommend CleanMyMac. Its Performance feature has tools to repair disk permissions, reindex Spotlight, flush DNS cache, and manage login and background items. All of those things will help keep your Mac running smoothly and without problems. Get your free CleanMyMac trial.

How to fix a greyed out folder on your Mac
The first thing you should do when trying to figure out how to fix greyed out files on Mac is back up all the data on the disk where the folder is located. A greyed out folder or file is a sign there is a problem somewhere. It could be a problem with the disk, and it could result in data loss. Once you’ve backed up your data, follow the steps below.
1. Try again
If the drive you’re copying the folder or file to or from is an external drive, make sure it’s connected securely. If it’s a server, make sure it’s mounted in the Finder, and your Mac can read from and write to it. Now, try copying the folder or file again.
2. Repair the disk
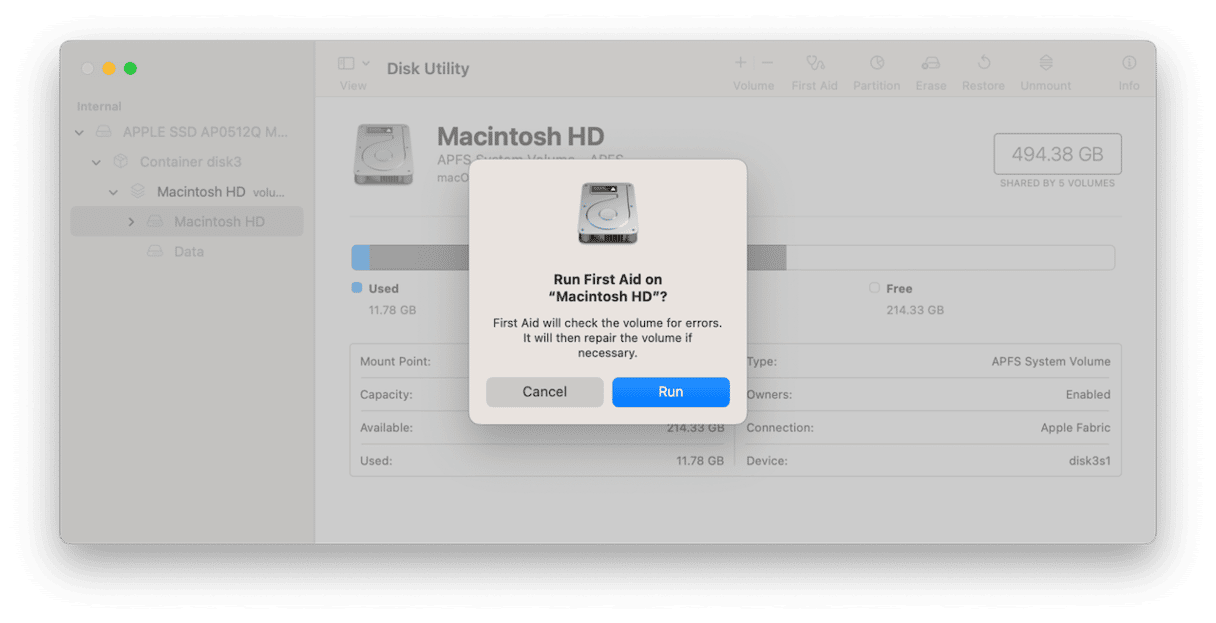
If the folder or file is still greyed out, use Disk Utility to repair the disk on which the folder or file is located.
- Go to Applications > Utilities and open Disk Utility.
- Select the disk and click First Aid in the toolbar and then follow the on-screen instructions.
3. Update macOS
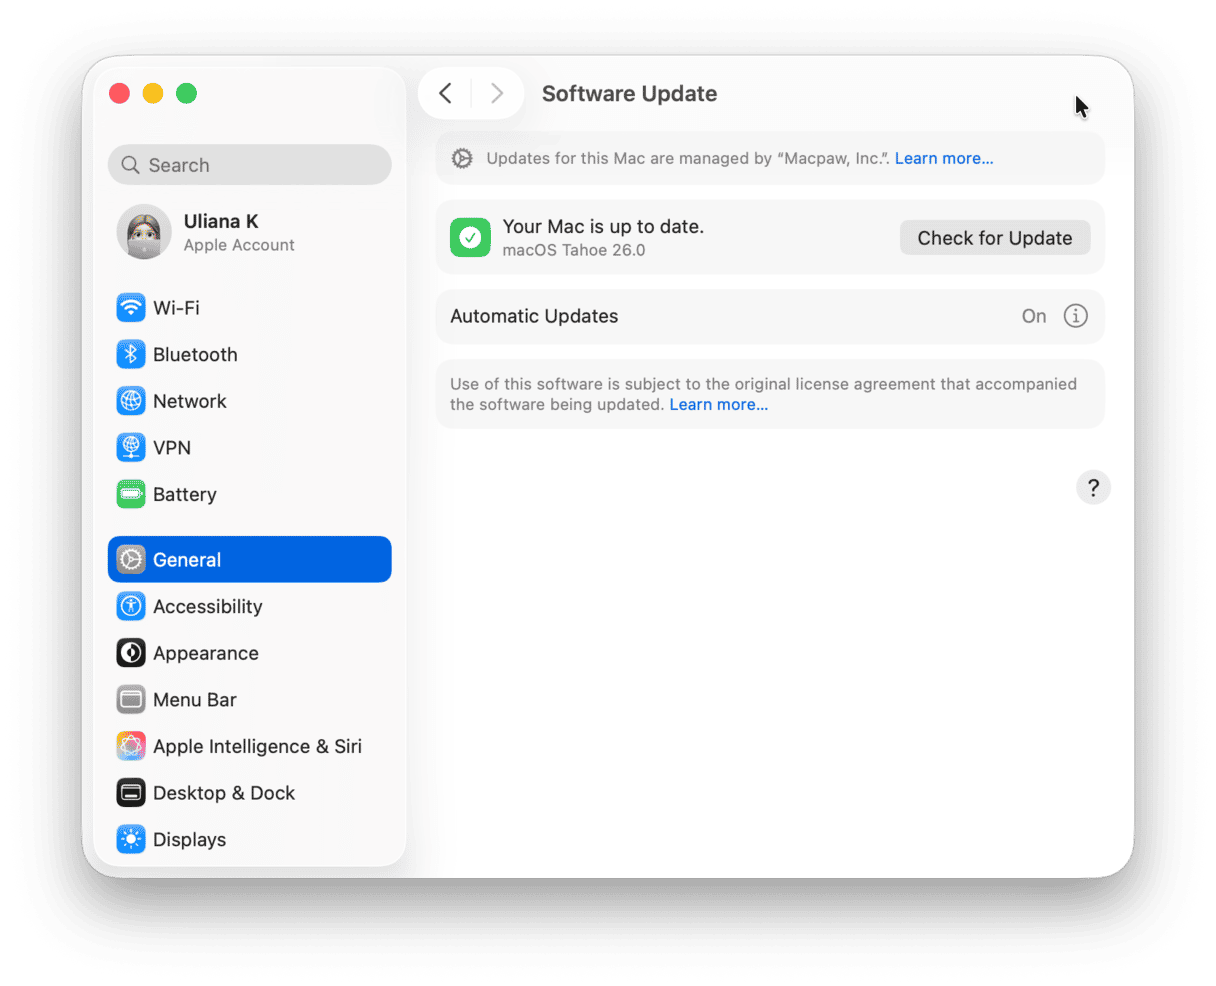
If repairing the disk doesn’t fix the problem, check whether there is an update available to macOS:
- Click the Apple menu, select System Settings, and then go to General > Software Update.
- If there is an update available, install it.
4. Use Terminal
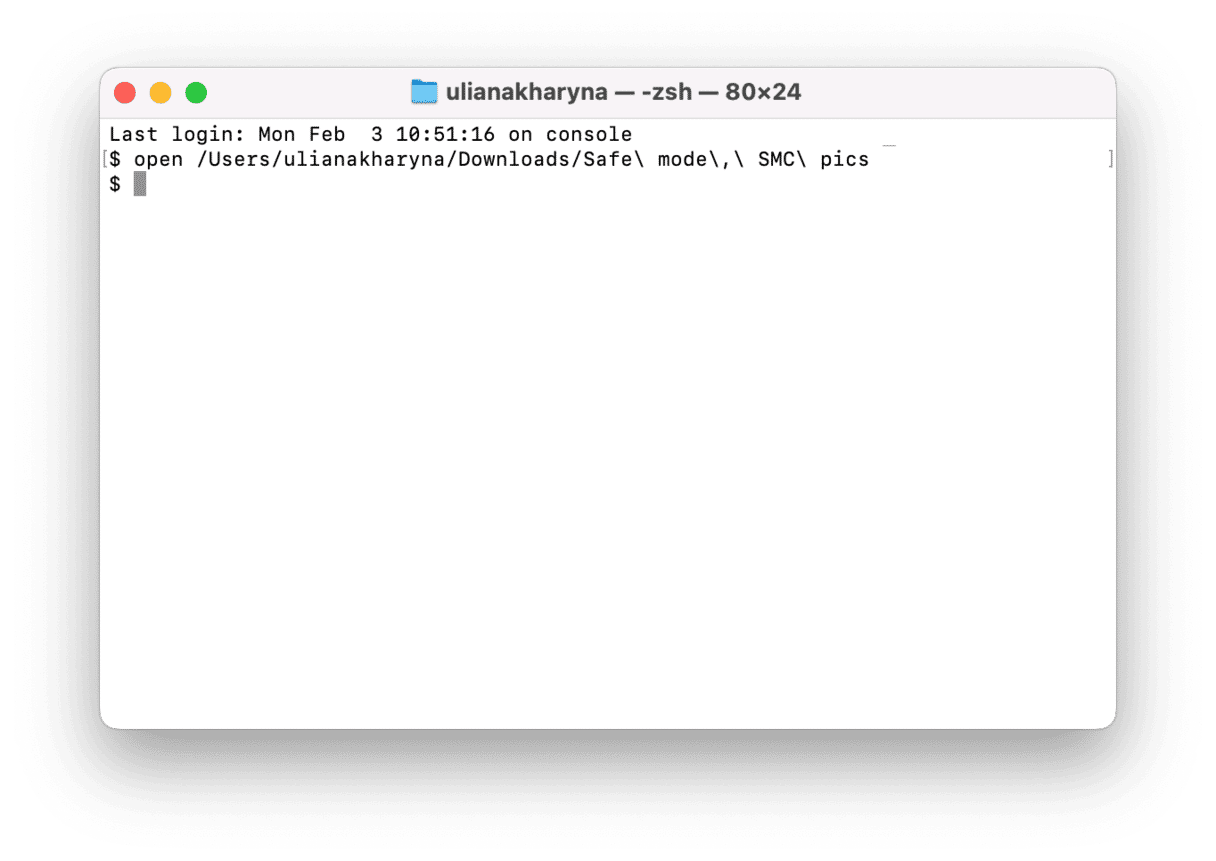
Even if you’ve never used Terminal before, it’s straightforward to use it to try and open the greyed out folder or file. Go to Applications > Utilities and double-click Terminal to open it.
- Type:
openand press the spacebar. - Drag the greyed out folder or file onto the Terminal window and drop it.
- Press Return.
5. Create an alias
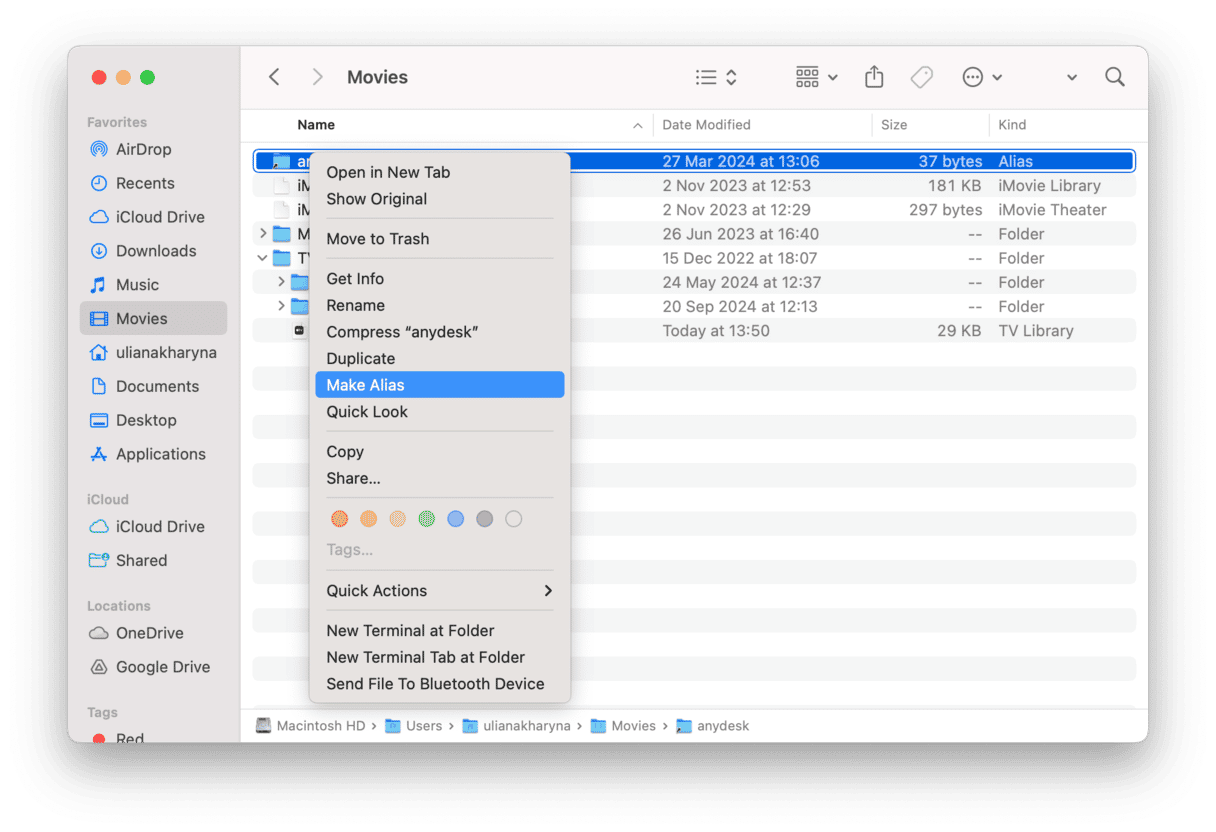
Another option is to create an alias of the greyed out folder and use that to access the files.
- Right-click or Ctrl-click the folder and choose ’Make alias’.
- Double-click on the alias to open it.
- Create a new folder, then press and hold the Cmd key, and drag the files to the new folder.
- Drag the alias and the greyed out folder to the Trash and empty it.
- Rename the new folder with the same name as the old one that was greyed out.
6. Change the creation date
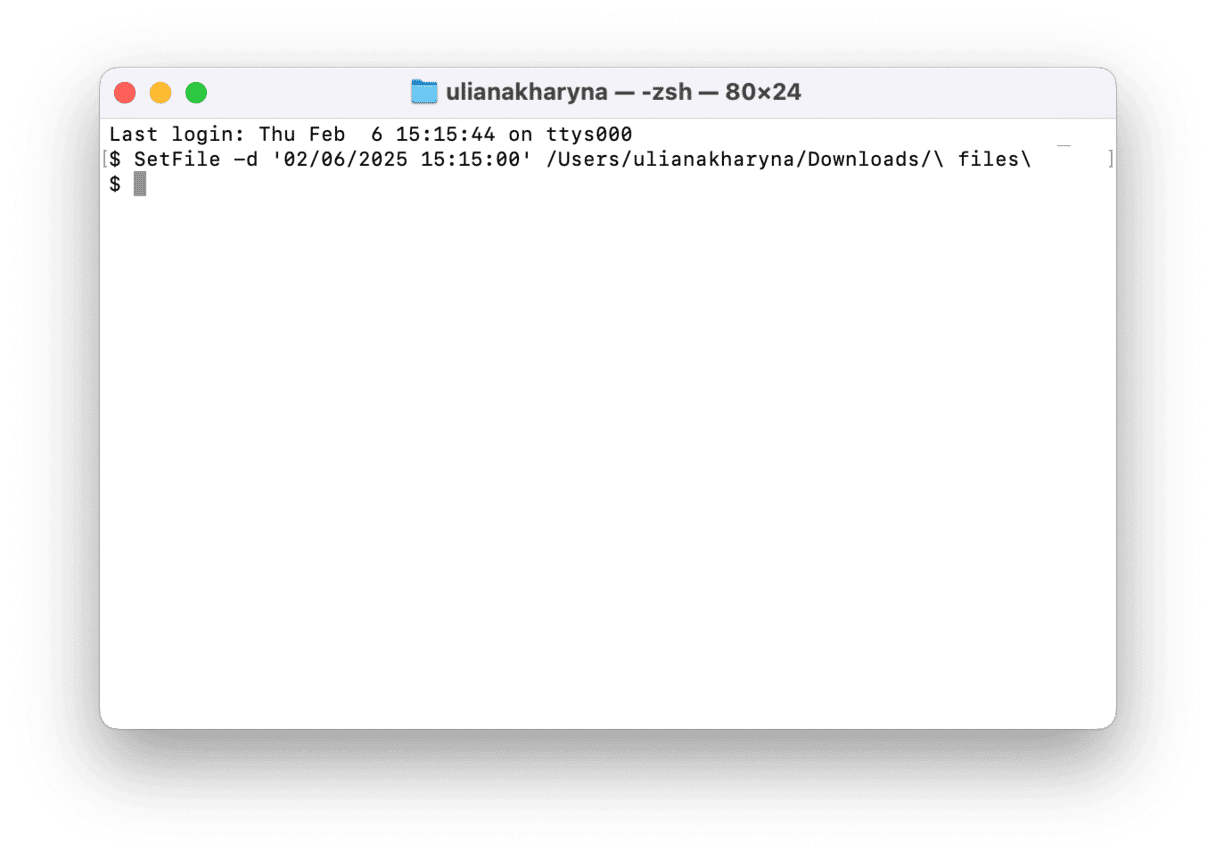
Sometimes, the reason a folder or file is greyed out is that its creation date is corrupt or missing. You can fix that using Terminal with the following command: SetFile -d 'date'
Replace date with your desired date in the following format:mm dd yyyy hh mm ss
It will look something like this:
SetFile -d '02/06/2025 15:15:00'
After typing the command, drag the folder or file onto the Terminal window and press Return.
7. Use Go to Folder
If nothing else works, you could try to access the folder using the Finder’s Go to Folder command. In the Finder, click the Go menu and choose Go to Folder. Type the folder’s path in the text box.
For example, if the folder is called ’Missing Folder’ and is on your Desktop, the path would be ~/Desktop/Missing Folder
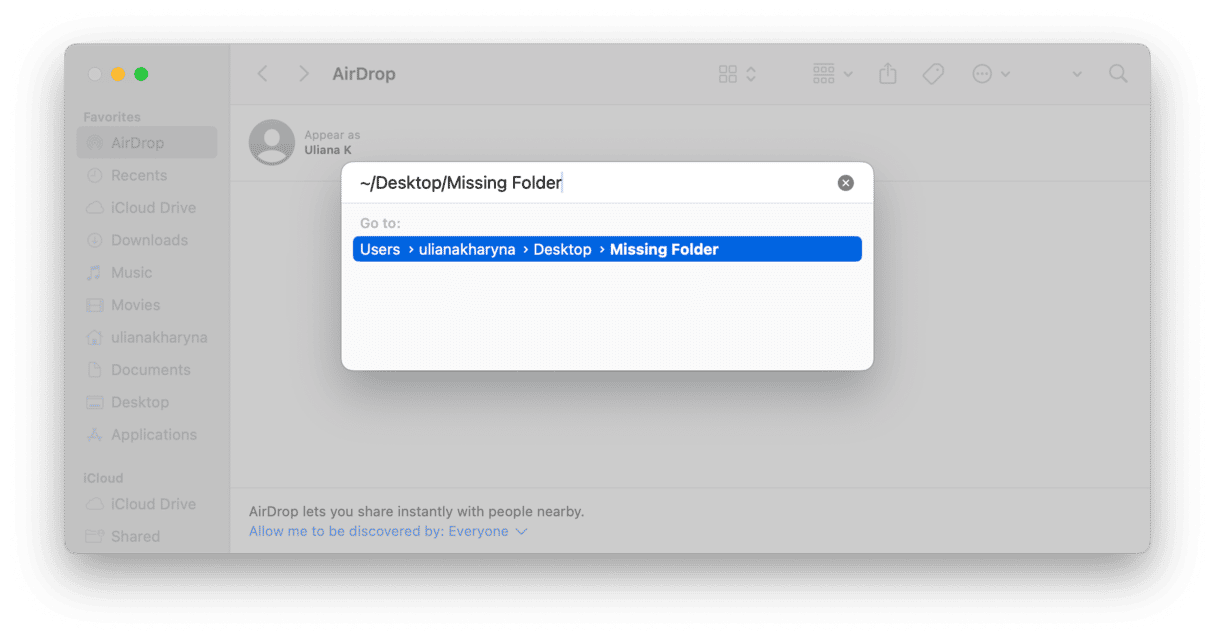
If that allows you to access the folder, move its contents to a new folder and drag the greyed out folder to the Trash.
8. Enter safe mode
If none of the above helped, try booting your Mac into safe mode and checking if your target folder is still greyed out. Safe mode loads only the most needed software and extensions, and so it lets you rule out the possibility that the issue is caused by some of your software loading on startup.
Based on the chip/processor, follow the steps below. You can check it in the main Apple menu > About This Mac.
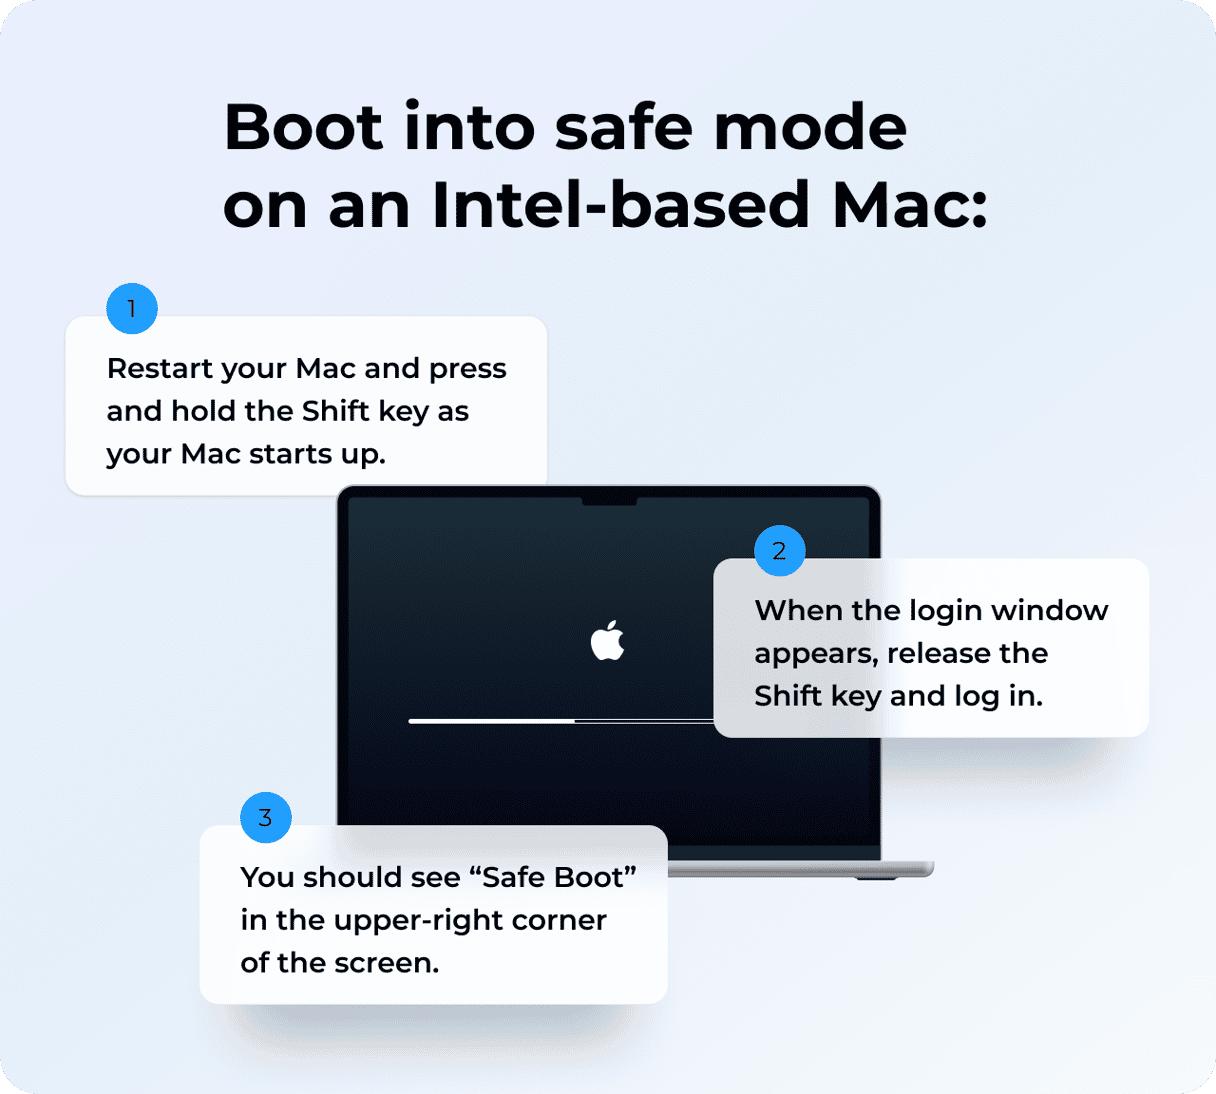
Intel processor
- Shut down your MacBook.
- Press the power button to turn it on and immediately press and hold Shift.
- Log in (you may be asked to do it several times).
Apple silicon chip
- Shut down your Mac.
- Press and hold the power button until you see Loading startup options.
- Select the volume, press and hold Shift, and click Continue in Safe Mode.
- Enter your password when your Mac restarts.

Regardless of the Mac you have, you should see Safe Boot top right.
9. Try data recovery
The final resort, if nothing helped, is to try data recovery. There are two possible solutions here:
- Recover your Mac from a backup using Time Machine. Check out this article from Apple to learn more about restoring files.
- If you have not backed up your Mac for a while or at all, try data recovery software like Disk Drill. Such apps can help recover corrupted files and folders, but use them with caution.
It’s very rare to see a greyed out folder or file on your Mac, but if it happens, there are a few possible reasons. It usually means that a problem has occurred while copying the folder to a different volume. If it happens to you, follow the steps above to fix it or access the contents of the folder.


