It’s a situation we all dread finding ourselves in. You go for a coffee or a drink after work and put your MacBook in its bag on the floor by your feet. When it’s time to leave, you bend down to pick it up, and it’s not there. It’s been stolen!
It might seem like a hopeless situation, but all is not lost. Chances are that your MacBook was stolen by an opportunist rather than someone who planned their crime carefully. And opportunists tend to make mistakes, such as not immediately shutting your MacBook down or heading to another coffee shop and logging in to a Wi-Fi network there. If they do, Find My can help trace your stolen MacBook.
Before we get to how to use Find My Mac, however, you’ll need to set it up.
How to set up Find My Mac
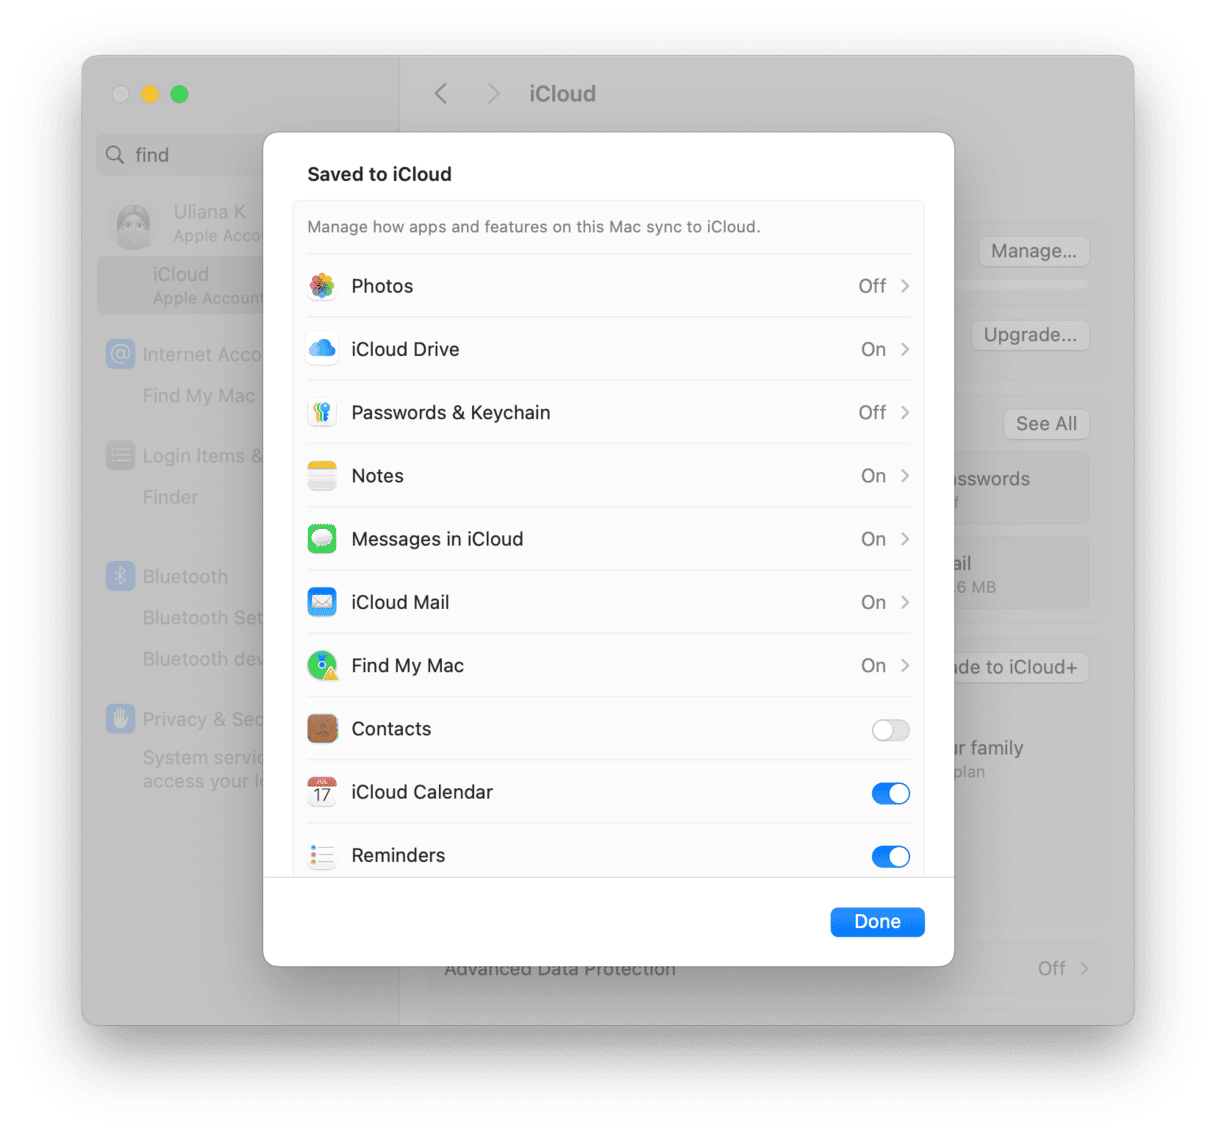
- Go to Apple menu and choose System Settings.
- Click Apple Account and log in if you’re not already logged in by entering your usual iCloud name and password.
- Click iCloud.
- Click See All under Saved to iCloud.
- Make sure Find My Mac is enabled.
To ensure it works properly, you also need to turn on Location Services:
- In System Settings, go to Privacy & Security.
- Click Location Services and enable Find My.
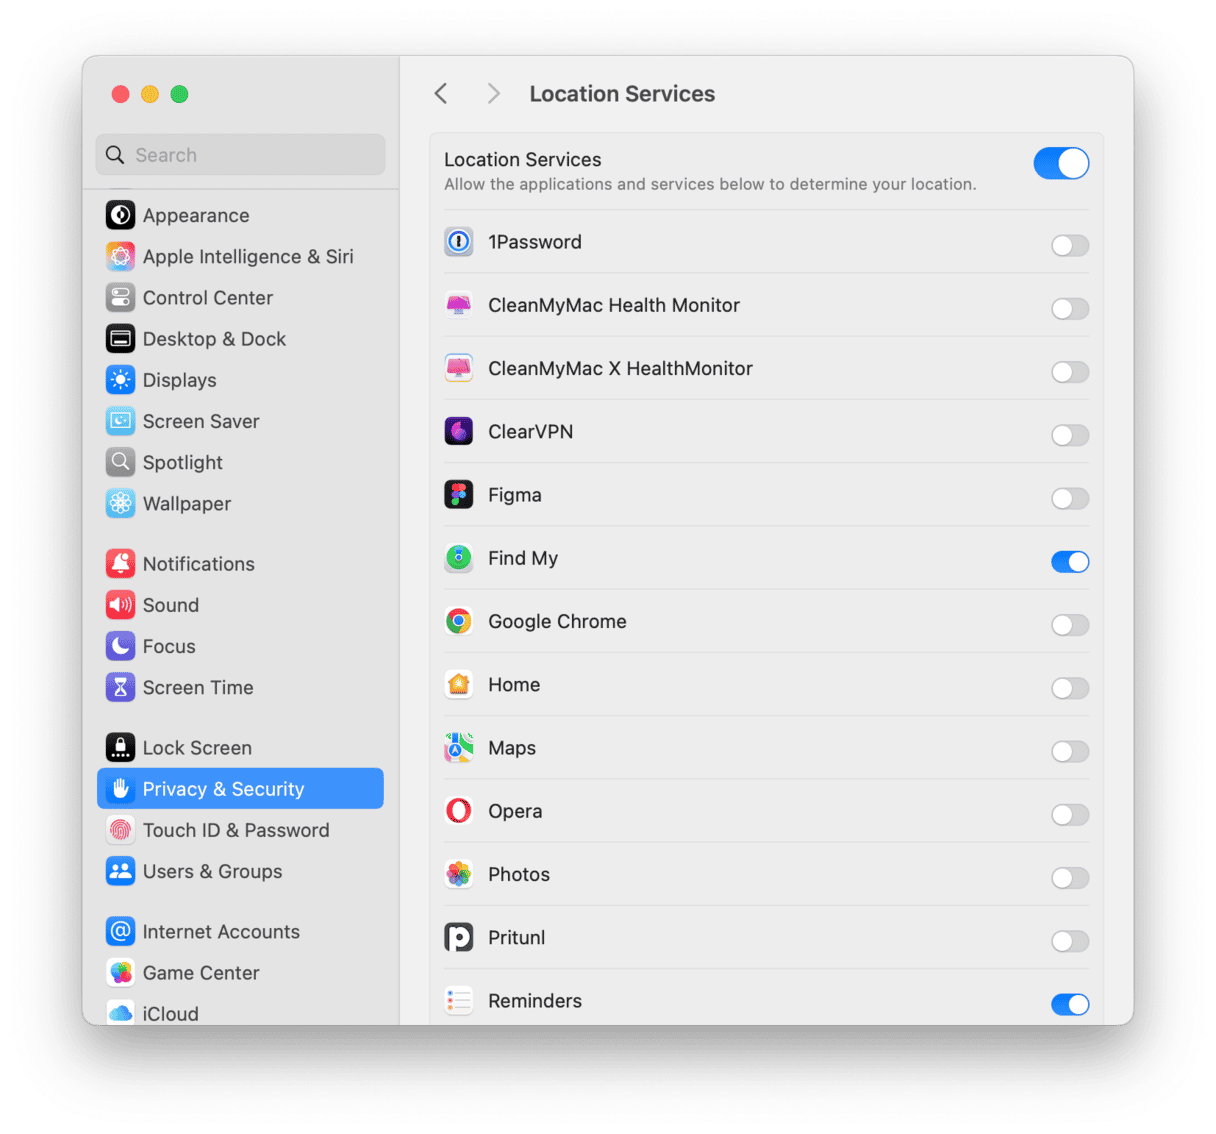
If you do not see Find My there, click Details at the bottom of the window and enable it. Then, follow the steps above.
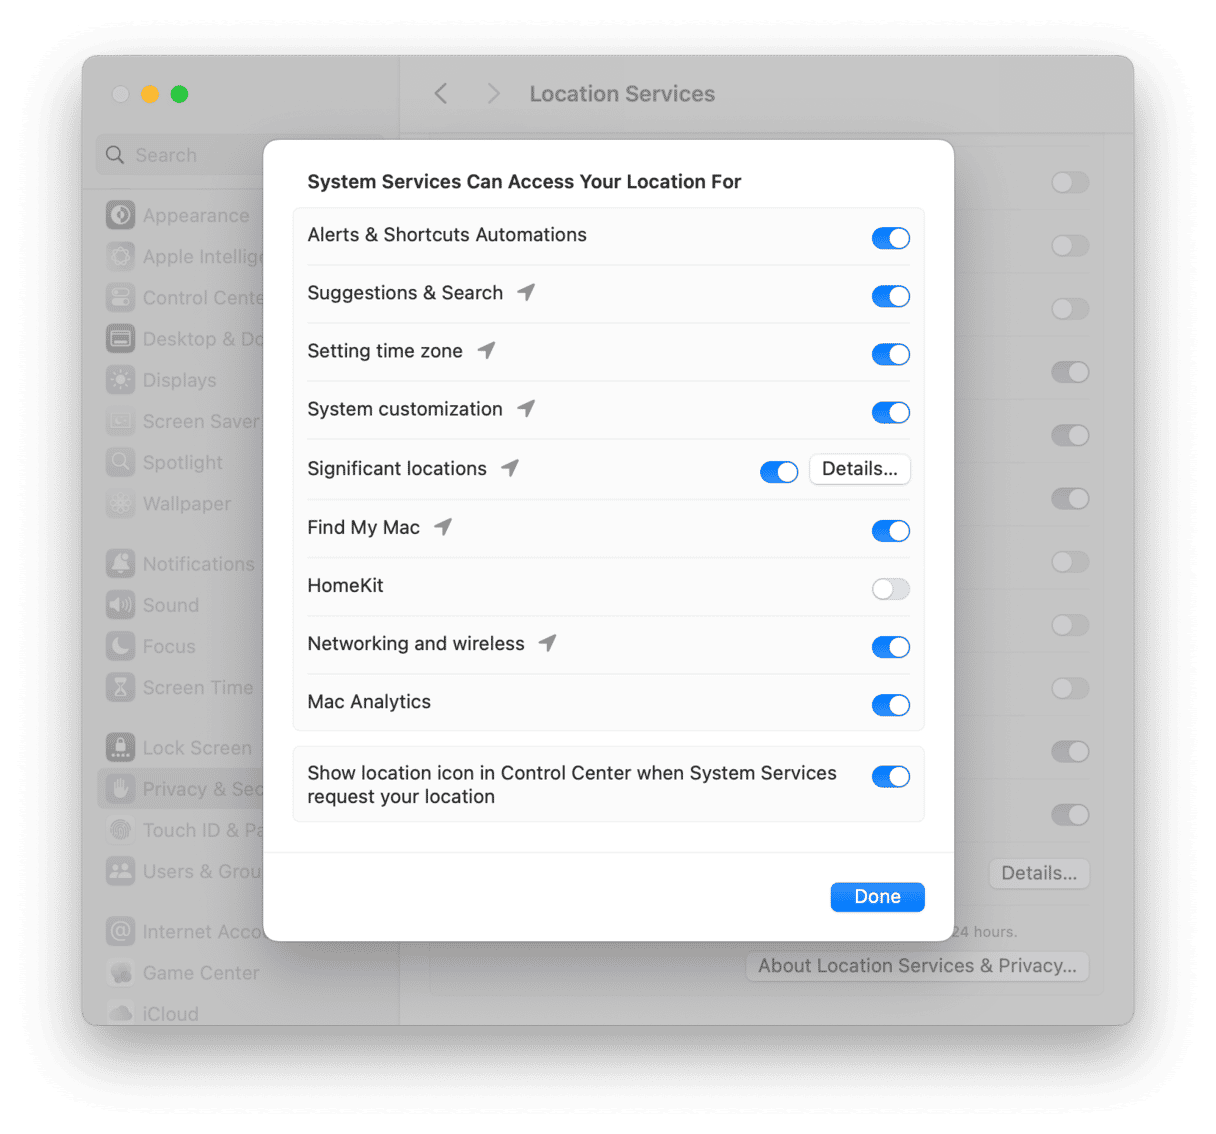
You’re all set! Now, if your MacBook is stolen, the iCloud Find My Mac utility will help you track it.
How to track a stolen Mac
Ok, so you’ve got Find My Mac set up, and the worst has happened. You’re now thinking, ‘How can I find my MacBook?’ You have two options here. You can either use another Mac or PC — anything capable of running a web browser will do, or you can use the Find My Mac app on your iPhone or iPad.
If you decide to use a web browser, and you’re using it on a computer on which you’ve never logged into iCloud previously, and you have two-factor authentication switched on, you’ll need a device with you that’s registered on your account to receive an authentication code. Apple calls it a ‘trusted device.’ That will most likely be an iPhone. Here’s what to do next:
- Open a web browser on a Mac or PC, go to icloud.com, and log in with your username and password.
- Click the apps icon next to your photo/initials and choose Find My.
- In the All Devices menu, click and choose your MacBook.If your Mac is online, you’ll see a map with its location and an indication of how long ago Find My Mac is able to verify it was there.
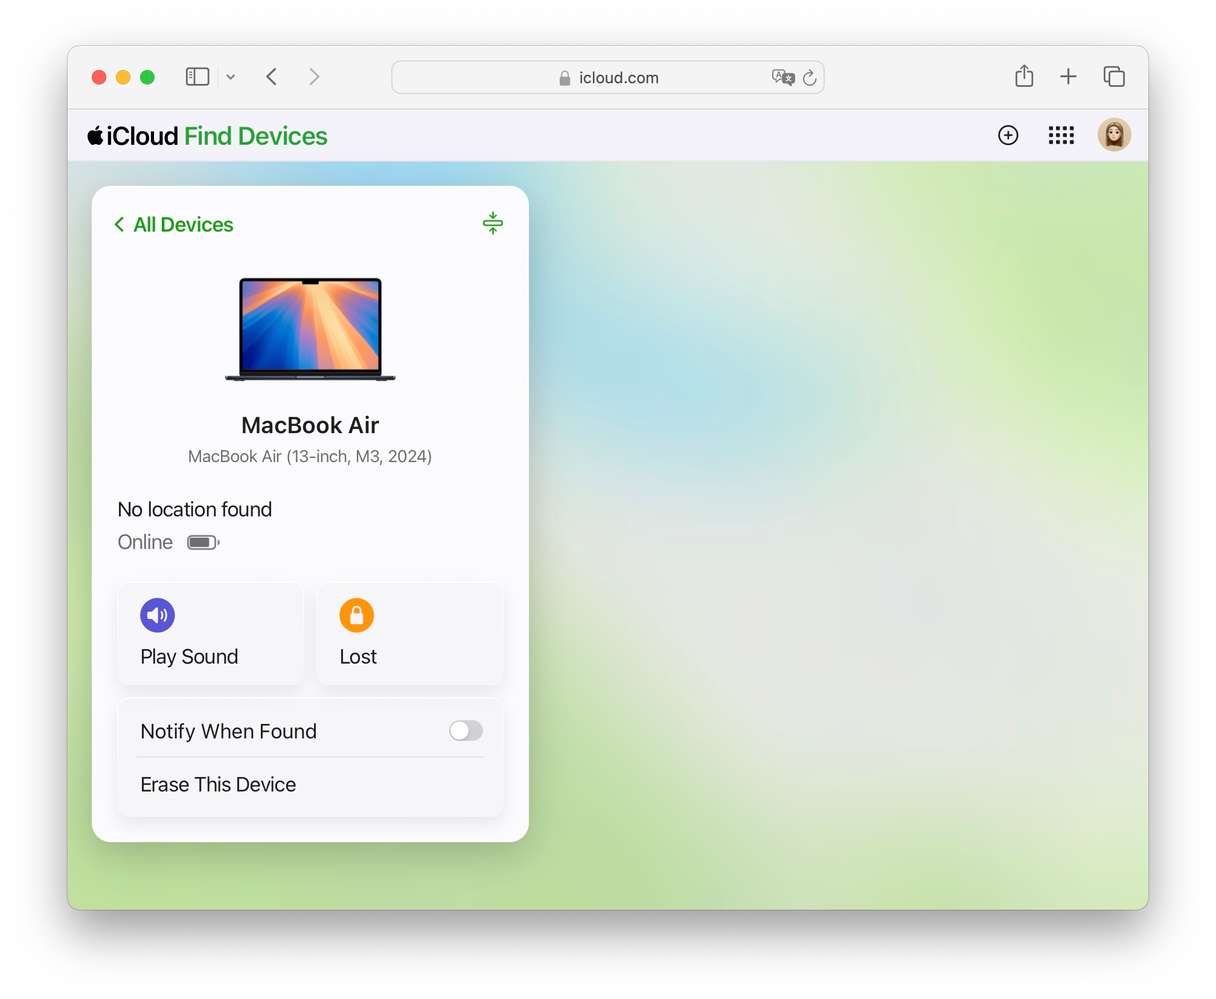
Now, you have three choices, displayed in a window at the top right of the screen under the name of your MacBook. You can:
- Play a sound. This is handy if you think the MacBook might still be nearby, as you’ll be able to hear it. Even if it’s not, it may spook the thief and make them dump your laptop. It also displays a message on screen saying ‘Find My Mac alert,’ which may further spook the thief.
- Lock/Lost. Lock will prevent the thief from accessing your MacBook without entering a four-digit code you set. Lost mode will prevent unauthorized access.
- Erase. This is the last resort. If you think there’s little chance of recovering your MacBook quickly, clicking Erase will wipe all your data.
How to track a stolen MacBook on your iPhone
- Open the Find iPhone app.
- Log in with your iCloud username and password.
- Tap your MacBook in the list of devices.
- If a location is displayed on the map, it’s found your computer.
- Tap the MacBook in the center of the screen.
- Tap Play Sound, Lock/Lost, or Erase Mac.
How to lock and erase your MacBook if it’s stolen
As we said above, provided you set up Find My Mac and your Mac is online after it’s stolen, you can log into Find My Mac on a Mac, PC, or iOS device and use the Erase or Lock buttons to wipe data or lock the thief out of your MacBook.
How do I track my MacBook if it’s offline?
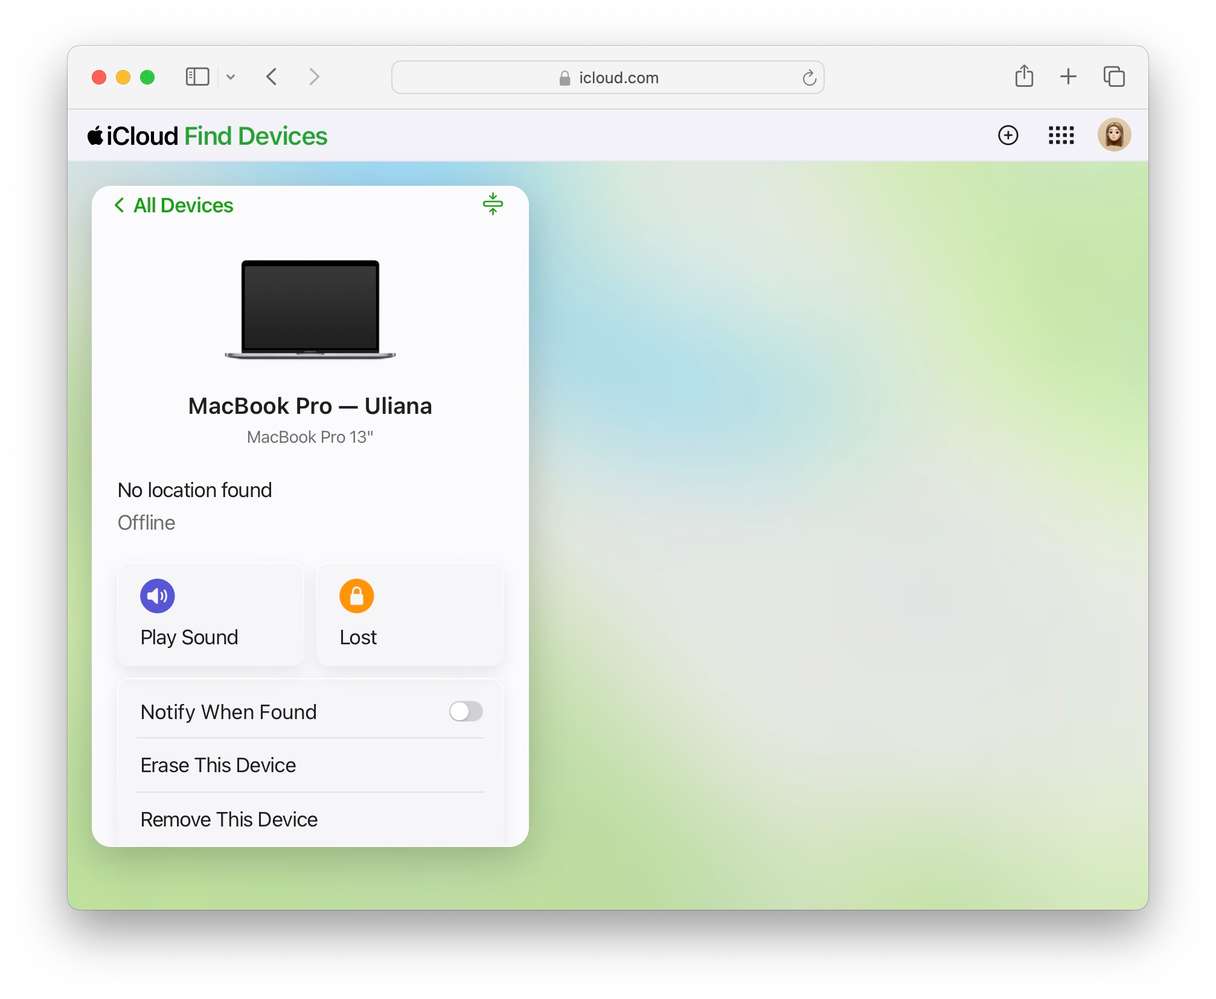
Find My Mac uses a range of methods, including Wi-Fi and cellular data, to track your Mac. So, if it’s switched off or not connected to a Wi-Fi or cellular network, Find My Mac won’t be able to locate it.
However, all is not lost. If Find My Mac can’t locate your MacBook, it will offer you the option to play a sound, lock, or erase it when it’s next back online. You can also keep checking Find My Mac, as it will update the map location the next time your Mac is online.
How to find your MacBook without Find My Mac
All of the above relies on you having set up Find My Mac before your Mac was stolen. If you didn’t, it wouldn’t work.
However, all is not lost. There are several online services that log the email address of your devices when you log into them. If your Mac is connected to one of those, and the thief doesn’t realize that when they connect to the internet, the service will log the IP address of your Mac.
Here’s how to locate the IP address for different services:
Dropbox
- Go to dropbox.com in a web browser on any Mac or PC and log in.
- Click your account picture — it’s at the top right of the screen. If you don’t have one, the default is a smiley face. Choose Settings > Security.
- Scroll down to Devices and locate your MacBook in the list.
- Place the mouse pointer over the ‘?’ under Most recent activity. The current IP address of your Mac will be displayed.
Gmail
- Go to gmail.com on any Mac or PC browser and log into your account.
- Go to your inbox and scroll down. Click Details bottom right.
- A new tab or window will open and display details of recent IP addresses from which your account was accessed.
- Log into your Facebook account in a web browser on any Mac or PC.
- Click the down arrow on your profile picture.
- Choose Settings & privacy > Settings > Accounts Center > Password & Security.
- Click Where you’re logged in the list and check if your Mac is listed as Active Now. It should show location.
A few things to keep in mind
1. Check your email
This one is a long shot, but it has happened. If the thief drops or otherwise damages your MacBook during the theft, they may try and get it repaired by Apple. If that happens, Apple will send an email to the address registered to that Mac, confirming the repair. If you get an email like that, contact Apple immediately and explain what has happened. Then, contact the police with the details.
2. Go to the police
If Find My manages to locate your MacBook, go straight to the police. It’s tempting to tackle the thief on your own. However, it’s unlikely that the thief will just hand over your computer, and you may be putting yourself at risk. Give the police the information and let them do their job.
3. Be careful
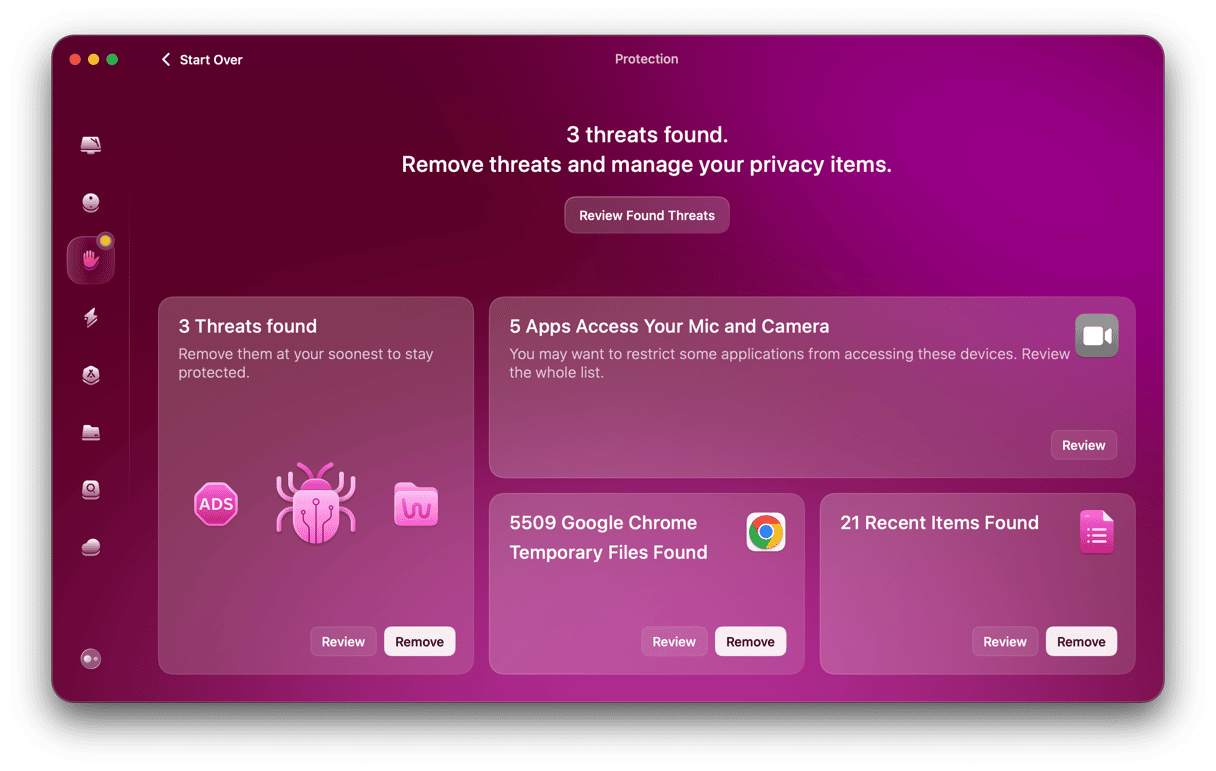
Having your Mac stolen is horrible, but losing precious data could be worse. Therefore, you should back up your Mac regularly and use CleanMyMac’s Protection feature to erase private data you no longer need. CleanMyMac can also uninstall unused applications with one click, remove junk files, and delete similars and duplicates. Try CleanMyMac for free.

Find My is a brilliant tool for tracking a stolen MacBook or any other Mac, but you must set it up first. So, do that as soon as you finish reading this article. If, for any reason, it doesn’t work, try using the tips above for Dropbox, Facebook, and Gmail. Above all, your personal safety comes first. Don’t attempt to tackle a thief or, in any other way, put yourself at risk of harm in an attempt to recover your computer. Contact the police and give them any information you’ve managed to gather.
Good luck! And stay tuned!


