With so many privacy threats around, having an extra layer of protection on your Mac is crucial. Luckily, you can keep your private data far from prying eyes by putting it in a password-locked folder.
Let’s see how to password-protect a folder on Mac so that no person or app can crack it.
Why you might want to protect a folder with a password
You wouldn’t show your credit card statements in public. So, why not protect financial or health information on your computer? If you share your Mac with someone else, password protection will cover up files you don’t want anyone to see. That also keeps your private data private if you lose your device.
Even if you’re the only user of your Mac, locking and encrypting your sensitive files is a must these days. Did you know that some data-mining apps could spy on your documents and folders? As cyber criminals adopt new tactics and code innovations, there’s no telling if your computer is hacked until your bank account turns out to be empty.
How you can keep your files safe
To be on the safe side, savvy Mac users regularly check their computers with anti-malware software. My personal favorite is CleanMyMac, as Apple notarized its use on macOS. It comes with the Malware Removal module that deals with Mac-specific viruses. Here is how it works:
- Get your free CleanMyMac trial.
- Click Protection > Scan.
- If CleanMyMac detects a threat, click Remove to get rid of it. If it doesn’t, congratulations! You have no malware on your Mac.

How to password lock a folder on Mac
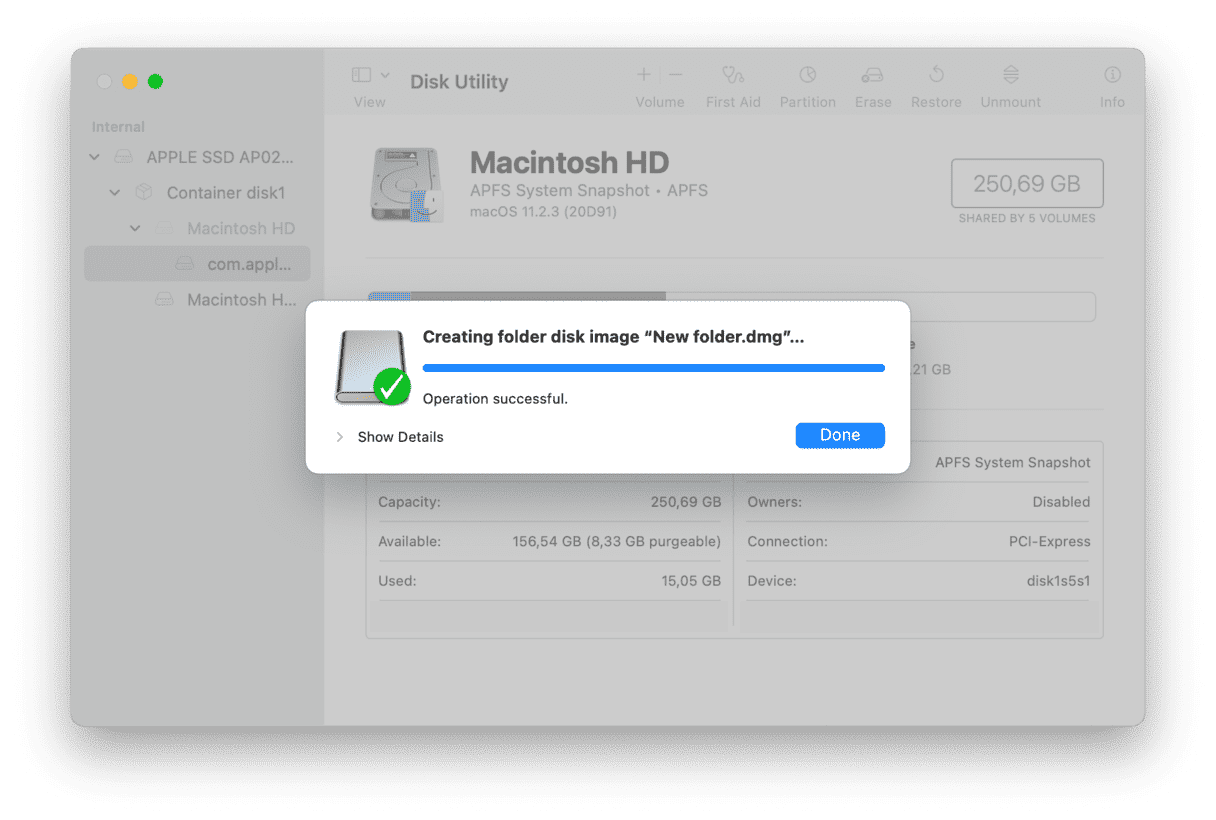
With Disk Utility, which is available on every Mac, you can encrypt and password-protect a folder by turning it into a disk image (DMG). Follow the steps below:
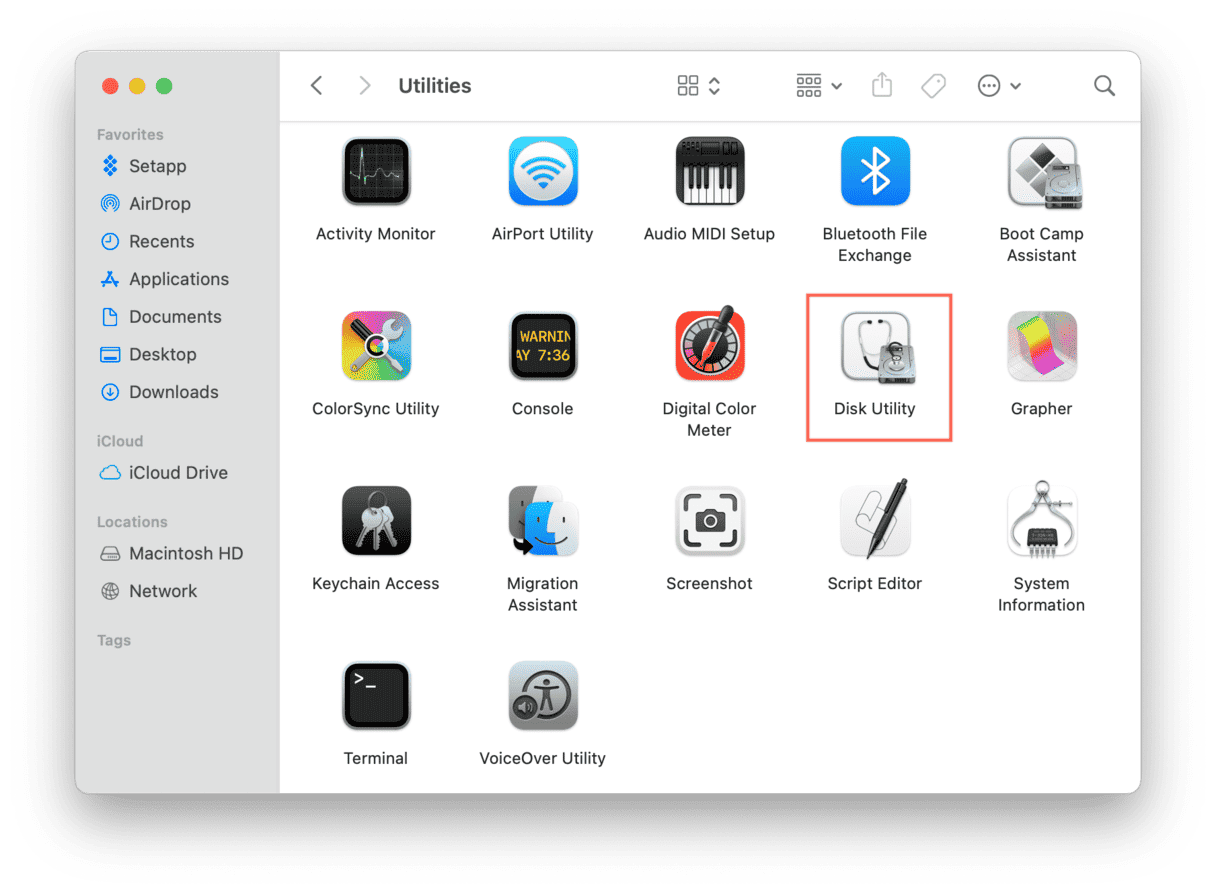
- Open Finder > Applications > Utilities > Disk Utility.
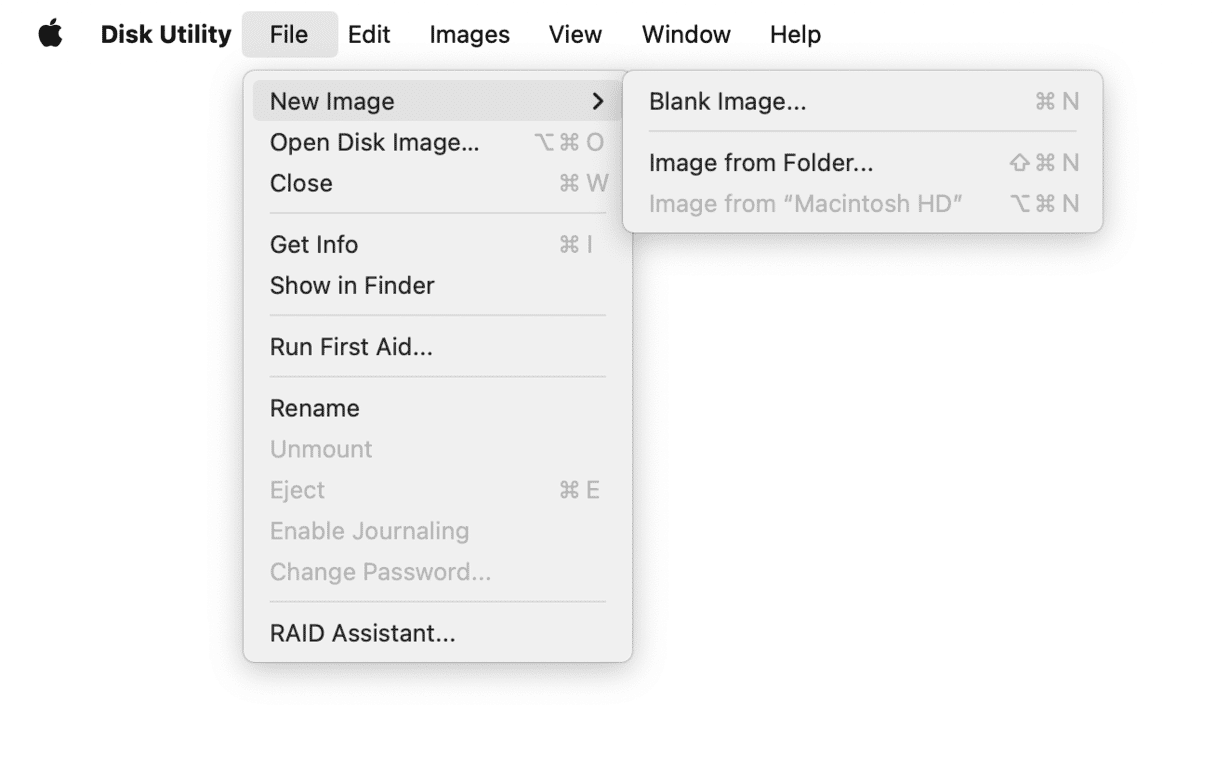
- Go to the File menu > New Image > Image from Folder.
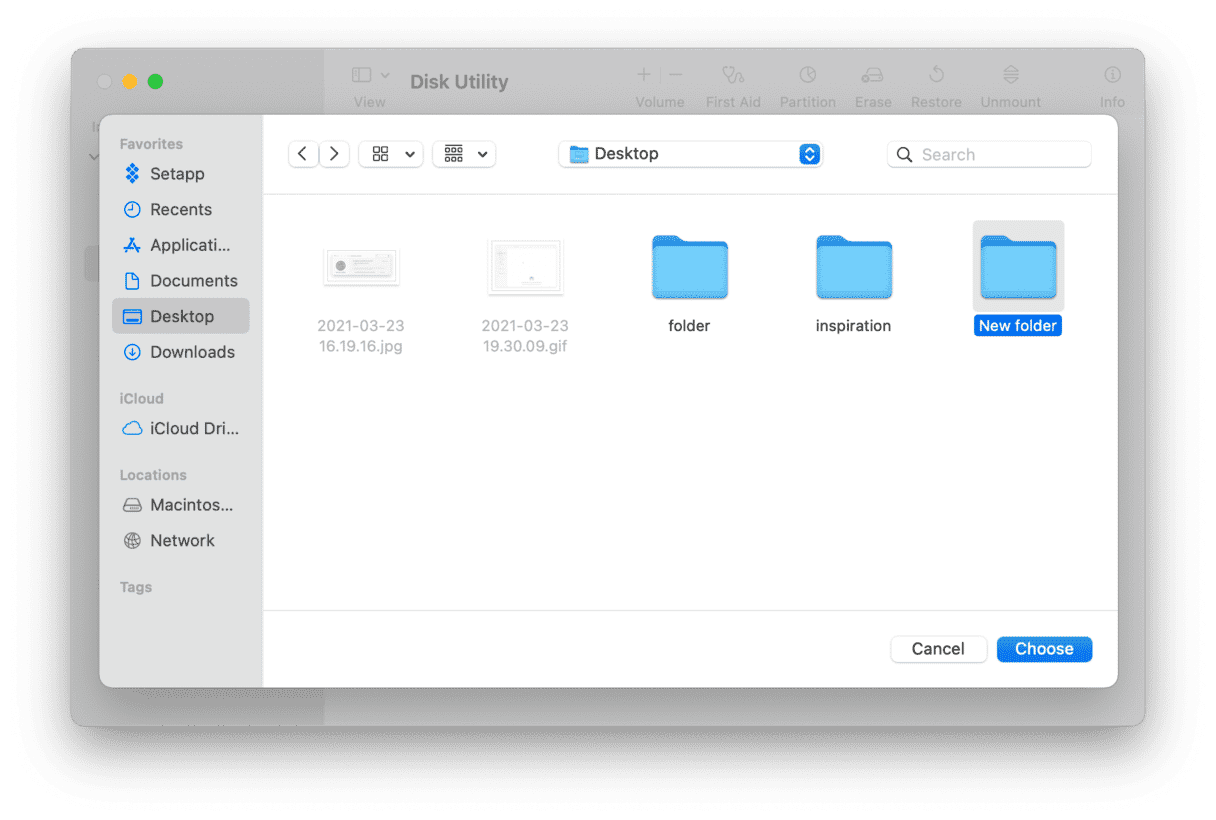
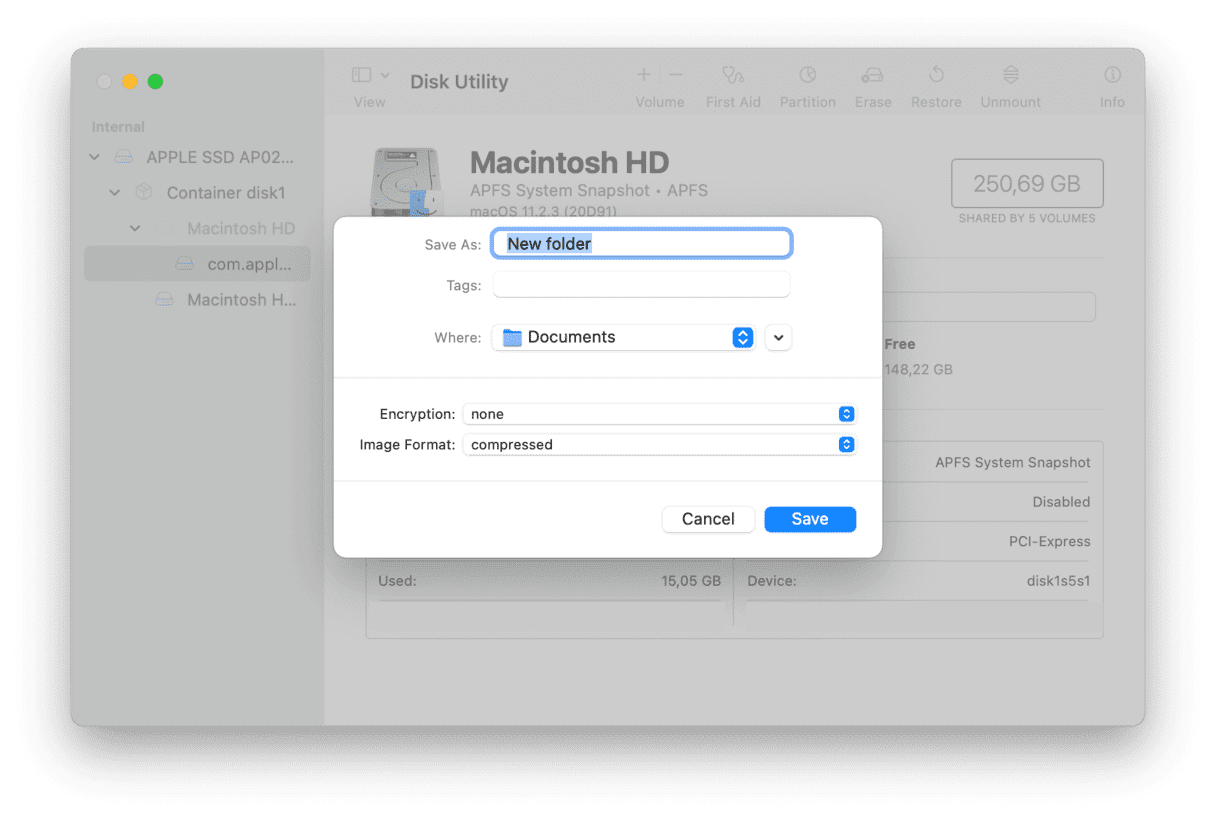
- Select a folder you want to password-protect in the dialog box that appears, then click Choose.
- Enter a filename for the disk image and select where to save it.
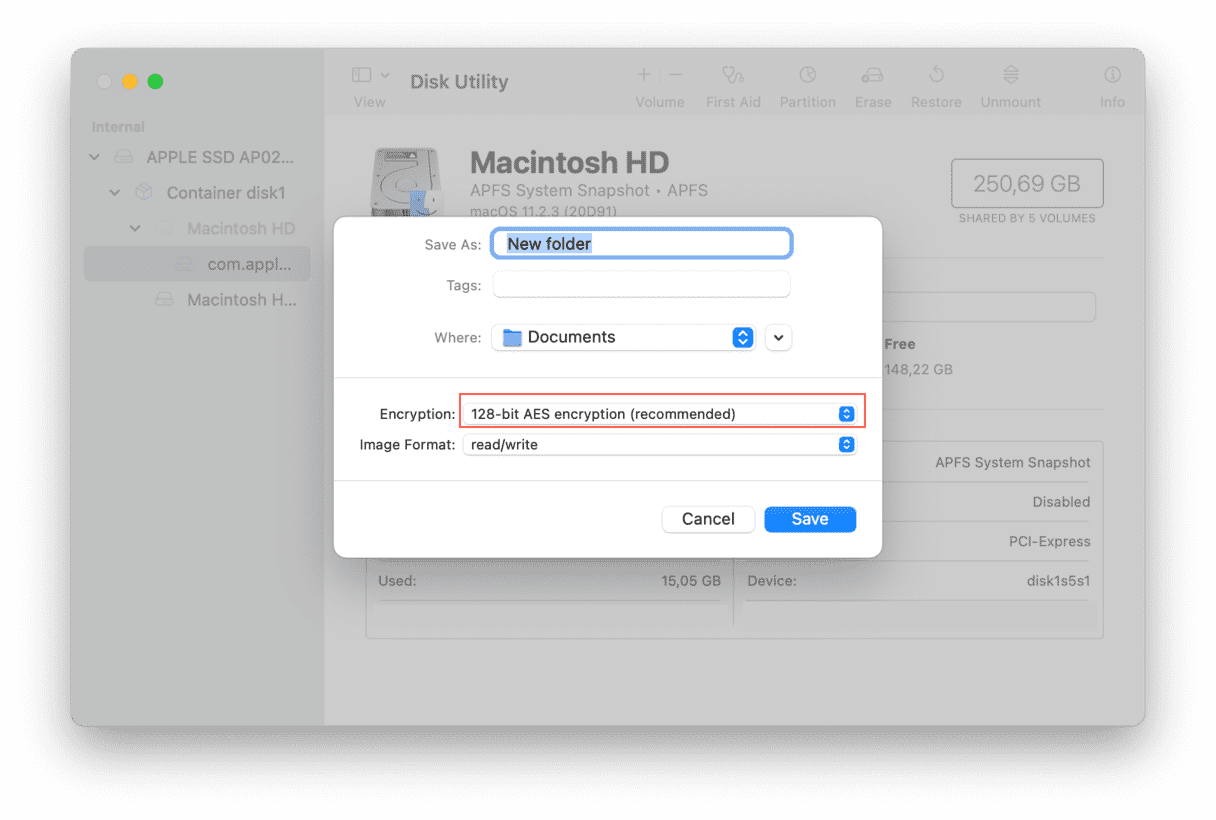
- Pick a preferred encryption option from the dropdown menu: 128-bit AES encryption (recommended) or 256-bit AES encryption (more secure but slower).
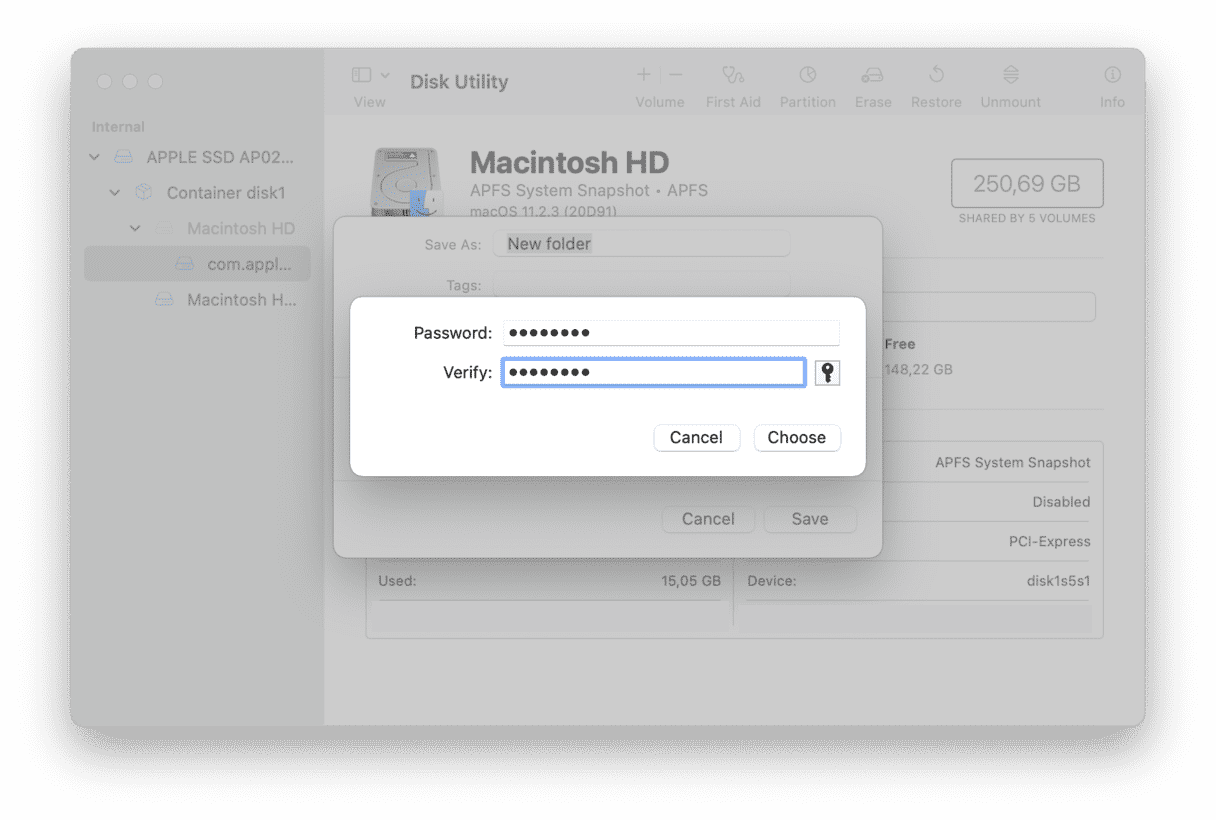
- Enter and verify your password in a new dialog box. Tap the key icon to open Password Assistant and check how secure your password is. Once you’re done with a password, click Choose.
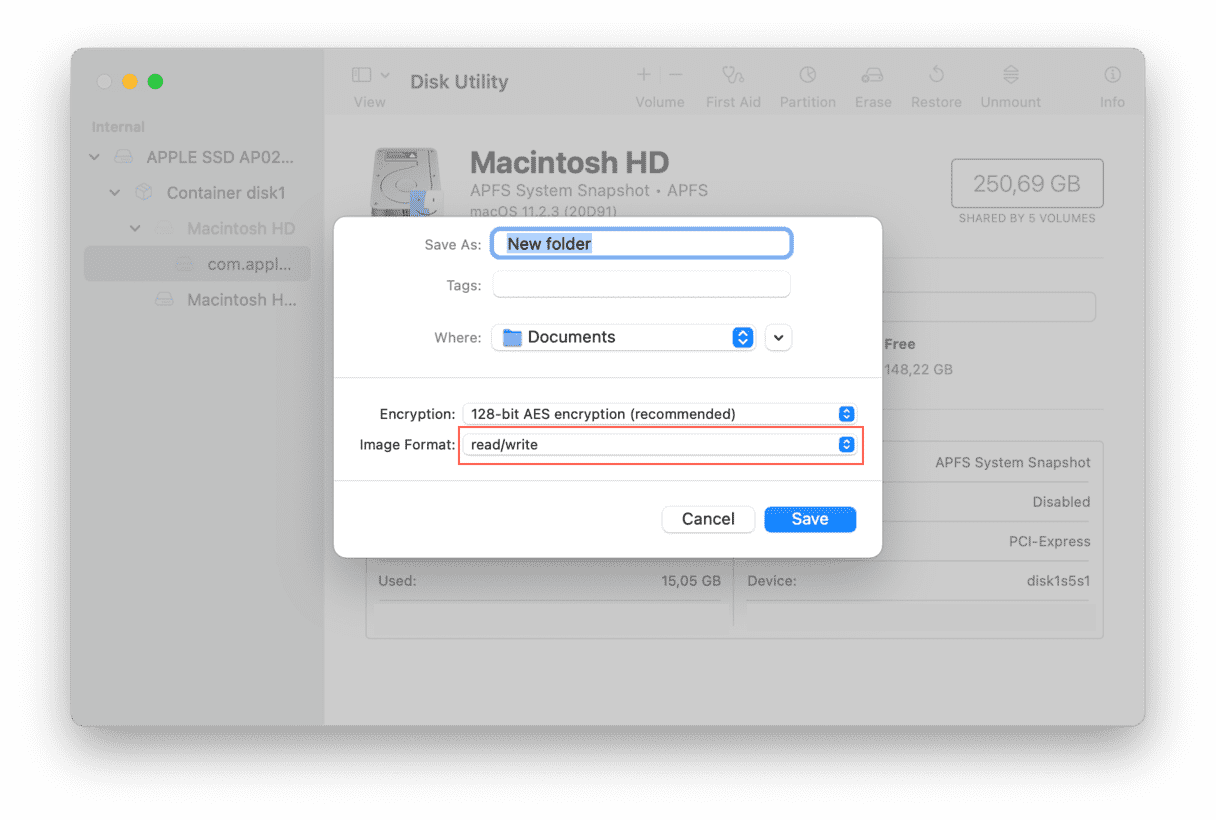
- Click the Image Format menu and pick “read/write.”
- Click Save, then click Done. Now your folder is password-protected.


Note that the original folder is still on your Mac. Make sure you have no issues accessing the DMG file, then drag the original folder to the Trash so that no one gets access to it.
How to lock a folder on Mac without Disk Utility? You can do that with Terminal or third-party apps with similar functionality. Still, I opt for Disk Utility, as this method is relatively fast.
How to use a password-protected folder
Go to the location where you saved the disk image and double-click to open and mount it to your Mac. Enter the password when prompted and press OK. You can optionally check the box to save the password in your keychain.
Once you enter the password, the DMG file mounts in two places: your desktop and the Finder sidebar. Click either one of these to open the folder.
To password-protect it again, click the eject icon in the Finder sidebar. That’s it!
Hope this step-by-step guide will help you keep your sensitive files safe and private.