There are several different ways to lock or sleep your screen in macOS. Before we show them to you, however, it’s important to make the distinction between locking your screen and just putting it to sleep.
If you lock your Mac, you’ll put it to sleep and need to type in your login password on your Mac’s lock screen or unlock it with TouchID on a MacBook Pro with Touch Bar or with an Apple Watch. However, if you put it to sleep, you won’t necessarily lock it. So, in order to lock your screen, you need to set up the password in System Settings. Here’s how to do that.
How to set up a password to lock the screen
- Open System Settings either by clicking on its icon in the Dock or by choosing it from the Apple menu.
- Click on the Lock Screen pane.
- Find the option that starts with Require password…
- Choose an option from the menu.

Now, whenever your Mac goes to sleep or a screensaver starts, it will lock, and you’ll have to authenticate with your user password, Apple Watch, or TouchID to gain access.
How to lock your Mac
If you have a MacBook, a MacBook Air, or a MacBook Pro, the quickest and easiest way to lock your Mac is just to shut the lid. When you do that, the Mac goes to sleep, and when you open it again, you’ll need to unlock it.
However, there are occasions when you want to prevent anyone from seeing the screen without actually closing it. And, in any case, if you have an iMac, Mac mini, or Mac Pro, it’s not an option. So here are some other ways you can lock your Mac’s display.
1. Use the Apple menu
Go to the Apple menu and choose Sleep. This will display the login screen for your account and won’t unlock with a password (unless you’re wearing an Apple Watch when you do it, and then it will lock and unlock immediately).

2. Use shortcuts
If you’re using a Mac that’s running the latest macOS version, go to the Apple menu and choose Lock Screen or press Command+Control+Q. This will lock your Mac and return you to the Login screen.
For older versions of the operating system, press Control+Shift+Power button (or Control+Shift+Eject if your Mac has an optical drive). It will lock the screen.
You can also use a keyboard shortcut to put your Mac to sleep. Press Command+Option+Power (or Eject). This works in a similar way to the previous one, but rather than just lock your Mac, it powers down the hard drive, puts the CPU into low-power mode, and stops background tasks to save energy.
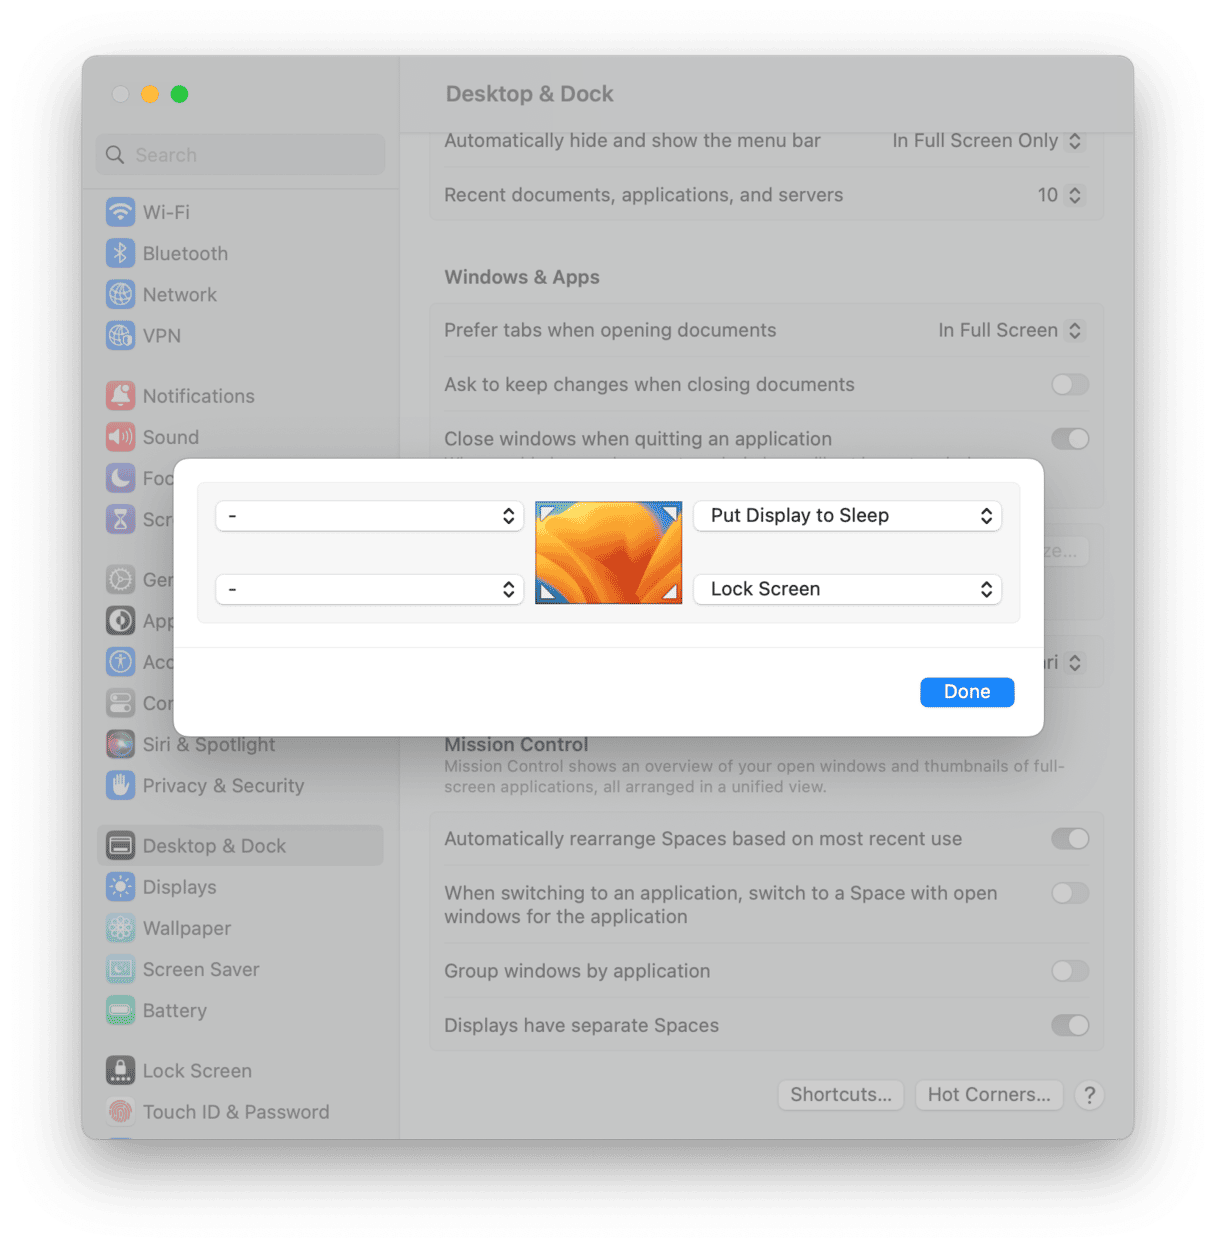
3. Set up a hot corner
Hot corners allow you to drag the mouse pointer to one of the four corners of the screen to initiate an action – you can use one as a sleep shortcut on your Mac. To set it up:
- Open System Settings.
- Choose the Desktop & Dock pane.
- Click the Hot Corners button at the bottom right of the window.
- In the window, choose a corner.
- Click on the menu and choose the options that work for you.
4. Use fast user switching
Fast user switching allows you to log into another user account on your Mac quickly. But you can also use it to return to the login window, which locks your Mac. Go to System Settings > Control Center. Find the Fast User Switching pane and set it up to your preferences. In this case, turn Show in Menu Bar on. You can also choose whether to show the menu as your full name, the account name, or an icon.
To lock your Mac, click the fast user switching menu at the right of the menu bar and choose Login Window…
5. Add Keychain Access to the menu bar
- Go to the Finder.
- Choose Applications > Utilities.
- Open Keychain Access.
- Click in the Keychain Access menu and select Preferences.
- Check the box next to Show keychain status in the menu bar.
- You’ll see a lock in the Finder menu bar. Click it and choose Lock Screen to lock your Mac.
Another way to protect your privacy
One of the main reasons for locking your Mac when you step away from it is to stop prying eyes from accessing your files, browser history, or anything else you don’t want them to see. CleanMyMac has a tool that gives you even more privacy protection.
CleanMyMac’s Privacy tool allows you to quickly delete your browser history in Chrome, Firefox, and Safari. It also allows you to control application permissions, clear the Recent Items list, and remove insecure Wi-Fi networks.

Also, CleanMyMac’s Shredder is a quick and easy way to delete sensitive data securely. You can start your free CleanMyMac trial and give it a try.
As you can see, putting your Mac to sleep or locking it is very easy. There are lots of different ways to do it, although some are dependent on the version of macOS you’re using. If you regularly lock your Mac to prevent others from accessing it, you should ensure your login password is strong and secure.
Finally, if privacy is important, CleanMyMac has a couple of tools that can help delete sensitive data.