Everyone takes the occasional poor photo. Maybe the angle is wrong. Or maybe the picture is either too dark or too bright, and you can’t really tell what you’re looking at.
If you’re tired of bad photos and are still getting used to your new iPhone, these iPhone Camera tricks will help you speed up your photography game in no time.
How to adjust iPhone Camera settings
Now, I know what you’re thinking, “I’ve played with the Camera settings, and nothing is really helping!” While it might be true, there is much more to iPhone Camera settings than you might think.
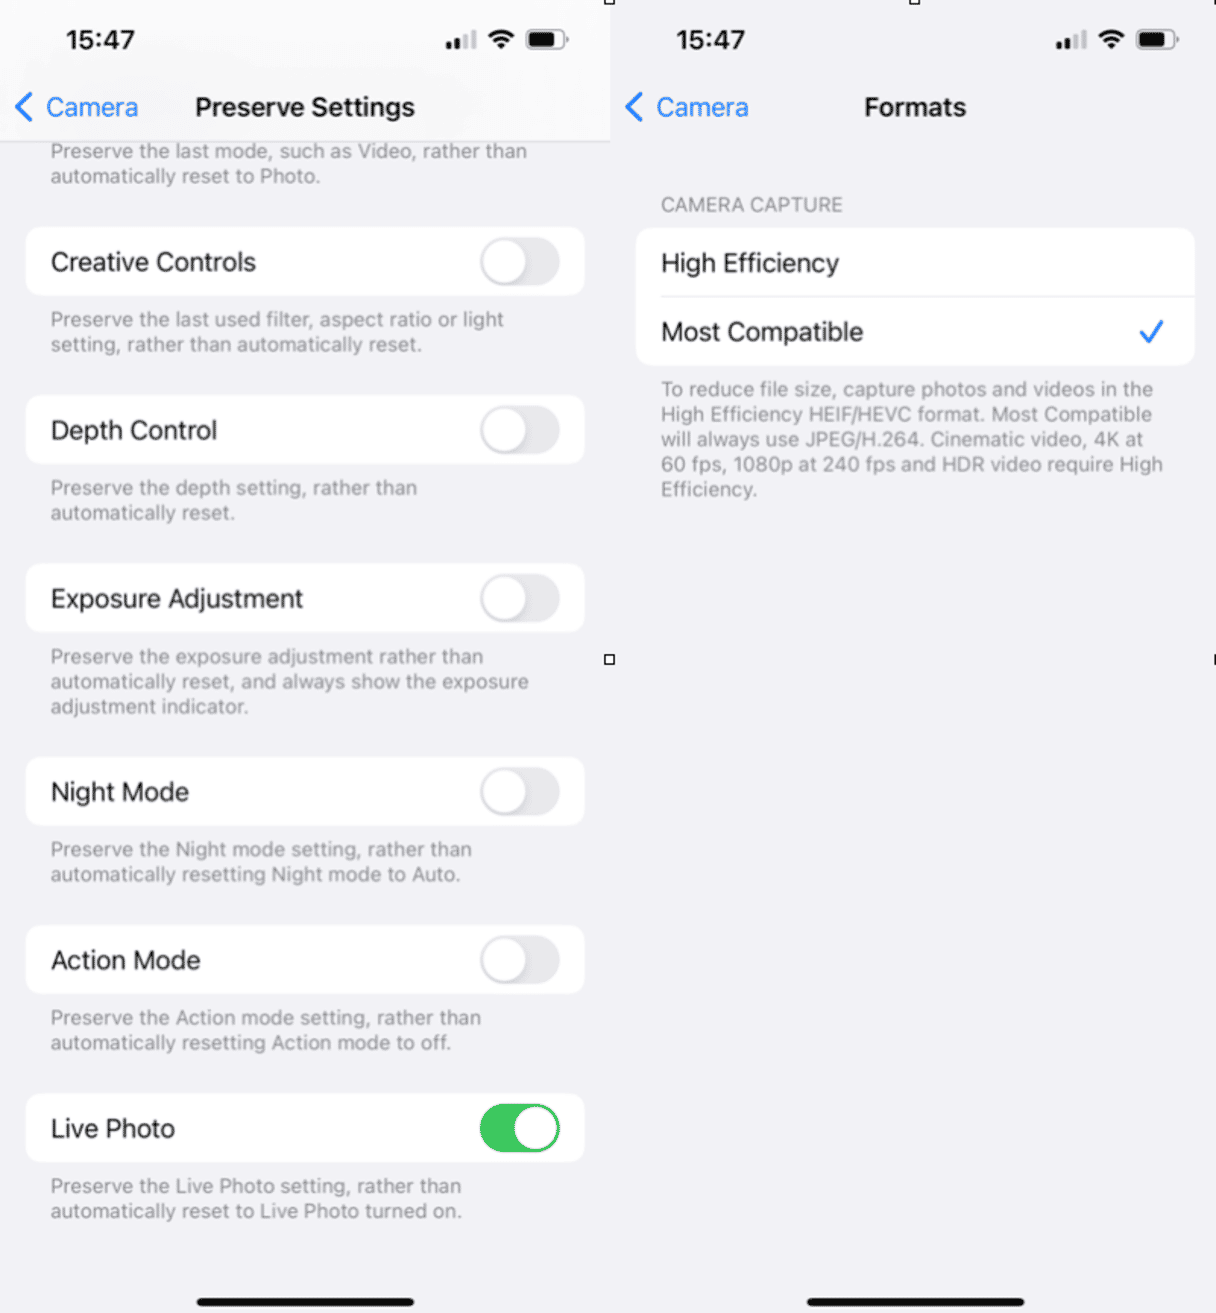
While things like the iPhone Camera’s flash or timer might not always help, those aren’t the only features available to you. Like other apps, Camera has only some of the settings directly in the app, while others are buried in the iPhone Settings. The features you’ll find in Settings > Camera include:
- Grid
- Keep Most Compatible for HDR
And within the Camera app, you’ll see some more familiar features like:
- Live Photos
- Camera Timer
- Brust Mode
- Night Mode
- HDR
- Portrait Mode
- Focus
- Exposure
Let’s go over what these features do and how you can adjust them to improve your photos.
Important note before you start taking new pictures
High-quality photos take up more space and can quickly fill up your storage. The size of one good photo can take up to 50 megabytes or even be larger.
To ensure your iPhone is ready for a large number of new photos, declutter the old ones with CleanMy®Phone.

How to set up the best camera settings on iPhone
There are several things you can do to achieve high quality photos with your iPhone. Like turning on Portrait Mode for portrait photos or using Grid for better composition. Below you'll find the basics that can add spice to your iPhone photography.
1. Turn on HDR to shoot in difficult lighting conditions
You may have seen the HDR badge in your Camera app before and wondered what it does and when to use it. An oversimplified description of HDR in the Camera app is that it takes three photos at different exposure and combines them using the best pieces from each. You’ll find that incredibly helpful when you’re trying to take photos in overly bright or dark conditions.
If you’re not a fan of HDR, you can turn it off by tapping the badge in the Camera app. Alternatively, set it to Auto and let the Camera decide when to shoot in HDR.
Your iPhone takes both an HDR and non-HDR photo by default. You can tell which version you’re looking at in the Photos app by the HDR badge in the top left corner of the picture. If you’d rather not keep two almost identical photos, just go to Settings > Camera and turn off the Keep Normal Photo toggle.
2. Use Live Photo to capture movement
Have you ever wished your photos had a little bit of motion to them? Well, that’s exactly what a Live Photo does. You take a Live Photo just like a normal one, except it captures a few seconds before and after the picture was taken. When you tap and hold on the photo, it plays as a short video.
To turn on Live Photos, open the Camera app and tap on the round icon at the top of the screen. You’ll know it’s on when the icon turns yellow. And from there just take your photo as usual. To turn the feature off, tap on the icon again, and it will revert back to white and have a line through it.
If for some reason you don’t like the photo — maybe it’s out-of-focus or someone is blinking — you can change what’s called the Key Photo. Just tap Edit, and a timeline will appear at the bottom allowing you to select the best frame to use as the Key Photo.
3. How to put a timer on iPhone camera
If you’re finding that all of your photos are a little blurry, maybe you’re moving the camera ever so slightly when you press the shutter to take the picture. To fix that, try out the iPhone Camera timer.
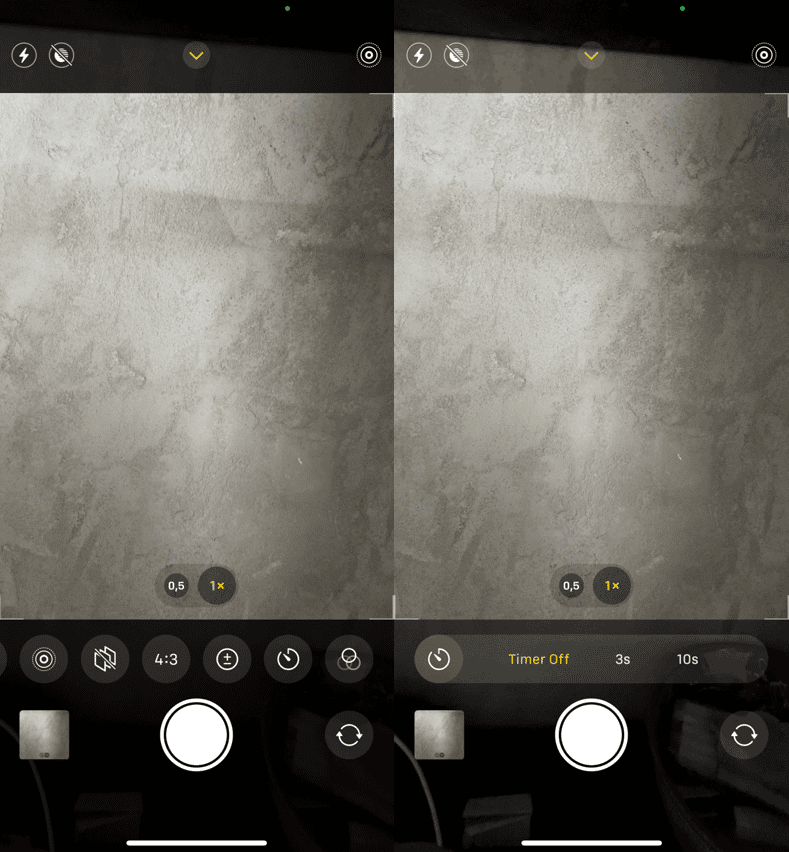
When you’re in the Camera app, tap on the timer icon at the top, and it will offer to delay the photo for 3, 5, or 10 seconds. Select the time for the delay, tap the shutter button, and then hold still. Voila! It’s as easy as that.
4. How to turn grid on iPhone camera
Composing your shot well is more than half the battle, and to help you with that, iPhone has built-in grid lines.
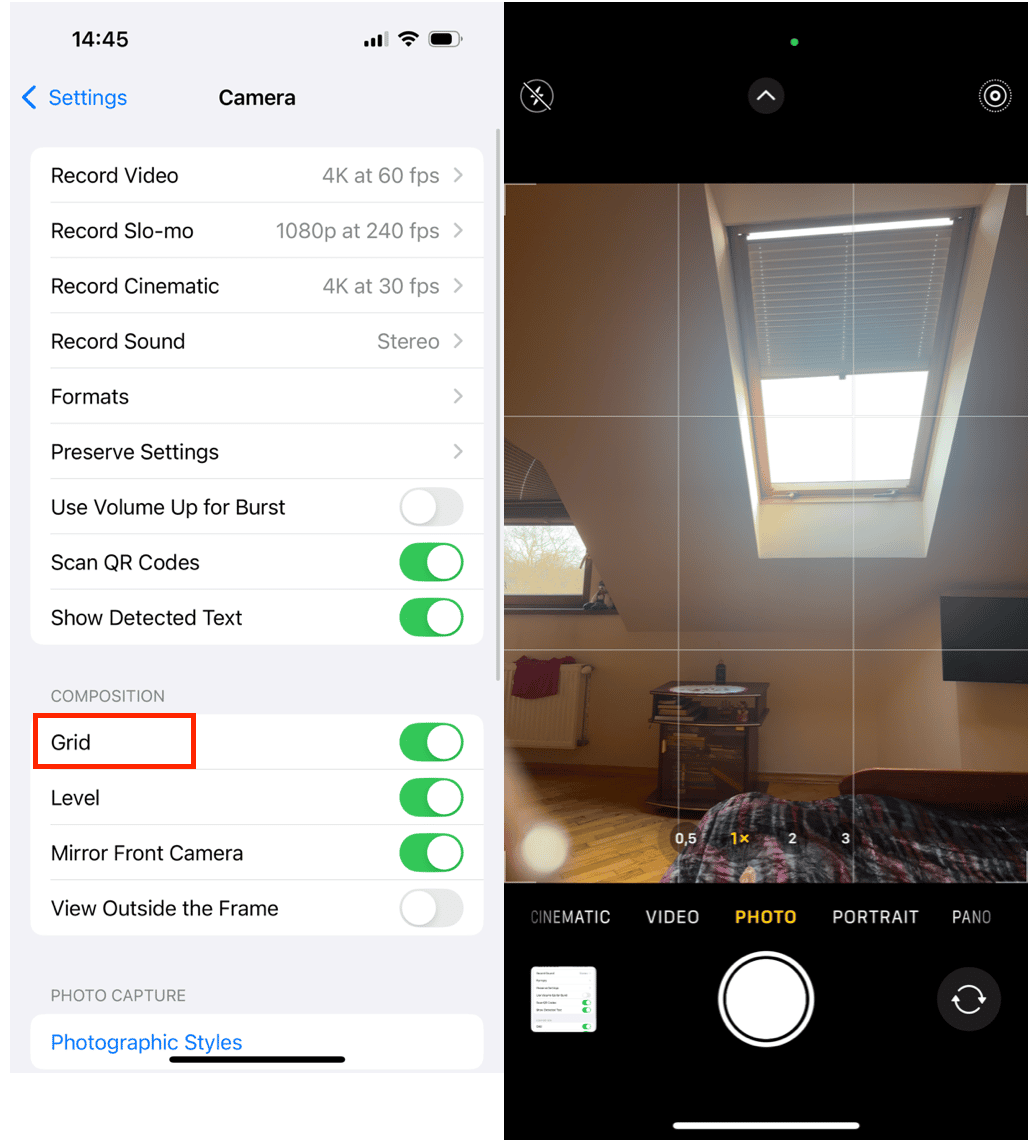
The iPhone Camera grid lines will show you how your picture is divided into nine equal squares, so you don’t have to guess at it. That’s helpful if you’re trying to line up a shot with the horizon, put the subject in the center of your frame, or follow the rule of thirds.
If you're wondering how to get grid on iPhone Camera, go to Settings > Camera and switch on the Grid toggle. Here's how it will look like when Camera is on.
5. Use Portrait mode to blur background on photos
If you want to put more emphasis on the person in your photo and blur everything else, try using Portrait mode. It achieves an effect similar to that of DSLR cameras, when the subject of the photo is in focus, but the background is blurred out.
You can switch to Portrait mode just like you switch to Video or Slow Motion within the Camera app. Just swipe on the slider at the bottom until you land on Portrait mode. Once you’re in Portrait mode, follow the on-screen prompts that will let you know if you’re too close or too far from your subject, or if you need to add more light to the picture.
6. Use burst mode to capture unique shots
Who doesn’t love a good, candid photo? A unique moment that seems to be captured spontaneously? But unless you’re able to tap the camera’s shutter at just the right second, you are likely to miss that moment.
Fortunately, there’s Burst mode. Instead of tapping on the shutter button, hold it and swipe to the left. Thanks to that, you’ll be more likely to catch that adorable yawn of your toddler’s or the way your dog cocks her ears when you call her name.
Each burst will appear in your Photos app as just one photo with the Burst badge. To view all pics in the burst, tap Select…, then swipe through the images and pick your favorites to save them as individual photos.
7. Capture Focus to Take sharper photos
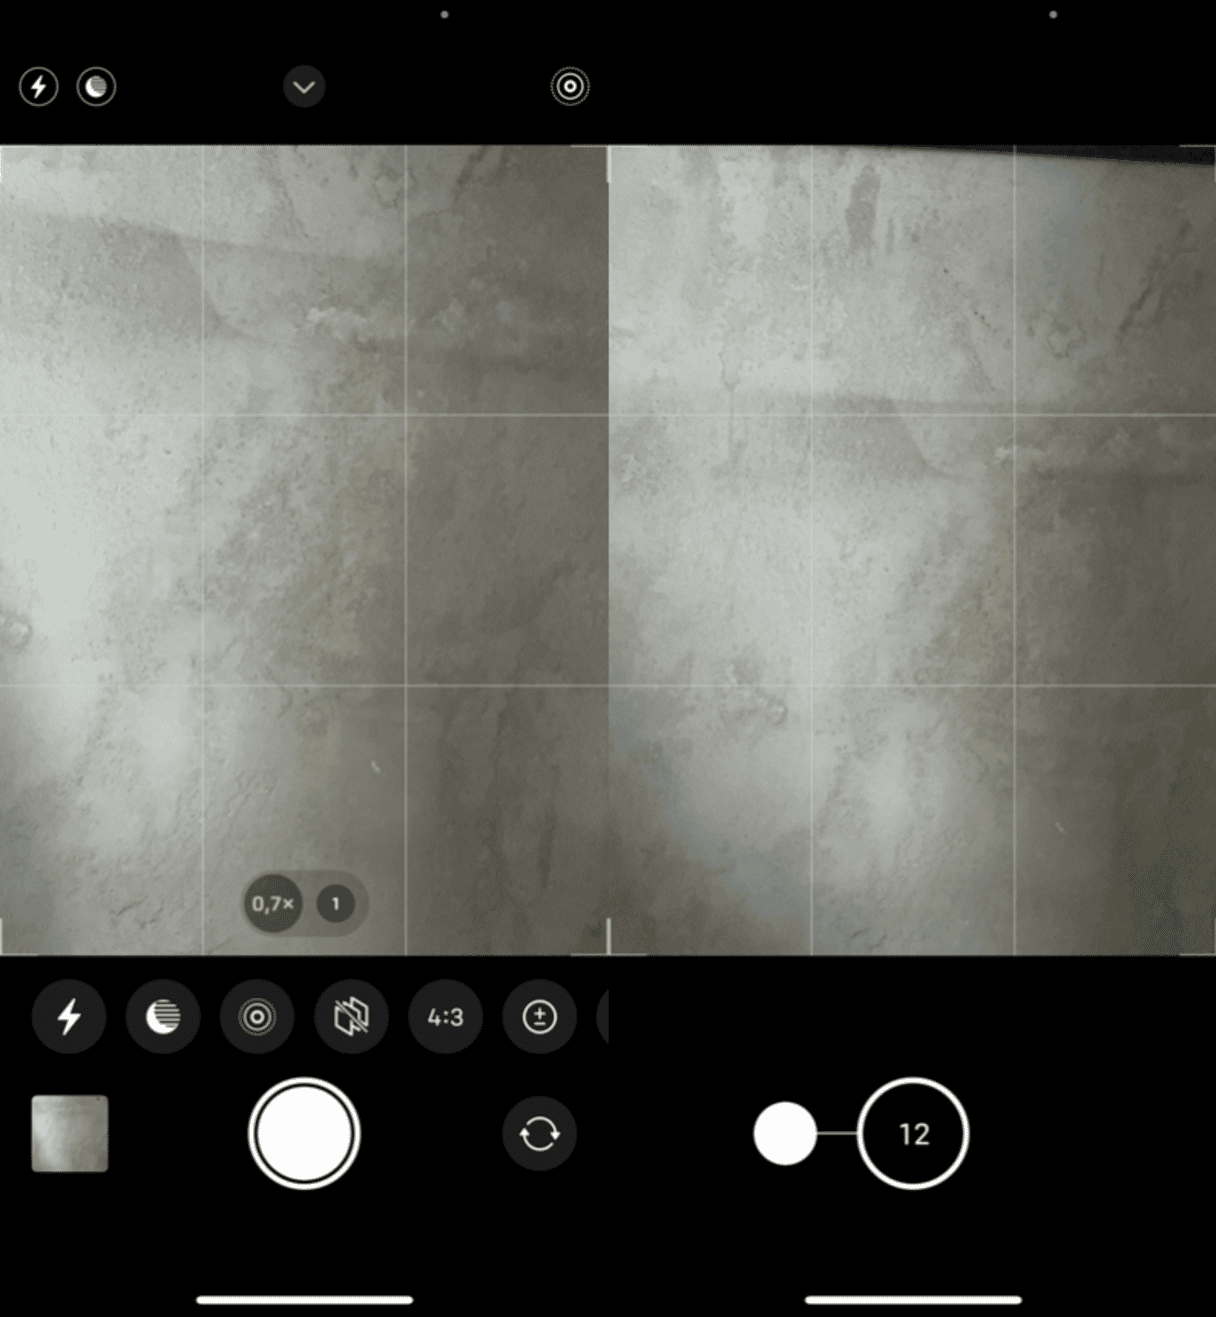
While most of us rely on the Camera app’s autofocus setting, there may be the instances when it doesn’t focus on what you want it to. In those cases, you can tap on the area of your screen where you want the camera to focus and it will re-focus.
Plus, you can lock the focus in place, so that your subject remains sharp as you move the phone and compose the shot. Instead of tapping, just press and hold where you want the camera to focus. When it’s locked, you’ll see a yellow box reading “AE/AF Lock.”
8. Adjust Exposure to Make photos brighter or darker
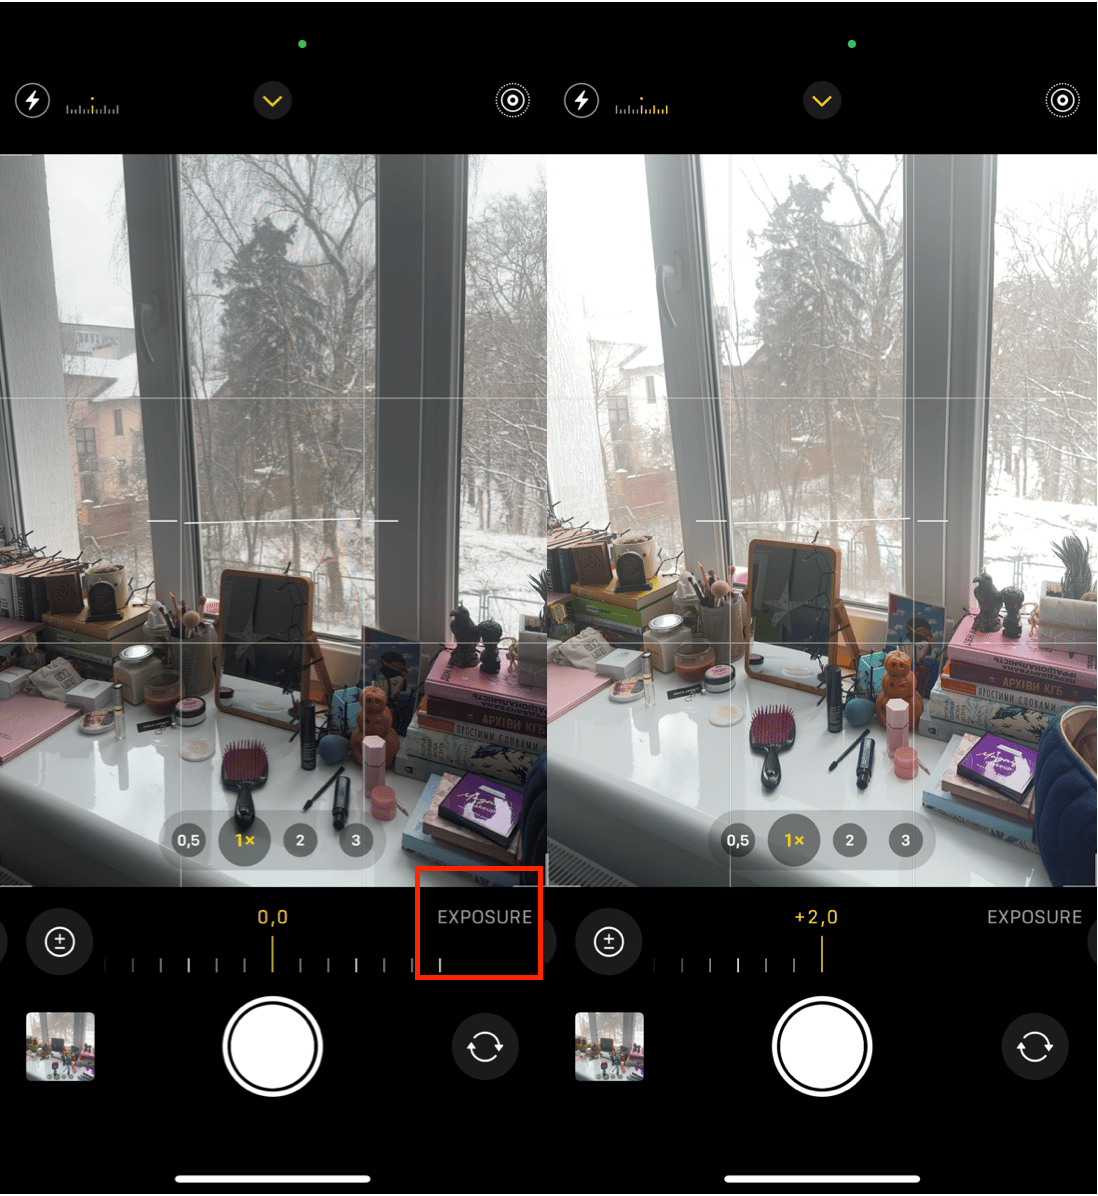
Similar to adjusting and locking the focus in Camera, you can adjust and lock the exposure, or the brightness, of your pictures. Just tap anywhere on the image and drag the sun icon up or down to make the photo brighter or darker. Additionally, you can press and hold to lock the exposure (the same yellow box labeled “AE/AF Lock” will appear). To learn how to change exposure on iPhone, this is the simplest method. And if you'd like more advanced, DSLR-like control over exposure, try on of the iPhone camera apps we like.
How to reset iPhone Camera settings
The best part of all this is that you can go ahead and tinker with all of the Camera settings without worrying. With iOS12, the Camera app will automatically reset to the default settings every time you exit the app.
However, if you don’t want to readjust those settings every time you open the Camera app, here’s how you can have it keep your most recent settings:
- Go to Settings > Camera
- Go to Preserve Settings
- Switch on the toggles for Camera Mode, Creative Controls, and Live Photo
_1718705993.png)
This will ensure that the Camera settings you adjust in the app stay in place after you close and re-open it.
Which iPhone has the best camera settings?
If you’re looking for the iPhone with the best camera settings, the iPhone 16 Pro and 16 Pro Max are the top contenders. These models offer an upgraded triple-lens system, including a 48MP wide and ultra-wide lens, along with a 5x optical zoom telephoto lens. You’ll also find new features like the Camera Control button, which makes accessing settings faster and more intuitive. Whether you're shooting in Night Mode, experimenting with ProRAW, or just snapping everyday photos, these iPhones deliver stunning results with ease.
Now that you’ve got a better handle on how to use the iPhone camera, it’s time to start experimenting and taking photos the way you want to. Let us know what your favorite settings are or which ones have been the biggest help in improving your pictures.


