If you’re not using something like iCloud Drive to back up the files on your Mac, you are really pressing your luck. iCloud Drive is like a giant safety net for your files. Whether you accidentally delete a file or you don’t have your computer with you. You’re able to access what you have saved on iCloud Drive at any time and from anywhere. There’s definitely peace of mind that comes with knowing that you can always get to the files you need as long as you have internet access.
Keep reading to learn how to access your files on iCloud, save them to your Mac, and even how to move them around and keep them organized in folders. It might sound like a lot, but trust me, once you jump into iCloud Drive — you won’t want to use anything else.
How to download files from iCloud to Mac
Downloading files from iCloud Drive to a Mac can be done in one of two ways. If you’re not using your own computer, then you might want to only save a single file at a time. But, if you are on your Mac, then you’ll probably want to sync all of the files so that they’re stored locally on your hard drive.
Download a single file
If you only want to save one or two files from your iCloud Drive, you can do that using only your browser. Here’s how you would do it:
- Open your browser (Safari, Chrome, or Firefox).
- Go to icloud.com
- Sign in with your Apple ID.
- Click iCloud Drive.
- Find and click on the file you want to save.
- Then, click the Download icon. It looks like a cloud with an arrow pointing down.

The file will automatically save to your default downloads folder.
Sync multiple files
Because iCloud is Apple’s cloud service, it’s fully integrated with macOS. This means you’re able to sign your Mac into your account and have it automatically sync your files from your computer. This is how you set it up:
- On your Mac, open System Settings.
- Click Apple ID > iCloud.
- Select iCloud Drive.
- Then, click the Options… button and select what you want to sync.

Once that’s turned on and your files have all had a chance to sync, you should see iCloud and iCloud Drive listed in the Finder sidebar. Now you can move or save files into those folders, and they’ll automatically sync with iCloud.
Make sure you don’t keep duplicate files and other clutter
If you’re not being super vigilant about your file organization, then you’re likely to end up with a ton of duplicate files and other unnecessary clutter fast. But even if you are wasting space with duplicate files saved on your computer and on iCloud, manually looking for them will take you hours.
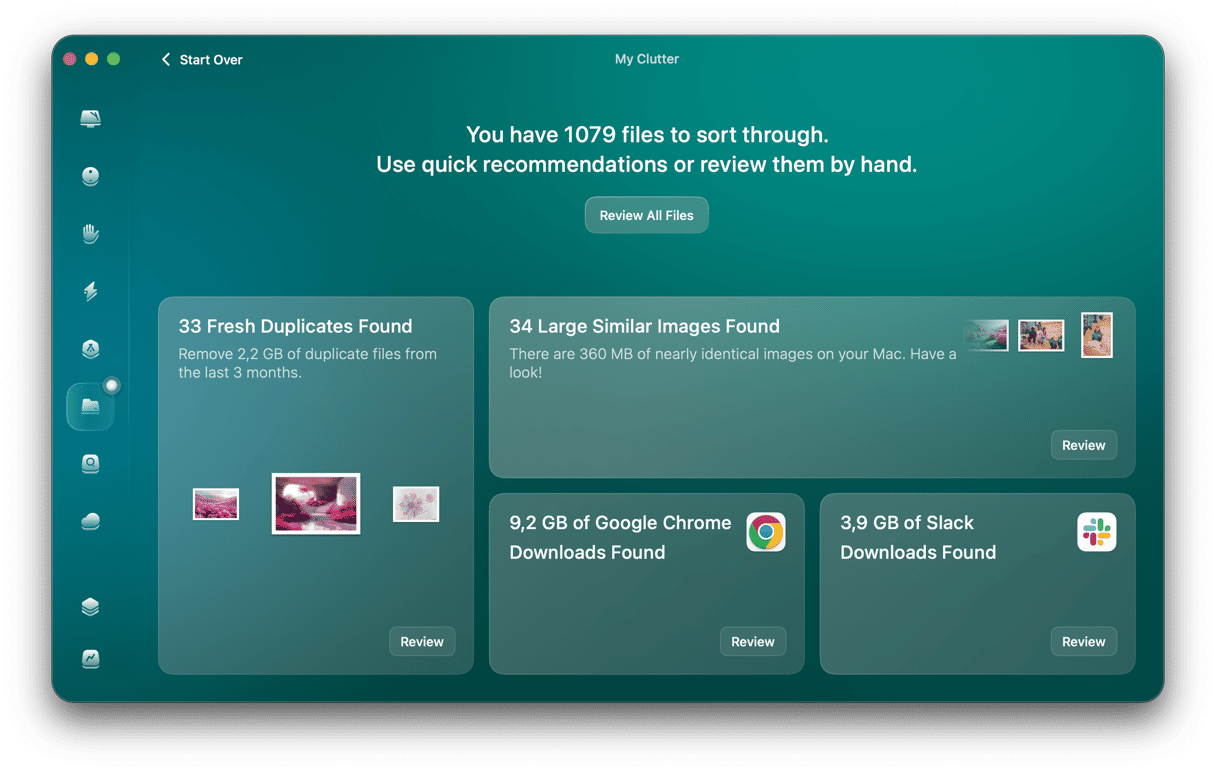
So, rather than audit your files, you can use CleanMyMac to help you quickly find duplicate files and other clutter. It’s an app for macOS that will scan either your entire hard drive or a specific folder looking for duplicates. It does all the heavy lifting for you and makes getting rid of those files even easier and quicker.
The good news is that you can test CleanMyMac for free for 7 days (get your free trial here). Once installed, follow these steps:
- Open CleanMyMac.
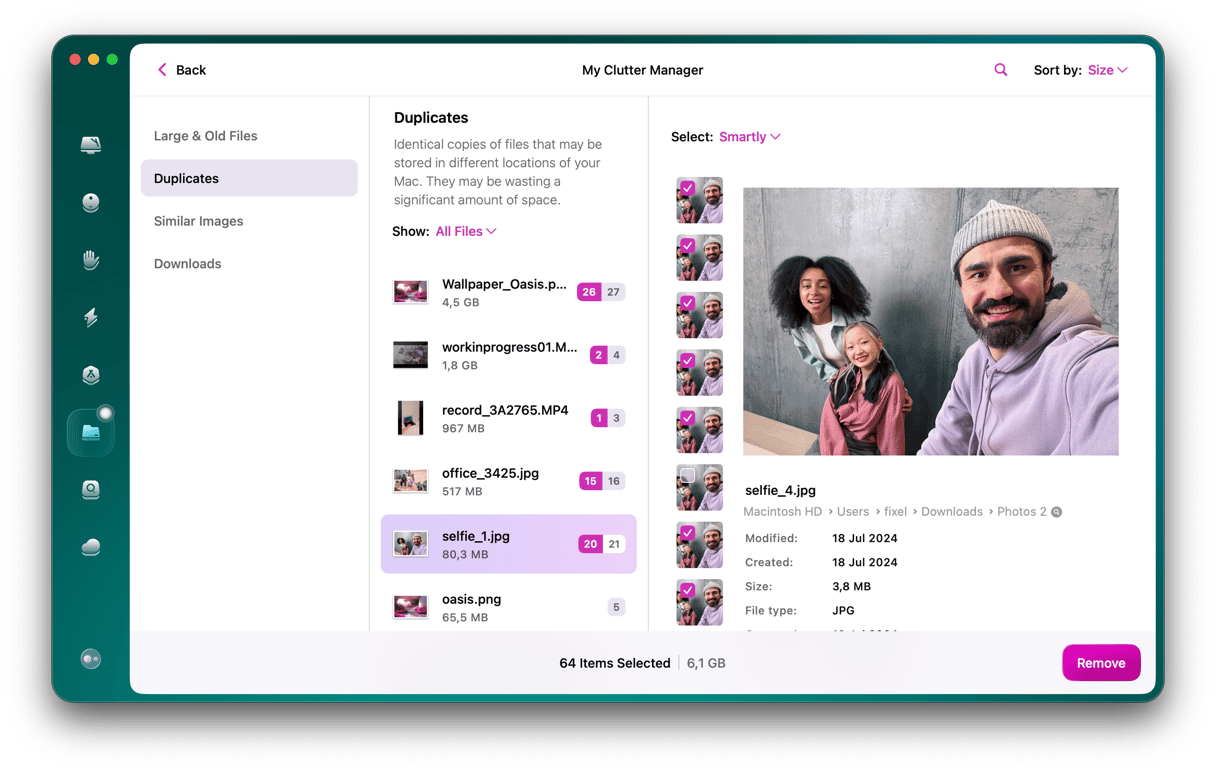
- Click My Clutter (you can select the target directory for the search) > Scan > Review All Files.
- Browse the categories, select files for deletion, and click Remove.


With this smart tool, you can find not only duplicates but also large and old files. But there’s more CleanMyMac has to offer. It now comes with the Cloud Cleanup feature that can declutter your iCloud Drive in a few clicks.
Here’s what to do:
- Once again, open CleanMyMac.
- Click Cloud Cleanup and connect your cloud
- Now, click Scan.
- Review the findings, select files you no longer need, and remove them safely.

How to move files on Mac
Thankfully, iCloud Drive is structured similarly to your hard drive on macOS, which makes it easy to keep your files organized into folders. You can keep your files organized in the Finder if you have iCloud Drive syncing with your Mac. Or you move files around in your browser if that’s how you’re accessing iCloud Drive right now.
Move files in your browser
If you’re not still logged into iCloud at this, follow these simple steps:
- Open your browser of choice.
- Go to icloud.com and sign in with your Apple ID.
- Click iCloud Drive.
- Then, you can click and drag the file you want to move on top of the new folder.
If you don’t have any folders on your iCloud Drive, you can create a new one just by clicking the New Folder icon at the top of the window. It’s the button that looks like a folder with a tiny + in the top-right corner.
Move files in the Finder
Now, if you have iCloud Drive turned on in System Preferences, then you might want to just use the Finder to move your files around.
- Open a new Finder window.
- Search for the file you want to move.
- Click and drag on the file until you get it to its new location.
That’s really all there is to it! And if you decide you need more folders or just want to add a new one, you can create a new folder in the Finder as you would normally. All you have to do is click File > New Folder.
iCloud Drive is a great way to keep all of your files in sync and backed up. So, whether you’re accessing the same file on different computers or you just need to restore a backed-up file, iCloud Drive is going to be a lifesaver for you. And if you’ve never used a cloud service like this before, then you’re in for a treat. Hopefully, you’ll get to experience the ease of being an iCloud member. Especially if you’re like me and have multiple Apple devices, then iCloud Drive will allow you to access all your files and will keep your digital life in sync.


