It’s no secret that Apple knows how to make a great camera. Look at any of their iPhones. But, the camera on most of their Macs can hold their own too. And as we’ve all relied on our Mac more and more for video calls lately, you might be wondering why you couldn’t use your computer to take pictures as well.
Good news. You can. In this article, I’ll show you how you can take photos with your Mac as well as how to take pictures of your Mac screen.
How to take a photo on a Mac
If you searched the Mac App Store for an app that will let you take a pic using the built-in camera, well, you’d find hundreds. And they’re all basically the same. They may offer a fun filter or two that other ones don’t, but that’s about it.
Thankfully, the app Photo Booth comes with macOS and pretty much sets the standard for taking pics with your MacBook camera. So, sure you can try another app that you find, but you’ll be hard-pressed to find one that beats the app you already have installed.
Take a picture with Photo Booth
As you’d expect from most Apple apps, Photo Booth is incredibly easy to use. This is all you need to do to take a picture:
- Open Photo Booth.
- Click the red shutter button.
- Your screen will flash white. And that’s it!

Seriously. That’s how simple it is to use Photo Booth.
Of course, you can also add effects by clicking on the button in the bottom-right corner and scrolling through the gallery to find the perfect one for your pic.
Clean up the clutter
Often, when you’re using Photo Booth, you end up taking a lot of similar pictures trying to capture the perfect one. But, each of those pics takes up space on your hard drive. Don’t let that clutter build up on your computer. You can use Gemini 2 to help you scan your Mac for duplicate files, like pictures, and quickly clean them up. You can download Gemini 2 for free, and it’s so easy to use.
Once you have Gemini 2 downloaded and installed on your Mac, you just need to:
- Open Gemini 2.
- Click + > Home folder > Scan for Duplicates.
- Then, choose Review Results or Smart Cleanup.

The Smart Cleanup feature uses Gemini 2’s algorithm to pick the best version of your files and delete the other copies. But, if you want to decide for yourself, you can just click Review Results to preview all of the files Gemini found.
How to take a picture of a Mac screen
Maybe you’re not reading this because you want to take selfies. Then, this section is for you. macOS also makes it really breezy to take pictures of your screen. But in an effort to give you more control, there are a couple of different ways to go about it.
Capture the whole screen
This is probably the easiest method of them all. It captures your entire screen, just the way you see it. This is all you have to do:
- On your keyboard, press and hold command + option + 3.
- Your screen will flash.
- Then, in Finder, go to your Desktop. Where you will see your new screenshot file.

After step 2, you should see a small thumbnail in the bottom-right corner of your screen for about 5 seconds. If you click on that screenshot, you can choose to edit, share, or even delete the screenshot.
Screenshot a portion of your screen
If you want to capture just a section of your screen, you’ll definitely want to use this method. The last thing you’d want is for your screenshot to have a bunch of other clutter in it. Especially if you’re sharing the image with someone, you might have personal info or files that end up visible.
So, play it safe and just capture a section of your screen by following these instructions:
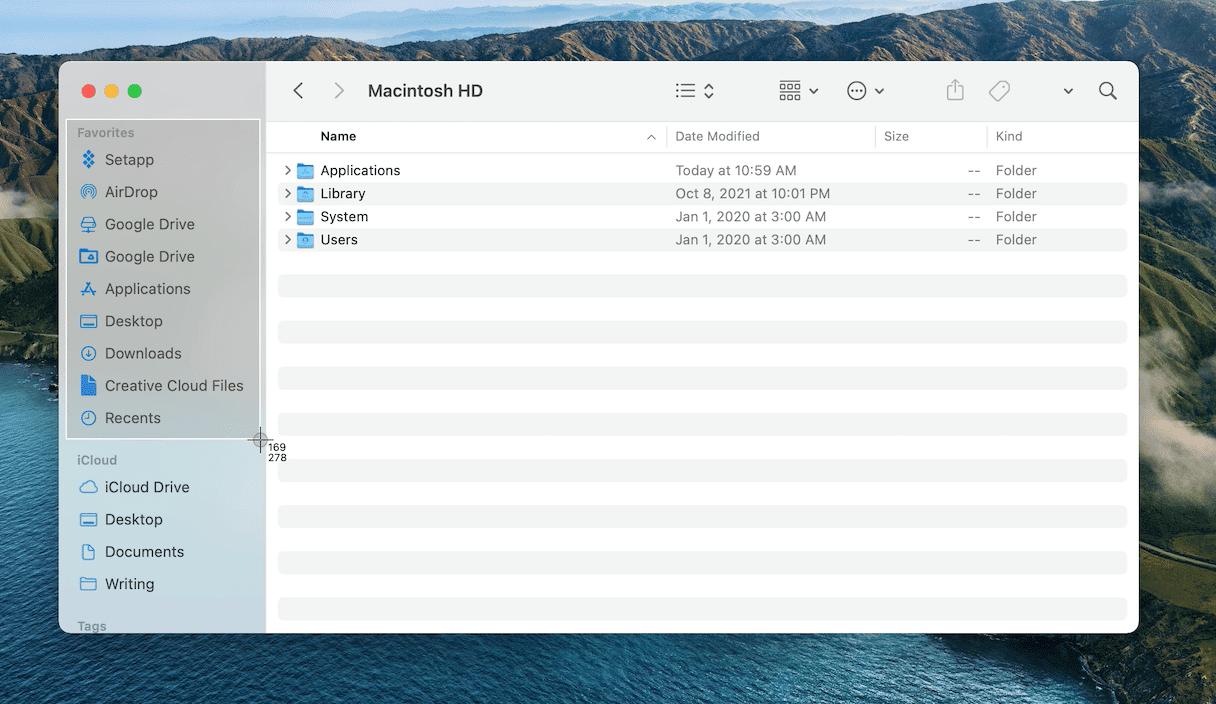
- Press and hold: command + option + 4.
- Then, using your mouse, click and drag around the section you want to capture.
- Your screen will flash, and save the picture to your Desktop.

How to screenshot an entire window
The method I probably use the most is taking a picture of an entire app window. Obviously, you can make an app full screen and then capture the whole screen. But, you might also capture your dock and toolbar. To avoid that, here are the steps to capture just one app window:
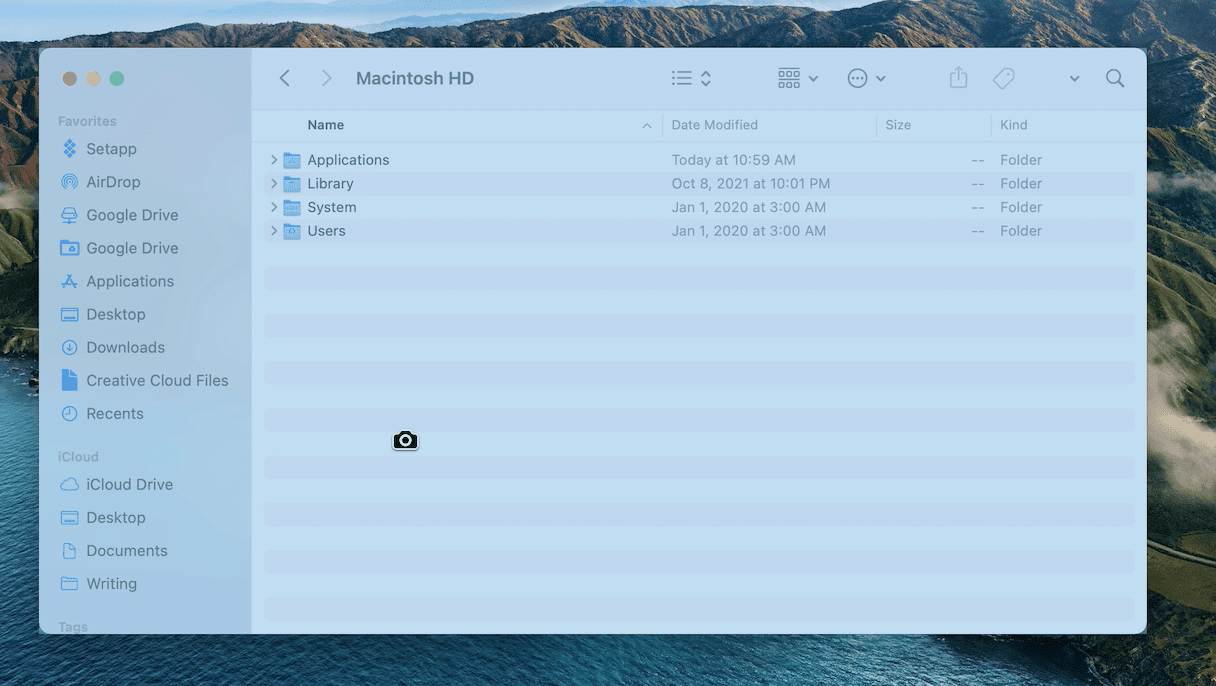
- On your keyboard, press: command + option + 4.
- Then, press the spacebar.
- Your cursor will turn from crosshairs to a camera icon.
- Click on the window you want to capture.
- You can find your screenshot on your Desktop.

Why am I only seeing a black image in my screenshots?
If you’re trying to take a screenshot of a video, image, or Livestream and the file is just black when you open it, then that means it’s encrypted. Certain platforms and services will encrypt their copyrighted content, causing you to get a black screen if you try to capture it.
Like most Mac features, taking a picture with your computer just works. Whether you want to take a selfie or take a photo of an app. Not only is it easy to do, but you also have a ton of options for getting the exact image you want. Just don’t forget to clean up after yourself. Taking pictures on your Mac is easy, and that means you can build up clutter. It never hurts to get into a regular habit of scanning your hard drive to clean up any of the waste you don’t want anymore.


