While you’re probably familiar with moving pictures from your iPhone to your computer, you might find yourself in a situation where you want to transfer them the other way. Maybe you took your DSLR with you on a trip and took a handful of photos, which you now want to keep in your Camera Roll. Whatever the reason, it couldn’t be easier to transfer them. In this article, we’ll review the various ways you can transfer photos from your computer to your iPhone.
Transfer photos from a PC to an iPhone
There are a couple of different ways you can go about transferring photos from your PC to your iPhone. It just depends on which of the ways you prefer. We’ll go over how to move photos using iTunes, as well as talk about a way that doesn’t require it.
How to transfer photos from computer to iPhone via USB
Setting up your iPhone to transfer photos using iTunes is a great way to keep your pictures in sync on both devices. Once you set it up using the steps below, you can update the photos on either your PC or your iPhone just by plugging in your iPhone.
So here’s how you can transfer pictures from your computer to your iPhone:
- Plug your iPhone into your PC.
- Open iTunes if it doesn’t automatically.
- Click on the iPhone icon in your upper left.
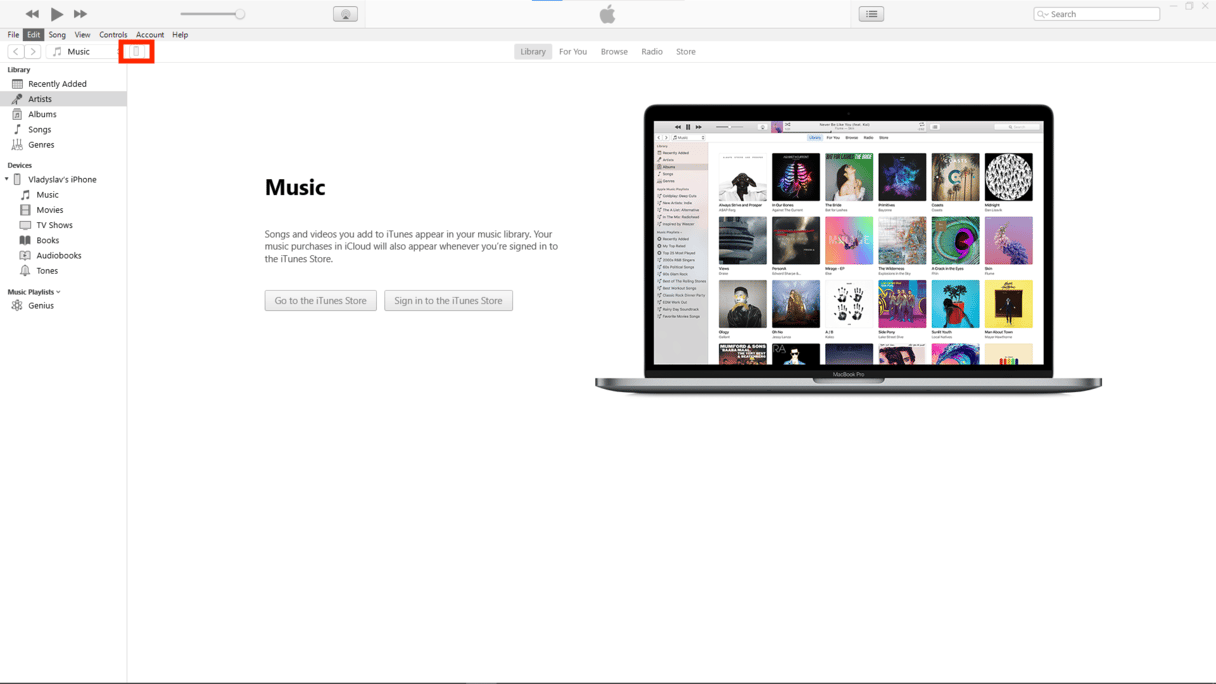
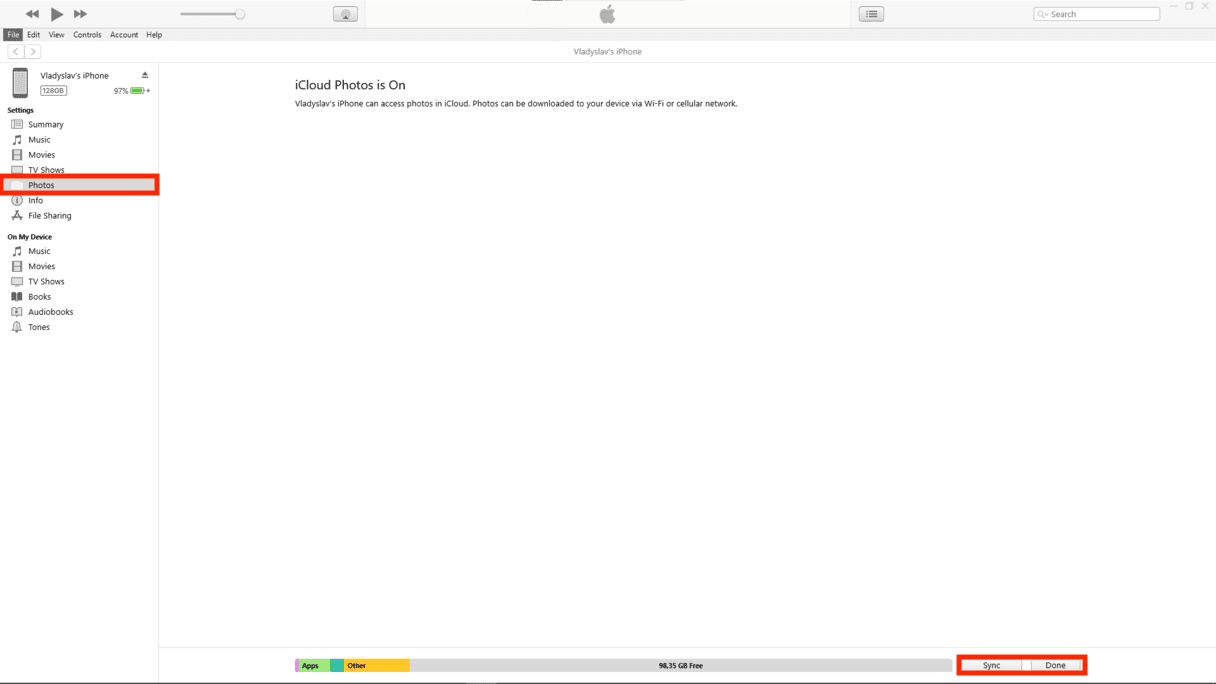
- Click on Photos in the sidebar.
- Check Sync Photos.
- Click Done in the bottom right corner.
There is one drawback to transferring your photos this way. When you sync your pictures, it overwrites your saved photo library on your iPhone. If you plan on syncing all your photos between your computer and phone, this won’t be as big of an issue. However, if you’re only trying to transfer a handful of images, then this is something you should be aware of before you start.
How to transfer photos from PC to iPhone without iTunes
One of the easiest ways to move your photos without iTunes is by using iCloud. Here’s how to do that with iCloud:
- On your PC, download iCloud for Windows.
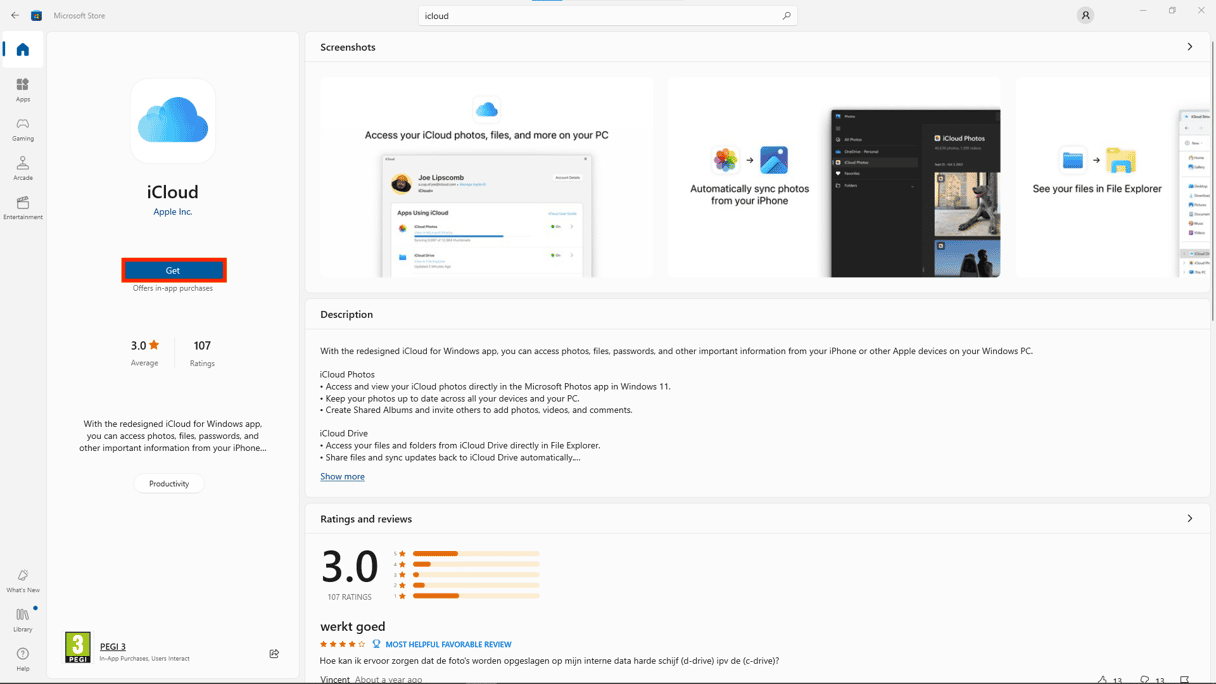
- Open iCloud for Windows.
- Log in using your iCloud account.
- Select the checkbox next to Photos.
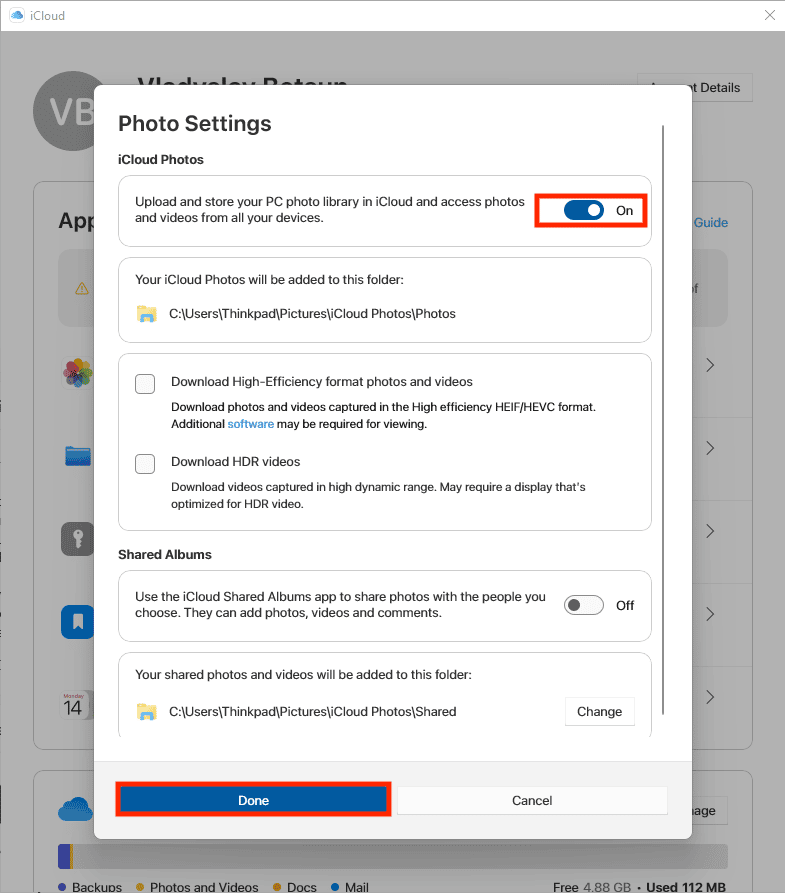
- Click Apply.
- Open a File Explorer window.
- Under Favorites in the left sidebar, click iCloud Photos.

- Copy the photos you want to transfer to the Uploads folder.

After the photos are uploaded, you can open the Photos app on your iPhone and see your pictures. If you don’t see them at least start to download, you might want to verify your phone has iCloud Photo syncing turned on, by going to Settings > [your name] > iCloud > Photos.
How to transfer files from PC to iPhone without iTunes
Transferring files from your PC to your iPhone without using iTunes can be easily achieved through various methods. While iCloud and third-party apps provide excellent alternatives, using a USB cable remains one of the most convenient and straightforward approaches. Here’s a step-by-step guide to help you transfer files effortlessly.
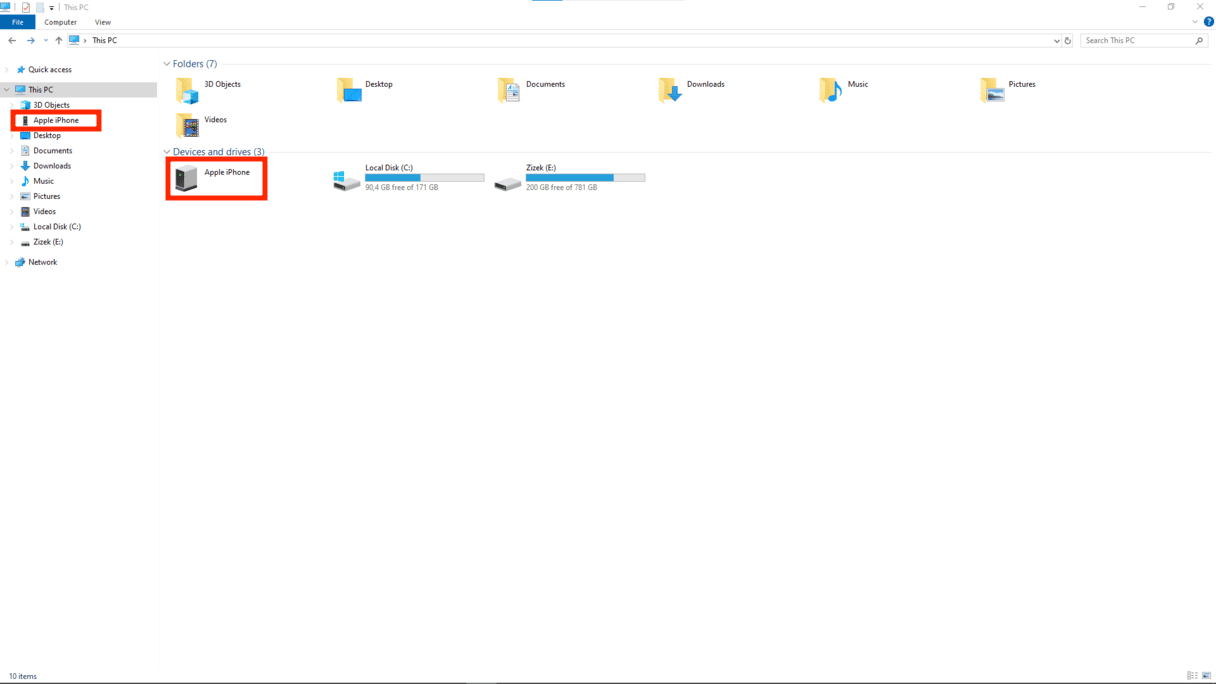
- Plug your iPhone into your PC using a USB cable.
- Once connected, set up your iPhone to view the files and folders. This will open a new window displaying the available folders on your iPhone.
- Choose the files or folders from your desired folder on your PC.
- Copy the selected files or folders and paste them into the destined folder on your iPhone's internal storage using the file explorer.
How to transfer photos from Mac to iPhone
You can move pictures from your Mac to your iPhone in multiple ways. The most obvious one is iTunes, but if you don’t like using iTunes, we’ll go over a way to transfer your picture without the app.
How to transfer photos from Mac to iPhone with iTunes
When you sync the photos on your iPhone to your Mac, you can sync do that whether you're using the Photos app, iPhoto, or Aperture. But to set up the syncing, you'll first need to use iTunes. Follow the steps below to get started.
- Plug your iPhone into your Mac.
- Open iTunes, if it doesn’t automatically.
- Click on the iPhone in the top left.
- Click on Photos.
- Check Sync Photos.
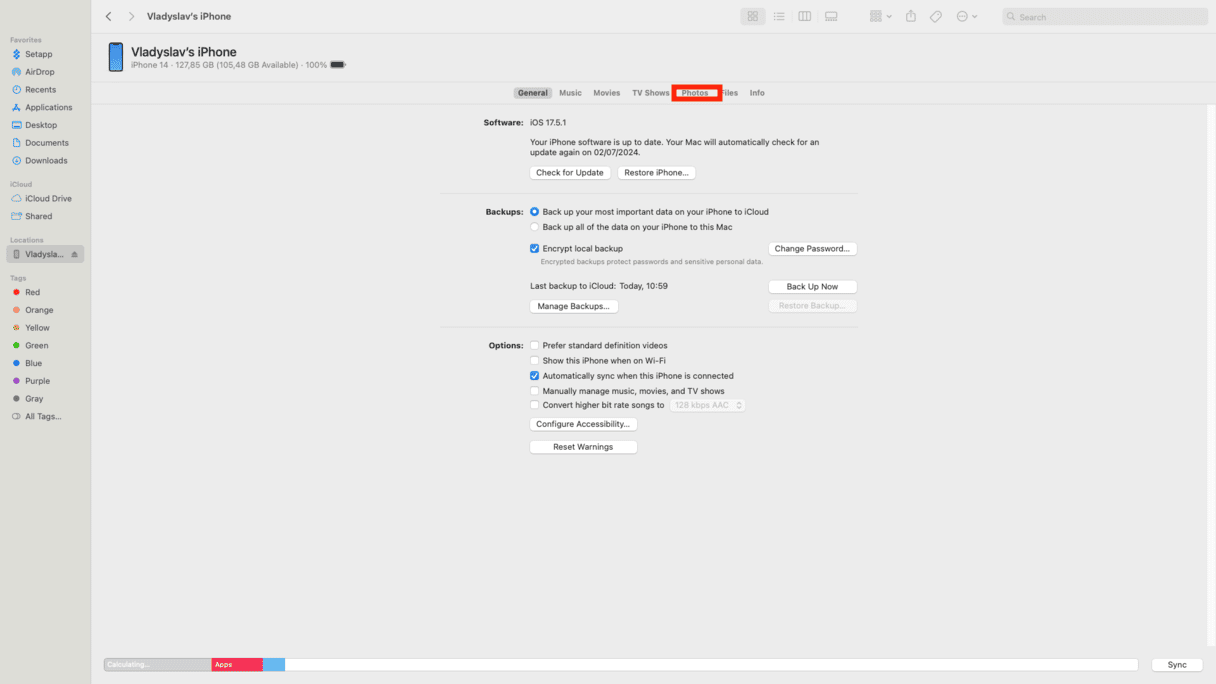
Syncing your photos may take some time, so some extra patience may be required. The larger the photo library, the more time it will take to transfer.
How to Airdrop photos from Mac to iPhone
Yes! If you want to transfer a limited number of photos quickly, you’ll definitely want to try AirDrop. Here’s how to transfer photos from a Mac to an iPhone without iTunes:
- On your Mac, open the Photos app or the folder you keep photos in.
- Select the pictures you want to transfer.
- If you’re sharing pictures from Photos for Mac, click on the Share button in your upper right. If you’re in a folder on your Mac, right-click on selected photos and select Share from the menu.
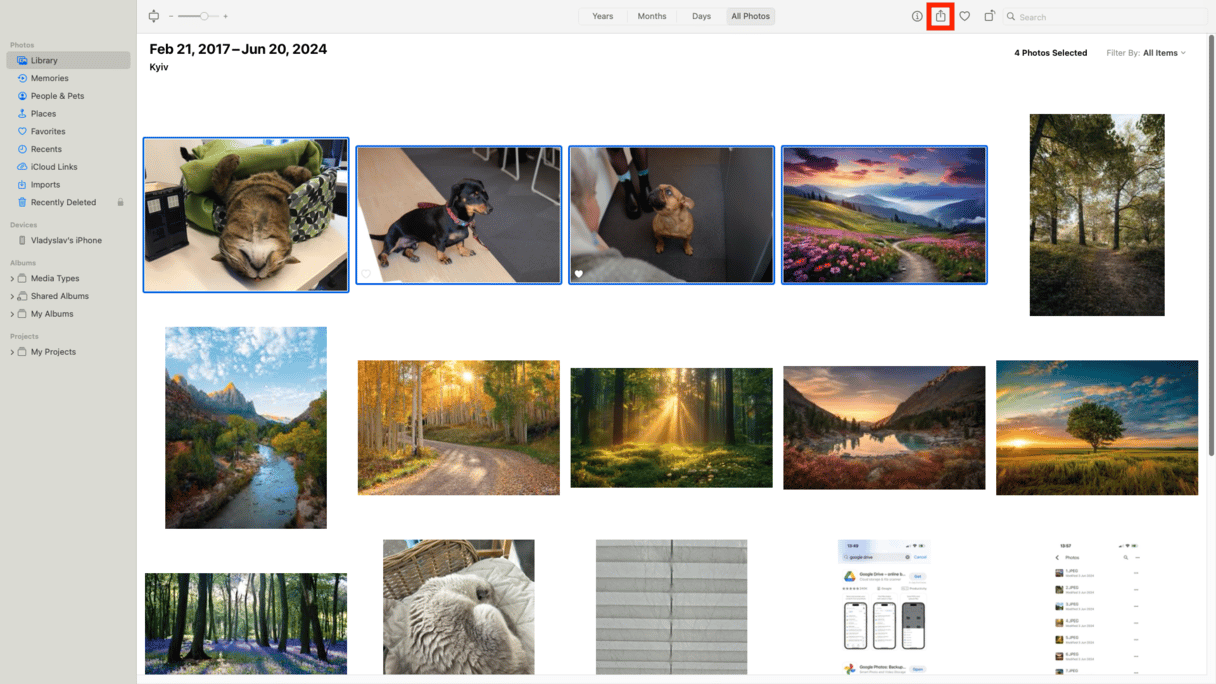
- Click on your iPhone name.
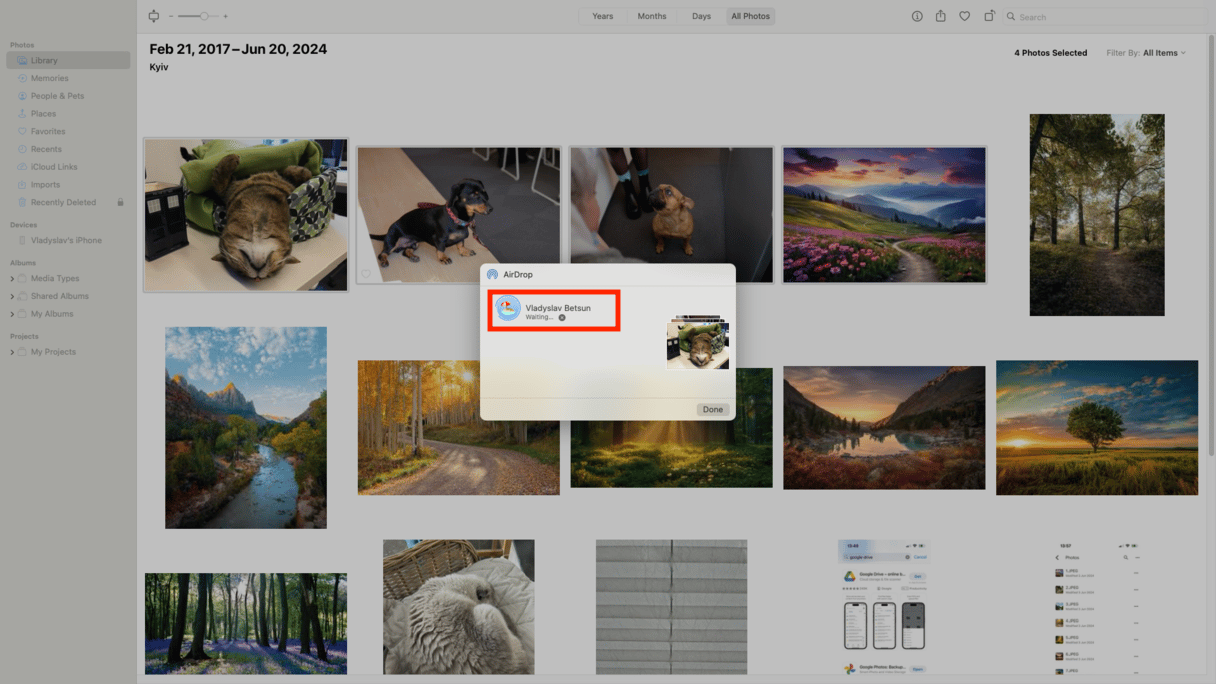
- An AirDrop notification pops up on your iPhone. Click Accept.
- Open the Photos app on your iPhone, and your pictures will appear.
Moving your photos from a Mac to an iPhone can also be done by syncing all your photos to a unified iCloud Photo Library (iCloud Photos).
Hopefully, now transferring photos from your computer to your iPhone will feel painless, whichever way you decide to do it. Whether you want to show someone the pictures you took with your digital camera or share the perfect old photo in a #TBT post, now you can!


