Notifications can be a great way of reminding yourself of tasks you need to complete or appointments you need to get to. They can also be useful for, say, telling you when an update to an app you use is available. However, they are now used by so many apps and websites for purposes that have little benefit to us users that they are often more of an inconvenience than anything else. Fortunately, they are easy to manage and even disable completely. Here’s how to turn off annoying Mac notifications.

6 ways to turn off notifications on your Mac
Thank you, Universe, for inventing “Do Not Disturb.” This feature, if set up correctly, will rid you of 90% of notifications on your Mac. The remaining part is browser-related and requires some extra work. But will get to that. Let’s first explore the Do Not Disturb tool.
1. Turn off notifications temporarily using Do Not Disturb
Do Not Disturb allows you to temporarily turn off notifications based on the schedule you have set.
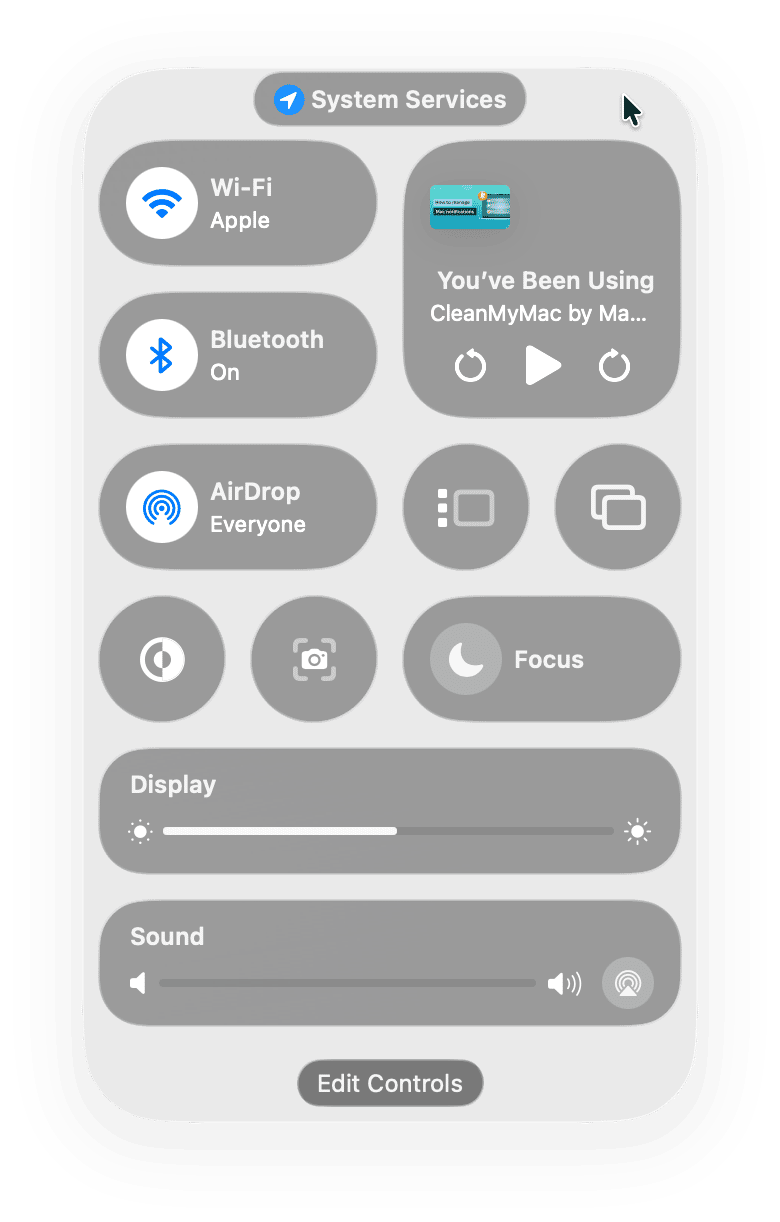
- Click the toggle icon at the right side of the menu bar to display Control Center.
- Choose Focus.
- Click to reveal the Do Not Disturb toggle switcher.
- Click the Do Not Disturb switch to turn it on. Notifications will now be blocked until whenever Do Not Disturb is set to end.
Here’s how to schedule and manage Do Not Disturb.
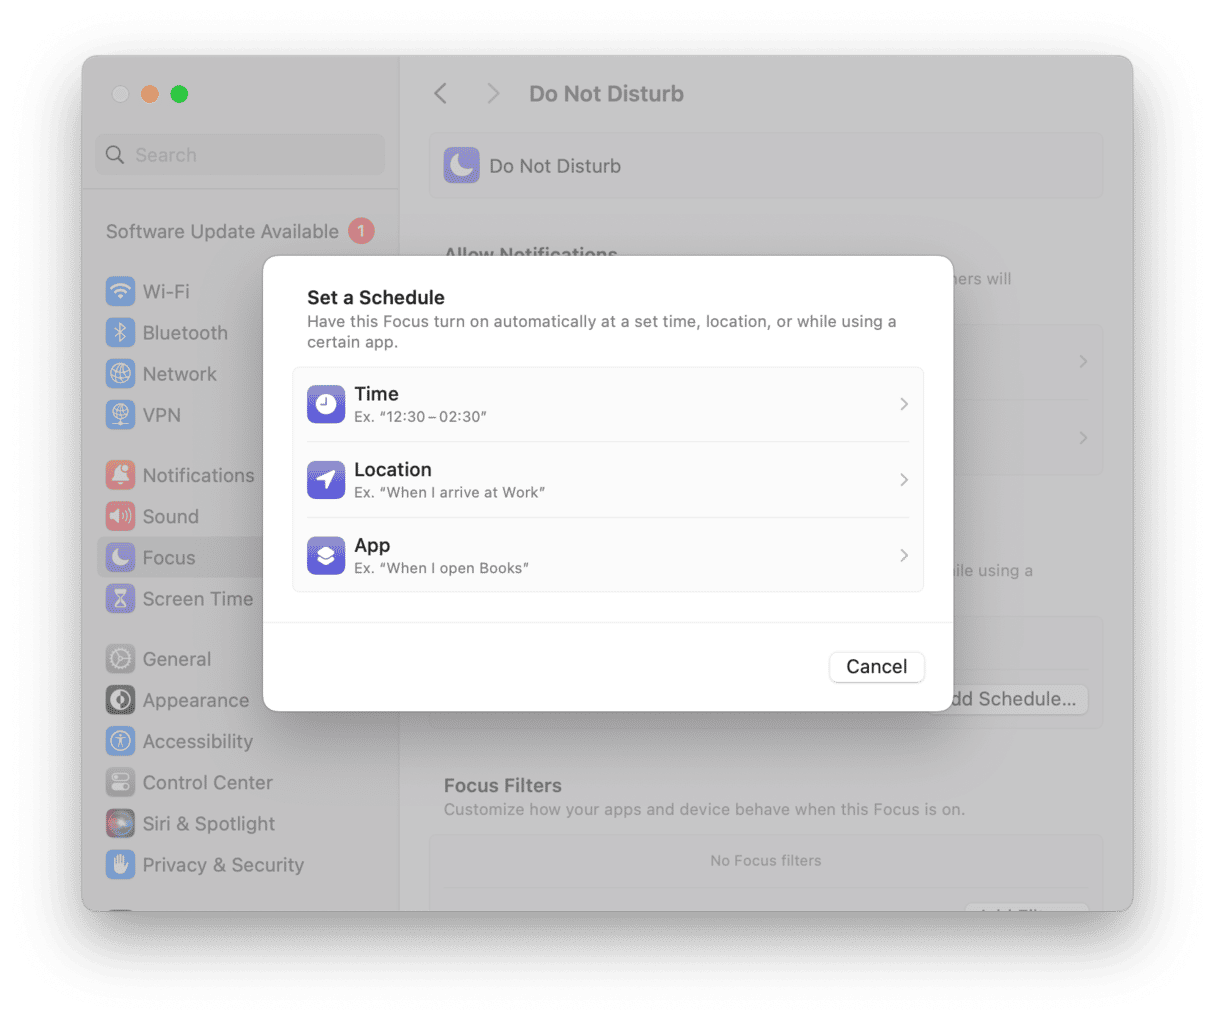
- Click the Apple menu and choose System Settings.
- Go to Focus.
- Select Do Not Disturb.
- Set the time schedule if you want Do Not Disturb to run automatically each day by clicking Add Schedule.

2. Turn off notifications for apps
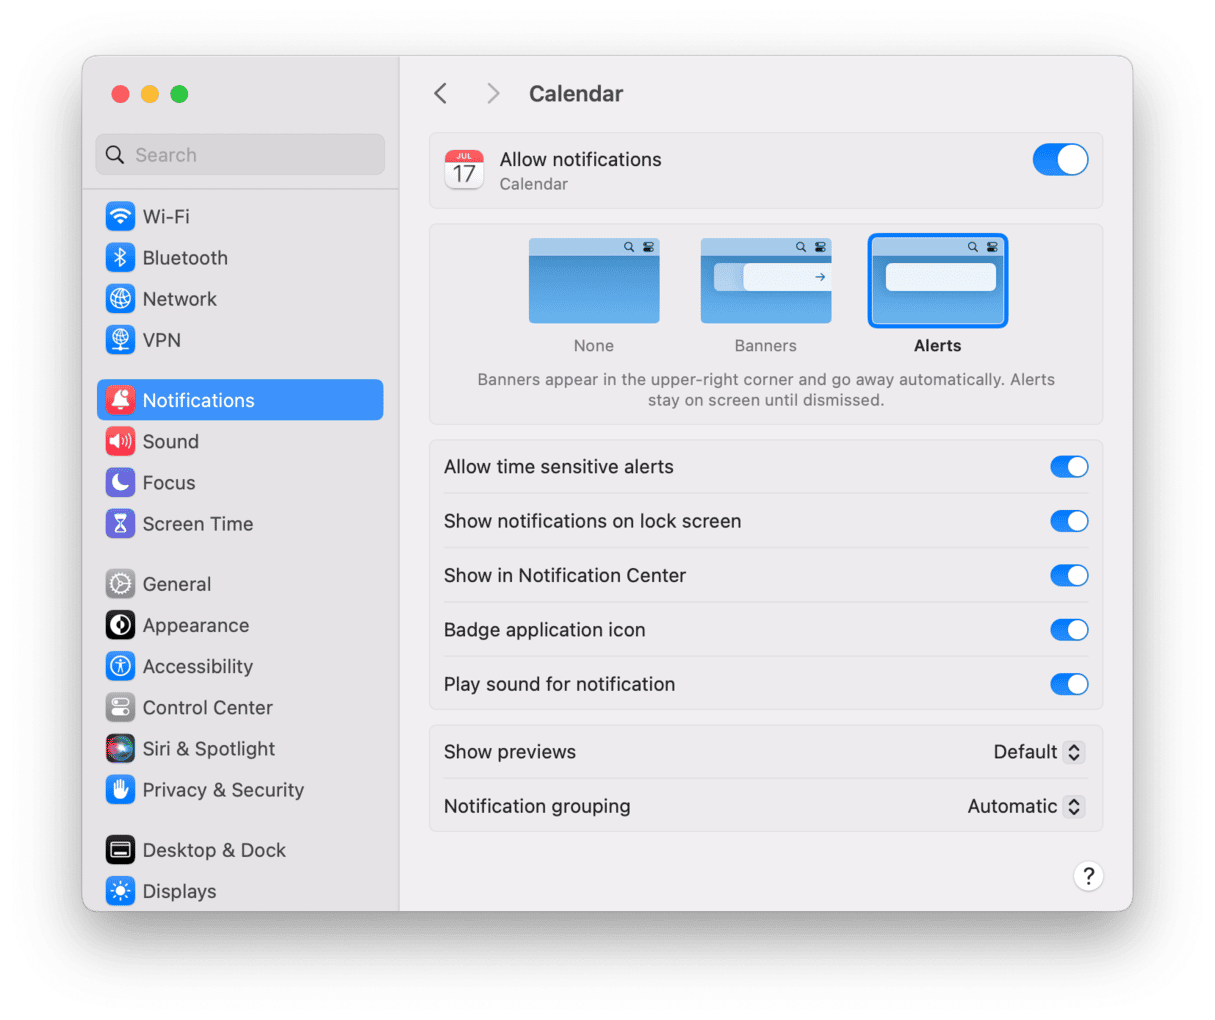
- Open System Settings > Notifications.
- Go through the list of apps, one at a time, clicking each one to review its settings.
- To switch off notifications altogether for an app, turn them off by clicking the toggle.
- If you don’t want to switch them off altogether, choose Banners or Alerts and then turn on your chosen behavior.
- Repeat steps 4 and 5 for every app in the list.
3. Turn off pop-ups on your Mac from hidden apps
When you review apps in the Notifications section of System Settings, it will show you the apps in your Applications folder. However, not all the processes you run on your Mac are from apps in the Applications folder. Some may be from login items and other background apps, and they don’t show anywhere.
We’ve found that the quickest way to control login and background items is to use CleanMyMac. Its Performance feature requires almost no work compared with the steps we’ve discussed.
Just follow these steps:
- Get a free trial of CleanMyMac (it’s notarized by Apple).
- Install the app and go to Performance.
- Run a quick scan.
- Review login and background items and remove any you don’t need.
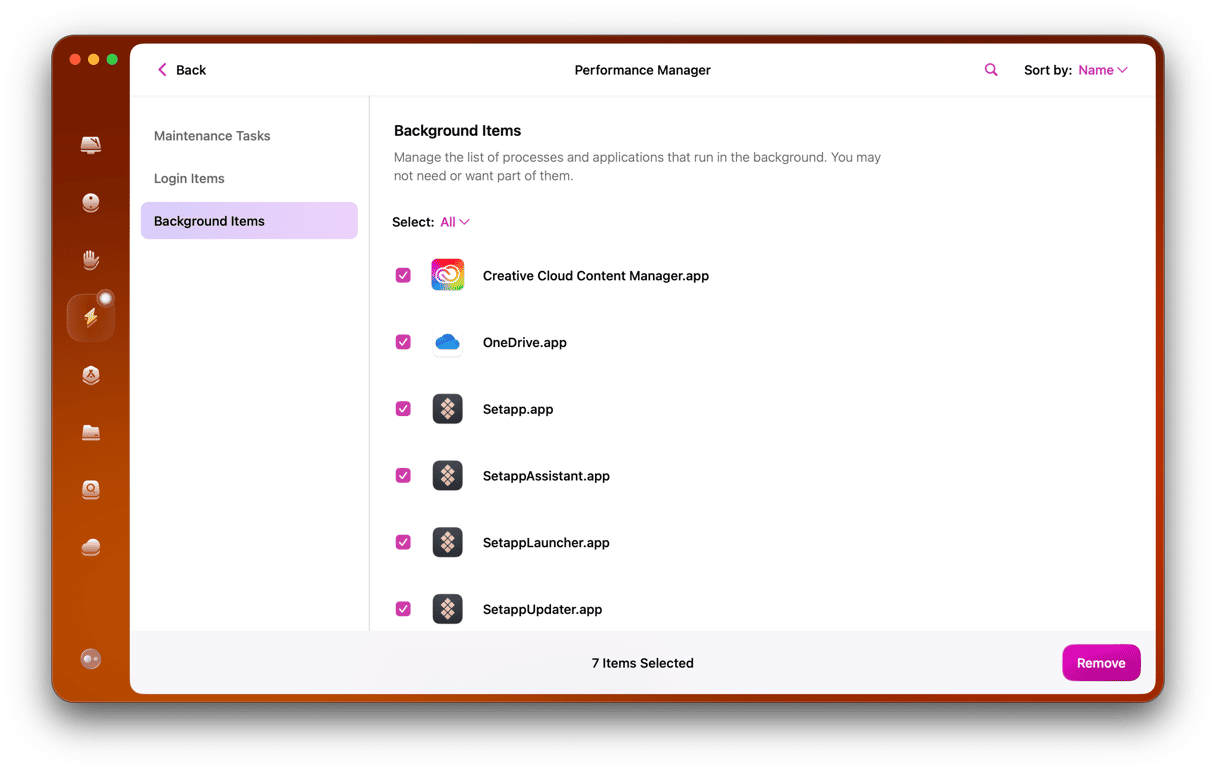
We recommend leaving an absolute minimum of such background apps on your Mac.
4. Turn off notifications for websites
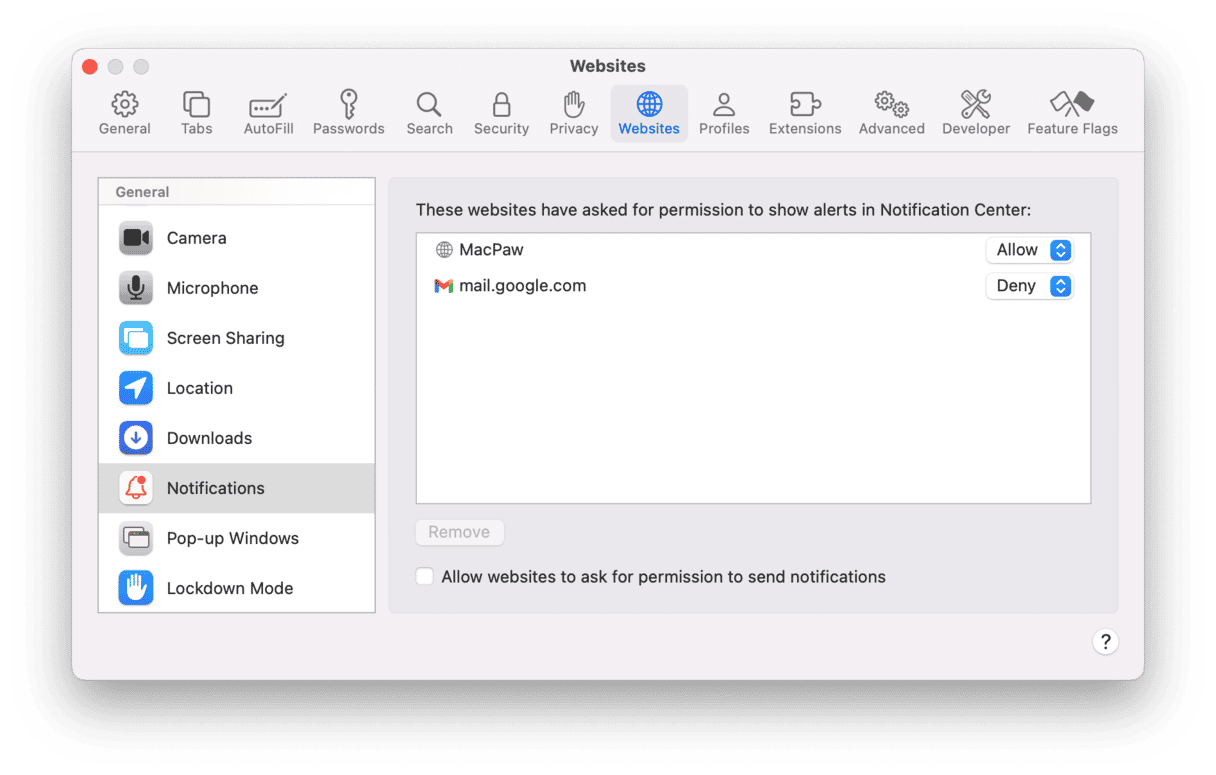
One of the most annoying aspects of notifications is that macOS allows individual websites to display them. They must ask permission first, so the easiest way to deal with them is to always say no when they ask. However, websites are persistent and will ask every time you visit. It’s all too easy to accidentally allow them. So, here’s how to turn off Safari website notifications:
- Open Safari > Safari menu > Settings.
- Choose the Websites tab.
- Select Notifications on the left side.
- Review the list of websites that have requested permission to show notifications.
- Make sure each one is set to ‘Deny.’ If not, click on the drop-down menu and choose Deny.
- Deselect the box at the bottom of the window that says. ‘Allow websites to ask for permission to send push notifications.’
5. Turn off Chrome notifications
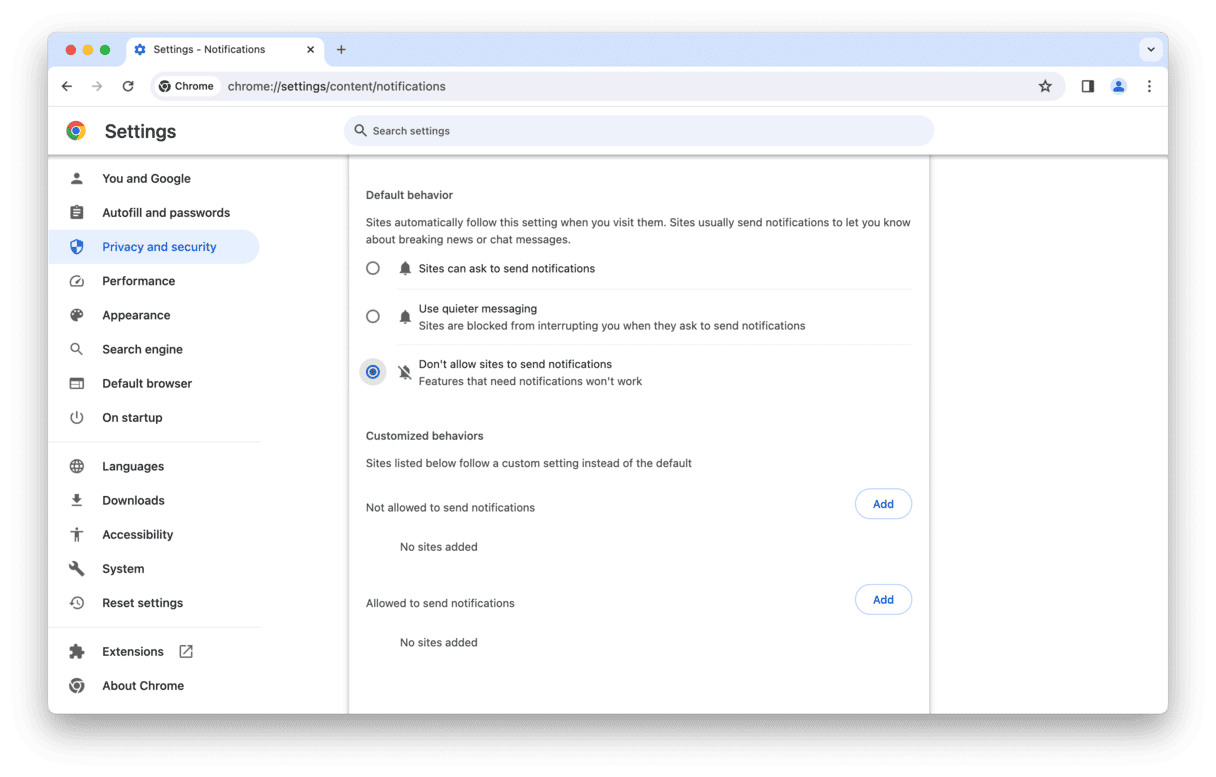
Chrome allows you to turn off site-specific notifications as well as general alerts. Let’s start with basic notifications
- Open Chrome and type the following into the address bar: chrome://settings
- Choose Privacy & Security menu
- Click Site Settings and scroll down to find Notifications.
- Toggle the slider switch at the top of the page so that it reads “Don’t allow.”
What about a particular website? If any site is annoying you with overlays and notifications, there’s one more control. Next to the site address (in the address bar), you can see the toggle icon or the (i) tool tip. Click it to set up notifications for that domain.
6. Turn off notifications in Firefox
Firefox has the most elaborate system when it comes to protecting users’ privacy. In our view, it outmatches Google’s. For example, you can disable ad tracking and cookie detection on many levels. How does Firefox deal with notifications?
- Open Firefox, click three horizontal lines top left, and go to Settings.
- Choose Privacy & Security.
- Scroll down to the Notifications > Settings.
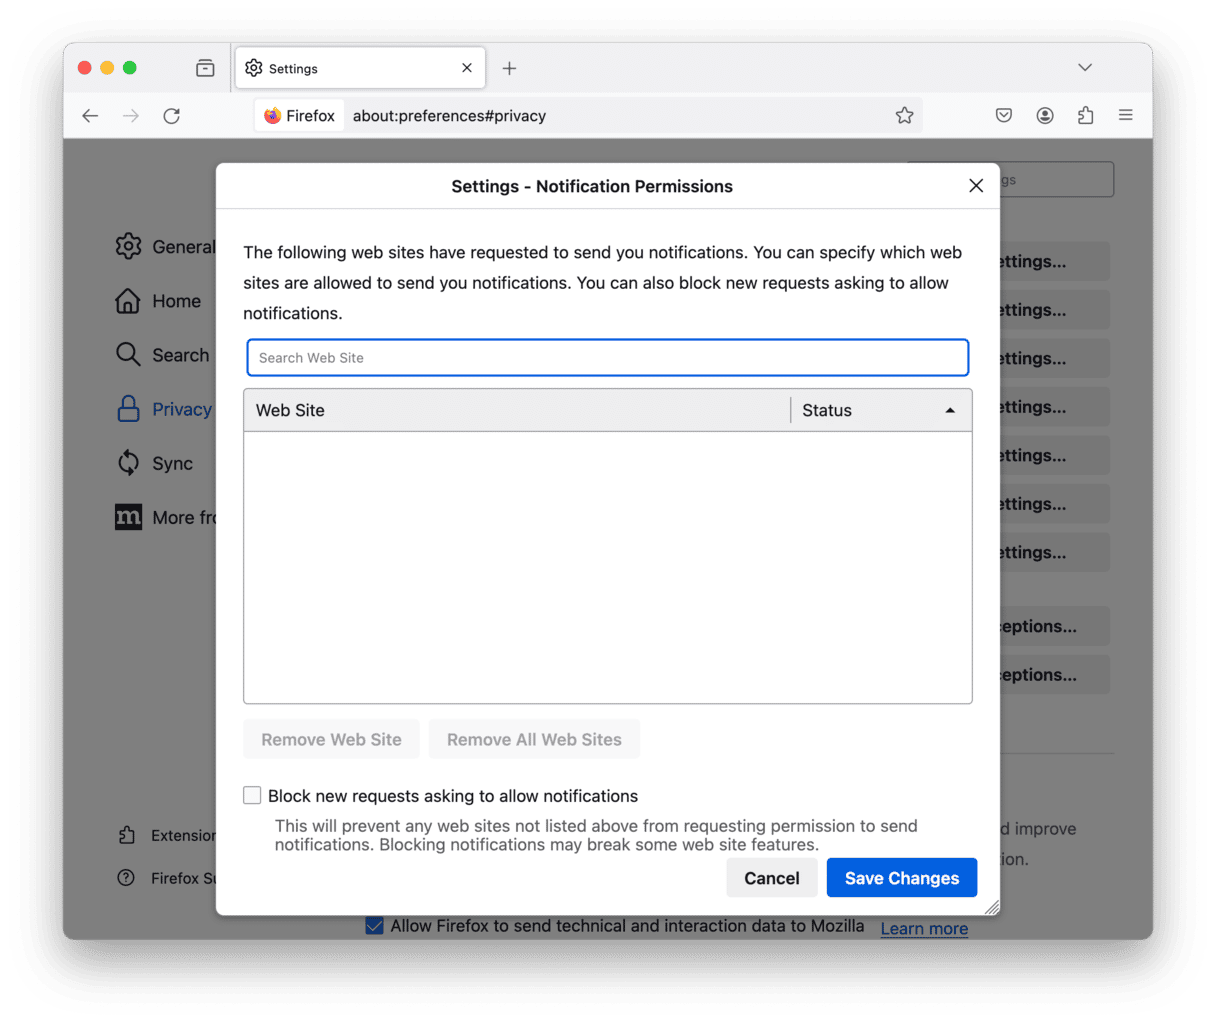
You will see a list of all the websites to which you’ve previously given permission to show notifications.
Select the box next to Block new requests asking to allow notifications.
Desktop pop-ups, alerts in your web browser, or other types of notifications are frequently intrusive and annoying. Fortunately, Apple has made it easy to control and block them from apps and websites in macOS. And you can easily stop them in Chrome and Firefox, too. Some pop-ups, however, originate from malware, and to get rid of them, you should use an antimalware tool like the Protection feature in CleanMyMac.


