Even though so much of our lives are now entirely digital, many of us still use printers occasionally, whether to print worksheets for a class or have important documents for a physical signature.
Using a printer with your Mac means adding it in System Settings and installing drivers. When you need to replace your printer, you will also need to remove the old one and uninstall its drivers. Below, I’ll show you how to remove a printer on your Mac.
Why uninstall a printer?
If you no longer need to use a printer with your Mac, perhaps because you’ve bought a new one, it’s good to reinstall the old one to prevent driver conflicts and other possible problems later. If you don’t, you probably won’t keep the drivers updated, and that could create issues with other printer drivers in the future.
How to delete a printer on your Mac
- Click the Apple menu and choose System Settings.
- Go to Printers & Scanners.
- Find the printer you want to delete.
- Control-click or right-click it and choose Remove Printer. Confirm the removal.

How to uninstall printer drivers on your Mac
Deleting a printer in System Settings makes it unavailable in the Print dialog box. However, it doesn’t uninstall it completely. To do that, you need to remove all the files on your Mac when you installed the drivers. If the printer manufacturer has an uninstaller (which should be in a folder in your Applications folder), the easiest way is to follow this instruction:
- Navigate to your Applications folder and look for a folder with the name of the printer manufacturer.
- Double-click the folder to open it and locate the Uninstaller file.
- Double-click the uninstaller and follow the instructions.
If there’s no uninstaller, you have two options that I’ll describe below.
Option 1: the manual method
Printer drivers install several files in different folders on your Mac, so to completely uninstall a printer manually, you will need to look in each of the possible folders and drag files to the Trash.
- Click the Finder icon in the Dock.
- Choose the Go menu and then Go to Folder.
- Paste each of the paths below into the text box, one at a time. Press Return after each path. At each location, look for files with the name of your printer manufacturer and drag them to the Trash.
~/Library/Cache
~/Library/Preferences
~/Library/Logs
~/Library/Application Support
~/Library/Containers
~/Library/Printers - Once you’ve checked all those folders and dragged all the files you can find to the Trash, empty the Trash.
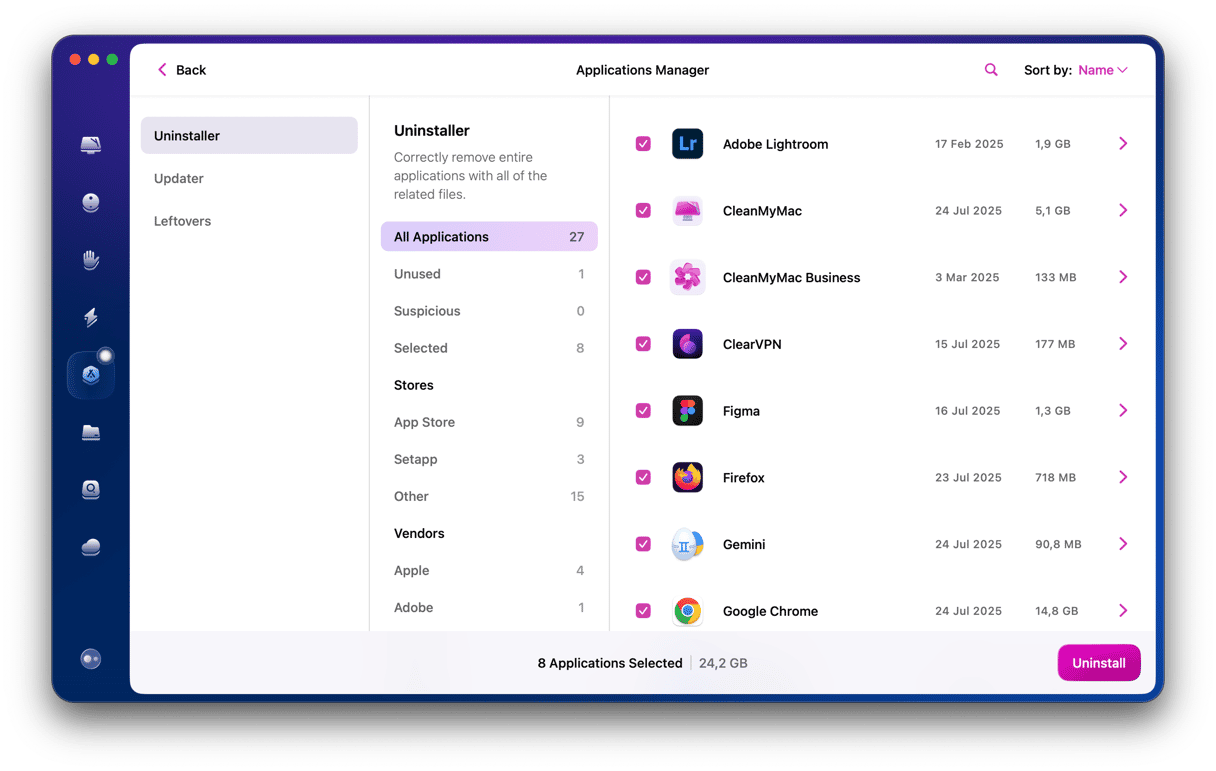
Option 2: the easy method
As you can see, uninstalling a printer manually tales a lot of effort and time. Fortunately, there is an utterly stress-free way with a handy tool CleanMyMac.
CleanMyMac has lots of modules for removing clutter from your Mac and keeping it running smoothly. Its Uninstaller module can uninstall most apps, including printer drivers. You can download it for free here.
- Open CleanMyMac and choose the Uninstaller in the sidebar.
- Type the name of the printer maker in the search box.
- When the drivers appear on the list of all apps, select the box next to them.
- Click Uninstall.

Once you’ve clicked Uninstall, CleanMyMac will remove all the files placed on your Mac by the printer driver, and it will be completely uninstalled.
Deleting a printer in System Settings is simple enough. But that doesn’t uninstall it entirely from your Mac. To do that, you will need to uninstall the drivers. If the printer manufacturer supplied an uninstaller, you could use that. However, many don’t. And that means you’ve got two options: either track down every file the driver has placed on your Mac or use CleanMyMac Uninstaller. I know which one I’d choose!