One of the most useful technologies on your Mac, but one of the least understood, is Thunderbolt. It’s a speedy connectivity protocol that uses the same port as USB-C and is often wrongly assumed to be the same as USB-C. All Thunderbolt ports can be used as USB-C ports, too, but not all USB-C ports support Thunderbolt transfer speeds. The Thunderbolt ports on your Mac look like USB-C but have a lightning bolt next to or above them. In this article, we’ll explain how to use the Thunderbolt Bridge on your Mac, a technology that allows you to connect two Macs together using Thunderbolt ports.
What is Thunderbolt?
Thunderbolt is a technology originally developed by Apple and Intel and designed to be a high-bandwidth data transfer interface that could also carry a video signal by incorporating the DisplayPort protocol. As well as data and video, Thunderbolt can also carry power. Early versions of Thunderbolt used a mini-DisplayPort Interface, but more recent versions use USB-C. Shortly after the technology was introduced, Apple launched a Thunderbolt Display that could connect to a Mac using one cable, provide power to the Mac, and carry a video signal to the display. Thunderbolt is now commonly used in hubs and docks to allow one connection from a Mac to drive multiple monitors, charge the Mac, and allow it to connect to other devices using USB-A or USB-C.
What is Thunderbolt Bridge?
Thunderbolt Bridge is a networking protocol that uses Thunderbolt ports on your Mac to connect to another Mac using a peer-to-peer connection. It’s often used as a way to transfer large amounts of data between two Macs quickly — Thunderbolt’s speedy transfer rates are perfect for that. It’s faster than Wi-Fi and Gigabit Ethernet. It can also be used to share the internet connection on one Mac with another Mac and, with the addition of extra software, to use the display on one Mac as a second display on another Mac.
Why use Thunderbolt Bridge?
The most common reason for connecting two Macs using Thunderbolt Bridge is to transfer several gigabytes of data directly from one Mac to another. When compared with other methods, like using a NAS box or portable hard drive, it’s faster and more convenient. There are other uses that need third-party software, like Astropad Luna Display, which uses Thunderbolt Bridge to enable one Mac’s screen to be used as a second display for another Mac.
How to use Thunderbolt Bridge
Here’s how to activate Thunderbolt Bridge on Mac:
- Connect a Thunderbolt cable to a Thunderbolt port on each Mac.
- If you see a message saying ‘New Interface Detected’, click OK to continue.
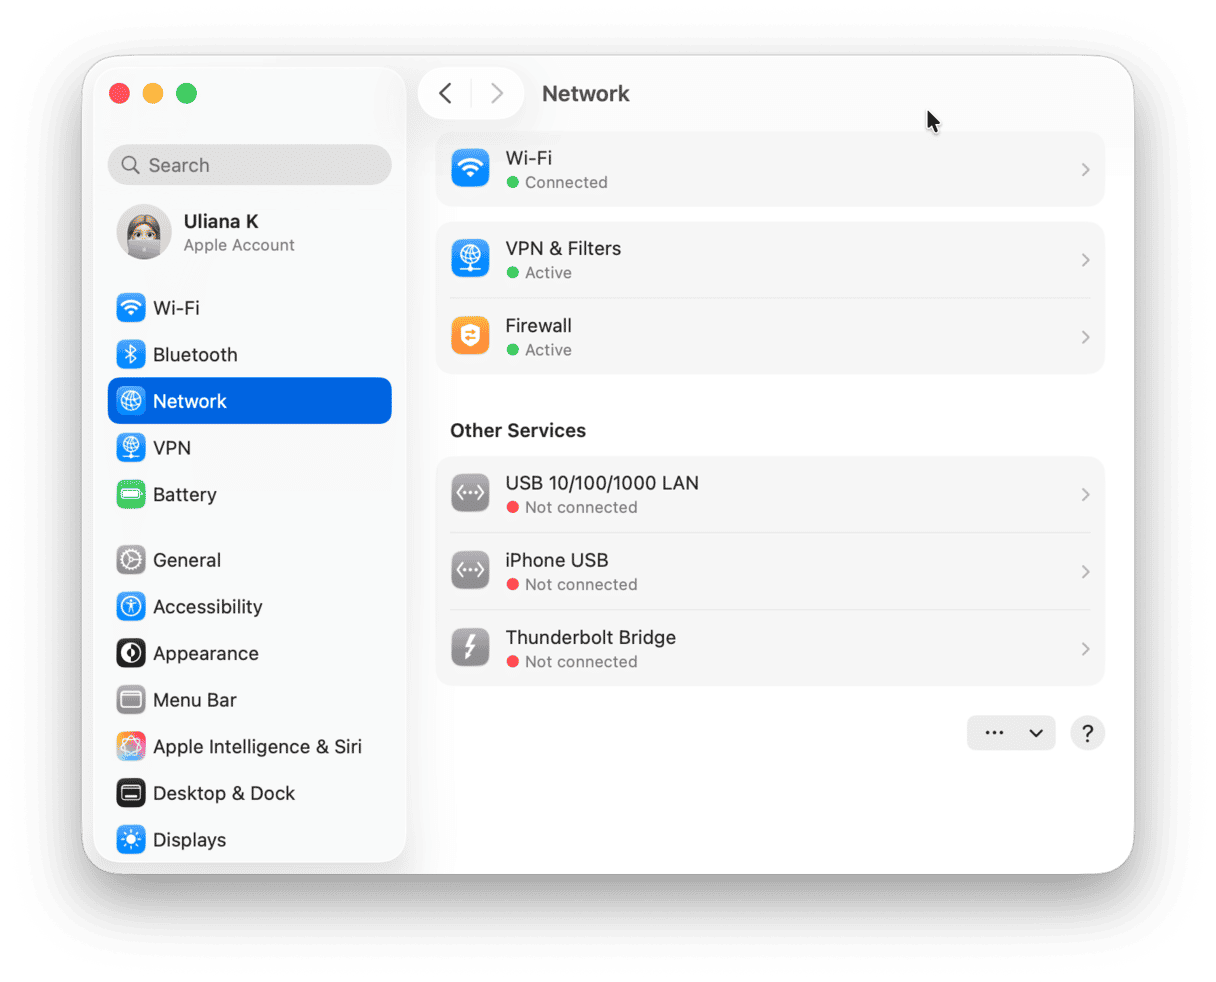
- Go to System Settings > Network on each Mac and choose Thunderbolt Bridge.
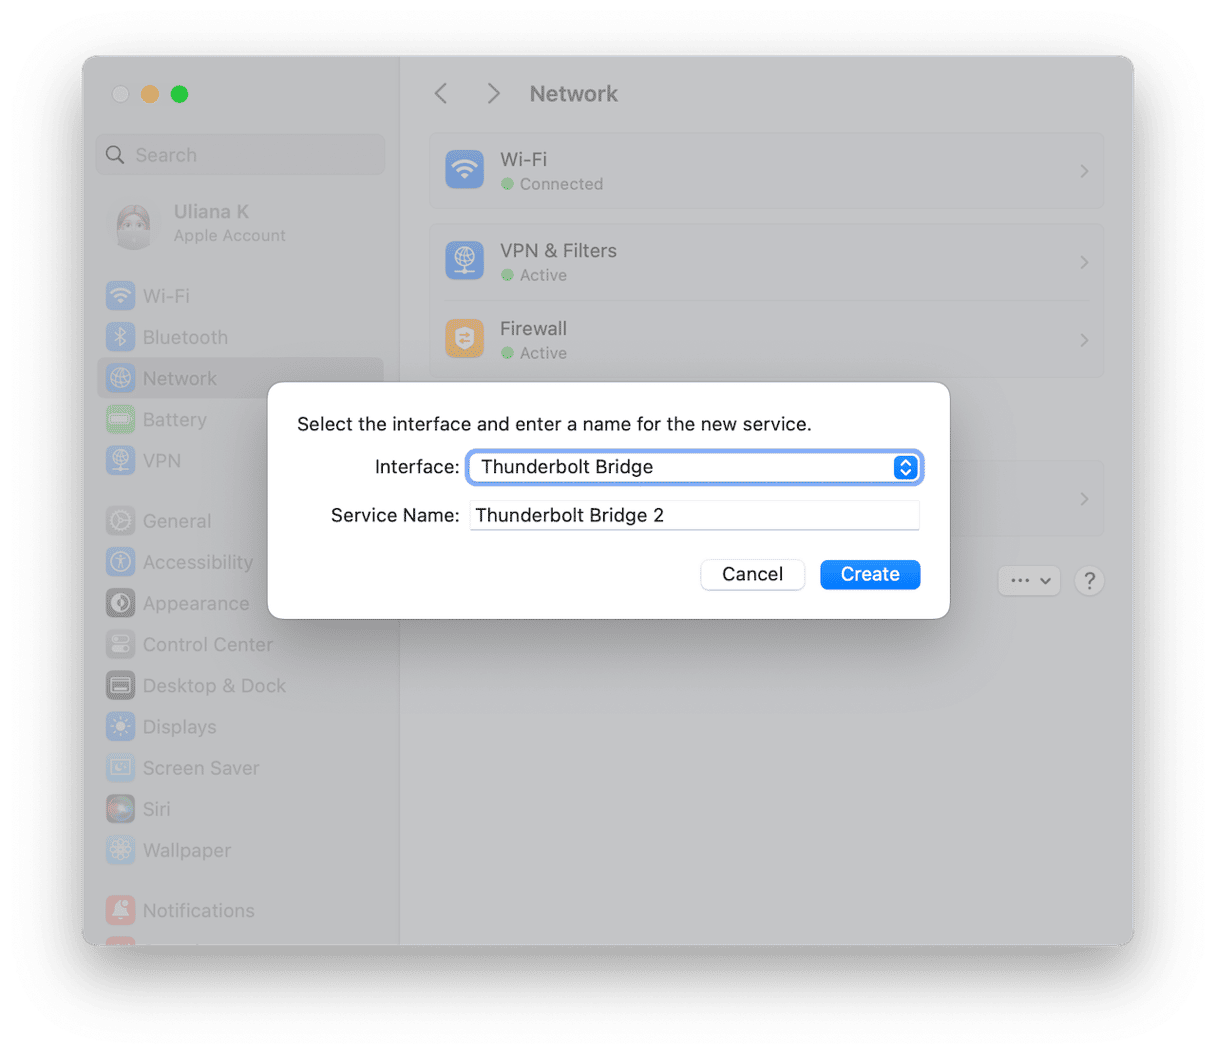
- If you don’t see Thunderbolt Bridge as an option, click the button with three dots and a down arrow and choose Add Service. Select Thunderbolt Bridge as the Interface and give it a name, then click Create.

Once you’ve selected Thunderbolt Bridge as the network, you can transfer files between the two Macs, but you will need to turn file sharing on. Here’s how to do that:
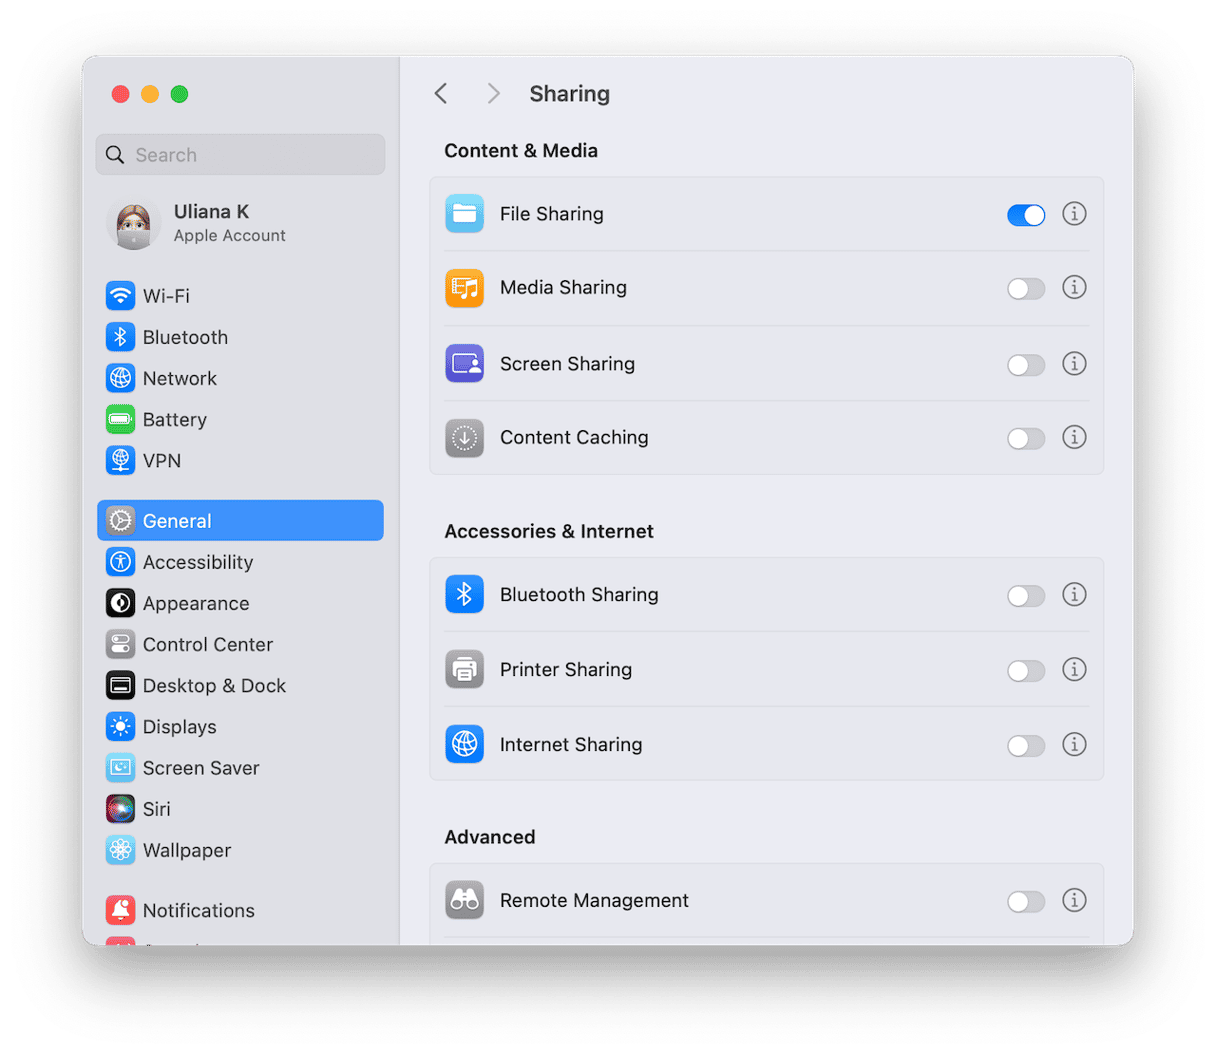
- Go to System Settings > General > Sharing and toggle File Sharing to on.
- Click the ‘i’ next to File Sharing.
- If you want to allow full disk access for all users, turn that option on.
- Alternatively, click the ‘+’ under Shared Folders and choose the folders you want to share.
- Select each shared folder in turn and choose which users you want to allow access to and what privileges to grant them.

When you’ve set up file sharing, open a new Finder window. Click the drop down arrow and you should see the other Mac. Double-click it, choose Connect as, select an option and click Connect.
What to do if Thunderbolt Bridge doesn’t connect automatically
If you see an error when you try to connect, or the connection just doesn’t work, you can assign manual IP addresses to the Macs. The IP addresses should be different from each other. When IP addresses are assigned automatically, they start with 169.254.x.x, so you can use that format for the addresses you assign manually, replacing the ‘x’s with numbers.
- Go to System Settings > Network and click Details next to Thunderbolt Bridge.
- Choose TCP/IP in the sidebar and click the Using DHCP dropdown menu.
- Choose Manually.
- Type in the IP address — say, 169.254.1.1 — and set the subnet mask to 255.255.255.0
- Click Ok.
- Repeat steps 1-5 on the other Mac, taking care to choose a different IP address, but use the same subnet mask.
- Restart both Macs and try the connection again.

Thunderbolt is a high-bandwidth interface for carrying data, video and power. Mac Thunderbolt Bridge allows Macs to be connected peer-to-peer with a Thunderbolt and is a great way to transfer files quickly. Now you know how to connect Thunderbolt Bridge to Mac and how to use it.


