Whether you just want to string together some family videos or you’re trying to be the next Martin Scorsese, iMovie is easy to use and designed for everyone to be able to just dive in. It’s native to macOS and somehow gets even more straightforward with each new iteration. But video files are large and can take up a lot of space. This is why it’s a good idea to stay organized and manage your files, so you’re not wasting storage space. Keep reading to see how iMovie handles your files and what you can do to optimize the storage on your hard drive.

Does iMovie autosave?
Yes, as you’re working in iMovie, it will periodically save all of your movie assets into a library file. So, any videos, images, or audio you drop into your project will be saved. But you should still get into the habit of periodically hitting command+S to save your projects.
Because the autosave is based on time, it’s possible you could do a ton of work on a video and have iMovie crash in between autosaves, and then ultimately losing all of that work you did in the interim. Plus, the more video files you add to a project, the heavier the file will be and the more resources that project will require to run. With that much strain on the app, it could cause iMovie to become unstable and crash more frequently.
All that to say, autosave is a great backup. But in no way should it be used to replace frequently saving your project on your own.
Where are iMovie projects stored?
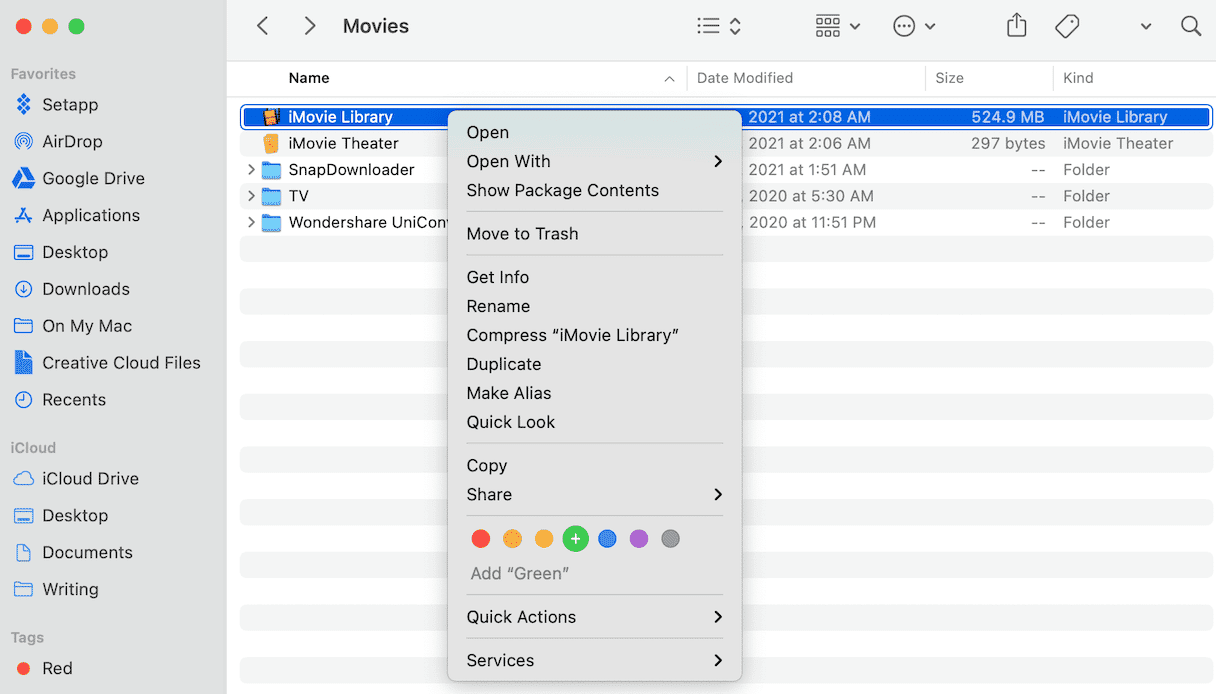
iMovie acts in the same way that Photos does. It creates a library file that stores all your projects and the corresponding assets for each of them. You can find the library file in your Movies folder in Finder or by clicking Go > Home > Movies.
If you want to go into the library file, you can do that by right-clicking or holding down the Option key and clicking on iMovie Library. There you’ll be able to see each project and all of its assets. But I’d caution you not to move, rename or delete anything in this file unless you know what you’re doing. You don’t want to screw up one or all of your projects accidentally.
How to delete duplicate projects and videos
It’s no surprise that video files are huge. They take up a lot of space on your hard drive. The last thing you’d want is to have a bunch of duplicates. But that can happen from time to time — especially the more you start editing.
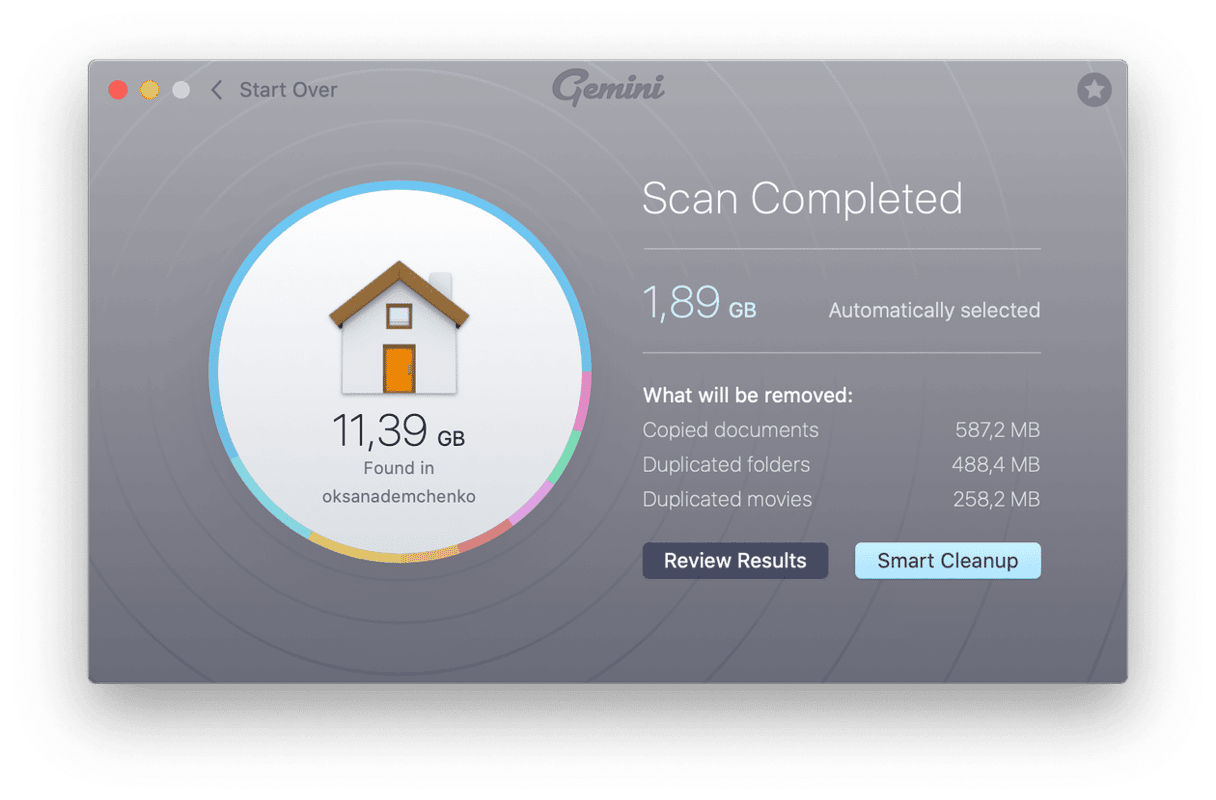
Thankfully, you can use the app Gemini 2 to help you scan your hard drive and quickly get rid of duplicate files of all types, not just videos. Once you download Gemini 2 on your Mac, this is all you need to do:
- Open Gemini 2.
- Click + > Home folder > Scan for Duplicates.

Seriously, that’s all there is to it. Then, you can either click Review Results to go through the files that Gemini found. Or you can click Smart Cleanup to let Gemini’s algorithm select the best version of each file and automatically get rid of the rest.
How to manage video files on Mac
If you’re concerned about cleaning up your Mac and trying to keep all your videos organized, then you’re going to want to find ways to optimize the hard drive space you do have. You’ll definitely want to check out these tips to manage those files better.
1. Tag your files.
You can assign different colors or tags to your files, making it easier to identify specific ones at a glance. It’s really helpful, especially when you have a lot of video clips that you want to edit. For instance, you can tag all the clips you want to use in a specific project as green. That way, when you go to import them into iMovie, you can quickly see just those files and import them. To tag a file, all you need to do is:
- Right-click or hold down the Option key and click on a file.
- Then, select one of the tags.

2. Use Smart folders.
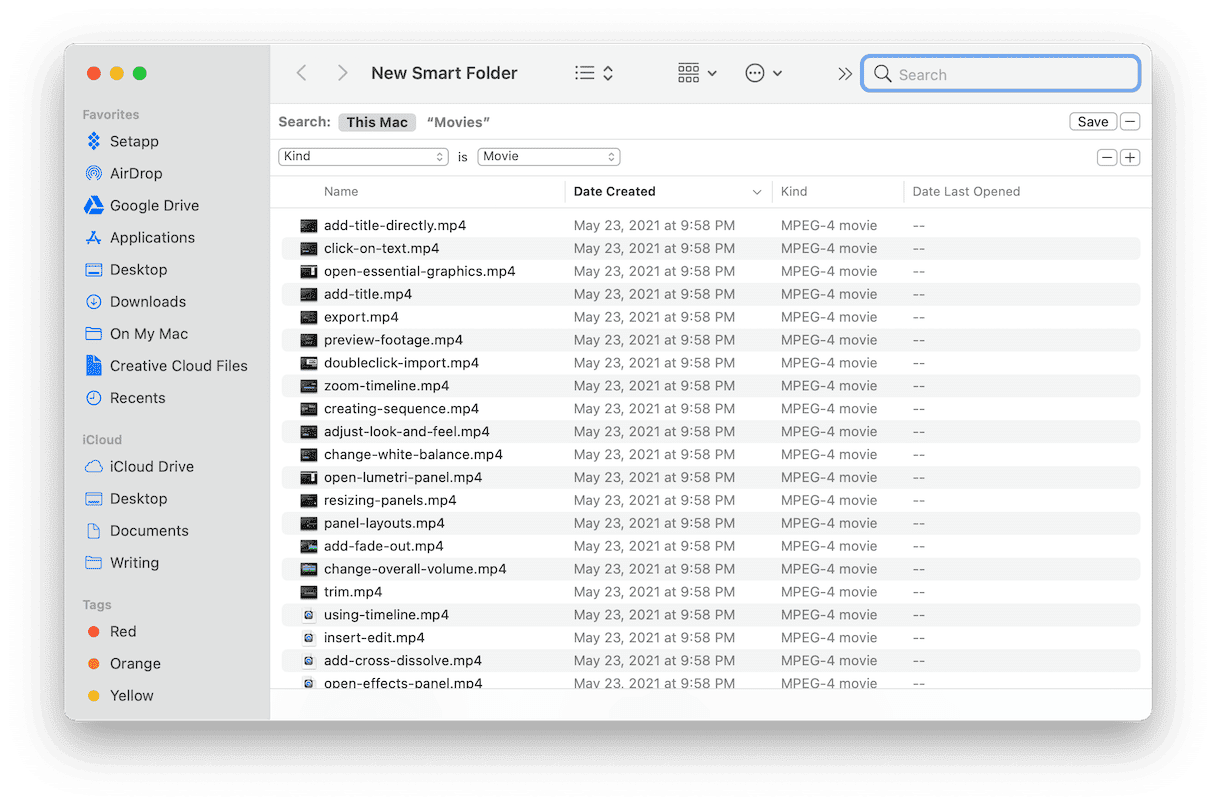
Smart folders are a great way to search for specific files based on different criteria. This is really handy when you want to see things like all of your video files that are saved on your Mac.
- In Finder, click File > New Smart Folder.
- Then, click + in the right corner and set your search parameters.

3. Instantly delete files.
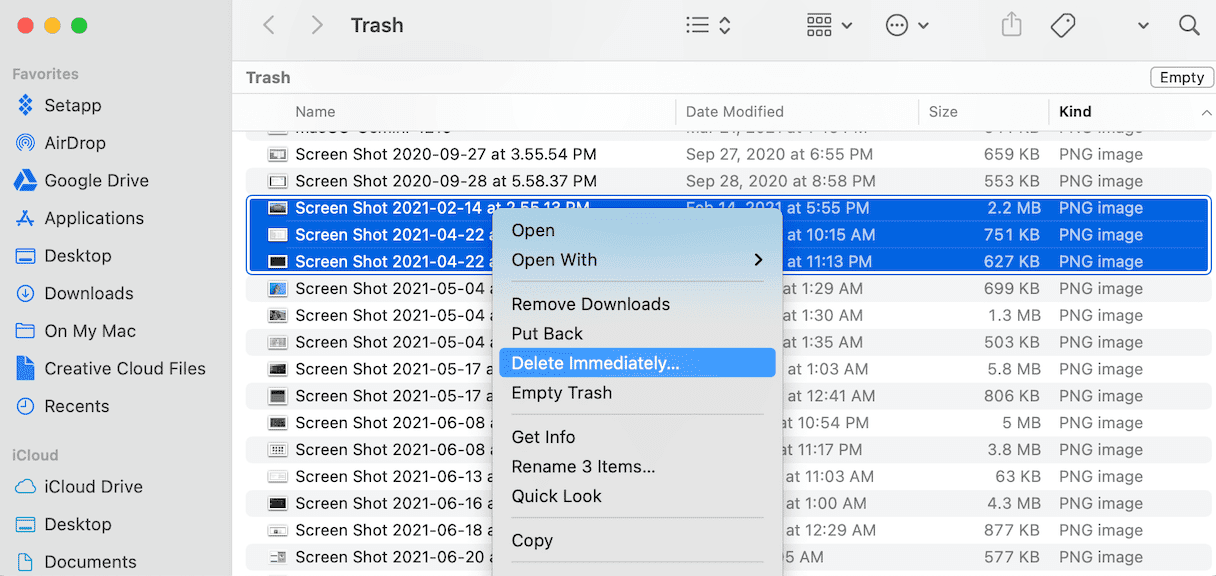
We all have files we don’t want people to see. Maybe it’s an embarrassing video or a really bad edit to a video you made. Whatever it is, you can ensure no one will see it by securely deleting it. All you have to do is:
- Open the Trash.
- Select the file.
- Right-click or hold down Option and click on the file and select Delete Immediately…

4. See more info about your files.
Sometimes the information you want to see about your files is missing. You might want to see a video’s length or even its resolution. But you can change your view preferences in Finder.
- In a Finder window, click View > Show View Options.
- Then, you can select the metadata Finder displays.
Editing with iMovie can be a lot of fun. The learning curve isn’t very steep, so you can practically hit the ground running. But all that comes to a stop when you run out of storage space. Or if you can’t find the video that you’re looking for. The better you manage your files, the more pleasant your editing experience is going to be. Hopefully, after reading this article, you have some ideas on how you can better your own workflow.


