Dropbox was one of the first cloud storage services and is a super-convenient way to share files or just store them, so you can access them from any device. But as well as being convenient, there are a few things that most people don’t realize about Dropbox. One of them is how much space it uses.
Does Dropbox take up space on my Mac?
Yes. Lots of people think that by storing files in Dropbox, you free up space on your computer. But that’s not the case. Every file on your Dropbox account is mirrored on your hard drive or SSD, meaning that a version of the file is stored on your Mac as well as in the cloud. So, if you have 2GB of files stored in Dropbox, you will also have 2GB taken up by those files on your Mac.
How to free up space used by Dropbox
1. Use Selective Sync
One way to cut down the amount of space Dropbox takes up is to use a tool in its Preferences called Selective Sync, which allows you to choose which folders in your Dropbox folder sync with your Mac and which don’t. The files will still be visible on your Mac, but you’ll have to download them if you want to use them.
- Click the Dropbox icon in the menu bar. If you cannot see it, open the Dropbox app from your Applications first.
- Click your initials and go to Preferences > Sync.
- Next to Selective Sync, click Select folders.
- Deselect the checkboxes next to the folders you don’t want to be saved locally.
- Click Update.
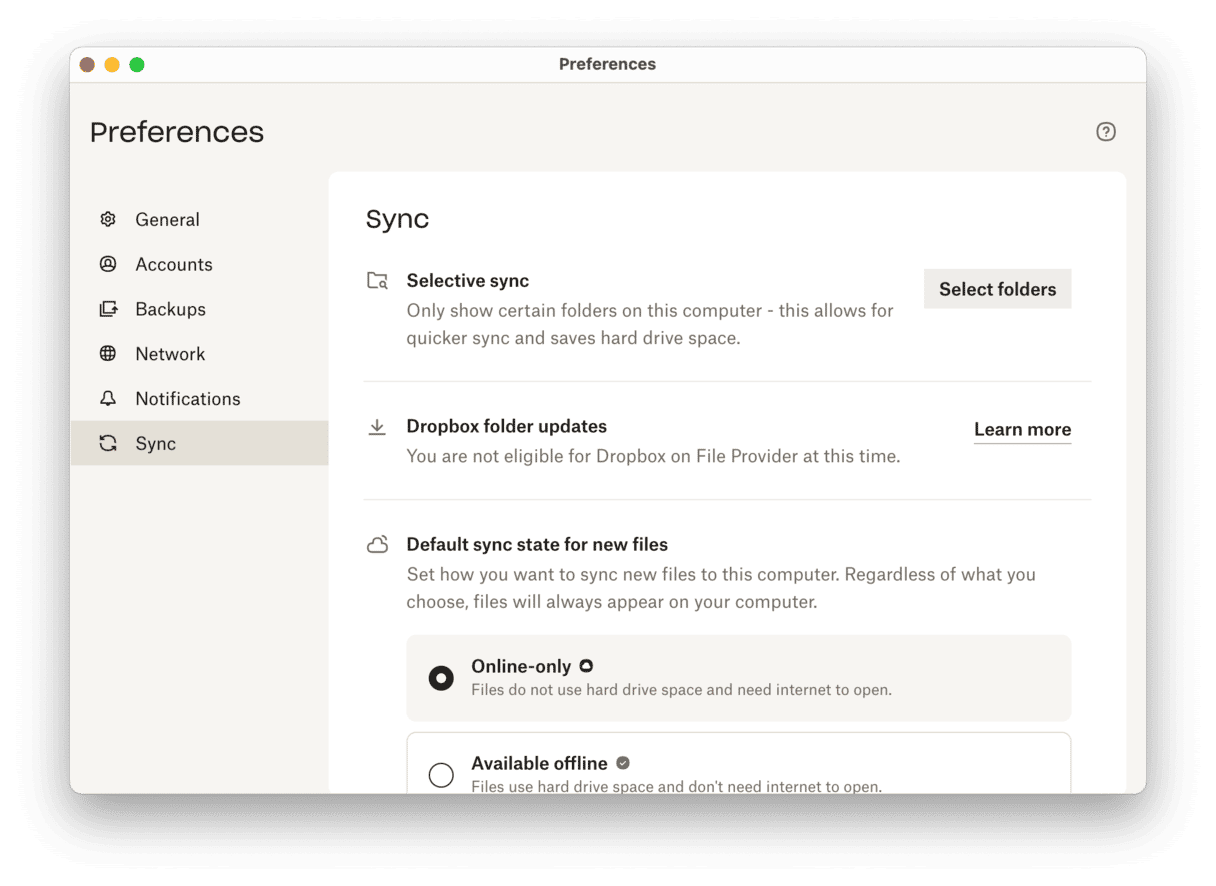
Dropbox will remove the folders you deselected, saving space on your Mac. Selective Sync is available on free versions of Dropbox.
2. Use Smart Sync
Smart Sync allows you to view all your files in Dropbox without taking up space on Mac because it lets you store your files online-only.
Here’s how to use it:
- Open your Dropbox folder from the Finder’s sidebar.
- Right-click the folder or file for which you want to enable Smart Sync.
- Choose Make online-only and click Update Anyway.
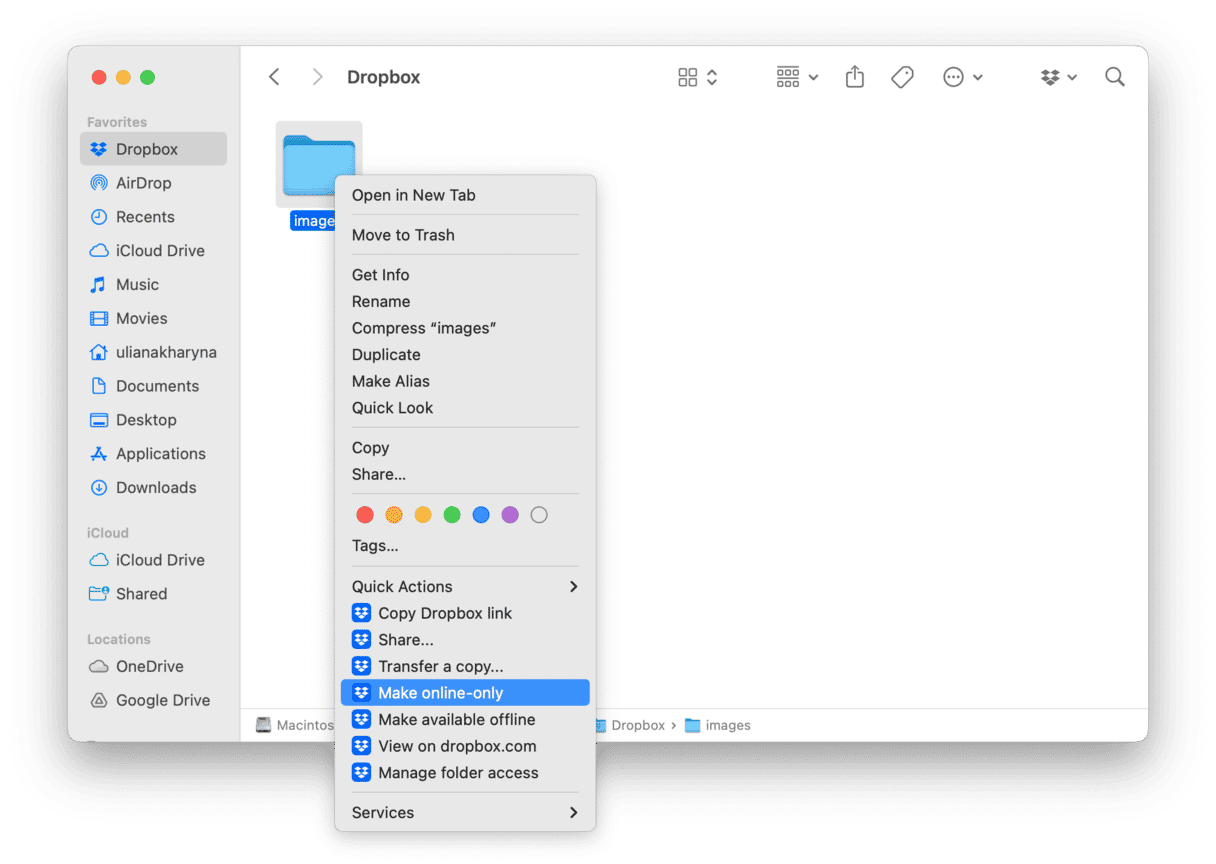
If you want to disable it in the future, right-click the folder or file and choose Make available offline.
3. Clear Dropbox application cache
If you want to reduce the amount of space Dropbox uses to the absolute minimum, you should also clear out its cache. The easiest way to do that is to use a junk-removing app.
If you love Macs and Apple-esque design, you may like CleanMyMac. This is a Mac app that detects large hidden files and knows their typical locations on macOS. After you install the app, go to Cleanup in the sidebar and click Scan. As well as removing application caches, this tool removes language files you don’t use, system cache files, and log files.
- Run CleanMyMac — get your free trial here.
- Choose Cleanup in the sidebar and click Scan.
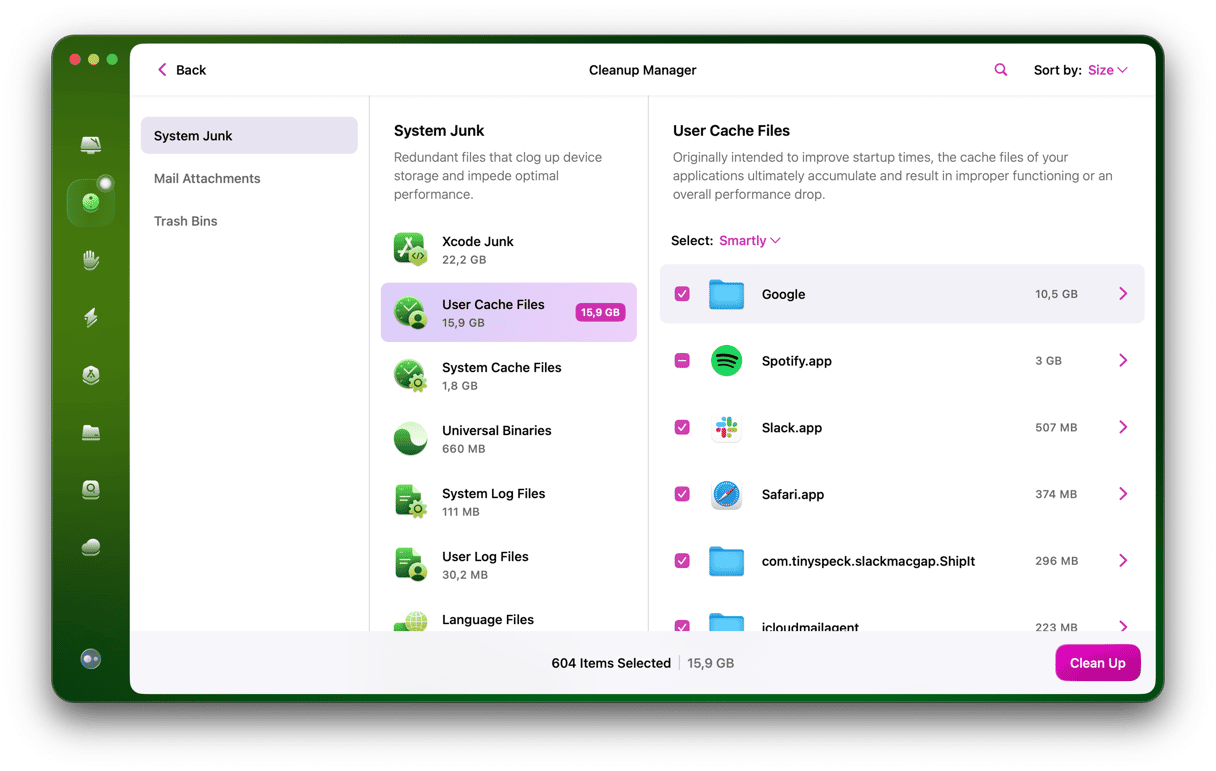
- Click Review All Junk and locate User Cache Files.
- Make sure Dropbox is selected and click Clean Up.
4. Reinstall Dropbox
Instead of removing Dropbox cache and trying to deal with different types of sync, you can give your Dropbox a fresh start by reinstalling the app. It does not remove the Dropbox folder or your files; it only resets your preferences and configurations.
Here’s how to reinstall Dropbox:
- Click the Dropbox icon in the menu bar, click your initials, and choose Quit.
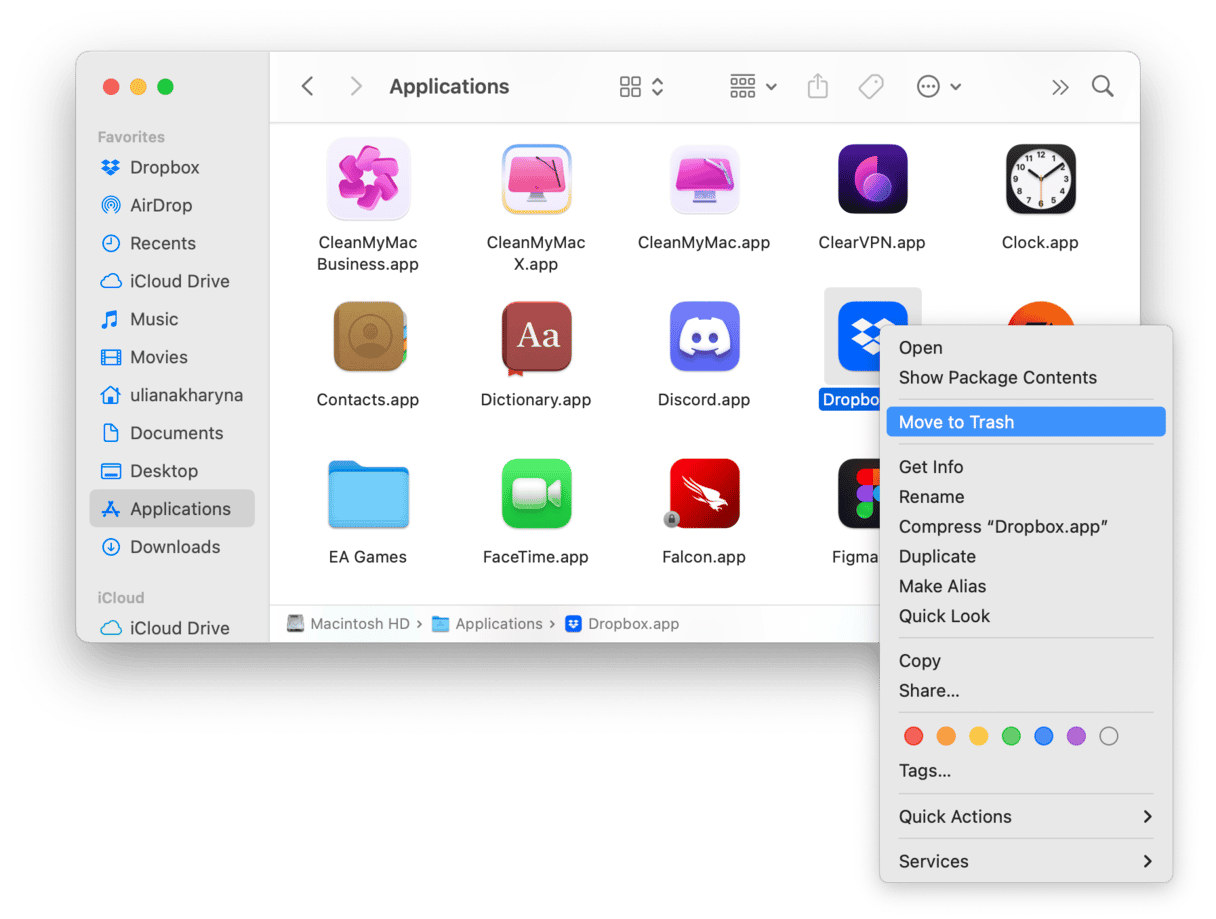
- Go to your Applications folder and send the Dropbox app to the Trash.
- Now, go to the official website and download Dropbox.
- Open the installer and follow the on-screen instructions to install it.
Once you install Dropbox, you will have to select your initial Dropbox folder for syncing files; otherwise, it will create a new one.
5. Delete unneeded files from Dropbox
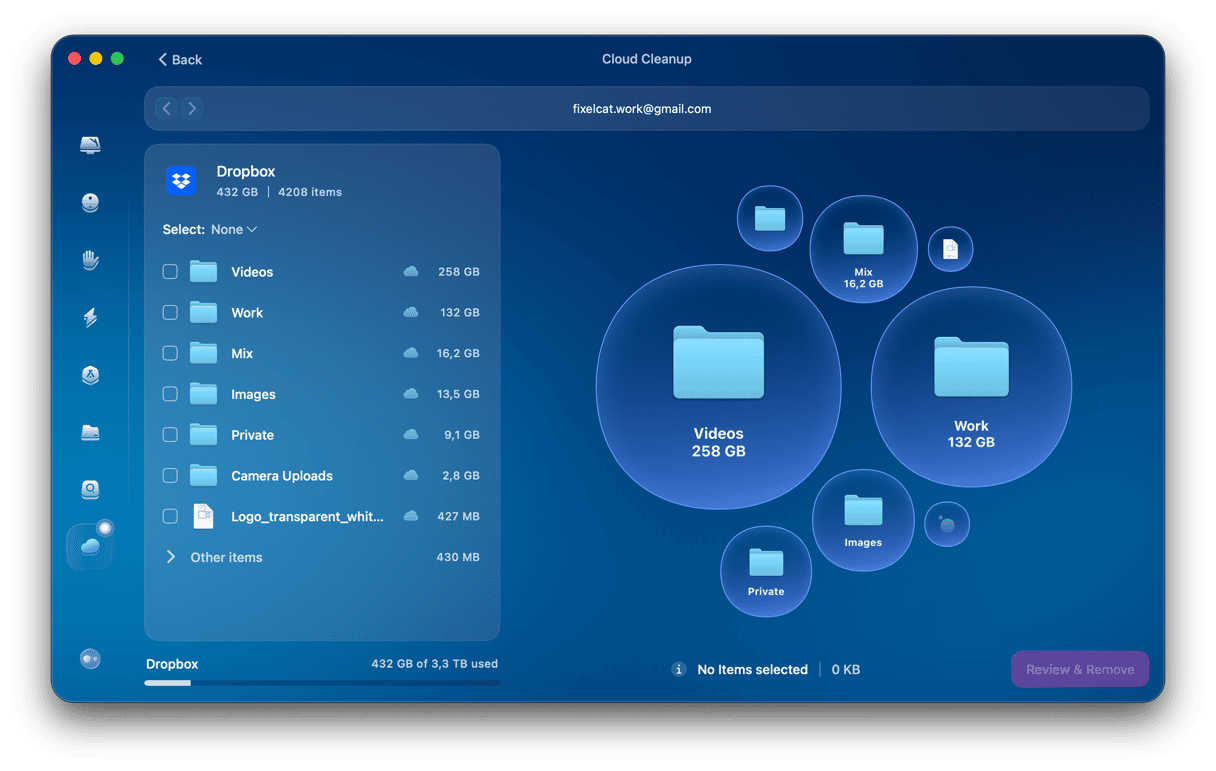
Instead of checking files and folders one by one in Dropbox, start with the files that matter most — the biggest ones. CleanMyMac’s Cloud Cleanup feature makes it easy. It connects directly to your Dropbox account and analyzes everything stored there, showing you large, old, or long-forgotten files that are taking up space.
Here’s how it works:
- Run CleanMyMac — get your free trial here.
- In the sidebar, choose Cloud Cleanup.
- Connect your Dropbox account and click Scan.
- Review large or redundant files and remove what you no longer need.
Dropbox is a cloud storage service that makes it easy to store files and access them from multiple devices as well as share them with others. It has a number of different subscription tiers, including a business service that provides tools for collaboration. However, moving files to Dropbox doesn’t free up space on your Mac automatically because they are mirrored in the Dropbox folder on your hard drive or SSD. If you follow the steps above, you can change that and free up space on your Mac that’s currently used by Dropbox. You will also free up space used by Dropbox’s cache.


